How to Transition CSS “display” + “opacity” Properties
This post explains the method for setting the transition with the help of CSS “display” and “opacity” Properties.
How to Transition CSS “display” and “opacity” Properties?
To transition CSS “display” and “opacity” properties, first, make a div container with the “<div>” element. Then, access the div container and add a background image with the help of the “background-image” property. After that, set the “transition”, “opacity”, and other required properties according to your choice.
Step 1: Create a “div” Container
Initially, make a div container with the help of the “<div>” container and add a class attribute with a particular name. To do so, we have set the name of the class as “item”:
Step 2: Set “display” Property
Next, access the div container by utilizing the class name “main-item” and set the “display” property:
display: block;
}
Here, the value of the “display” property is set as “block” for taking up all screen width.
Step 3: Add Background Image
Next, apply the following CSS properties on the accessed div container:
height: 400px;
width: 400px;
background-image: url(spring-flowers.jpg);
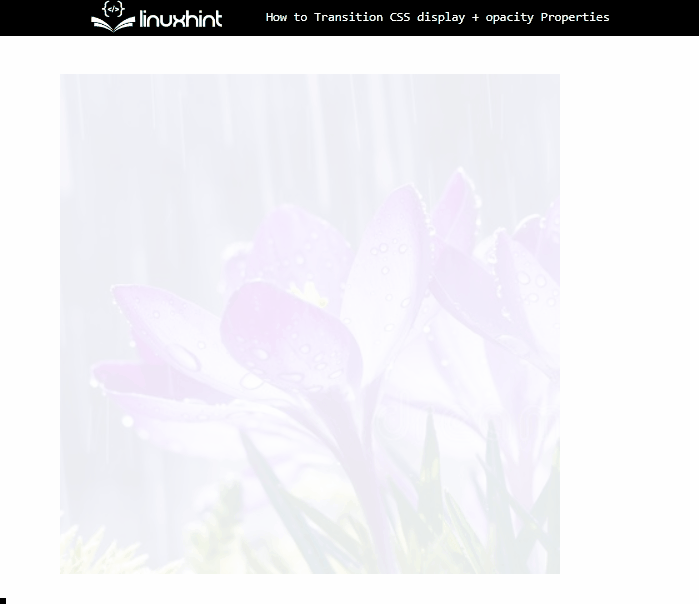
opacity: 0.1;
transition: opacity 2s ease-in-out;
margin: 30px 50px;
}
In the above-stated code snippet:
- “height” and “width” properties determine the size of the defined element.
- “background-image” CSS property is used for inserting an image with the help of the “url()” function at the backside of the element.
- “opacity” determines the level of opacity for an element. The opacity level demonstrates the transparency level, where “1” is used for no transparency, and “0.5” is for “50%” transparency.
- “transition” in CSS permits the users to change property values smoothly over a given duration.
- “margin” defines the space outside the defined boundary around an element.
Output

Step 4: Apply “:hover” Pseudo Selector
Now, access the div container along the “:hover” pseudo selector that is utilized for selecting elements when we hover the mouse over them:
opacity: 1;
}
Then, set the “opacity” of the selected element as “1” to remove the transparency.
Output
That’s all about setting transition CSS “display” and “opacity” properties.
Conclusion
To set the transition “display” and “opacity” properties, first, make a div container by using the <div> element. Next, access the div element and set “display” as “block”. After that, apply the other CSS properties, including “background-image” to insert an image in the container, “transition”, “opacity”, and others. This post explained the method for setting the transition with CSS “display” and “opacity” properties.
Source: linuxhint.com