How To Tighten MacBook Pro Hinges
Tightening the MacBook Pro hinges
Before the jumping to tightening the hinges there are two tools that are required for this whole job:
- Pentalope screwdriver matching the size of screws on the MacBook Pro
- Small pry bar
- Plucker
Now just follow the steps below to tighten the hinges of your MacBook pro:
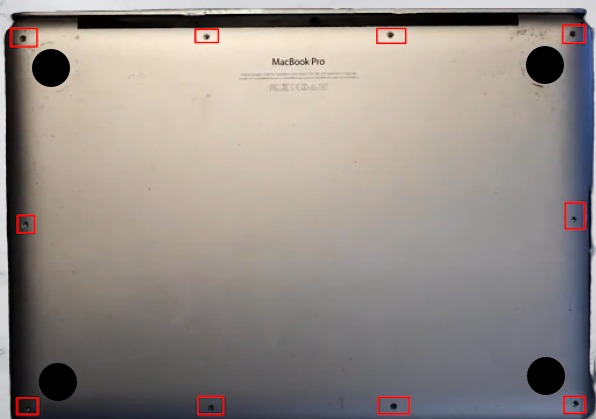
Step 1: Place the laptop upside down on a table by opening its lid and start opening the ten screws of the back cover:
Step2: Once you have opened all the ten screws, now use the pry tool gently to open the back cover:
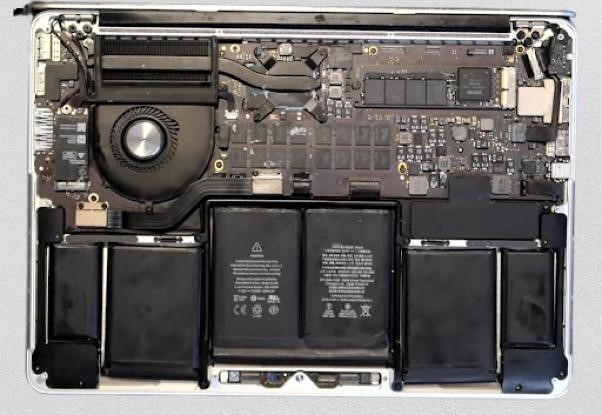
Note: Always remove the battery pin first to avoid any damage to other components of MacBook pro
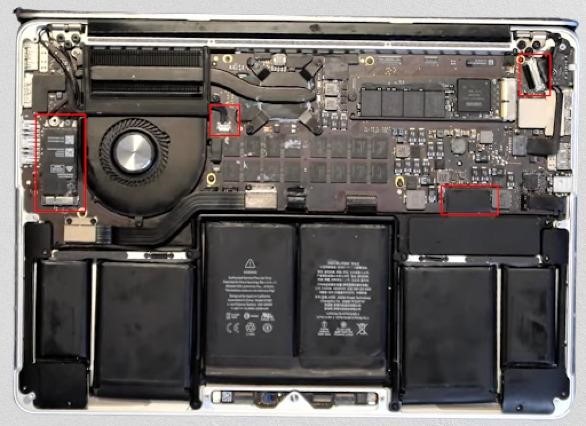
Step 3: Now remove all the connections gently that are highlighted in the image below with the help of a plucker, so first remove the battery pin and then remove the pin for display and Wifi module.
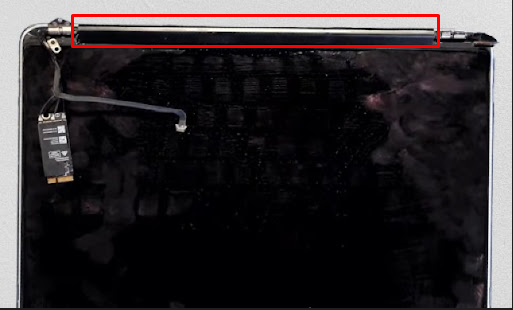
Step 4: Next using the pentalobe screwdriver open the screws highlighted in the image below:

Next carefully remove a small, tiny metal part once you have removed both screws. After that remove the remaining screws highlighted in the image below:

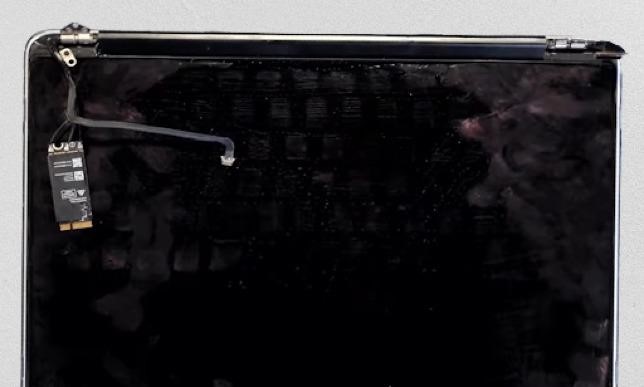
Now do a little bit of wiggling to separate the display screen from the rest of the laptop and place the other half of the laptop at a safe place:
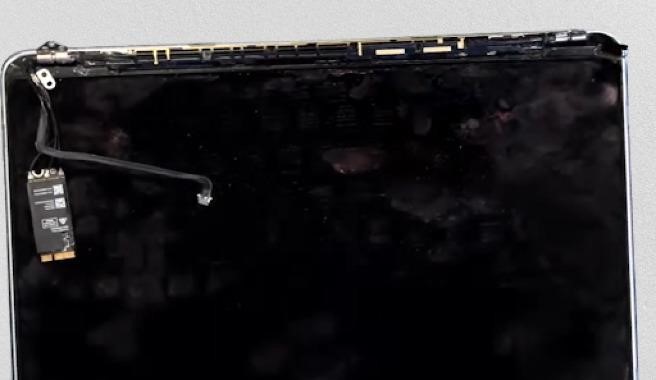
Step 5: Now remove the black cover to access the other part of the hinges of the screen by sliding it in the one direction as highlighted in the image below:
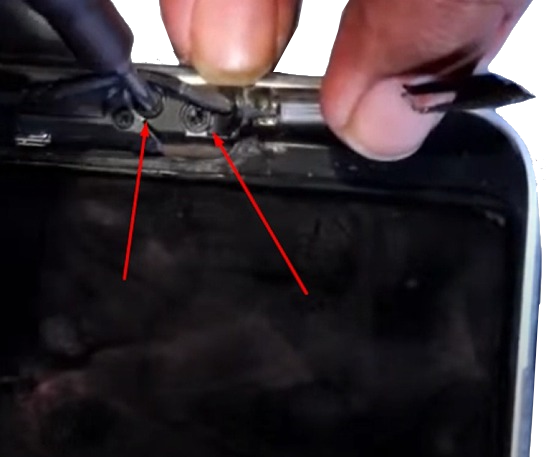
Step 6: Now tight the two screws on each side highlighted in the image below by using the pentalobe screwdriver:
Step 7: Once you are done with tightening the screws check both the hinges are straight, if not then make them straight and start assembling back the laptop.
Step 8: Place the hinges on their dedicated place on the other part of the MacBook Pro and screw it back. Next connect the cables back and press the power button to check if everything is working, once everything is working fine place the back cover and tight the screws gently.
Point to remember before tightening the hinges of MacBook Pro
There are few things that one should keep in mind before tightening the hinges of MacBook Pro:
- Always consult the user manual before opening the back of the MacBook Pro
- Take pictures before disconnecting any cables or opening any screws
- Never tight the screw too much as it can damage the body and will be harder to open next time
Conclusion
Apple laptops are known for their uniqueness when compared with other laptop manufacturers, however as the technology is getting advanced the design of the Apple laptops is getting more complex. Due to this laptops Apple laptops especially MacBook Pro require great care, but as they age their hinges tend to get loose. So, read this guide if you are experiencing such a situation as it explains the process of tightening the hinges of MacBook Pro.
Source: linuxhint.com