How to Take Screenshots on Arch Linux
Images and screenshots are becoming very popular amongst the young generation of this era due to the blessings of the internet and technology. Everybody are used to take images and screenshots of important moments and occasions wherever using their mobile phones and laptops. Just like this, you can take screenshots of different operating systems like Linux to save your work information without putting so much time and effort into writing like working on Arch Linux shell and wanting to take a screenshot of some of its executed commands along with their output. Therefore, this guide covers all the possible ways to get screenshots on Arch Linux.
Screenshot Using Keyboard Shortcuts
Before moving towards the use of any other screenshot utility to capture screenshots, let’s have a look at some of the most known and easiest ways to capture screenshots via keyboard shortcuts. For this, we use the “PrtScr” key of our keyword along with any other key. Here are some of the key combinations that are utilized to take screenshots on Arch Linux:
PrtScr: By pressing the “PrtScr” key solely from the keyboard, you can simply launch the screenshot utility of Arch Linux and select the option to take a screenshot on the select screen and Window.
Alt + PrtScr: Using the combination of the “Alt” key along with the “PrtScr”, you can capture the active window on your desktop screen. For example, you can tap on the “terminal” that is already working on your desktop. Then, press “Alt+PrtScr”. Your screenshot will be ready.
Shift + PrtScr: The combination of the “Shift” key with a “PrtScr” key allows you to take a full-screen screenshot on ArchLinux along with all the active application windows.
Screenshot Using the Default Screenshot Utility
The very first method to take a screenshot on Arch Linux is to use its default screenshot utility that comes with the configuration of Arch Linux. To use it, you have to search for this utility in the “Activities” area of your Arch Linux desktop after login. Type “screenshot” in the search bar that is shown in the attached image and you will see the matching utilities pop up. There is a “Take a Screenshot” utility name on your search screen as shown in the photo as well. You have to “Tap” on it to start using it.

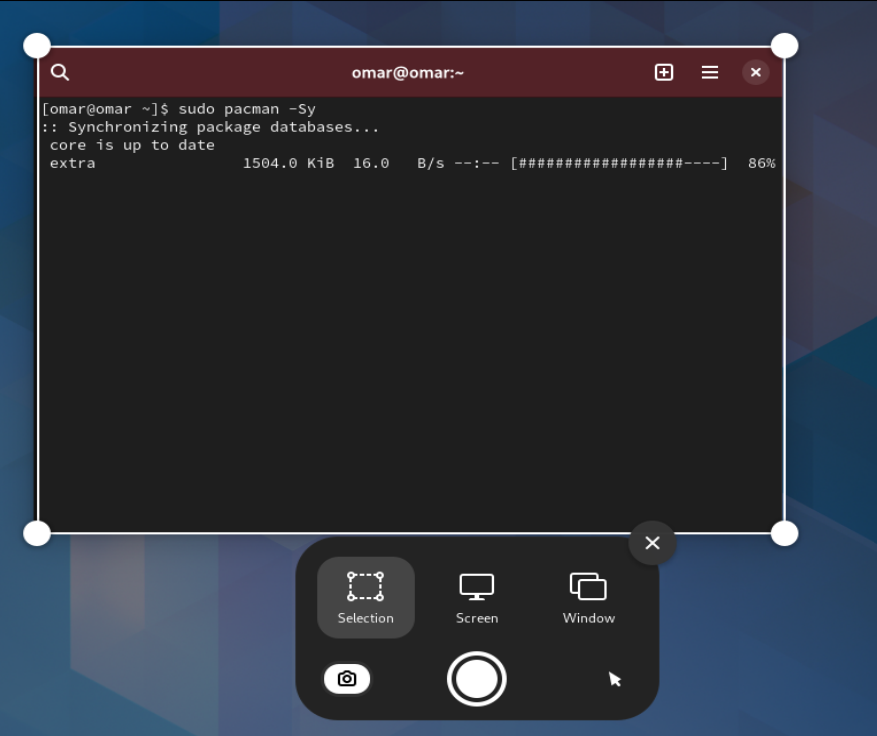
After launching the screenshot utility by clicking on it, you will see an output like the one in the following. The screenshot utility starts to work right at that moment. You can use it in three ways. The first method is to take a screenshot of the currently opened application window using the “Window” option and tapping the screenshot button as shown in the following:
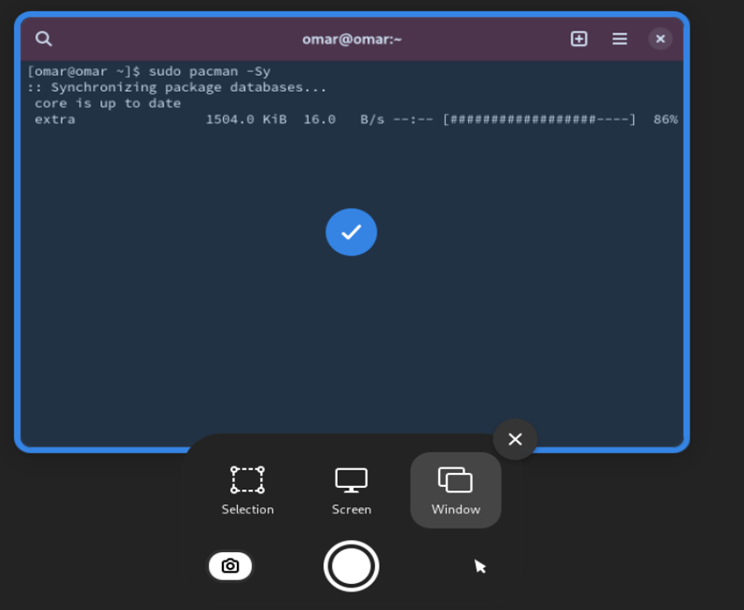
Right after tapping the white screenshot button, your screenshot is saved to the Arch Linux system default folder for images which is “Pictures”.

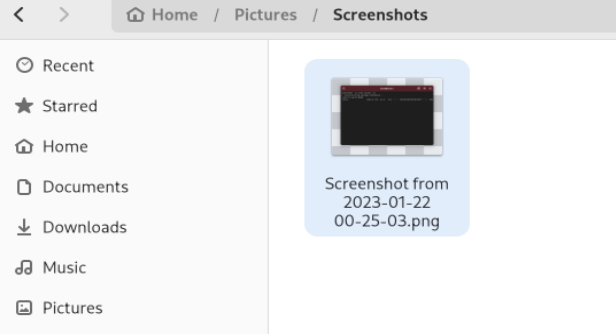
From the file explorer, you can move within the “Screenshots” folder of the default image folder which is “Pictures”. There, you can see the newly taken screenshot.
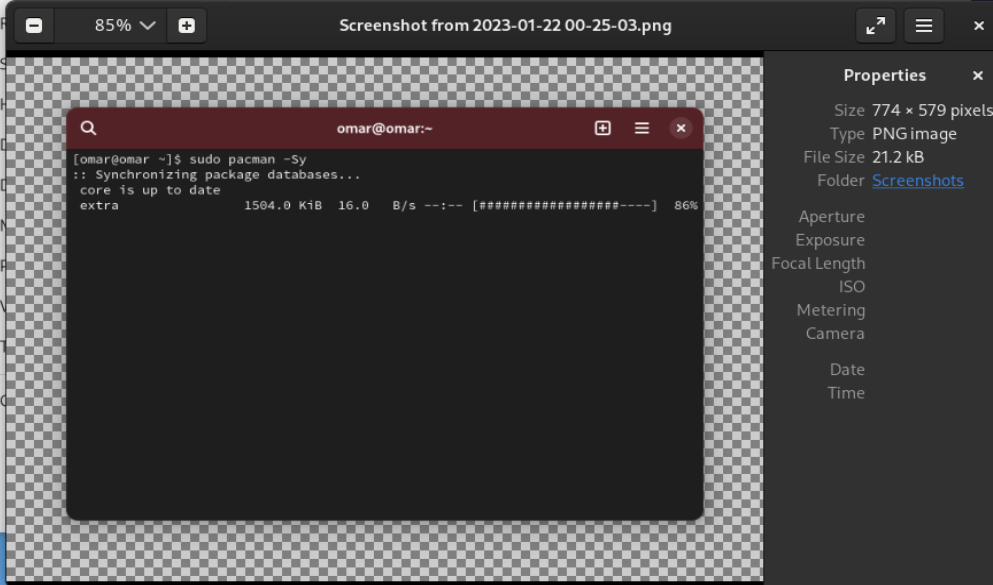
Double tap on the screenshot image to open it. The output image is shown in the following. You can see that the screenshot image only covers the terminal application that is already active:
To take a screenshot of the entire Arch Linux desktop screen including all its opened applications, you can use the “Screen” option which is listed in the middle of all the options of the “Take a Screenshot” tool.
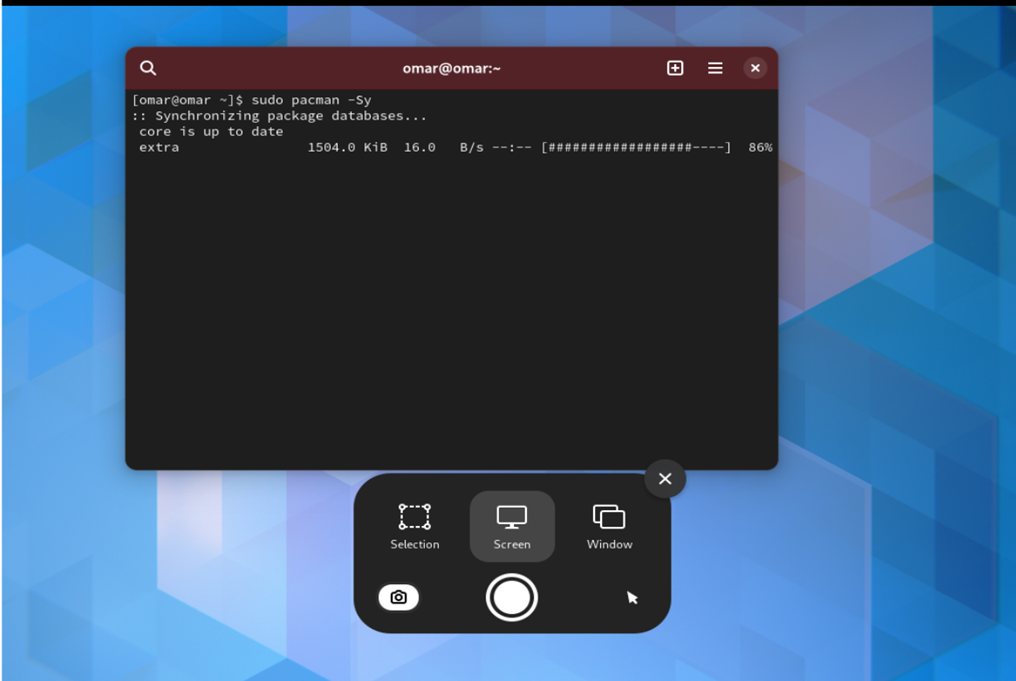
The image screenshot that is taken by the “Screen” option of the default screenshot tool can be seen in the following image. It shows that the screenshot has a blue desktop and the terminal screen in front.

Now, you may use the “Selection” option to capture a screenshot of a specific part of the Arch Linux screen. You can see from the following image that we selected this option to just take pictures of the terminal area. You can select the area for a screenshot of your own choice.
The output of the image that is taken by the “Selection” option of the utility is shown in the attached photo which covers only the terminal area:

’
Screenshot Using Flameshot
The third method to take a screenshot in Arch Linux is to use some third-party software that doesn’t come pre-built with the Linux distribution. For such types of utilities, you need to install them yourself using some commands in the terminal. In one of those screenshot utilities, we have a flameshot tool that can be utilized to take screenshots in Arch Linux. You need to install it at your end using the package manager of Arch Linux, the pacman utility, which is used to install the utilities on Arch Linux.
The following command shows the use of the pacman utility along with the “-S” flag to install the “flameshot” utility on our Arch Linux system. Within a few seconds, the pacman is installed. In case you don’t find the attached command very usable, try installing the “flameshot” utility using the Software Manager of your Arch Linux system. For that, you need to search for the Flameshot application and tap on the “Install” button in front of it. The installation procedure begins with the “Installing 11%” message as displayed in the following image. The installation could finish in up to five minutes.
resolving dependencies…
looking for conflicting packages…
Packages (1) flameshot-12.1.0-1
Total Installed Size: 2.78 MiB
:: Proceed with installation? [Y/n] y
(1/1) installing flameshot [######################] 100%
:: Running post-transaction hooks…
(3/3) Updating the desktop file MIME type cache…

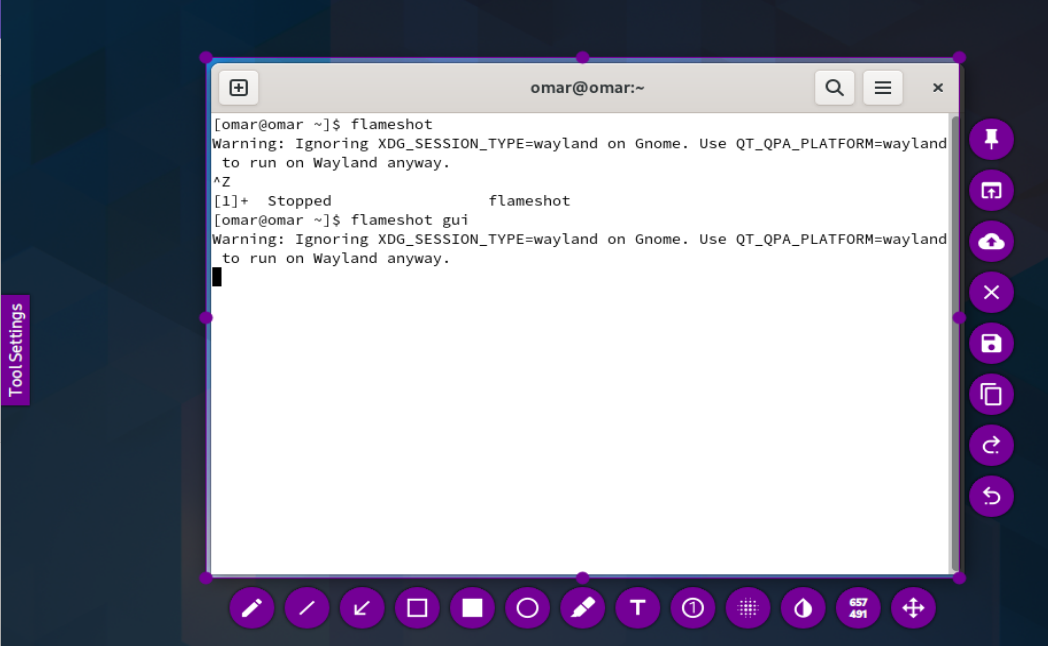
After installation, run the following command in the terminal to launch Flameshot and you get the following output – Flameshot being launched:

Select the area to take a screenshot and tap on the “floppy” icon under the “cross” sign from the right side of the icons that are shown in purple.
Conclusion
After discussing the use of taking images and screenshots in the main introductory paragraph, we explained the three different ways to take screenshots in the Arch Linux system. The first method covers the use of keyboard shortcuts to take screenshots for the selected areas, full screen, and currently active windows. The second method discusses the use of the “Take a Screenshot” built-in screenshot utility of Arch Linux. The last method covers the use of a third-party software utility to take screenshots on Arch Linux, the “Flameshot”.
Source: linuxhint.com