How to Style Table With CSS
This study will guide related to styling tables with CSS.
How to Style Table With CSS?
To apply styles to the table, we will go through the series of steps given below.
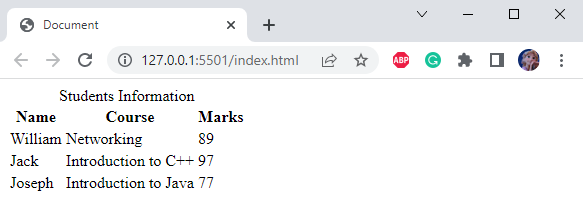
Step1: Create a Table in HTML
<caption>Students Information</caption>
<thead>
<tr>
<th>Name</th>
<th>Course</th>
<th>Marks</th>
</tr>
</thead>
<tbody>
<tr>
<td>William</td>
<td>Networking</td>
<td>89</td>
</tr>
<tr>
<td>Jack</td>
<td>Introduction to C++</td>
<td>97</td>
</tr>
<tr>
<td>Joseph</td>
<td>Introduction to Java</td>
<td>77</td>
</tr>
</tbody>
</table>
To create a table in HTML, the following HTML elements are utilized:
- “<table>” element is used to create a table in HTML.
- “<caption>” element is utilized to add a caption to the table.
- “<thead>” is utilized to specify the table’s header, which usually contains the headings.
- “<tr>” is used for the adding row.
- “<th>” specify the heading content.
- “<tbody>” specifies the body part of the table.
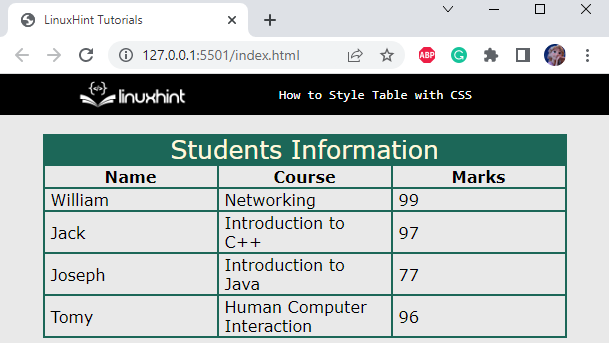
The created table currently looks like this:
Let’s move forward to see how to style this table.
Step 2: Style “body” Element
font-family: Verdana, Geneva, Tahoma, sans-serif;
background-color: rgb(233, 233, 233);
}
The <body> element is applied with the following CSS styling properties:
- “font-family” property with the value “Verdana, Geneva, Tahoma, sans-serif” is utilized to apply the font that is supported by the browser. If the browser does not support the first font style, the other will be used.
- “background-color” property sets the element’s background color.
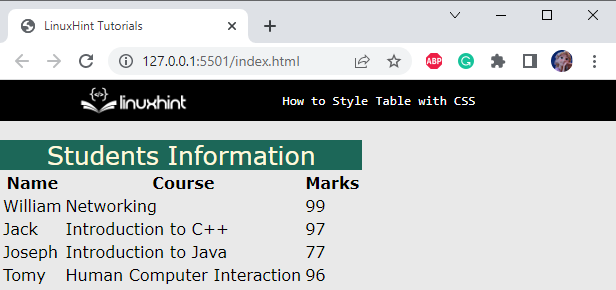
Step 3: Style “caption” Element
font-size: 25px;
text-align: center;
background-color: #1C6758;
color: cornsilk;
}
The <caption> element is styled as follows:
- “font-size” property is utilized for the setting of the font size.
- “text-align” property specifies the alignment of the element’s text.
- “color” property refers to the element’s font color.
Here is the output of the above-provided code:
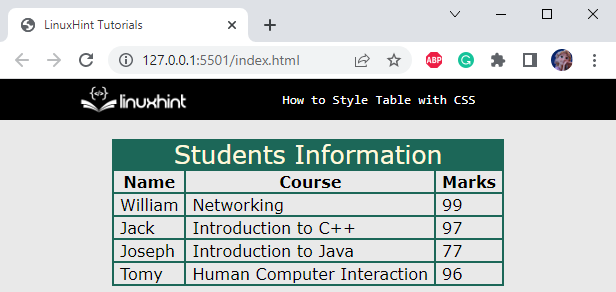
Step 4: Add Border to the Table
The “border” property is utilized to add a border around the element. It is a shorthand property that specifies the border width, border style, and border color.
Let’s apply the border, along with the padding, and margin to the table:
border: 2px solid #1C6758;
padding: 1px 6px;
margin: auto;
}
Here:
- “border” property adjusts the border around the table, by specifying the border width, border style, and border color.
- “padding” specifies the space around the element’s content, where the first value defines space at the top-bottom and the second value adds space at the right-left sides of the content.
- “margin” property with the value “auto” adds equal space around the element.
Output
Note: If we don’t want the spaces between the table borders, use the border-collapse property.
Step 5: Collapse Border Spacing From Table
The spaces between the table borders can be removed by utilizing the “border-collapse” property with the value “collapse”:
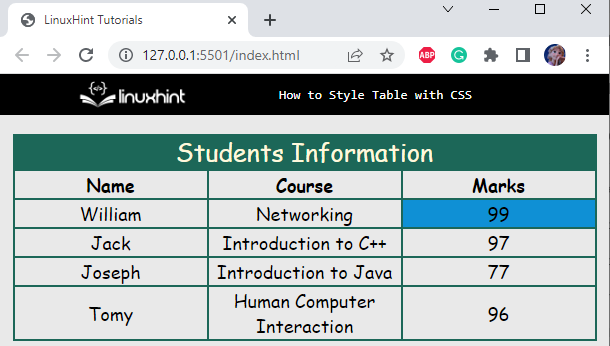
Step 6: Adjust the Table Size
Let’s see how to adjust the table size:
width: 160px;
}
The added “width” property with the <th> element will automatically adjust the table size according to it::
We can also apply styles to the specific table cell. Let’s discuss them!
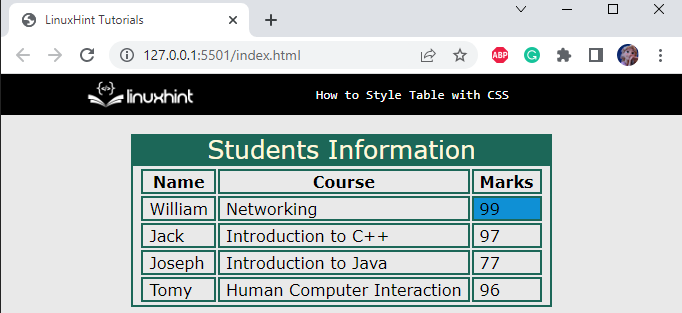
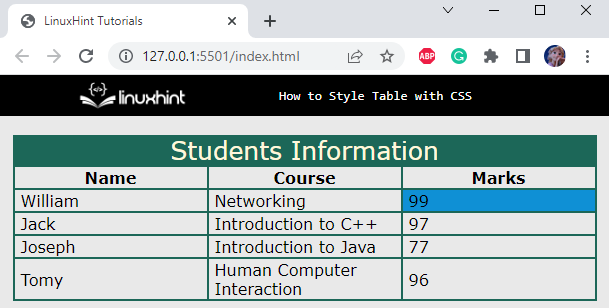
Step 7: Style Specific Table Cells
To style the specific table cell, specify the class name of that particular cell. For instance, the code below represents that the third cell of the second row is assigned a class name “highlight”:
Now, access the cell using the class name in the CSS file:
background-color: #0f90d5;
}
The “.highlight” refers to the class highlight of the <td> element. This element is applied with the “background-color” property to specify the color on the background.
As we can see, the specified table cell is successfully styled:
Step 8: Set the Font Family and Size of Table
font-family: cursive;
font-size: 18px;
text-align: center;
}
The following CSS properties are applied to the table element:
- “font-family” property sets the element’s font style.
- “font-size” property is utilized for the setting of the element’s font.
- “text-align” property is used for adjusting the text alignment.
Here is the output:
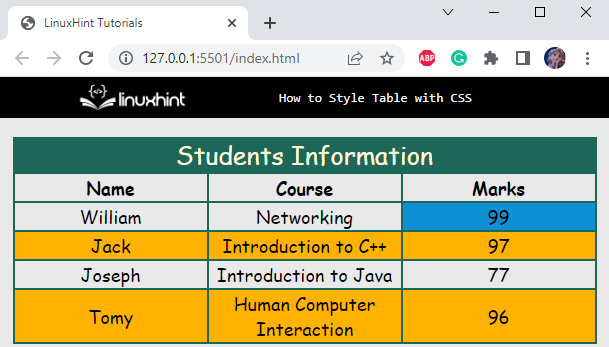
Step 9: Color rows in Sequence
It is also allowed to apply styles to specific rows or columns. For instance, the even rows are styled by following the below format:
tbody tr:nth-child(even) {
background-color: #FFB200;
}
Here:
- The “:nth-child(even)” pseudo selector is utilized to take one argument that specifies the pattern on which the styling is to be applied.
- “background-color” property is utilized to set the element’s background color.
It can be observed that the background color is successfully applied to the even rows:
That was all about styling tables with CSS
Conclusion
Tables are an important tool to keep the data organized. The table can be created by using the HTML <table>, <th>, <tr>, and more elements. Several CSS properties are utilized to stylize the table, such as border, background-color property, font-family property, and many more. For better understanding, this write-up has explained a step-by-step procedure to style a table with CSS.
Source: linuxhint.com