How to Squash Commits in Git After They Have Been Pushed?
While working on a Git project, developers add new features and make a lot of changes to them. Later, they can add modifications to the Git local repository by committing. Sometimes, it is required to push multiple changes simultaneously with a single commit. So, Git allows them to combine several commits into one using a squashing procedure.
This write-up explained the method to squash commits in Git after they have been pushed to a local repository.
How to Squash Commits in Git After they Have Been Pushed?
In order to squash commits in Git after they have been pushed to the local repository, follow the below-listed steps:
-
- Go to the local directory.
- View the commit’s history.
- Apply to rebase operation.
- Squash commits in the default editor and saves new changes.
- Verify new changes.
- Push added changes to the remote repository.
Step 1: Navigate to Local Repository
First, switch to the desired directory by running the “cd” command:
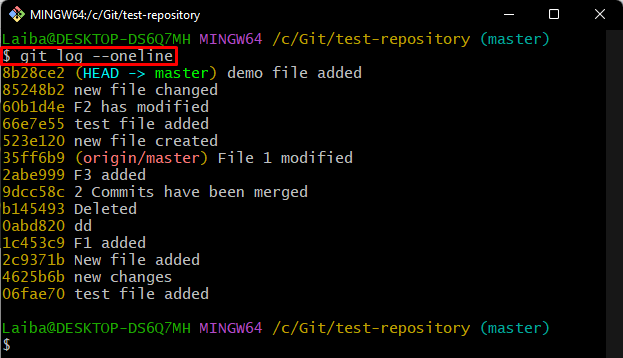
Step 2: Check Git Log
Then, view the commit history by checking the Git log using the below-stated command:
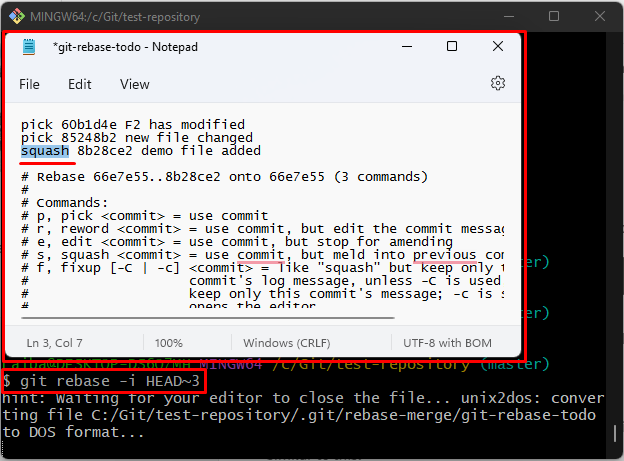
Step 3: Squash Commits
Now, execute the following command to perform the squash operation on multiple commits:
Here, the “-i” option is used for an interactive mode that allows editing rebased commits and the “HEAD~3” option is utilized to edit the last three commits.
The above-stated command will open a file with an interactive screen. Replace the “pick” keyword with the “squash” beside the commit that needs to be squashed. Then, save changes by pressing the “CTRL + S” and close the opened file:
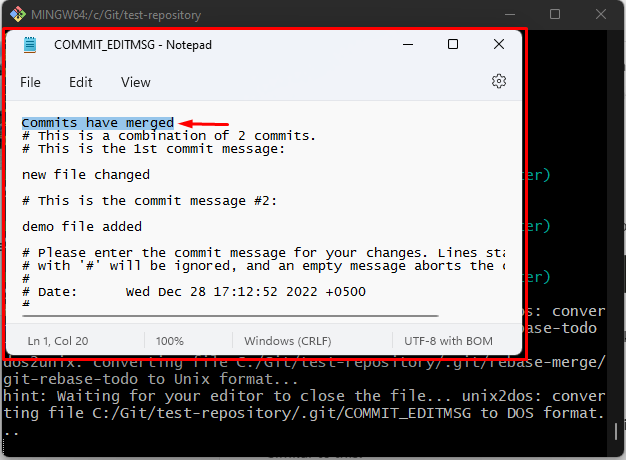
After that, the squash operation will start performing, and the default editor will open up. Add the commit message on the top, save changes and close the editor:
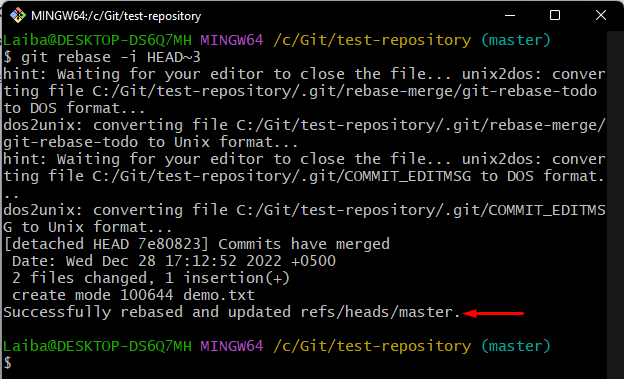
It can be observed that the rebase and squash operation has been performed successfully:
Step 4: View Commit History
Next, verify the newly added changes by checking the commit history:
The below-provided output indicates that the two commits have been merged/squashed successfully:

Step 5: Push Local Changes to Remote Repository
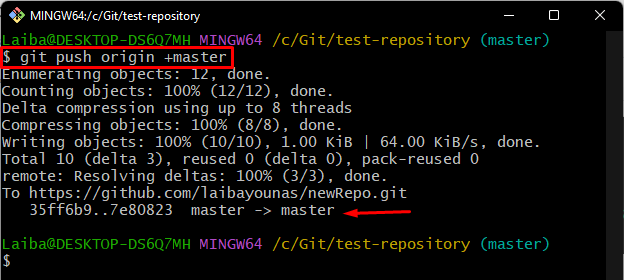
Lastly, push local changes as a single commit to the remote repository using the “git push” command:
Here, the “+master” is used to forcefully push the modified local repository content to the remote repository.
As you can see, the changes have been pushed successfully to the GitHub repository:
That’s it! We have explained the procedure of squashing commits in Git after they have been pushed to the local repository.
Conclusion:
To squash commits in Git after they have been pushed to the local repository, first, navigate to the local repository. Then, view the commit history and choose the desired commits that need to be squashed. After that, execute the “git rebase” command with the “-i” option for editing rebased commits and the “HEAD~3” option to edit the last three commits. Lastly, verify the changes and push them to the GitHub repository. This write-up explained the method of squashing commits after they have been pushed to the local repository.
Source: linuxhint.com