How to Show FPS Counter in Linux Games
With the growth of Linux gaming, many users started to look for proper ways to display “frames per second” (FPS) counter as an overlay on running Linux games. An FPS counter helps in tweaking performance of running games as well as in benchmarking a PC’s overall ability to play games at different resolutions.
Unfortunately there is no single unified way to display FPS counter in all Linux games that is independent of underlying technologies a game is running upon. Different renderers and APIs have different ways to display FPS counter. This guide will explain various methods that can be used to display an FPS counter in Linux games.
Method 1 (Steam)
Compatibility Notes:
- Works with OpenGL and Vulkan games.
- Works with native games and Proton games. Proton is a compatibility layer included in Steam for running Windows games in Linux. It is based on Wine, DXVK and D9VK open source projects with additional patches and new features added by Valve/Wine developers.
- Works with games purchased on Steam or third party games added to Steam by the user.
- Tested working with integrated Intel and AMD graphics cards.
- Untested with NVIDIA cards as I don’t own an NVIDIA card. But according to Steam community forums, built-in fps counter works fine on NVIDIA cards.
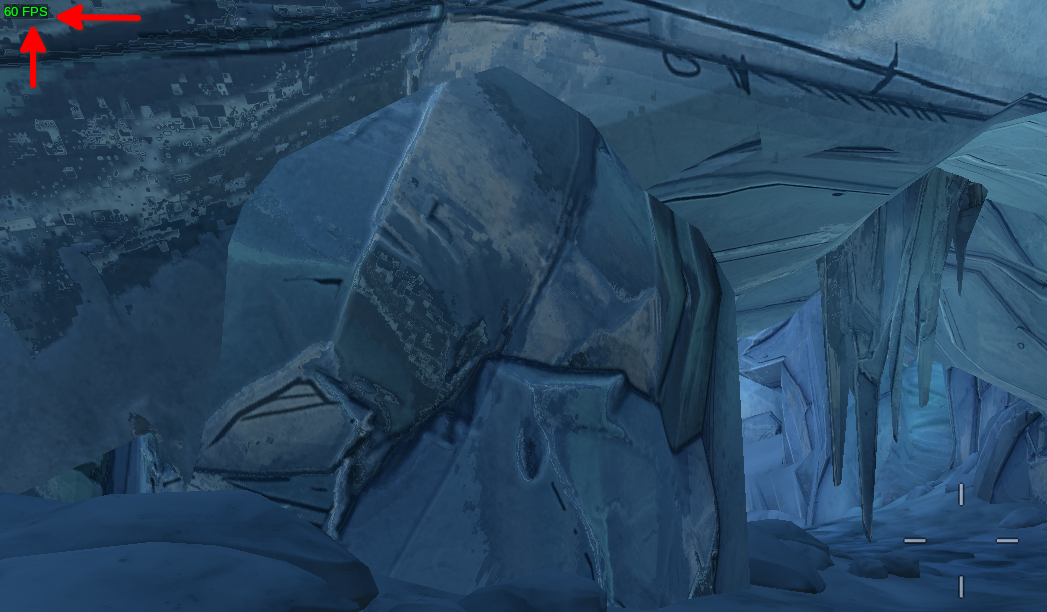
Steam for Linux includes a built-in FPS counter that can be toggled from settings. This is probably one of the most compatible options that works with a majority of Linux games. However I had some issues with Unity engine games not displaying the built-in FPS counter. This option also requires you to have a Steam account and Steam client installed on your system.

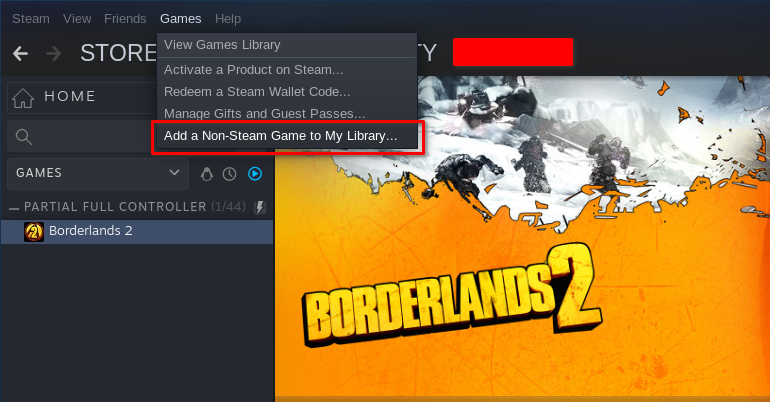
Steam even allows you to add games not purchased from Steam to the game library and the built-in FPS counter works in these games as well. To add a non steam game, click on “Games” and then click on “Add a Non-Steam Game to My Library”, as shown in the screenshot below:
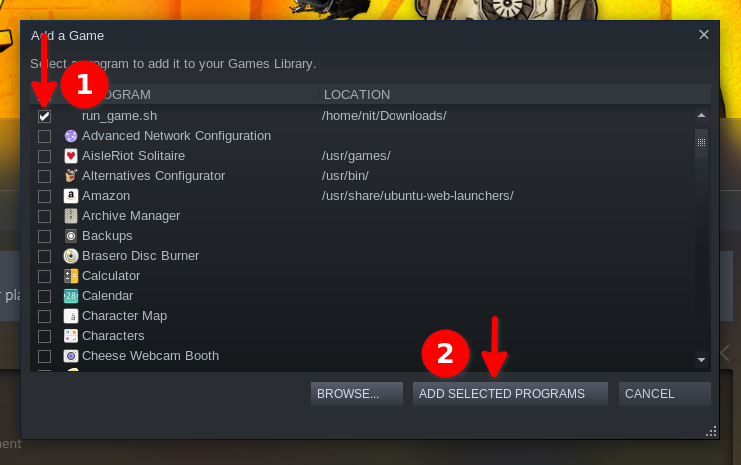
Browse to the location of your game files and then toggle “All Files” option at the bottom.

Select the game executable and then click on “ADD SELECTED PROGRAMS” as shown in the screenshot below:
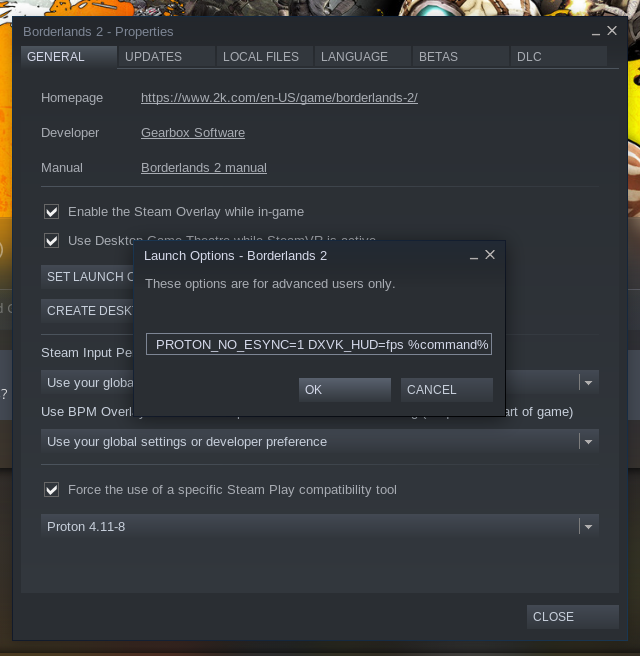
If you want to run a Windows only game in Steam’s Proton compatibility layer, you will have to enable an additional option in game properties.
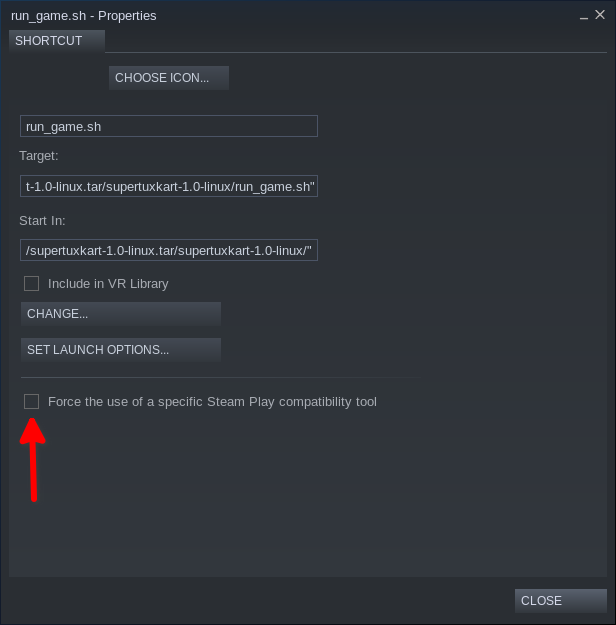
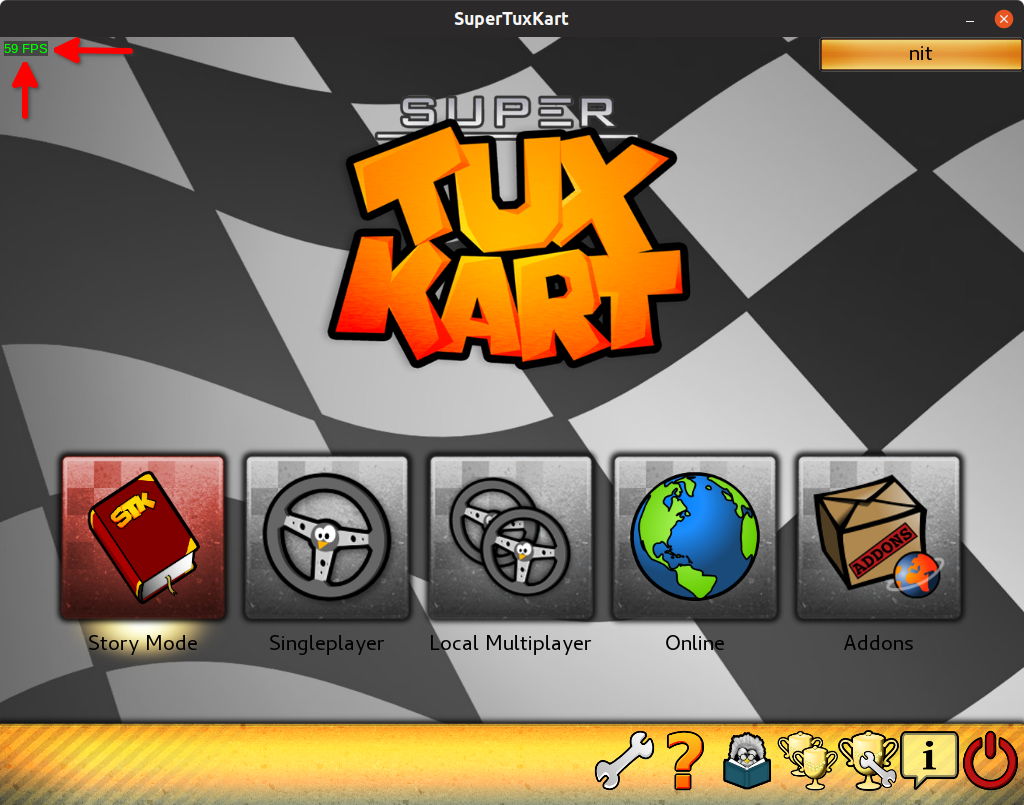
I have added SuperTuxKart executable in steam Library, and FPS counter is working fine here as well. Note that any third party games added to Steam library should not have any spaces in their file location path.
Method 2 (LibGL)
Compatibility Notes:
- Works with OpenGL games only.
- Works with native games and Wine games.
- Tested working with integrated Intel and AMD graphics cards with open source drivers.
- Untested with NVIDIA cards as I don’t own an NVIDIA card. It should however work with NVIDIA GPUs with open source drivers.
LibGL is a Mesa library that exposes OpenGL APIs to apps and games and it is included in almost all Linux distributions by default. Using this library and another package that creates a HUD on visible display, we will show an FPS counter in Linux games. Run the following command to install the required package:
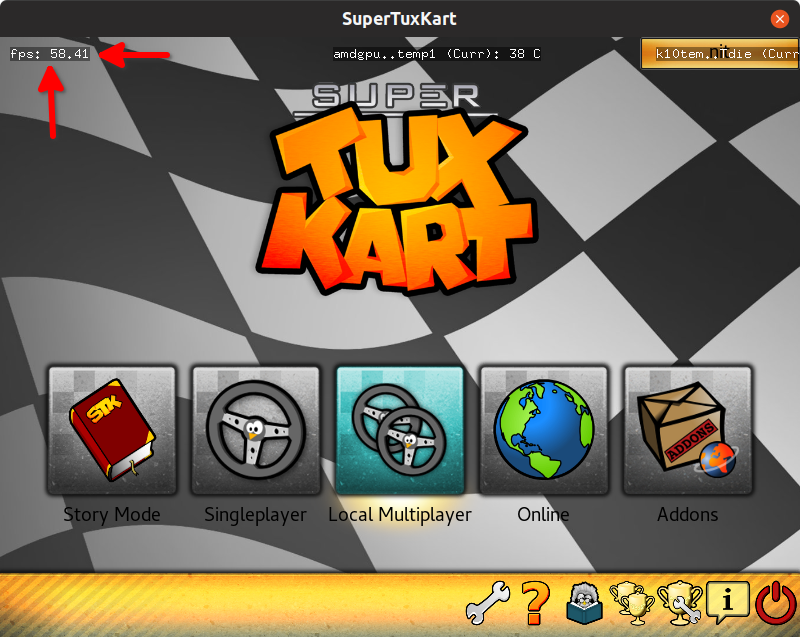
To show FPS counter in native Linux games, use the command below after replacing /path/to/executable with your own game executable path. You can know more about all osd-cat options from here.

To show FPS counter in Windows games running on Linux through Wine, use the command below after replacing /path/to/executable with your own game executable path.
If you are using a Wine prefix, command would be (replace /path/to/wine/prefix and /path/to/executable):

This method has a small limitation. While you can customize the osd-cat HUD, it stays at a fixed position on the display area without taking into consideration the geometry of the game window. In the screenshot above, FPS counter is shown above game window, not inside it. Games running in fullscreen are not affected by this.
Method 3 (Gallium3D)
Compatibility Notes:
- Works with OpenGL games only.
- Works with native games and Wine games.
- Tested working with AMD graphics cards with open source drivers.
- Gallium3D support for Intel is ongoing, so not working yet.
- Untested with NVIDIA cards as I don’t own an NVIDIA card. Since NVIDIA open source driver is Gallium3D enabled, this method should work.
Gallium3D is an API that makes it easier to develop drivers for graphics cards by providing a set of standard libraries and interfaces. AMD and NVIDIA open source drivers are built upon Gallium3D.
To show FPS counter in native Linux games, use the command below after replacing /path/to/executable with your own game executable path:
To show FPS counter in Windows games running on Linux through Wine, use the command below after replacing /path/to/executable with your own game executable path.
If you are using a Wine prefix, command would be (replace /path/to/wine/prefix and /path/to/executable):
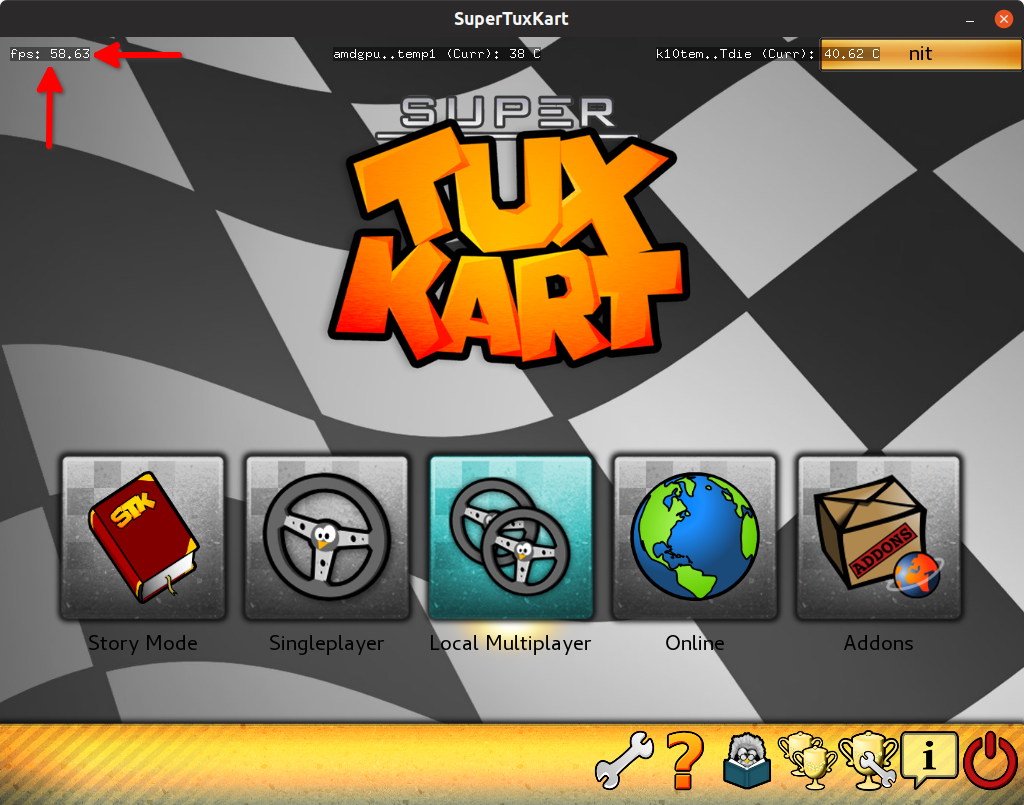
In the screenshot above, I am using a customized GALLIUM_HUD variable that shows GPU and CPU temperatures as well. This custom command is different for different PC configurations. To read more about all customization options, run commands:
GALLIUM_HUD=help glxgears
Just for reference, here is the Custom command I used in the screenshots above:
Method 4 (Mesa Vulkan Overlay)
Compatibility Notes:
- Works with Vulkan games only.
- Works with Ubuntu 19.10+ only and other distributions having latest Mesa with vulkan overlay layer.
- Works with native games and Steam Proton games running with DXVK/D9VK support.
- Works with with Wine games running with DXVK/D9VK libs.
- Working status unknown for Wine’s Vkd3d. Since this is a Vulkan layer, it should work with anything as long as Mesa is built with VK_LAYER_MESA_overlay support.
- Tested working with AMD graphics cards and integrated Intel cards with open source drivers.
- Untested with NVIDIA cards as I don’t own an NVIDIA card. Since this is a Vulkan layer, it should work with anything as long as Mesa is built with VK_LAYER_MESA_overlay support.
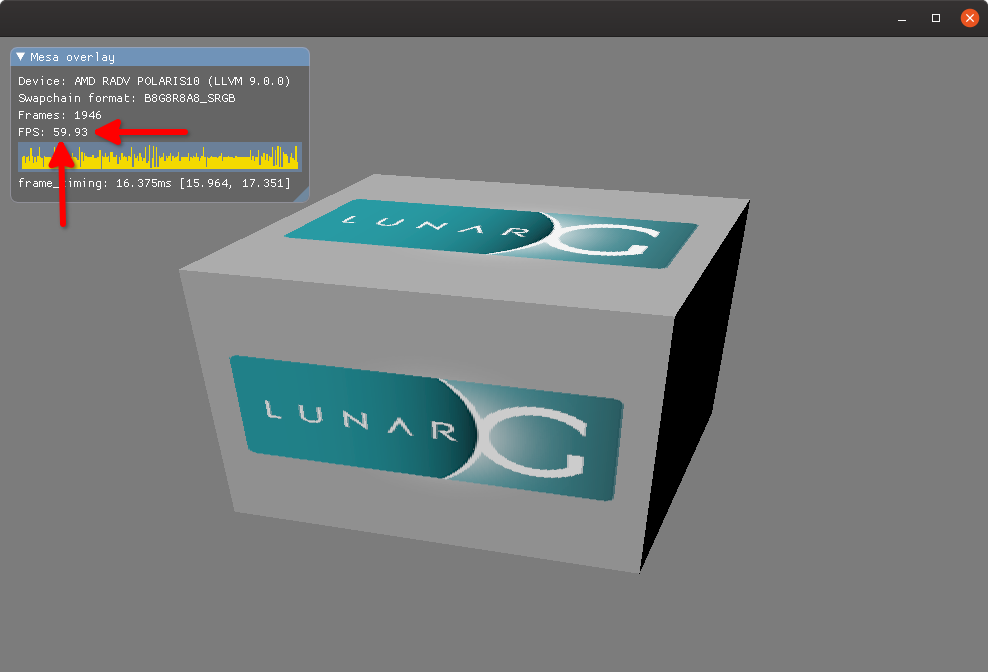
Mesa Vulkan overlay is a new Vulkan layer added to recent builds of Mesa. It displays various information about the running application using an overlay.
To show FPS counter in native Linux games, use the command below after replacing /path/to/executable with your own game executable path:
To show FPS counter in Windows games running on Linux through Wine and DXVK, use the command below after replacing /path/to/executable with your own game executable path:
If you are using a Wine prefix, command would be (replace /path/to/wine/prefix and /path/to/executable):
Method 5 (DXVK HUD)
Compatibility Notes:
- Works only with Vulkan games running in Wine and Proton with DXVK/D9VK libs.
- Tested working with AMD and integrated Intel graphics cards with open source drivers.
- Untested with NVIDIA cards as I don’t own an NVIDIA card. Source code has commits that mention NVIDIA support so this method should work.
DXVK provides a Vulkan-based translation layer for D3D10 and D3D11 allowing users to play Direct3D 10/11 games on Linux. D9VK uses DXVK backend to provide an additional Direct3D9 implementation that can be used to play games built upon D3D9.
To show FPS counter in DXVK games running on Linux through Wine, use the command below after replacing /path/to/executable with your own game executable path:
If you are using a Wine prefix, command would be (replace /path/to/wine/prefix and /path/to/executable):

This marks the end of this post. To conclude, I would mention one small detail omitted from above. All the non-steam methods explained above will work for Steam games as well. You have to replace “/path/to/executable” or “wine /path/to/executable” or “WINEPREFIX=/path/to/wine/prefix wine /path/to/executable” with “%command%” in the same commands used above. Just add the full command to launch options in game properties inside Steam app, as shown in the screenshot below:
New Update: Method 6 (MangoHud)
MangoHud is a universal FPS counter for Linux that shows real time frames per second for almost all games that can run on Linux. It works with native as well as wine based games and works well with both OpenGL and Vulkan renderers. In addition to FPS, it shows CPU and GPU loads as well. Here is a small animation showing how it looks like as an overlay (gif credits):
MangoHud has been integrated into Valve’s Linux based handheld gaming console called “Steam Deck” (launched in 2022). It is available in default repositories of latest version of Ubuntu, so you can install it by running the command below:
You can install the latest version of it in Ubuntu and other Linux distributions by downloading its newest build from here. Once downloaded, extract the archive and run the following command to install it:
Now you can use MangoHUD with any Linux game by running a command in the following format (replace the file path):
If you are running a game from the Steam client, access the game properties dialog by right clicking on an installed game title. In the “LAUNCH OPTIONS” field, add the following command to enable MangoHud for that game:
By default, MangoHUD shows detailed gaming metrics, as shown in the animation above. If you wish to customize the size and layout of the overlay, you can tweak its extensive configuration file by following official instructions available here.
Source: linuxhint.com