How to Setup a Raspberry Pi Samba Server
This tutorial presents a detailed guideline for setting up a Raspberry Pi Samba server to allow file sharing between your Raspberry Pi and other devices.
How to Setup a Raspberry Pi Samba Server
Setting up Samba Server on Raspberry Pi is the simplest task that doesn’t require additional package installation. You can successfully turn your Raspberry Pi into a Samba-enabled device using the following steps:
Step 1: Install Samba Software with required packages on Raspberry Pi
In the initial step, you will first need to install Samba on your Raspberry Pi with the required package through the following command:

The above command installs the Samba server with required packages on your Raspberry Pi device.
Step 2: Create a Samba Directory
Next, you will need to create a directory into your home folder using the following command as this directory will be accessed from another device through Samba server.

From the above command, you will need to replace the username “raspberrypi” and directory name “samba_dir” with the name of your choice.
Step 3: Configuring Samba Sharing
In this step, you will need to provide a path to the Samba server so that it can access your directory from your Raspberry Pi device. For this reason, you will first need to open the Samba configuration file using the following command:
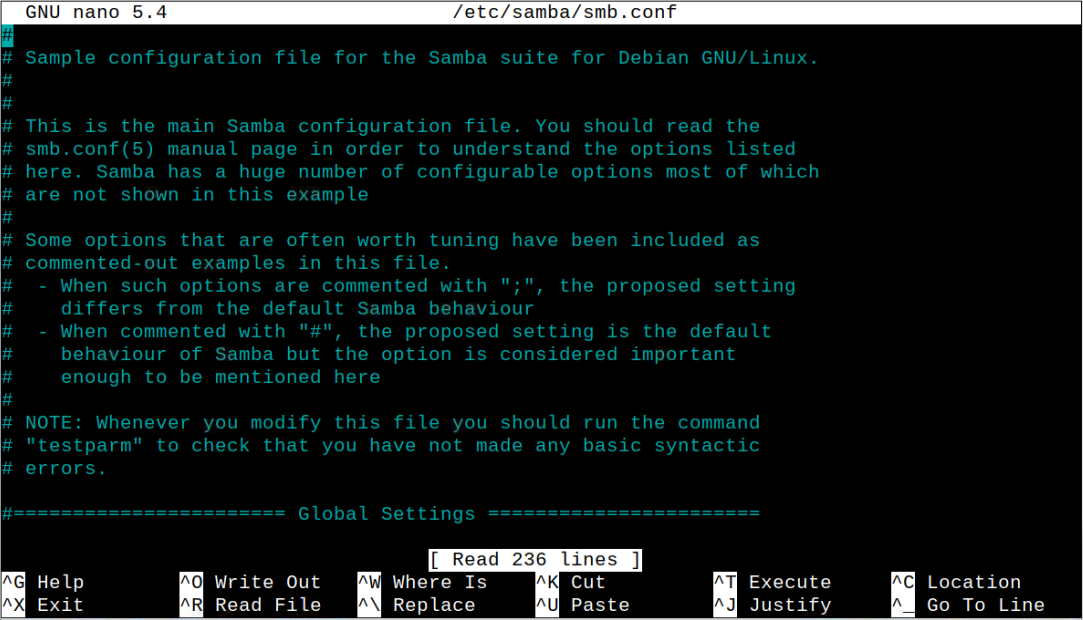
Then add the below-given lines at the bottom of the opened Samba’s configuration file.
path = /home/raspberrypi/samba_dir
writeable=Yes
create mask=0777
directory mask=0777
public=no

Save the file using “CTRL+X” keys, add Y and then use enter to exit. You will also need to ensure that the path your provided must be the same as the path in the Step 2. Further, you can use you own point “linuxhintshare” to access the share through Samba server.
Step 4: Set a password for Samba Share
This step is optional but it’s better to set a password for Samba share to secure the file sharing system and you can do it using the below-given command:

Step 5: Restart Samba Server
Once you done with the changes, you should need to restart your Samba server through below-given command:

You can also check the status of the Samba server on your Raspberry Pi device to ensure that the changes we made didn’t impact the server.

After ensuring the active running status of Samba server on your device, it’s now time to access your Raspberry Pi directory from your laptop or PC. There are two methods to do file sharing operation and the details of both these are discussed as under:
Accessing Raspberry Pi Directory through Samba Server on Windows OS
On Windows OS, you can use the following steps to access the Raspberry Pi directory through Samba share.
Step 1: Select the “Computer” option and then click on the “Map Network Drive” icon as highlighted in the image below:

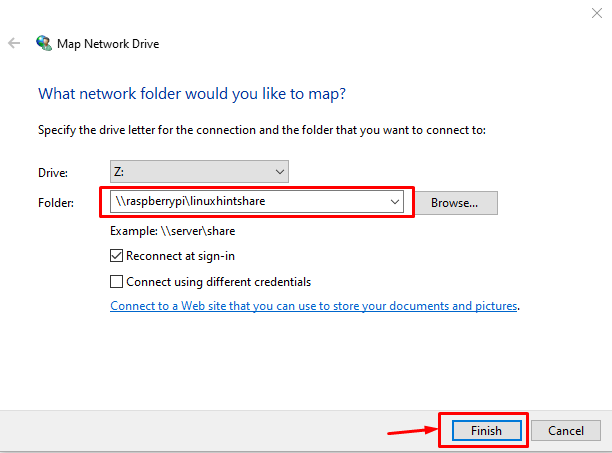
Step 2: The above step will open the “Map Network Drive” window on your screen. You have to add the address \\raspberrypi\linuxhinthshare , or \\hostaddress\linuxhintshare and then click on the “Finish” option:
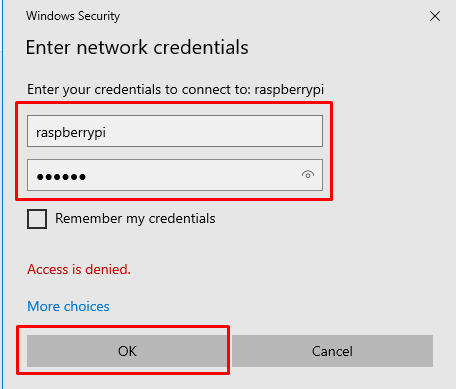
Performing the above step will open the network credentials on your system screen and you have to provide your Raspberry Pi username and password which you set in Step 4.
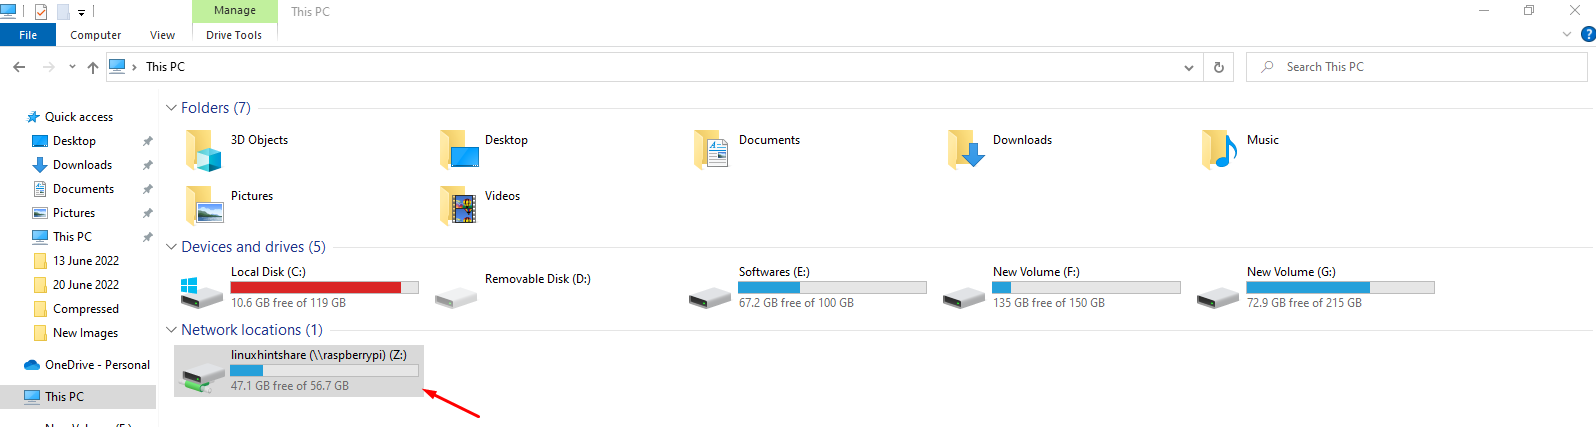
This opens up the Raspberry Pi shared directory on your Windows system.

You can go back and check your Raspberry Pi directory in the “Network locations” option.
Accessing Raspberry Pi Directory through Samba Server on macOS
To access the Raspberry Pi directory through Samba server on macOS, you have to follow the below mentioned steps:
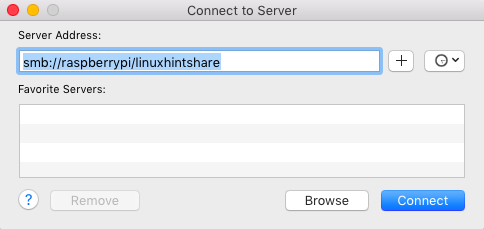
Step 1: Find the “Connect to Server” option in the “Go” section.

Step 2: Add the address “smb://raspberry/linuxhintshare” and then click on the “Connect” button.
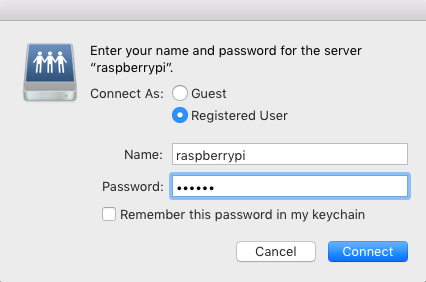
You will also need to provide the Raspberry Pi username and password that you set in Step 4 and then click on the “Connect” button again.
This opens the Raspberry Pi directory on your macOS desktop.

Now, you can easily share files from your Raspberry Pi device to your laptop or PC and vice versa.
Conclusion
Samba Server is one of the most robust on-network file sharing systems to share files between multiple devices. You can use the Samba file-sharing system on your Raspberry Pi by installing the server, creating a shared directory and then providing the path in the configuration file to access the shared directory from your laptop or PC. The step-by-step process is already provided in the above guidelines, and in case of any issue, ensure that you have an active internet connection.
Source: linuxhint.com