How to Set Up Kali Linux on VirtualBox?
Using Kali Linux in the hypervisor tool is one of the best ways as VMs allow us to run multiple OS on the system and easily interact with other virtual machines. The Kali Linux in the VM cannot affect the original OS of the system. Users can boot the Kali Linux through Live USB, but this is not a good approach as turning off the Kali from the system removes all the processing and data. In contrast, the Kali virtual machine can be run as a separate host and preserve Kali’s data on system memory.
This blog will demonstrate:
Prerequisites
To set up and run Kali Linux on the host system, the user is required to fulfill the following prerequisites:
- Install VirtualBox: To run Kali Linux using VirtualBox, first install the “Oracle VirtualBox” on the system by following the “Install Oracle VirtualBox 7 on Windows” article.
- Hardware Virtualization Supported System: To run the Kali Linux in a virtual machine, the user must have the hardware virtualization supported system and this feature must be enabled. To enable or check virtualization on the system, follow our linked “Enable VT-x/VT-d/AMD-v Hardware Virtualization Feature” article.
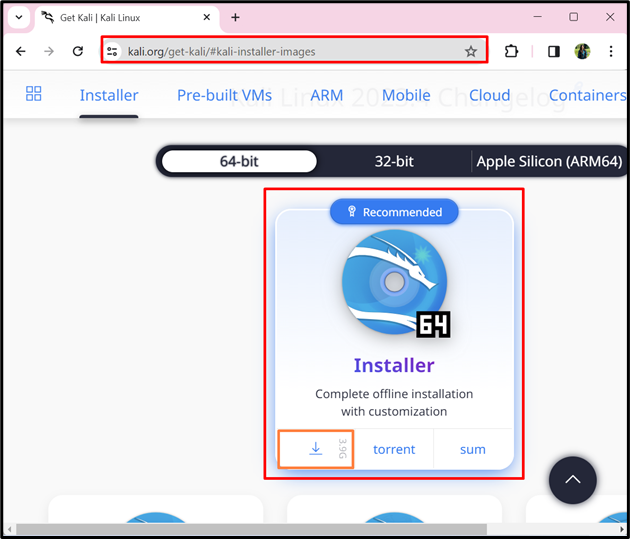
- Download Kali ISO Image: To run the Kali Linux on a VirtualBox, first download the ISO image to install the Kali Linux. For this purpose, first navigate to Kali’s official website and download the Kali image ISO by hitting below pointed “Download” button:
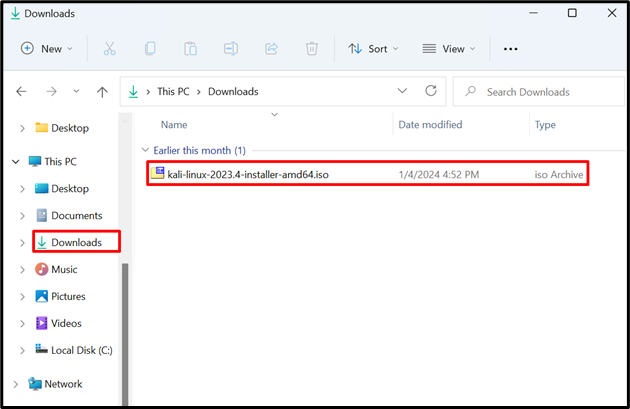
This will download the Kali Linux ISO file in the Windows “Downloads” directory:
Now, use the downloaded ISO in VirtualBox to run Kali Linux in a virtual machine by following the below section.
How to Setup Kali Linux on VirtualBox?
The VirtualBox is one of the hypervisor tools that provide virtualization. It enables us to execute the different operating systems on a virtual machine without affecting the physical machine. To set up and run Kali Linux in VirtualBox’s virtual machine, follow the following instructions.
Step 1: Launch VirtualBox
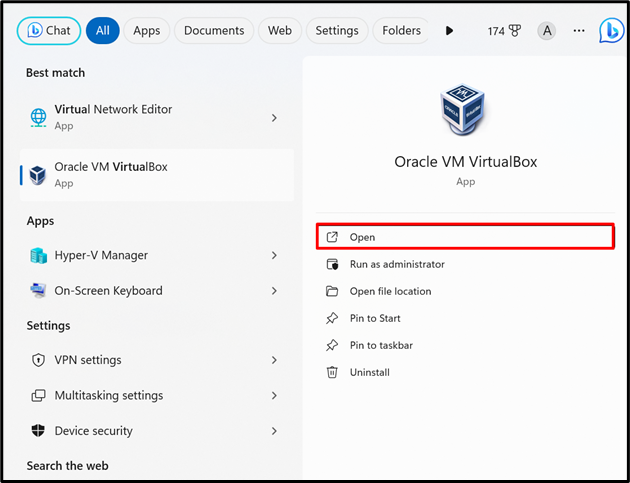
First, launch the VirtualBox on the system by searching it in the Start menu:
Step 2: Create a New Machine
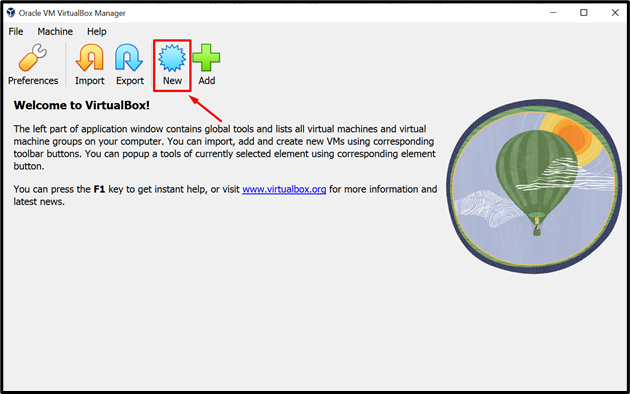
Create a new machine by hitting the below pointed “New” button:
Step 3: Provide ISO Image
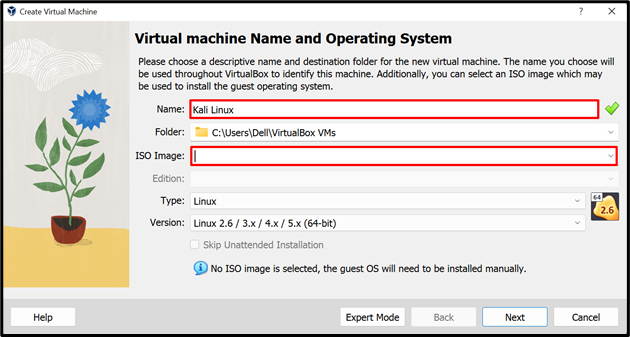
Set the name of the Virtual Machine, the directory where the Virtual Machine stores the data on the host system. After that, provide the ISO image. For this purpose, click on the “ISO Image” drop-down menu and browser the location where the Kali ISO image is downloaded:
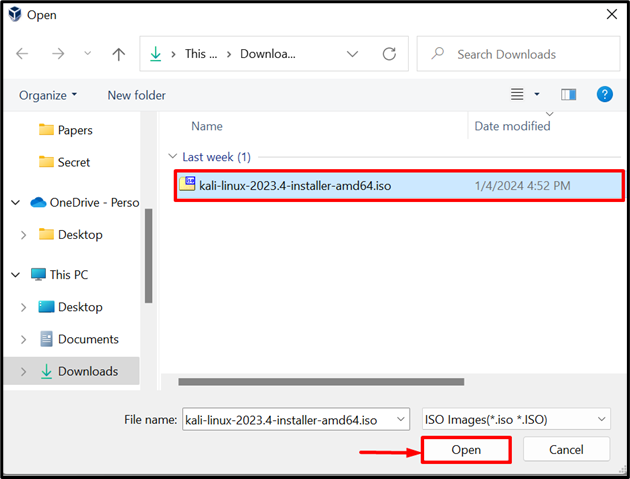
Select the ISO image and hit the “Open” button. Here, our Kali ISO image exists in the “Downloads” directory:
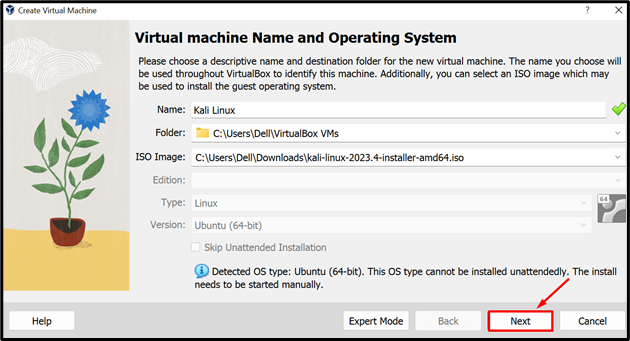
After providing the ISO, hit the “Next” button to proceed:
Step 4: Configure Essential Settings
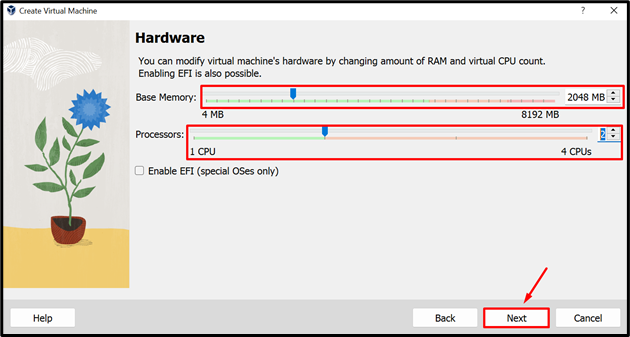
Next, configure the basic Hardware settings such as allocating the memory and processor to the Kali Linux virtual machine, and hit the “Next” button. For instance, we have assigned 2GB RAM and 2 processors:
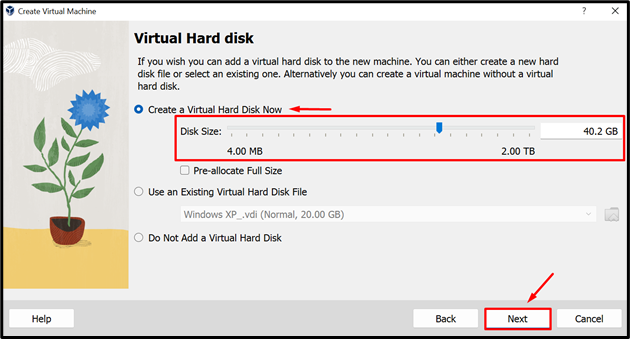
Now, create a Virtual hard disk to store the Kali Linux machine data. For this purpose, mark “Create a Virtual Hard Disk Now”, select the Disk size from the below-highlighted slider, and hit “Next” to proceed. Here, the user can also use an existing virtual disk file instead of creating a new one:
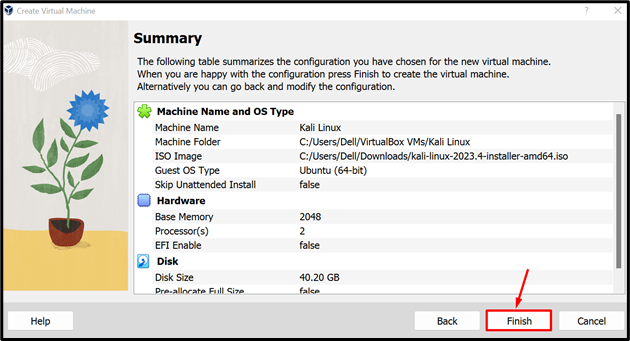
At this point, the process of creating a Kali Linux machine is completed, review the short summary of the VM and press the “Finish” button:
Step 5: Start Kali Virtual Machine
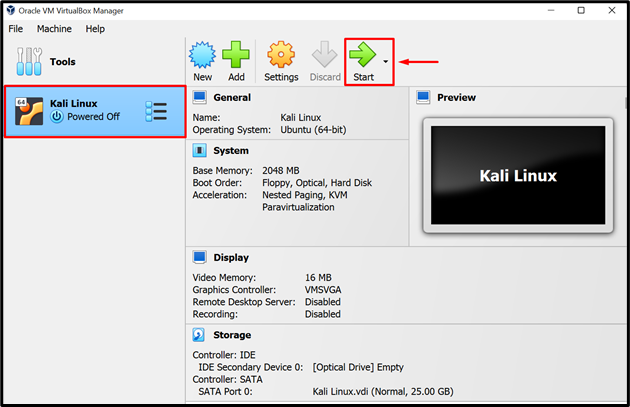
Here, you can see the Kali Linux VM is created. Now, select the machine and hit the “Start” icon to Power On the machine:
Step 6: Install Kali
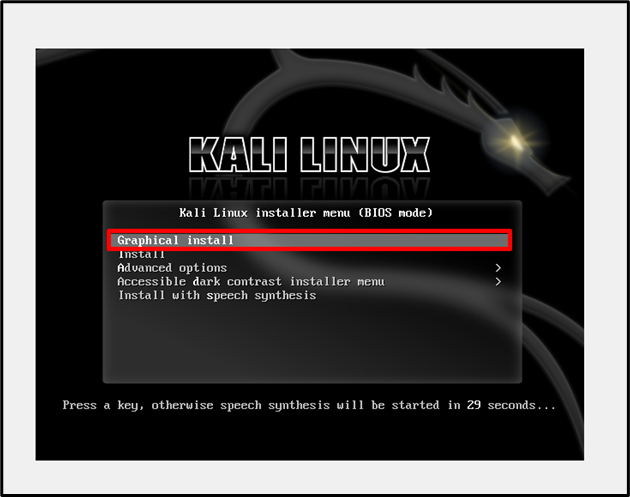
After starting the machine, the Kali Linux installer menu will appear on the screen. To install the Graphical Kali Linux interface, first, use the “DOWN” arrow then use the “UP” arrow to move to the “Graphical Install” option. Then, press the “Enter” key:
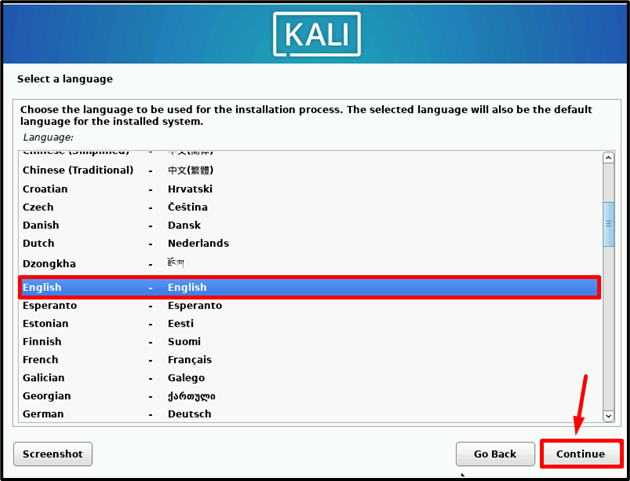
Now, select the language to complete the installation process and press the “Continue” button. Here, we have selected the “English” language:
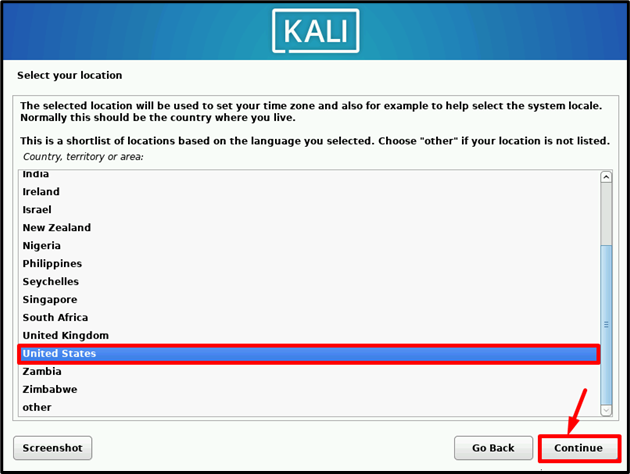
Next, select the location from where you will use “Kali Linux”. This will be helpful for identifying the time zone for the machine. Then, press the “Continue” to proceed:
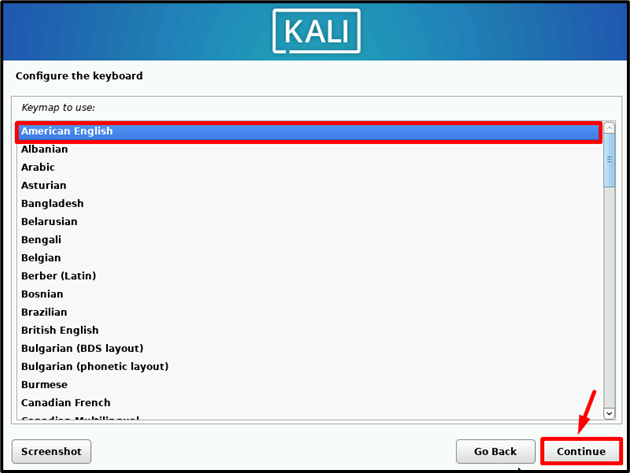
Select the Keyboard for the Kali machine. Here we have chosen the “American English” keyboard:
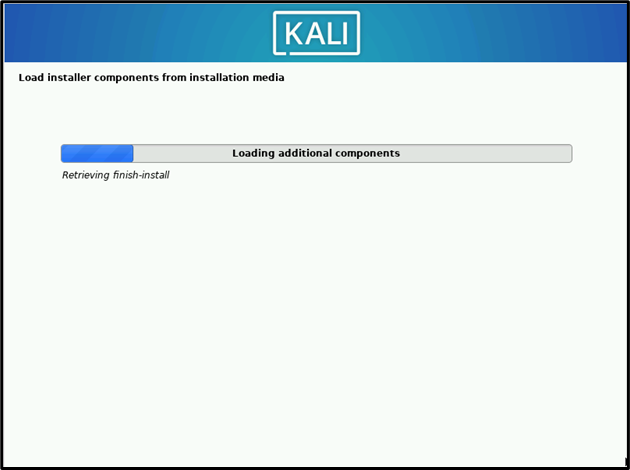
This will start installing and configuring the essential components according to the provided information:
Step 7: Set Kali User
In the next step, the on-screen instruction will ask to set the user on the Kali Linux system. For this purpose, first, set the “Hostname” for the Kali Linux machine and press the “Continue”:
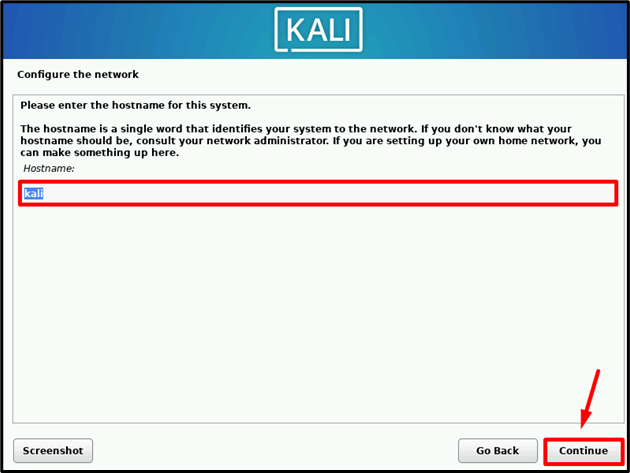
Next, provide the domain name that is part of your internet address and hit the “Continue” to proceed. For instance, we have set the dummy domain name as “Kali Linux”:
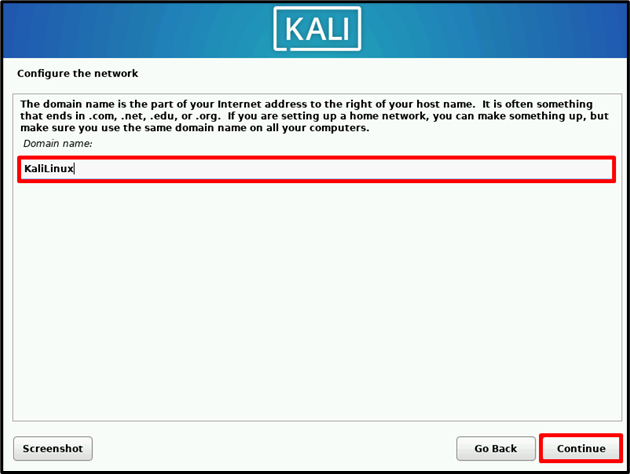
Now, create a new user for the Kali Linux virtual machine. Set the username and press the “Continue” button:
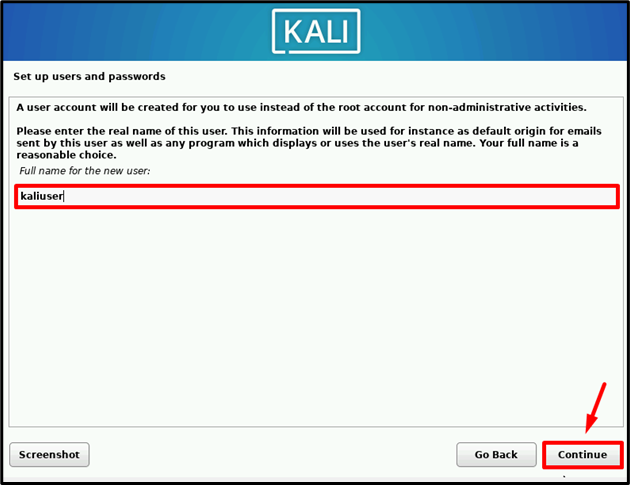
Now, provide the username for your Kali Linux VM. Press the “Continue” to move to next step:
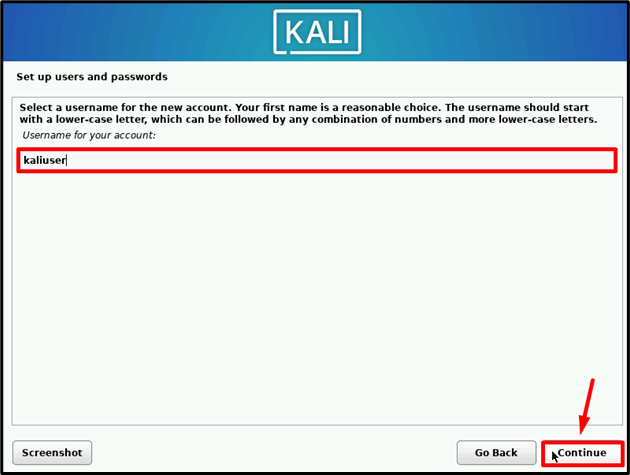
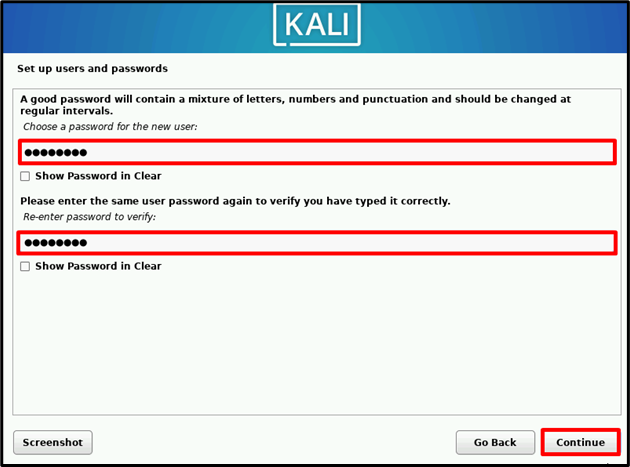
Set the User account password and re-enter the password for verification. After that, hit the “Continue”
Step 8: Set Time Zone
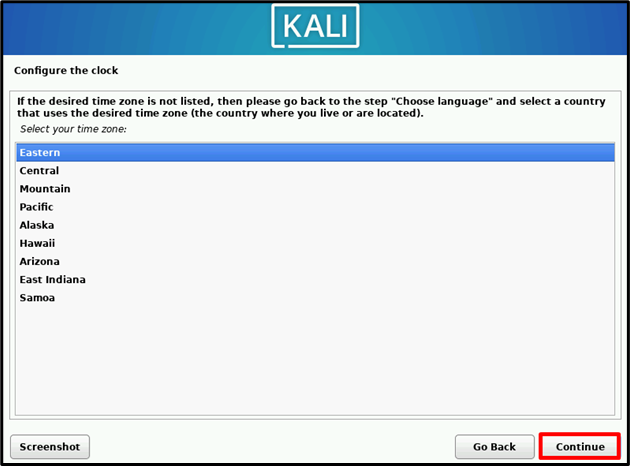
Now, choose the time zone to set the Kali Linux clock accordingly, and press “Continue”. If your required time zone is not available in the list, move back to the “Select your location” screen, and set the correct location:
Step 9: Set Disk Partition Settings
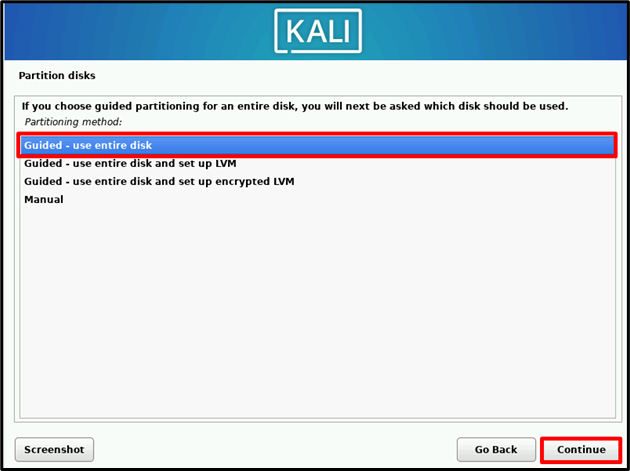
Next, the “Partition disks” setting will open on the screen. Select the “Guided – use entire disk” option and press the “Continue”:
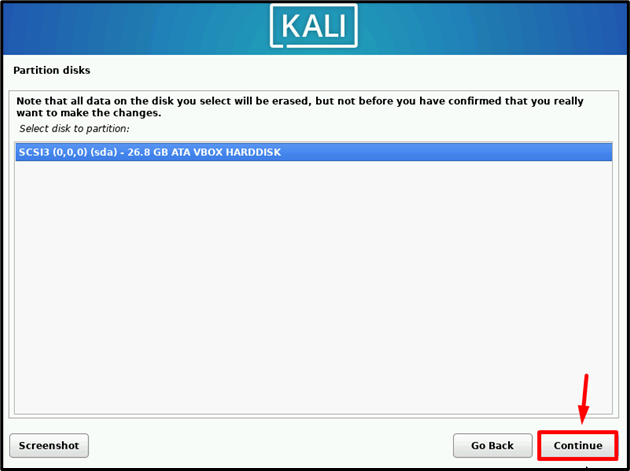
Go with the default selected option and hit “Continue”:
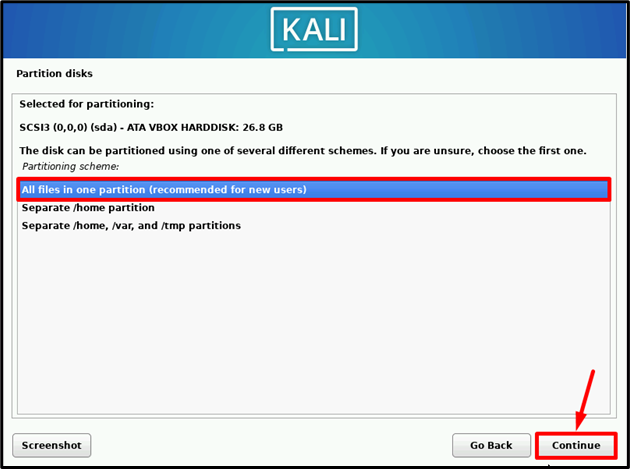
Now, select the below-pointed option to store all Kali Linux files in one partition and click on “Continue”:
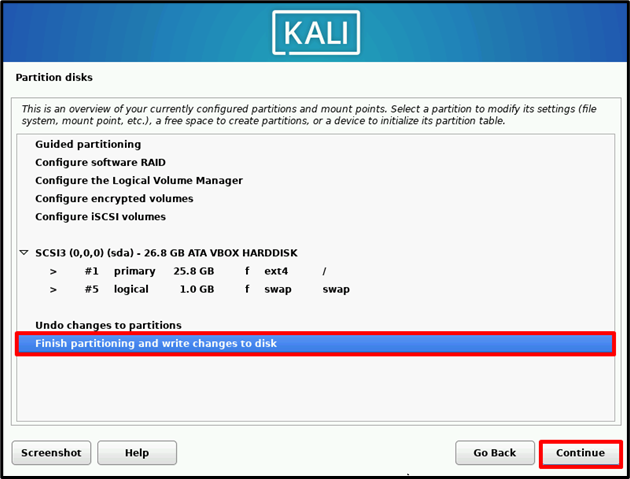
Now, save the changes by selecting the below-highlighted option. Proceed to the next step by hitting “Continue”:
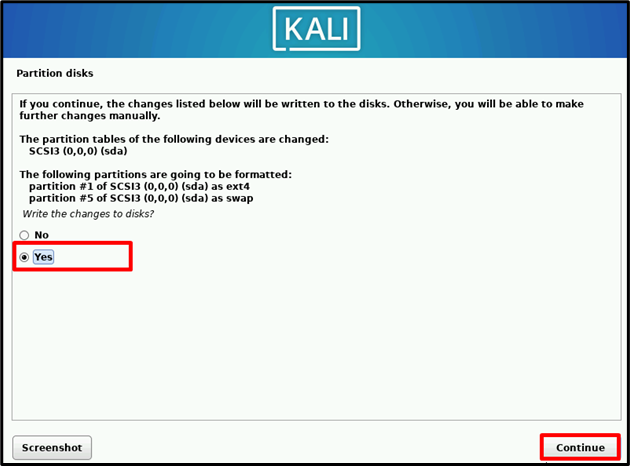
A confirmation box will pop out on the screen. Mark the “Yes” radio and press “Continue”:
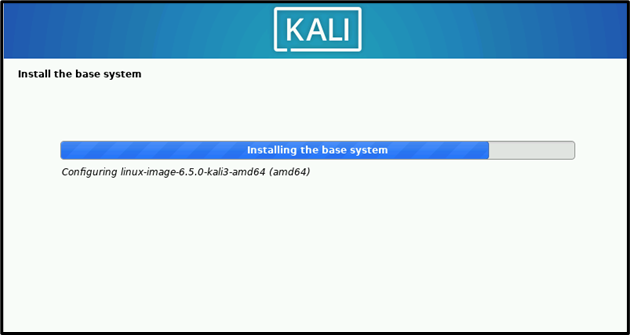
This will start configuring the Disk partition and install the base system:
Step 10: Install Kali Desktop
Set up the Desktop environment to use Kali Linux. For this purpose, choose Kali’s default desktop and hit “Continue”:
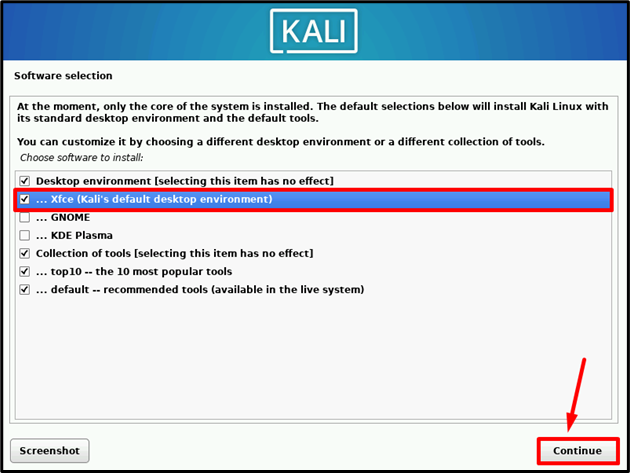
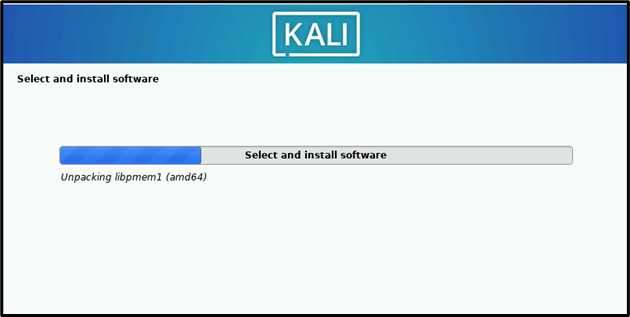
This will start installing the Kali default Desktop on the Virtual Machine:
Step 11: Install GRUB Boot Loader
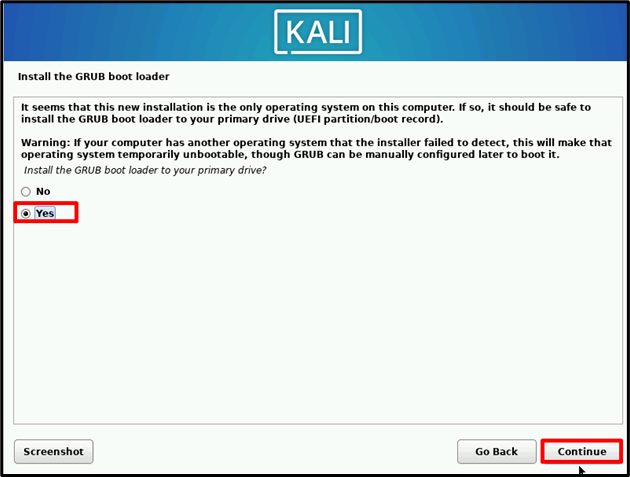
The next, instruction will ask to download the GRUB boot loader on the system. The GRUB boot loader will help you initialize hardware and load the essential components to complete the boot process. It enables us to choose between operating systems if the system has multiple OS. However, usually, this is not required but in order to install the GRUB boot loader, choose the “Yes” radio and press “Continue”:
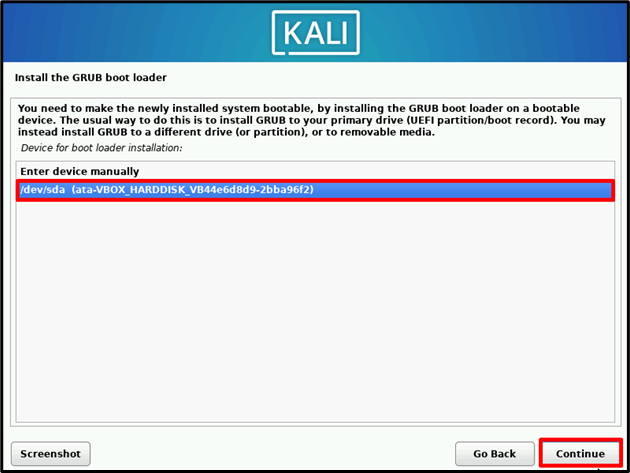
Go with default settings and proceed to the next step by pressing “Continue”:
Step 12: Restart the Kali Virtual Machine
After completing all the Kali Linux configurations, users are required to restart the system. To do so, hit “Continue”:
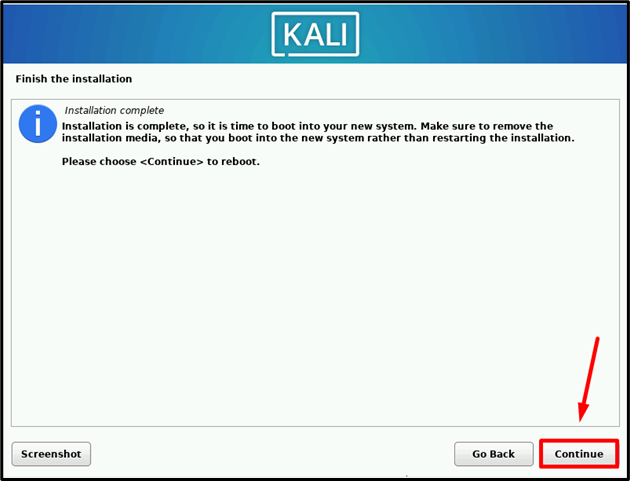
Here, the Kali Linux is rebooting in the VirtualBox VM:

Step 13: Log in to the User Account
Provide the user login credentials that are configured during the installation process. After that, press the “Log In” button:
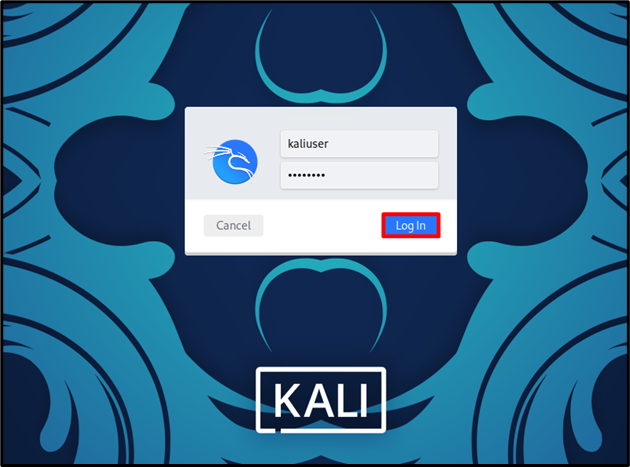
The below result shows that we have effectively set up the Kali Linux in VirtualBox. Now, the user can start using Kali Linux on the system:
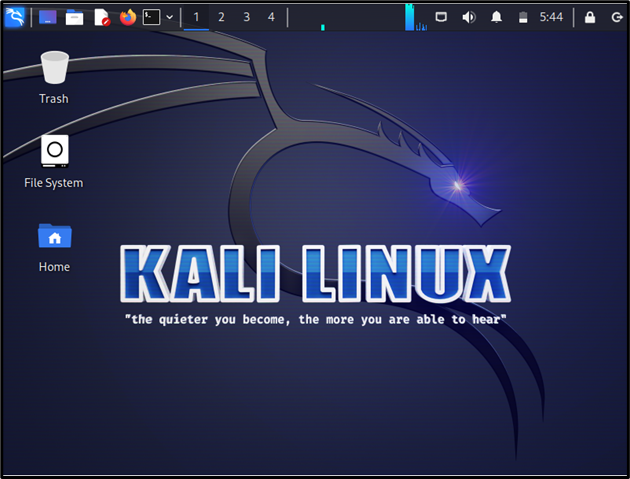
We have demonstrated the method to set up Kali Linux on VirtualBox.
Conclusion
To set up and install Kali Linux on the VirtualBox, first, install the Kali Linux ISO image from Kali’s official website. Then, create a new machine in VirtualBox, provide the ISO image, and allocate essential resources such as Processors, memory, and Hard disk space. After that, start the Kali Linux machine and complete the on-screen instructions, setting the time zone, Kali user, disk partitions, and GRUB boot loader. After that, restart the system and start using Kali Linux in VirtualBox. We have illustrated how to install and set up Kali Linux on VirtualBox.
Source: linuxhint.com
