How to Set the Default Gateway on Ubuntu
All the devices on your network rely on the default gateway for communication. Data packets pass through the router to and from your network before being routed to the particular device that owns the packet.
Each operating system comes with a default gateway. However, you can temporarily or permanently change the default gateway to add another route for your network devices. You can use the IP command on Ubuntu to modify your default gateway.
Checking the Default Gateway
Changing the default gateway is common when you have different sub-networks or when you must point a specific machine to a particular gateway. Before changing the default gateway, let’s list the available routes.
Use the list option with the IP command or its shorthand r to stand for the route.
or
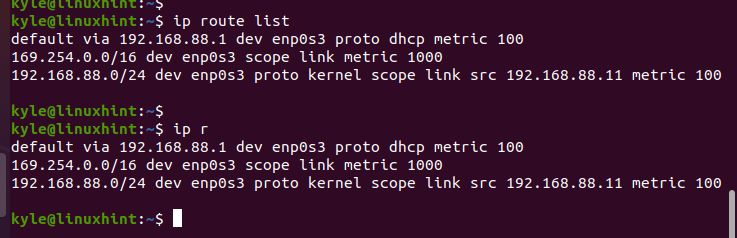
The default gateway has the default keyword in it. If you configured multiple routes on your network, you can use the grep command to filter the router and get the default gateway.
Use the following command:

The current default gateway is 192.168.88.1 on enp0s3 interface. Let’s proceed to set a new default gateway.
How to Set a New Default Gateway
The ip command uses the route option to set the new default gateway. You must specify the type of route that you want to add. In our case, it’s “default”.
For instance, let’s set the default gateway as 192.168.88.10.

Suppose we want to set the default gateway for a particular network interface. In that case, specify the network interface after the gateway. In our case, the interface is enp0s3.
Note that we must add sudo to use the administrator privileges since we are editing the routing table for Ubuntu which is an administrative task.
We can use the list or route options to verify the newly added default gateway.
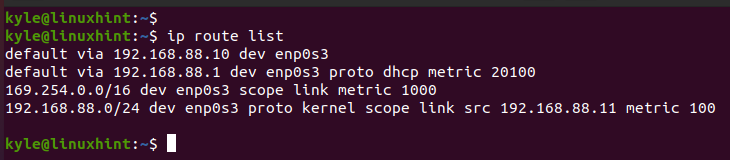
Note how the currently added default gateway is the one that we specified earlier. In the previous output, we now have two default gateways. The keynote is that the changes we made are temporary until you add them to the network manager configuration files.
In the previous case, we can delete the added gateway such that we remain with only one.
Use the delete keyword to remove the added gateway.
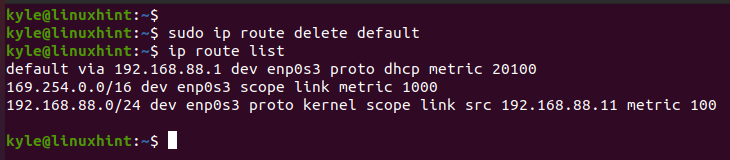
If we check the available default gateway after running the delete command, we confirm that we only have one default gateway remaining which is 192.168.88.1.
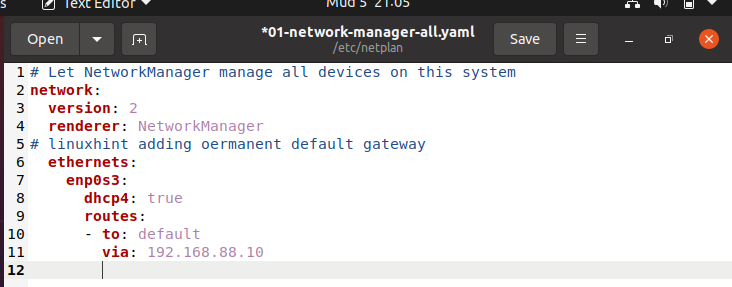
Suppose we want to make the permanent network changes to implement the new gateway. We must edit the configuration file. Open the network manager file using a file editor of your choice. In this case, let’s use gedit with the following command:

Add the new gateway using the following presented format. Make sure that the spacing is set to two whitespaces with the correct indention. Once edited, save the file and exit the editor.
Before applying the changes using the netplan command, run a dry test.
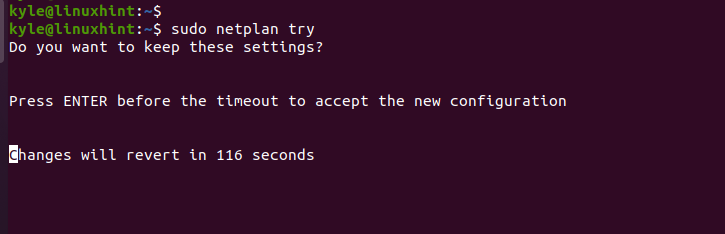
If you are sure with the new network configuration, press the enter key. Otherwise, the changes will revert to the previous settings after the specified seconds.

Conclusion
Ubuntu comes with a default gateway, but that doesn’t mean that you can’t set a new gateway. This guide covered everything about adding a new gateway using the ip command and how to save the changes permanently to the configuration file.
Source: linuxhint.com