How to Set Aspect Ratio Plugin in Tailwind?
In Tailwind, the aspect ratio is the proportion of an element’s width to height, like a video or an image. Tailwind CSS introduced native support for aspect-ratio utilities, which use the CSS aspect-ratio property to set the desired aspect ratio for an element. However, this property is not supported in older browsers. Therefore, users can use the aspect ratio plugin to support these browsers. This plugin introduces two classes i.e., “aspect-w-{n}” and “aspect-h-{n}”, which can be combined to give an element a fixed aspect ratio.
This article will explain the method to set the aspect ratio plugin in Tailwind.
How to Set Aspect Ratio Plugin in Tailwind CSS?
To set the aspect ratio plugin in Tailwind, look at the below-provided steps:
- Install the aspect ratio plugin in the project
- Add the aspect ratio plugin in the “tailwind.config.js” file and disable the “aspectRatio” core plugin
- Use the aspect ratio plugin classes in the HTML program
- Verify the output by viewing the HTML web page
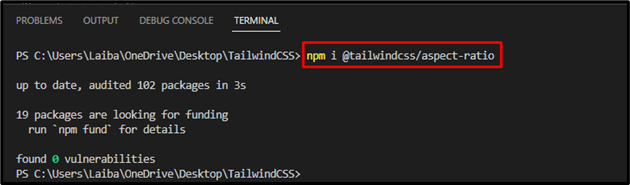
Step 1: Install Aspect Ratio Plugin in Tailwind Project
First, open the terminal and execute the below-stated command to install the aspect ratio plugin in the project:
Step 2: Configure Aspect Ratio Plugin in Tailwind Config File
Then, open the “tailwind.config.js” file, add the aspect ratio plugin in it, and disable the “aspectRatio” core plugin to avoid any conflicts:
content: ["./index.html"],
corePlugins: {
aspectRatio: false,
},
plugins: [
require(‘@tailwindcss/aspect-ratio’),
],
};
Step 3: Use Aspect Ratio Plugin in HTML Program
Now, make an HTML program and utilize the aspect ratio plugin in it. For instance, we have used the “aspect-w-16” and “aspect-h-9” classes in our program to maintain the 16:9 aspect ratio:
<div class="aspect-w-16 aspect-h-9">
<iframe src="https://www.youtube.com/embed/NX_NW6bt6_s"
frameborder="0" allow="accelerometer; autoplay;
clipboard-write; encrypted-media; gyroscope;
picture-in-picture" allowfullscreen></iframe>
</div>
</body>
Here:
- The “<div>” element is using two aspect ratio plugin classes i.e., “aspect-w-16” and “aspect-h-9”. These classes are utilized to create a container with a fixed aspect ratio of 16:9.
- The “<iframe>” element is used to embed a YouTube video.
- The “src” attribute sets the source URL of the video to be embedded.
- The “frameborder” attribute’s value is “0” which removes the border around the embedded video.
- The “allow” attribute specifies the permissions for the embedded video, such as allowing autoplay and picture-in-picture mode.
- The “allowfullscreen” enables the video to be watched in full screen mode.
Note: Make sure the link to the video is embedded.
Step 4: Verify Output
Lastly, run the HTML program and view the web page to verify the output:
According to the above output, the aspect ratio plugin classes ensure that the container is maintaining the desired aspect ratio i.e., 16:9.
Conclusion
To set the aspect ratio plugin in Tailwind, first, install the aspect ratio plugin in the project. Then, add the aspect ratio plugin in the “tailwind.config.js” file and set the “aspectRatio” core plugin’s value to “false” to disable it. After that, utilize the aspect ratio plugin classes in the HTML program. Finally, verify the output by viewing the HTML web page. This article has explained the method to set the aspect ratio plugin in Tailwind.
Source: linuxhint.com