How to Secure Your HAProxy with SSL
When you have your website up and running, there are key things that you must work on to ensure security, availability, and reliability. The first thing is to configure a load balancer, and HAProxy has proved to be a reliable option. HAProxy handles the load balancing while acting as a reverse proxy. Even with HAProxy in place, you must still secure the traffic by encrypting the transactions with HTTPS. You can quickly secure your web server using the SSL/TLS encryption. That way, the data between your server and the client devices are transmitted securely, and the data integrity is achieved. Read on to understand how to secure your HAProxy with SSL.
How Does the SSL Encryption Work?
Thanks to options like Let’s Encrypt, you can now obtain a free SSL/TLS certificate for your website encryption. Let’s Encrypt is a free open certificate authority that gives free SSL/TLS certificates with a 90-day validity for live domains. With these certificates, your web traffic between the server and the client are sent as HTTPS. That way, the hackers can’t eavesdrop on the traffic and manipulate the integrity of the shared data.
Aside from making it free, Let’s Encrypt also supports automation. The SSL/TLS certificate that you receive automatically renews every 90 days. Therefore, you can have a script that runs the renewal and updates your HAProxy every 90 days. Moreover, Let’s Encrypt certificates are compatible with all browsers and operating systems which ensures a seamless use of them to secure your HAProxy.
Step-by-Step Guide on How to Secure Your HAProxy with SSL
So far, we now understand what an SSL/TLS certificate does and why you need it for your website. Moreover, we discussed how you can acquire it. The last step is to share the steps to secure HAProxy with SSL.
Before we begin, ensure that you have a live and valid domain associated with the target web server that you use with HAProxy. Once that is ready, proceed with the following steps:
Step 1: Update the Repository
Updating your system ensures that you get the latest source for the packages that you want to install.

Step 2: Install HAProxy
For this case, we must install HAProxy as it is what we want to secure using SSL. If you have HAProxy running on your web server, skip this step. Otherwise, run the following “install” command to install HAProxy quickly:

Once you installed it, do the configurations that are ideal for your server’s need such as load balancing.
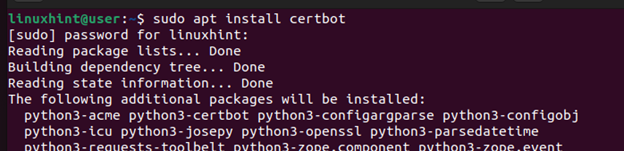
Step 3: Install Certbot
All the free SSL certificates that are issued by Let’s Encrypt are provided through Certbot. You don’t need to install Certbot if your certificate is purchased elsewhere. We are running Ubuntu 22.04 for this case, and the Certbot package is available from the default repository. To install it, run the following command:
Step 4: Obtain the SSL Certificate
Once you installed Certbot, you can obtain the SSL certificate from Let’s Encrypt. Use the following syntax and ensure that you replace the “exampledomain.com” with the valid domain that you want to secure.

Once you run the command, a series of prompts will appear. Go through each prompt and answer them with the correct details. For instance, you must give the email that is associated with the domain. Once you answered the prompts and your domain gets verified, an SSL certificate will be obtained and saved on your server.
Step 5: Create a Single PEM File
To use the generated SSL certificate with your HAProxy, save the certificate and the corresponding private key into one PEM file. Therefore, we must concatenate the full chain certificate file to the private key file with the following command:
Ensure that you replace the domain whenever required.

Step 6: Configure HAProxy
Once you have a single PEM file, you must configure HAProxy to reference the file to secure it. In the HAProxy file, include the port that you want to bind with HTTPS and add the path to the PEM file using the SSL keyword.
Open the file using a text editor.
Next, edit the configurations to have a frontend similar to the one in the following, showing which port to secure and where to source the PEM file.
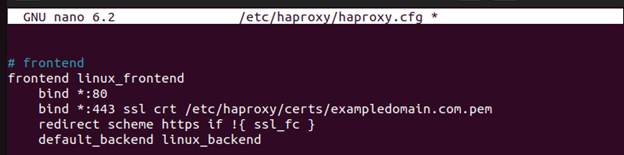
Lastly, save and exit the config file. You can restart HAProxy, and your traffic is secured as it transmits from the client to the server. All the HTTP traffic will be redirected to HTTPS, thanks to the redirect scheme that we included in the config file.
![]()
That’s how to secure your HAProxy with SSL.
Conclusion
An SSL/TLS certificate is a handy way of securing your traffic when using HAProxy as your load balancer. You can obtain a free SSL certificate from Let’s Encrypt using the Certbot tool and configure your HAProxy to use it when redirecting the traffic. We presented the detailed steps to follow and provided an example to reference when configuring the same on your web server.
Source: linuxhint.com