How to Safely Remove PPA Repositories in Ubuntu
If you have recently added some repositories to the Ubuntu system and are no longer helpful, you can safely remove them through this article’s guidelines. This will not only free up space but also helps speed up the updating process, which may slow down due to crowded repositories.
How to Safely Remove PPA repositories in Ubuntu
There are two methods to safely remove PPA Repositories in the Ubuntu system, which are as follows:
Method 1: Remove PPA Repository Through GUI
One of the easiest methods to remove PPA Repository from Ubuntu can easily be done through GUI using the following steps:
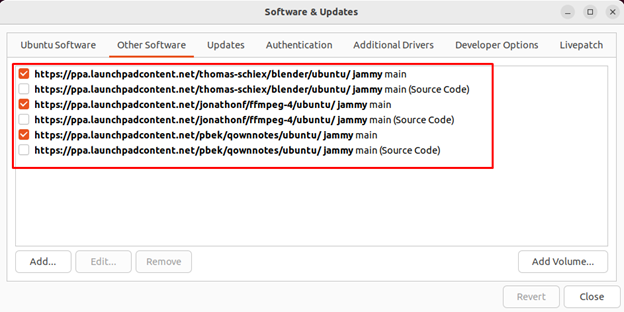
Step 1: Search for “Software & Update” in Ubuntu’s application search menu.

Step 2: Go to the “Other Software” section to see the list of added PPA repositories to the Ubuntu system.
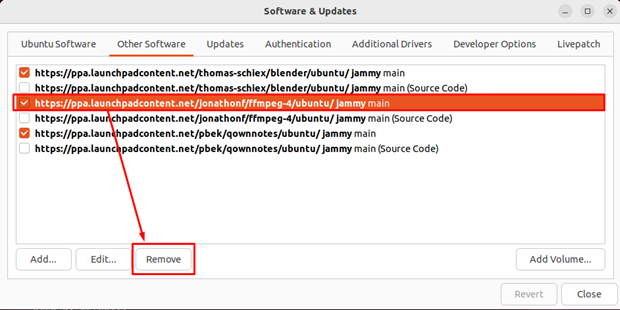
Step 4: Click on any repository you want to delete and select the “Remove” button.
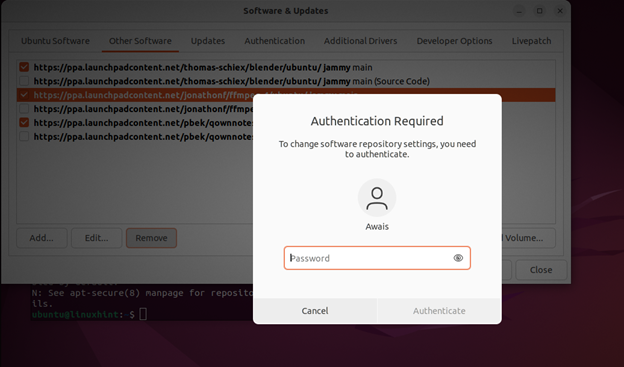
Step 5: Enter the system password to remove the PPA repository from your Ubuntu system.
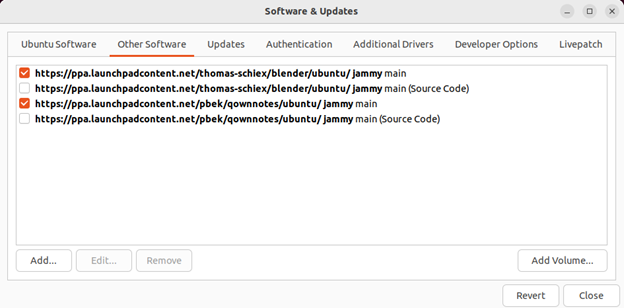
This removes the PPA repository from your system.
Method 2: Remove PPA Repository from Terminal
There are three simplest sub-methods that can remove the PPA repository from the Ubuntu system using the terminal, which is as follows:
- Remove PPA Repository from add-apt Repository Command
- Remove PPA Repository from Source List
- Remove PPA Repository PPA-Purge Command
i: Remove PPA Repository from Add-apt Repository Command
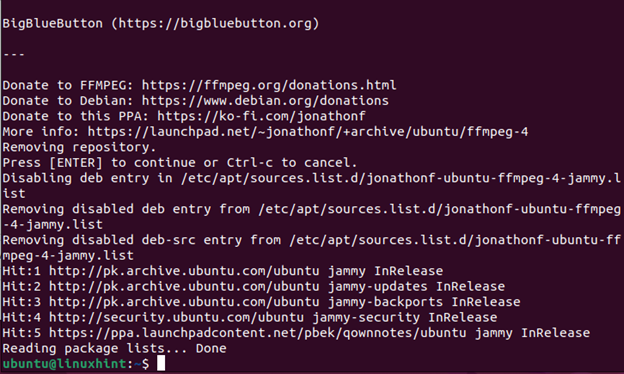
You can use the “add-apt-repository” command with the repository name to remove it from the Ubuntu system directly. However, for this method, you must remember the name of the repository you want to delete.
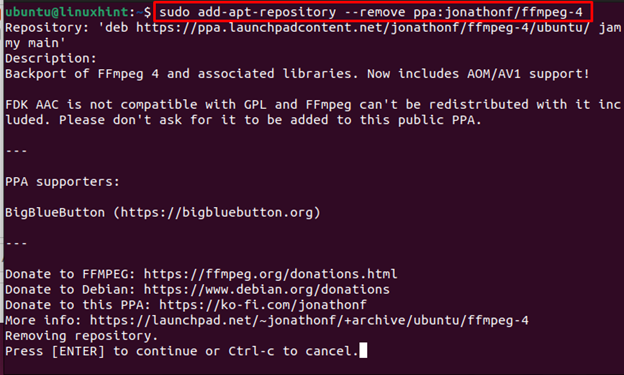
Press Enter to remove the PPA repository from the Ubuntu system successfully.
ii: Remove PPA Repository from Source List
The repositories in the Ubuntu system are placed inside the location “/etc/apt/source.list.d”, which you can navigate using the following command:

To view the list of PPA repositories, use the following command:

Now, to remove any repository, you can simply use the following command with the repository name:

iii: Remove PPA Repository Through PPA-Purge Utility
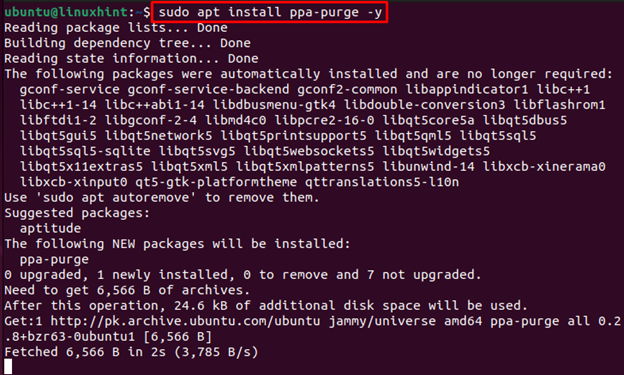
The “ppa-purge” is a third-party utility that can be used to remove PPA repositories from Ubuntu systems. However, by default, it isn’t installed on your system and you can use the following command to install it.
After the installation, use the following command with the repository name to successfully remove a PPA repository from the Ubuntu system.
![]()
Conclusion
Removing the PPA repository from the Ubuntu system isn’t difficult since there are multiple methods to remove it, which are already discussed in the above guidelines. You can pick the GUI method to remove a repository or go for the terminal method, which has three sub-methods. All these methods can safely remove the PPA repositories from the Ubuntu system.
Source: linuxhint.com