How to Run Consul Server Using Docker
Docker is a well-liked open-source platform that builds, tests, deploys, and ships different applications and services. It is commonly used for testing purposes. Docker offers a containerized environment that is independent of the platform and runs on different operating systems. However, many users use Docker containers to deploy different services, databases, programs, and servers.
In this blog, we will illustrate:
- What is a Consul Server?
- How to Run Consul Server Using Docker?
- Bonus Tip: How to Configure New Service on Consul Server?
- How to Run Consul Server Using Docker Compose?
- Conclusion
What is a Consul Server?
As we are all well aware, microservices and distributive systems offer speedy and efficient software development. However, it also increases operational complexity in different processes such as network segmentation, service communication, service discovery, and many more.
To overcome these types of networking challenges, HashiCrop introduced the Consul server in 2014 which provides efficient service networking. It enables developers to manage and control secure network connections between services, runtimes, and cloud environments. For this purpose, it provides different services such as traffic management, auto-updates, health checks, service discovery, load balancing, and service mesh. These services can be executed in virtual machines, Docker containers, and Kubernetes cluster containers.
How to Run Consul Server Using Docker?
To run the Consul server in a container using Docker, go through the following steps.
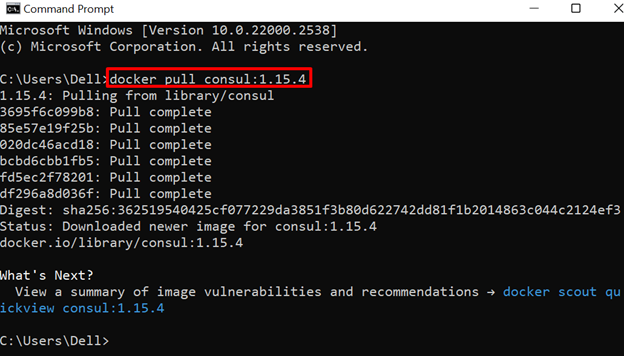
Step 1: Pull the Consul’s Official Image
First, pull the Consul’s official image from the Docker Hub registry using the below command:
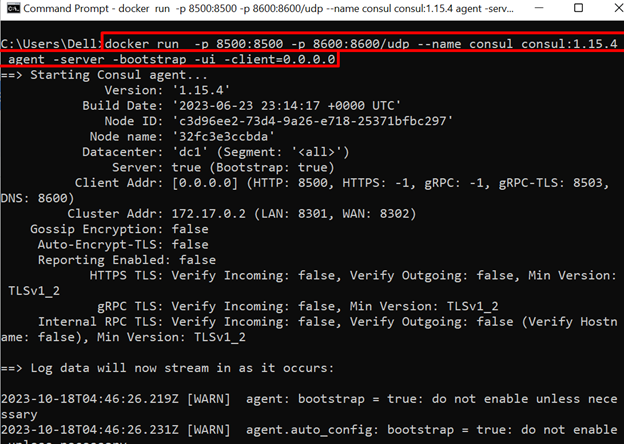
Step 2: Start Consul Server
Now, deploy the Consul server inside the Docker container by executing the “consul” image through the “docker run <image-name>” command:
In the above command, we have used the following options:
- “-p” is used to configure the exposing ports for the container.
- “–name” sets the suitable name of the container.
- “agent -server” is used to run the consul server.
- “-ui -client” sets the client’s UI address.
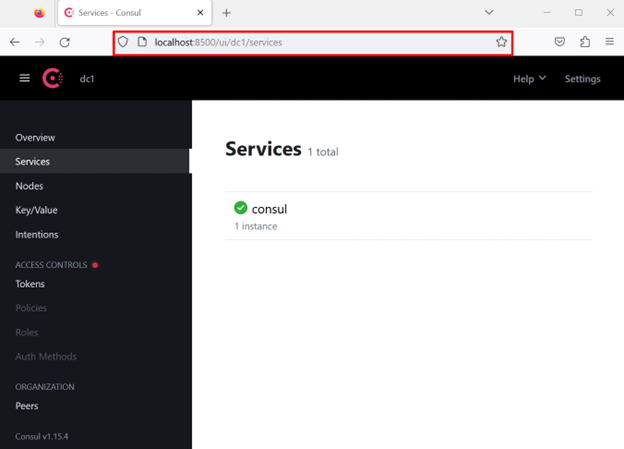
To check whether the server is deployed using Docker, navigate to the “http://localhost:8500” port. The below output shows that we have successfully run the consul server using Docker:
Step 3: Execute Consul Client and Connect it to Server
Next, start the new instance of Consul in a separate container using Docker. This instance will act as a Consul client that will connect to the Consul server. To do so, utilize the below command:
In the above command, “agent” is the Consul command used to start the Consul client. The “–retry-join” option is utilized to connect the client to the server. The connection will be established through the Consul server IP address:

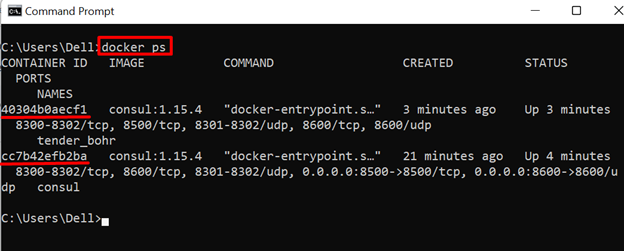
Step 4: List Down Docker Running Containers
Now, list down the Docker running containers through the “docker ps” command:
Note down the ID of the server container and verify whether the client is connected to the Consul server or not:
Step 5: Verification
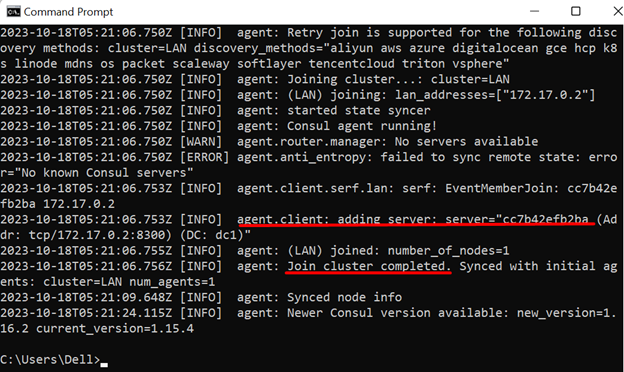
Check the logs of the Consul client container using the “docker logs <container-id/container-name>” command:
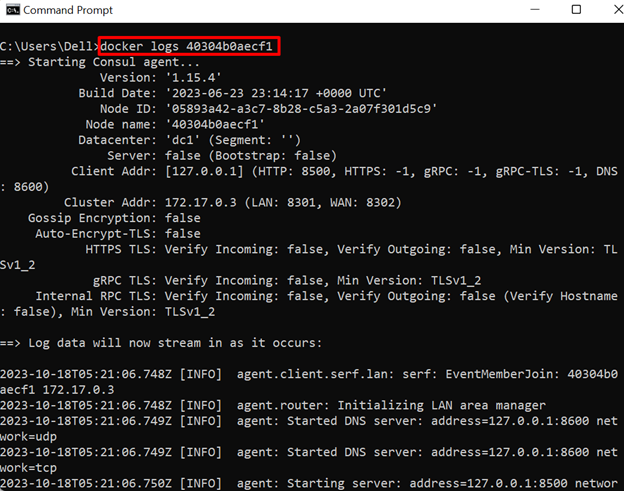
The below result shows that the Consul client is successfully connected to the Consul server:
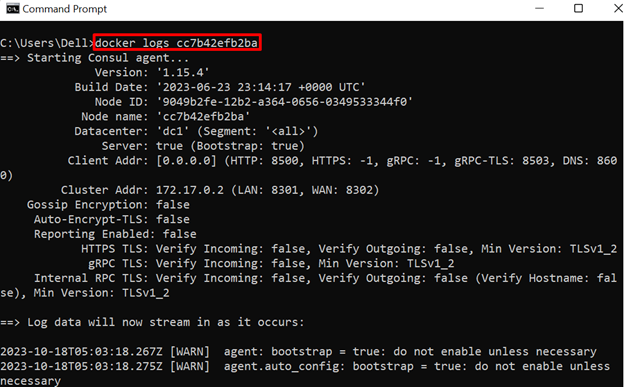
Alternatively, the user can utilize the “docker exec -it <container-id/container-name> consul member” command to verify if the Consul server is connected to the consul client or not:
The two instances show that both the Consul client and the Consul server are connected with each other:

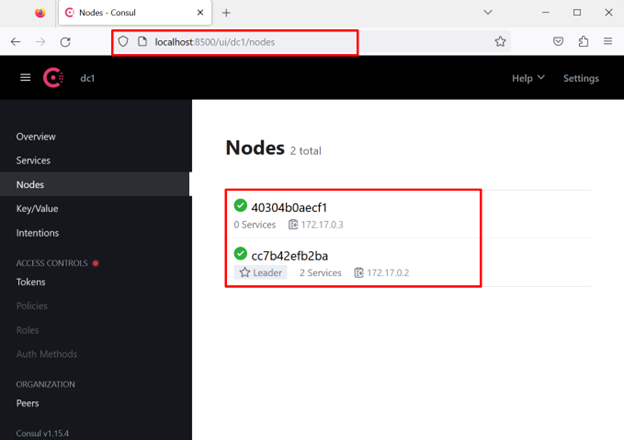
However, the user can also check the connecting nodes or clients through the Consul server UI:
Bonus Tip: How to Configure New Service With Consul Server?
To configure additional or new services in the Consul server, go through the following illustration:
Step 1: Start the Service in the Container
First, start any service inside the container. For demonstration, we have run the counting service in a container by executing the “hashicorp/counting-service:0.0.2” image. The “-p” option will define the service exposing port:

Step 2: Configure the Service in Consul Server Container
Next, run the below command to configure the new service in the Consul server. In this demonstration, we have utilized the “consul” container that runs the consul server in the above section of this article:

Step 3: Reload the Server
Now, reload the server using the “consul reload” command. This command will also be executed in the “consul” container without interacting with the shell:

Step 4: Check Container Logs
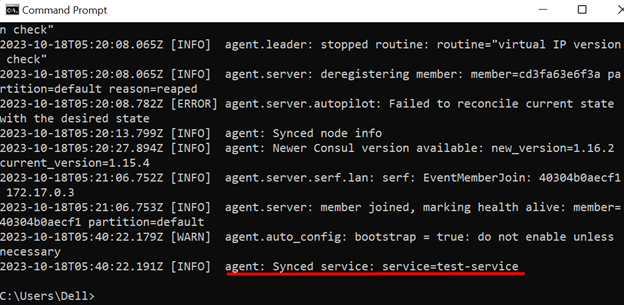
Now, check the logs of the container in which the Consul server is executing and verify if the service is configured in the Consul server or not:
The output indicates that the new service is successfully configured in the Consul server:
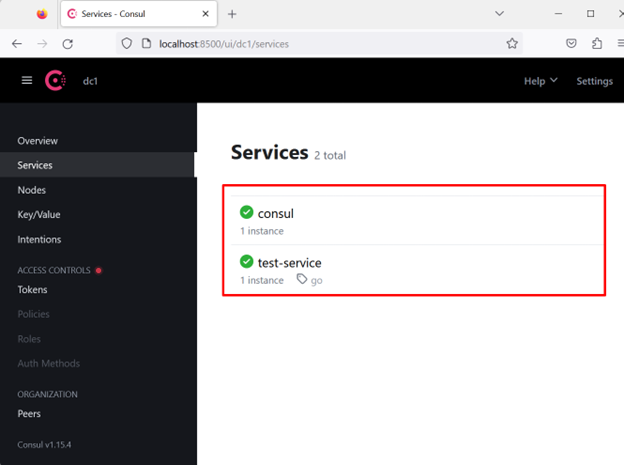
Here, the user can also view the newly configured service from the Consul server user interface:
How to Run Consul Server Using Docker Compose?
Docker compose is one of the major components of Docker that is utilized to manage, deploy, and test multiple services or multiple container applications. To run the Consul server and Consul client using Docker Compose, follow the listed steps.
Step 1: Configure Consul Server and Consul Client Services
First, create a Yaml file named “docker-compose.yml”. Then, copy the below code snippet into the file:
services:
consul-server:
image: consul:1.15.4
container_name: consul-server
restart: always
networks:
- consul
ports:
- "8500:8500"
- "8600:8600/tcp"
- "8600:8600/udp"
command: "agent -server -bootstrap -ui -client=0.0.0.0"
consul-server1:
image: consul:1.15.4
container_name: consul-server1
restart: always
networks:
- consul
command: "agent -server --retry-join consul-server -client=0.0.0.0"
consul-client:
image: consul:1.15.4
container_name: consul-client
restart: always
networks:
- consul
command: "agent --retry-join consul-server"
networks:
consul:
driver: bridge
In the above code:
- “services” key is utilized to configure services in Docker Compose. For instance, we have configured two servers and one client service “consul-server”, “consul-server1” and “consul-client”.
- “image” key is utilized to specify the container base image.
- “container_name” sets the name of the container.
- “networks” key is utilized to specify the container network.
- “command” key defines the executable points of the container. The server containers will use “agent -server” commands to run the consul server. The first server will be the leader server and the second will be the follower server. The “–retry-join” option is used to join “consul-server1” and “consul-client” to “consul-server”.
- “ports” specify the exposing ports for the “consul-server”.
Step 2: Run the Consul Server and Consul Client
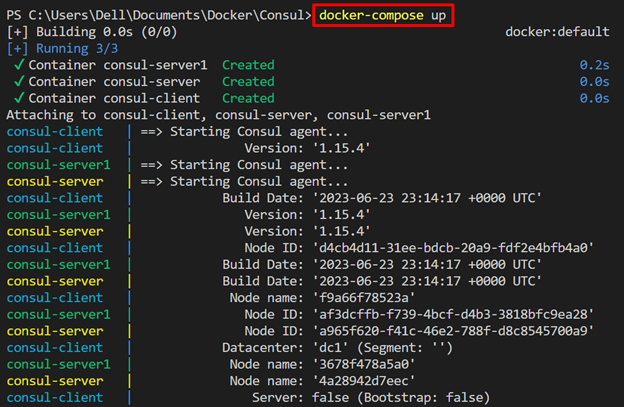
Next, run the “docker-compose up” command to run the services configured in the “docker-compose.yml” file:
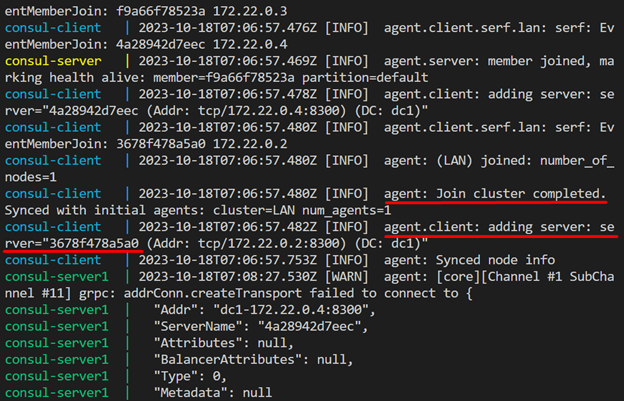
Here, the below output shows that “consul-client” and “consul-server1” are successfully connected with “consul-server”:
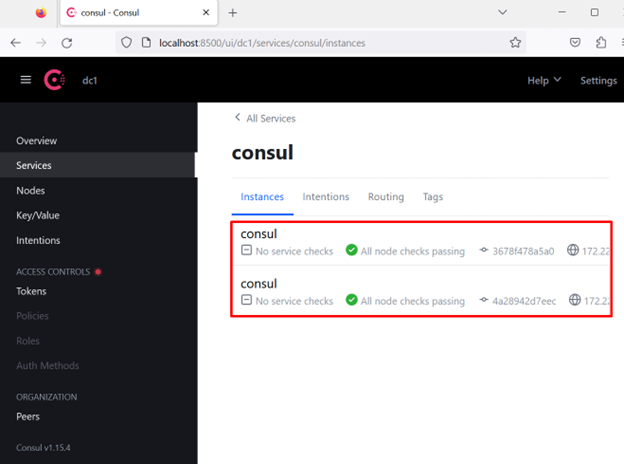
For verification, navigate to the exposing port of the “consul-server” container using “http://localhost:8500”. The output shows that we have successfully deployed the Consul server using Docker Compose. In the below result, the first service is coming from the “consul-server1” which is the follower server and the second service is for the “consul-server” leader server:
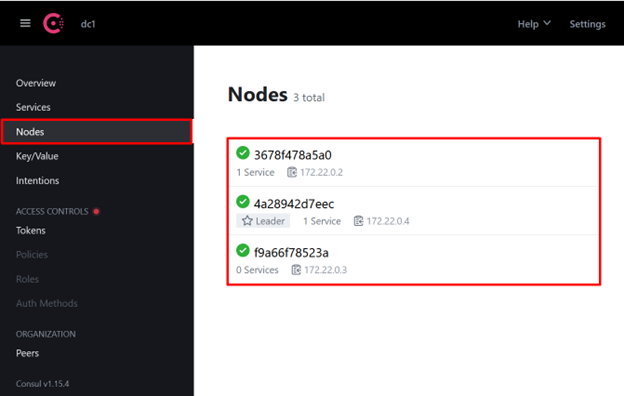
From the “Nodes” menu, the user can view the nodes connected to the Consul server. Here, the first node is “consul-server1”, the second node is the “consul-server” leader node and the third node is the “consul-client” client node:
That is all about deploying the Consul server using Docker and Docker Compose.
Conclusion
To deploy the Consul server using Docker, first, pull the official Consul docker image from the Docker hub. Then, run the server inside the container using the “docker run -p 8500:8500 consul:1.15.4 agent -server” command. To connect the Consul client to the server, run another container using the “docker run consul:1.15.4 agent –retry-join=<Consul-server IP Address>” command. To run the Consul Server using Docker compose, first configure the Consul server and client in the “docker-compose.yml” file. Then, run the “docker-compose up” command. This post has demonstrated how to run the Consul server using Docker and Docker Compose.
Source: linuxhint.com