How to Resolve Large WinSxS directory Causing disk space issues in Windows 10
The solution for this problem is that the user can clean up any unnecessary files in this folder using various methods. This can decrease the folder size, hence solving the disk space issue in Windows. In order to clean up the space, the user has to first check whether it is recommended by the system to clean up the WinSxS folder.
This article will provide the procedure for resolving the WinSxS directory causing the disk space issues in Windows 10 using the following outline:
- How to Check WinSxS Directory Size and Perform Clean-up Using Command Prompt?
- How to Resolve the WinSxS Folder Causing Disk Space Issue Using the Disk Cleanup?
- How to Resolve the WinSxS Folder Causing Disk Space Issue Using the Storage Settings?
How to Check WinSxS Directory Size and Perform Clean-up Using Command Prompt?
To check the directory size and fix the disk space issue of the WinSxS folder using the Command Prompt, follow the below-given steps.
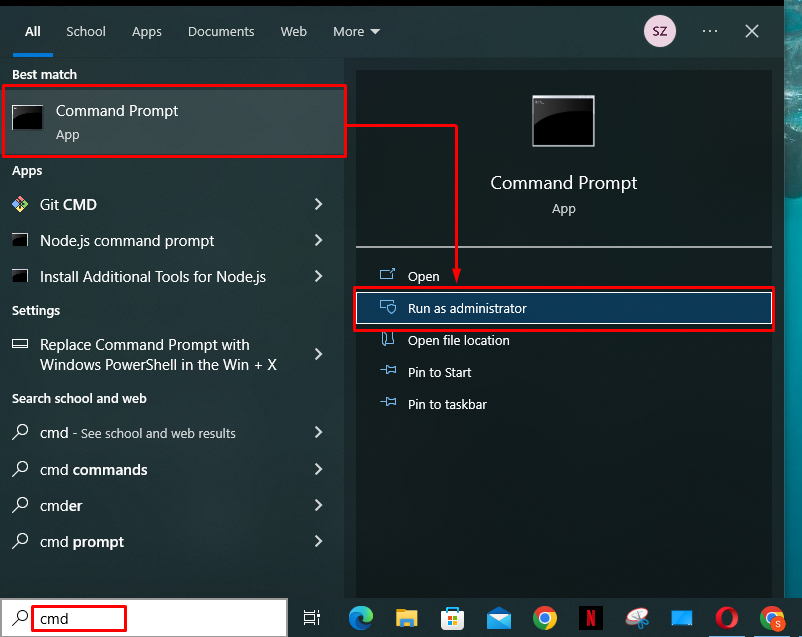
Step 1: Open Command Prompt
From the Start menu, open the “Command Prompt” window by searching for “cmd” in the Start search box:
Step 2: Check the Directory Size
In order to first check the size of the WinSxS folder, insert the below-given command in the Command Prompt:
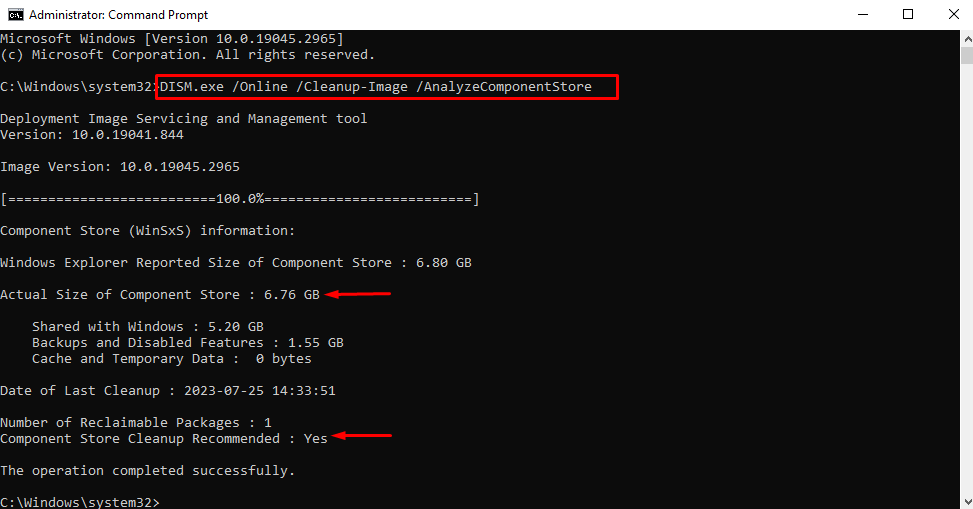
From the above output, the size of the WinSxS directory is “6.76 GB”. The user can also see that the “Component Store Cleanup Recommended” parameter is “Yes”.
Step 3: Perform the Cleanup Operation
To do a cleanup, insert the below-provided command in the Command Prompt and hit the Enter key:
The following snippet demonstrates that the stated “DISM.exe” command executed successfully:
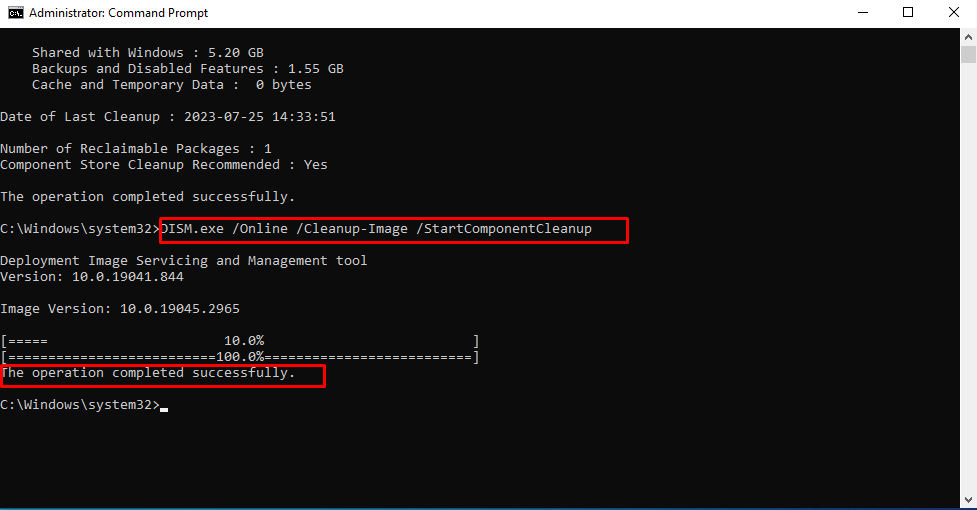
This will resolve the Disk Space Issue caused by the WinSxS directory.
How to Resolve the WinSxS Folder Causing Disk Space Issue Using the Disk Cleanup?
WinSxS directory cleanup can also be done using the “Disk Cleanup” utility. Below are the steps provided to use this utility in Windows.
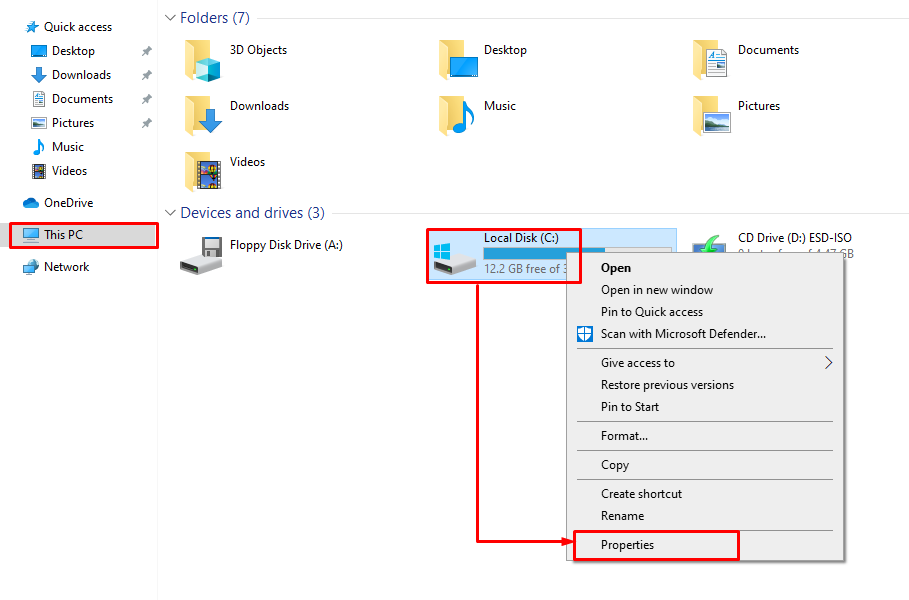
Step 1: Open C: Drive Properties
First, open the File Explorer using the “Windows + E” shortcut, then go to “This PC” and right-click on the “C:” drive. Then, select the “Properties” option from the context menu:
Step 2: Go to Disk Cleanup
Once the properties window opens, click on the “Disk Cleanup” button in the “General” tab of the window:

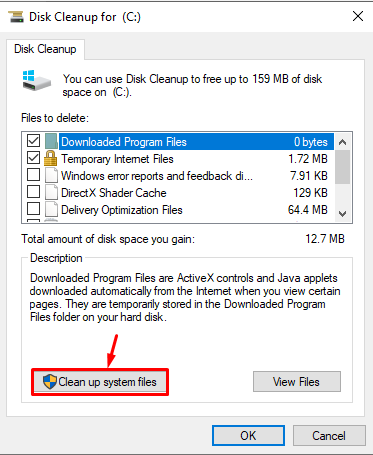
Step 3: Select System Files for Cleanup
In the opened Disk Cleanup window, click on the “Clean up system files” button:
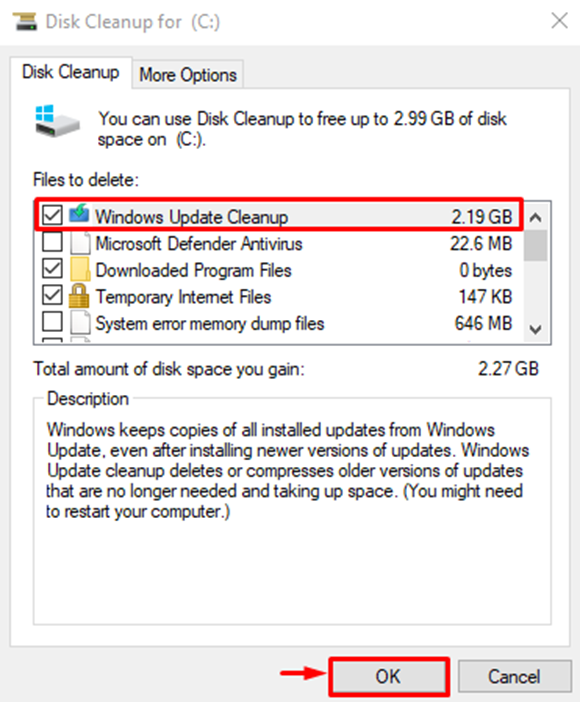
From there, mark the “Windows Update Cleanup” tickbox and click on the “OK” button to start the Disk Cleanup:
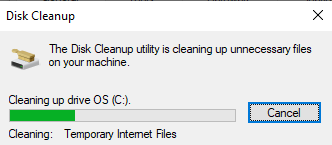
Upon doing so, the Disk Cleanup utility will start cleaning up the disk space:
This will also clean up all the unnecessary files in the WinSxS folder, hence decreasing the disk space.
How to Resolve the WinSxS Folder Causing Disk Space Issue Using the Storage Settings?
A cleanup operation can be performed on the “WinSxS” directory using the Storage settings in Windows as well. To do that, follow the below-given steps.
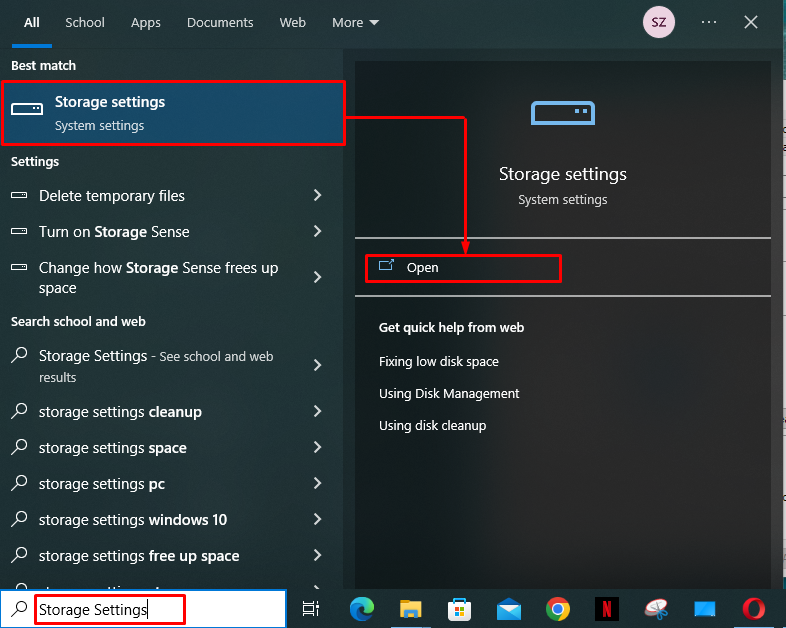
Step 1: Open Storage Settings
From the Start menu, open the “Storage Settings” by searching for it in the Search box:
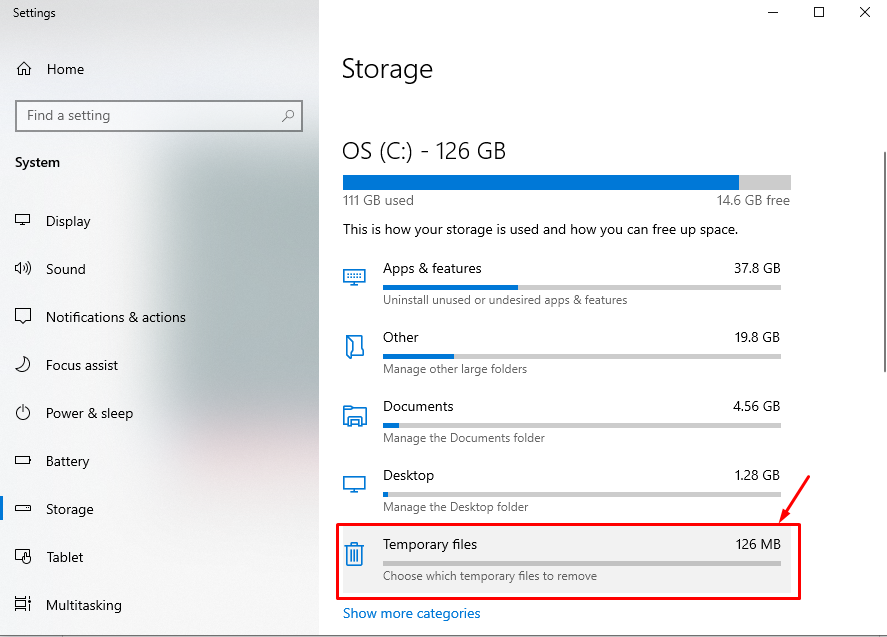
Step 2: Go to Temporary Files
In the right windowpane of the Storage Settings, click on “Temporary Files” to do a cleanup:
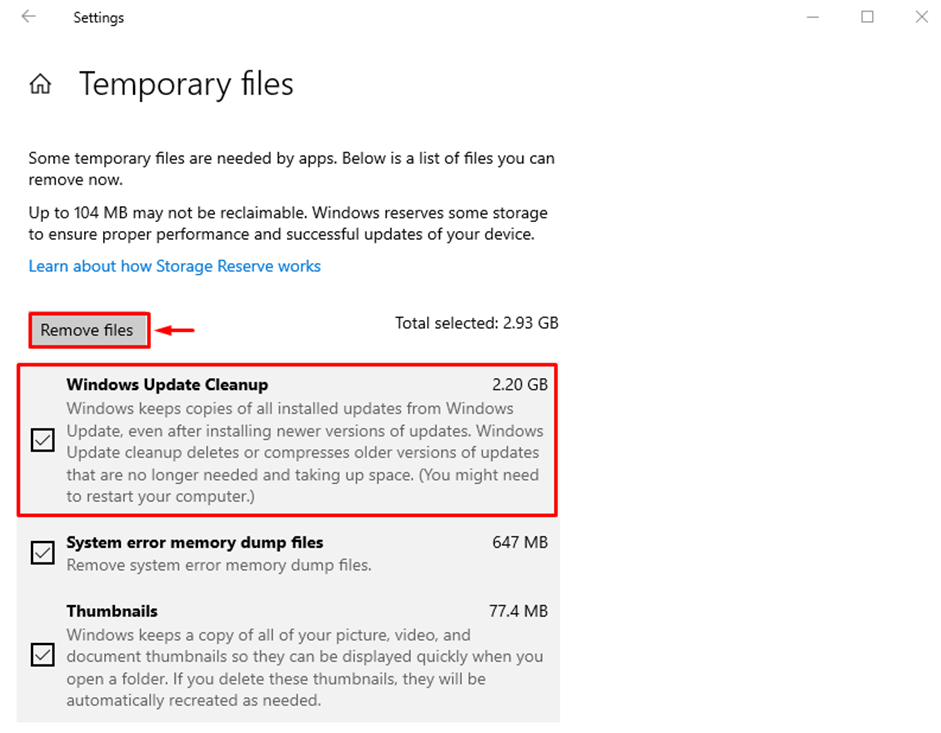
Step 3: Remove Windows Update Cleanup Files
Here, mark the “Windows Update Cleanup” checkbox, and others that the user wants to remove and click on the “Remove Files” button:
Upon doing so, Windows will remove the selected files and the WinSxS directory will be cleaned up.
Conclusion
To resolve the Large WinSxS directory causing disk space issues in Windows 10, open the “Storage Settings” by searching for it in the Start menu search box. Then, in the right windowpane, click on “Temporary Files”. From there, mark the “Windows Update Cleanup” checkbox and other files that the user wants to delete. Next, click on the “Remove” button to start the cleanup. This article has provided the procedure for resolving the WinSxS directory causing the disk space issues in Windows 10.
Source: linuxhint.com