How to Reset File to be Same as Master Branch in Git
In this guide, you will learn the procedure to reset files to be the same as the master branch in Git.
How to Reset File to Be Same as Master Branch in Git?
Suppose we have an important file in our Git “master” branch that was not updated. However, it has already been updated and committed multiple times in another branch. Now, we are required to remove all the changes made on the file and revert it to its same state as in the master branch.
Move toward the below-given procedure to understand the above scenario!
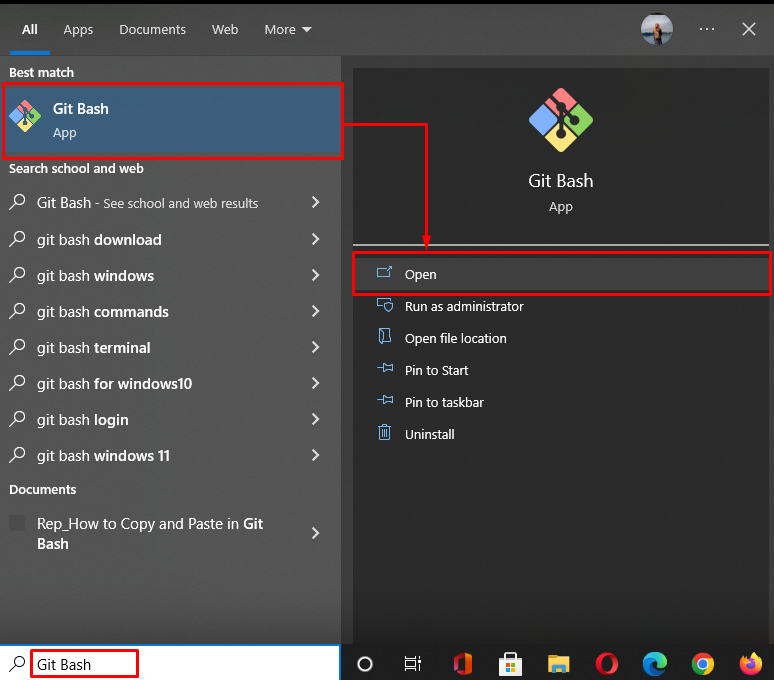
Step 1: Launch Git Bash
Open the Git terminal with the help of the “Startup” menu:
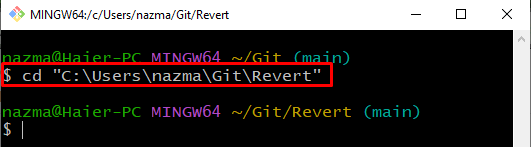
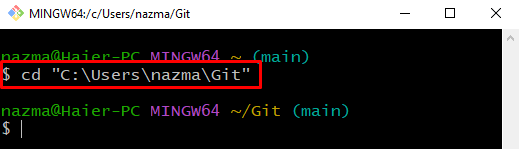
Step 2: Move to Git Directory
Navigate to the Git local directory using the “cd” command:
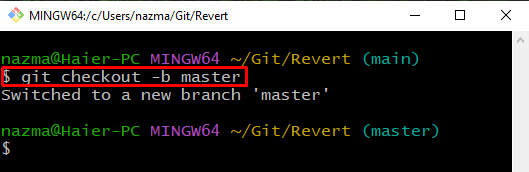
Step 3: Create and Switch Branch
Now, create and switch to the new branch immediately by utilizing the provided command:
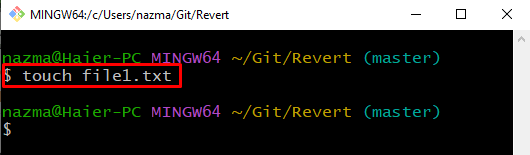
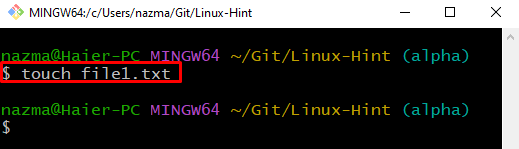
Step 4: Create File
Execute the “touch” command to create a new file named “file1.txt”:
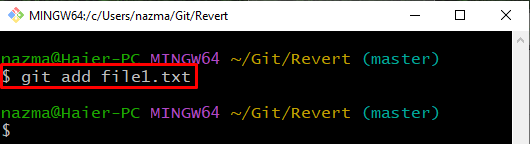
Step 5: Track File
Next, track the file from working directory to the staging area:
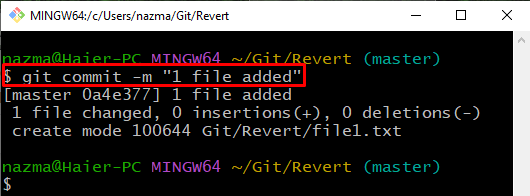
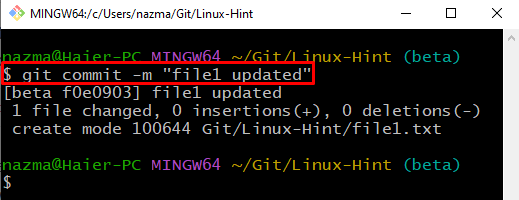
Step 6: Commit Changes
Commit the changes made to the Git repository with a commit message:
As you can see, changes are committed successfully to the Git repository:
Step 7: Update File
Open the file to make some changes to it:

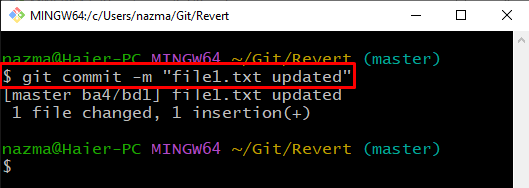
Step 8: Commit Changes
Now, save changes using the “git commit” command with “-m” option to specify any message:
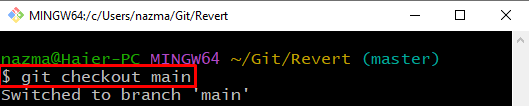
Step 9: Switch Branch
Next, execute the “git checkout” command to switch back to the previous “main” branch:
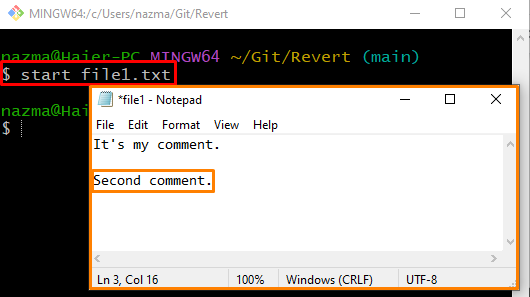
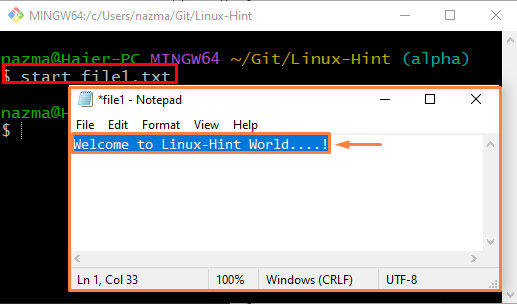
Step 10: Update File
Open the file using “start” command to update it and press “CTRL + S” key to save changes:
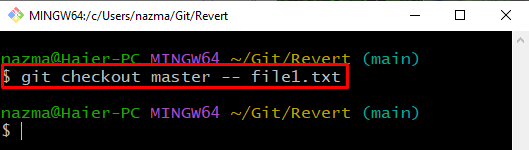
Step 11: Reset File
To reset the changes, execute the “git checkout” command:
Here, we have specified the branch name “master” and used “—” before the file name which indicates that the specified text will be interpreted as a file name rather than branch name:
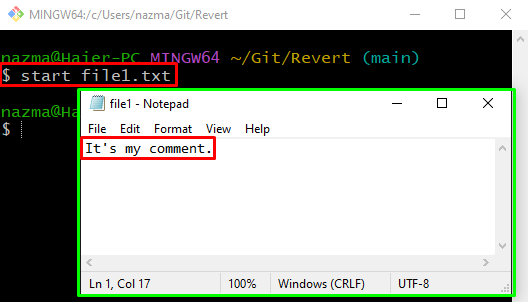
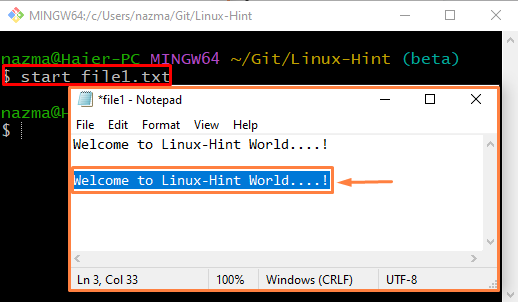
Step 12: Verify Reset Operation
Now, open the file to verify the reset operation:
As you can see, the specified file is opened in the default editor, and it is reset to same as master branch:
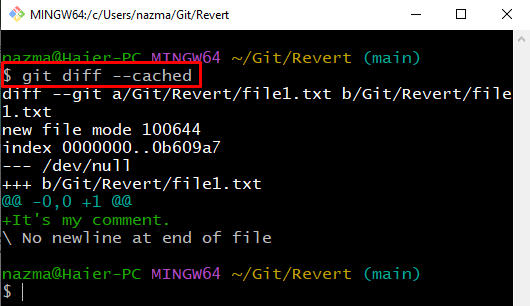
Step 13: View Changes
Lastly, execute the “git diff” command to view the difference between the content in the newly reset file:
Here, the “–cached” option is used to display the reset changes:
Let’s check out the procedure to reset the file to a specific commit in the Git.
How to Reset File to Specific Commit in the Git?
Sometimes, users need to reset the file to a particular commit. To achieve that, users can view the changes made between the file versions. Let’s try the below-provided instructions for this purpose.
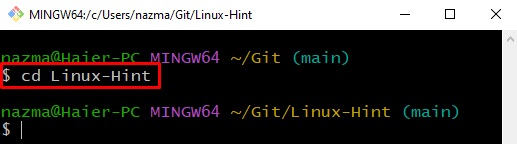
Step 1: Move to Folder
Execute the “cd” command to navigate to the specific folder:
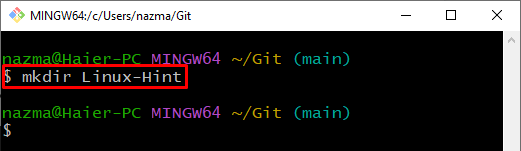
Step 2: Create Directory
Create a new Git local directory utilizing provided command:
After that, navigate to the newly created Git local repository:
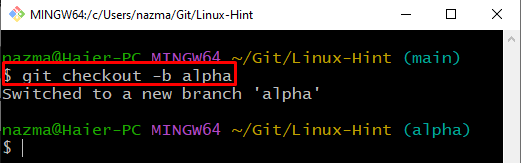
Step 3: Create and Switch Branch
Now, create a new branch and switch to it immediately:
Here, the “-b” flag represents the branch:
Step 4: Create File
Create a new file named “file1.txt” using the following command:
Step 5: Track File
Next, execute the “git add” command to track the file to the staging area:

Step 6: Open File
Open the created file, add some text and save it:
Step 7: Create and Switch Branch
Next, create and switch to the new branch named “beta” with the help of “git checkout” command:

Step 8: Open and Update File
Open the file, update it in the new branch and save it:
Step 9: Commit Changes
Commit all changes to the Git repository:
Step 10: Check Log History
View the log history of the Git local repository:
The output refers to the most recent commit changes:

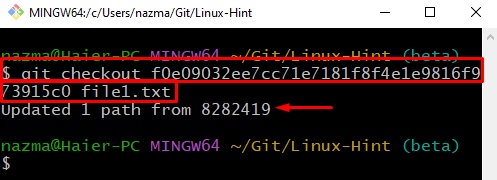
Step 11: Reset File Using Commit Hash
Execute the “git checkout” command with the commit hash and file name to reset it:
As you can see, the changes are reset successfully:
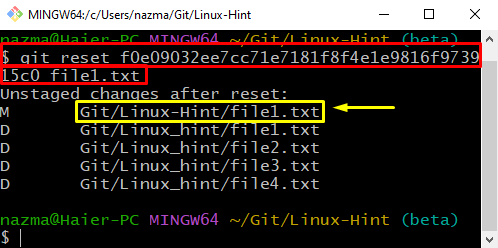
You can also perform the same task using the “git reset” command as follow:
As you can, the current status of “file1.txt” is “M” which indicates that it is modified and is reset as before:
We have compiled the method to reset files to be same as a master branch in Git.
Conclusion
To reset the file to be the same as the master branch in Git, create a Git local repository. Then, create and add files to it. Next, create and switch to the new branch immediately. Open the file in a new branch, update it, and save it in Git. Execute the “$ git checkout master — file_name” command to reset the file. To reset the file to a specific commit in Git, utilize the “$ git reset ” or “$ git checkout” command. This guide illustrated the procedure to reset files to be the same as the master branch in Git.
Source: linuxhint.com