How to Remove & Re-Enable the Cast to Device Context Menu From the Options in Windows
The Cast to Device Option can be accessed by right-clicking on the media that the user wants to share. Then, select the “Cast to Device” option and click on the device from the available list of devices for casting the media file.
This article will provide the procedure for removing the Cast to Device menu options in Windows 10.
How to Remove the ‘Cast to Device’ Context Menu From the Options in Windows?
The Cast to Device option can be removed and then re-enabled in Windows using the “Registry Editor” tool. Registry Editor is a database of all the settings and configurations that are necessary for the normal operations of the system. These system configurations can be edited through the Registry Editor tool. To do all that, follow the steps stated below.
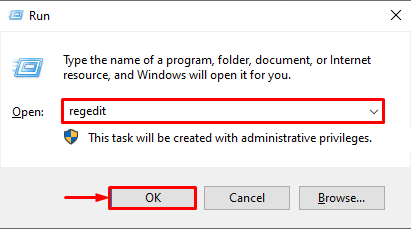
Step 1: Open Registry Editor
First, hit the “Windows + R” shortcut on the keyboard to launch the RUN dialog box. Then, type in “regedit” and press the “OK” button:
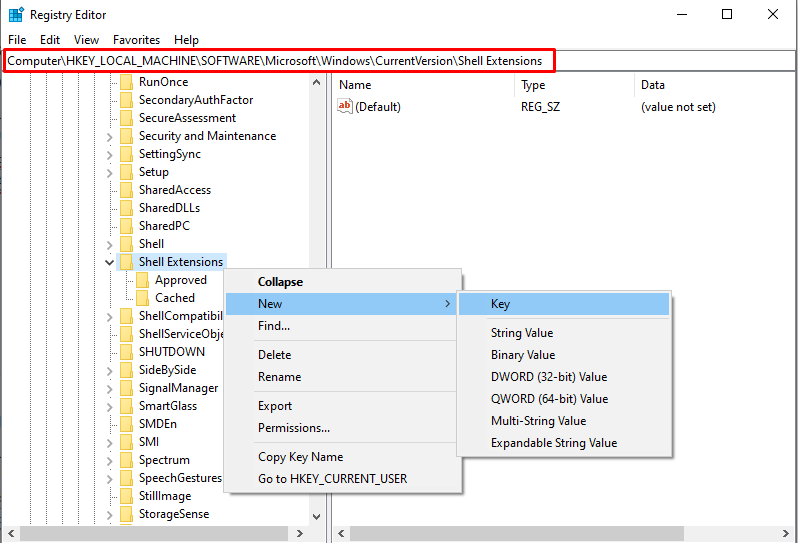
Step 2: Create a New Key
Once the Registry Editor is opened, go to the “HKEY_LOCAL_MACHINE > SOFTWARE > Microsoft > Windows > CurrentVersion > Shell Extensions” route. Then, right-click on the “Shell Extensions” and select the “New > Key” option:
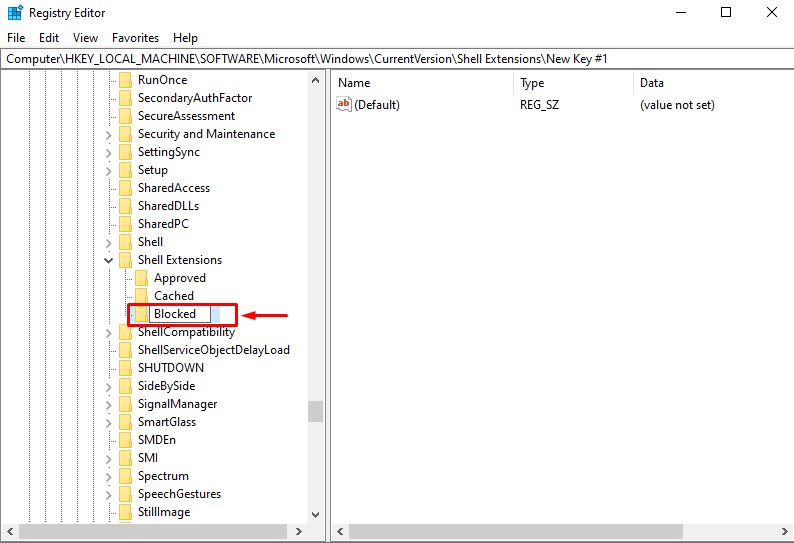
Name this newly created key as “Blocked”, as shown below:
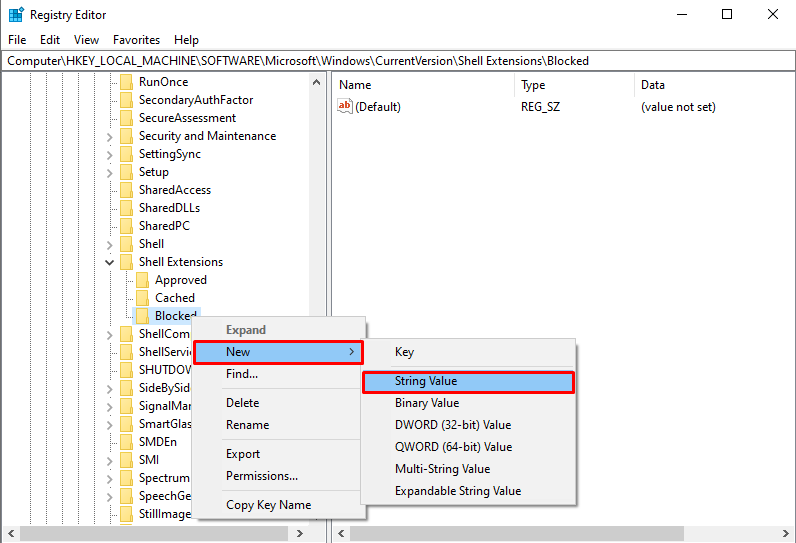
Step 3: Create a New String Value
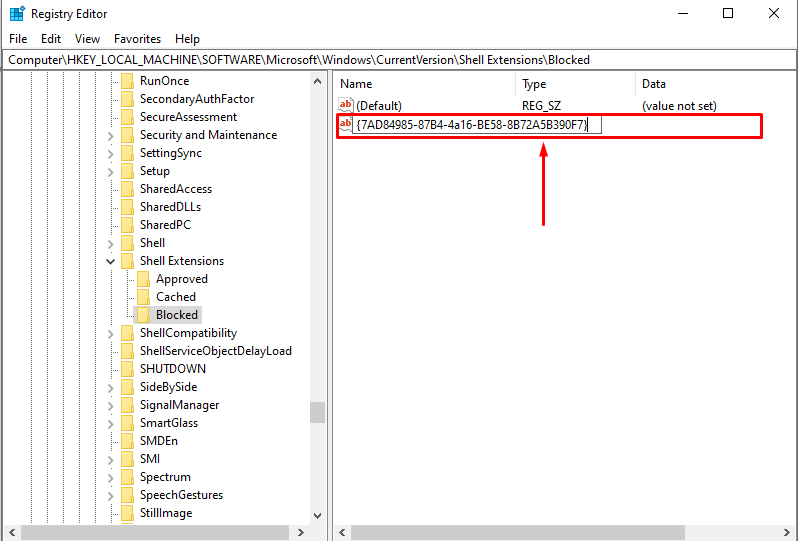
Right-click on the newly created key “Blocked”, and select the “New > String Value” option:
Rename this newly created string value as follows: {7AD84985-87B4-4a16-BE58-8B72A5B390F7}
After that, close the Registry Editor and reboot the PC to save the applied changes.
Step 4: Verify if Cast to Devices is Removed
After Restarting the PC, open the “File Explorer” and right-click on any media file to see if there is any “Cast to Devices” option available:
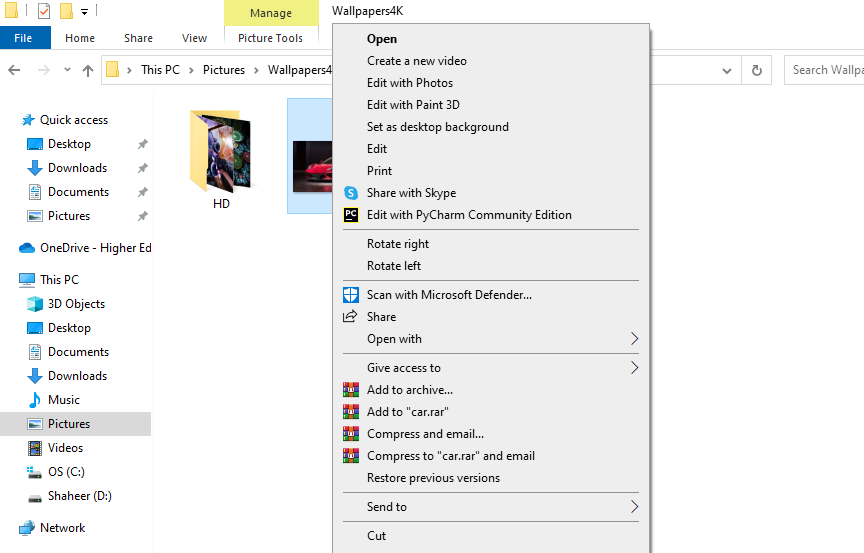
From the above screenshot, it is clear that there is no “Cast to Device” option which means that it has been removed successfully.
How to Re-Enable the ‘Cast to Device’ Context Menu From the Options in Windows?
To re-enable the Cast to Device option, follow the steps shown below.
Step 1: Open the Registry Editor
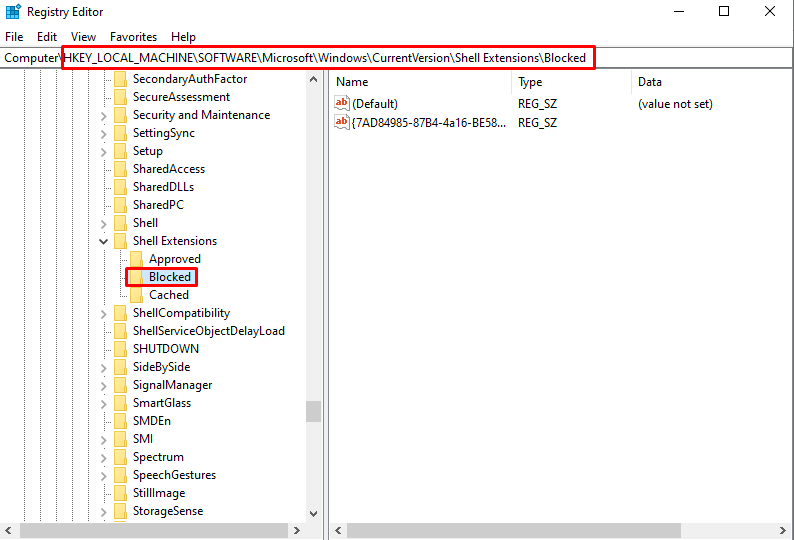
Hit the “Windows + R” shortcut, then enter “regedit” and press “OK”. Then, in the Registry Editor, go to the same route where the user created the new “Blocked” key i.e. “HKEY_LOCAL_MACHINE > SOFTWARE > Microsoft > Windows > CurrentVersion > Shell Extensions > Blocked”:
Step 2: Delete the String Value
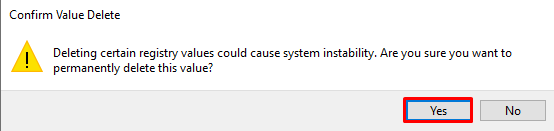
Now, right-click on the highlighted-below string value, and select the delete option:
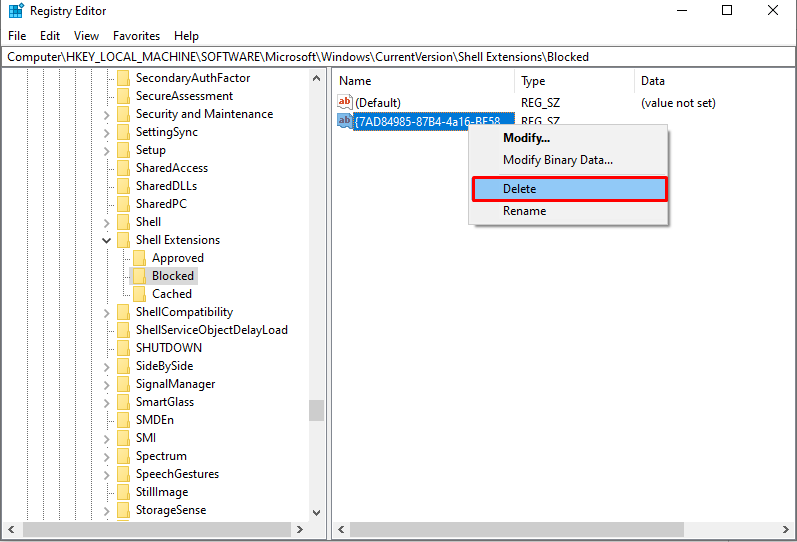
Confirm the delete request by clicking on the “Yes” button:
Next, reboot the PC to save the applied changes.
Step 3: Verify the Cast to Device
After the PC restarts, open File Explorer and right-click on any media file. Verify if the “Cast to Device” option is available in the menu:
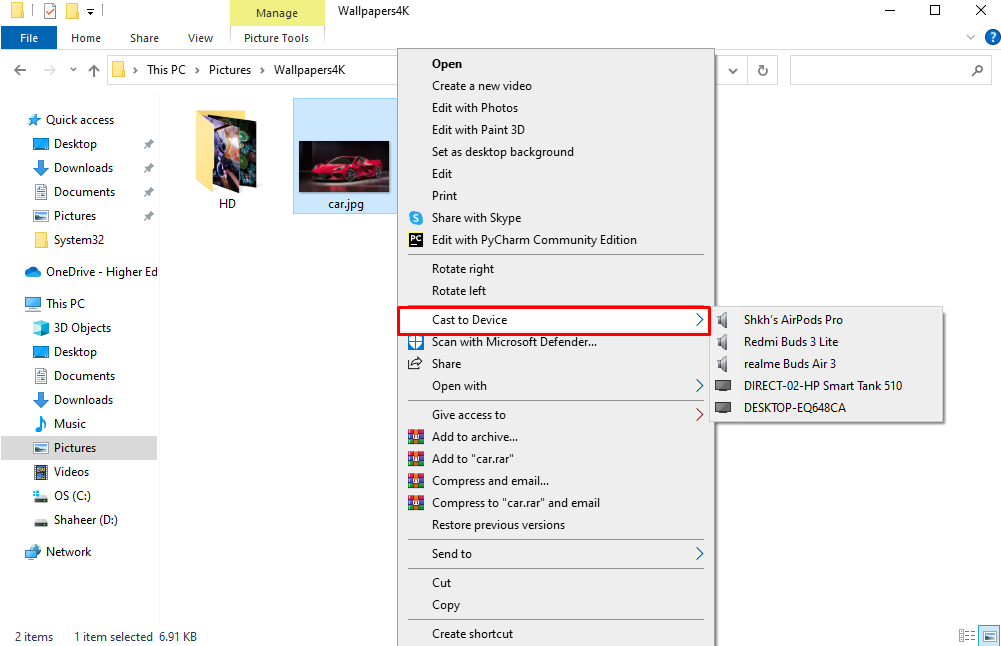
It is clear from the above screenshot that the “Cast to Device” context menu has been successfully re-enabled.
Conclusion
The Cast to Device option can be removed or re-enabled using the Registry Editor in Windows. To do that, first, hit the “Windows + R” shortcut for opening up the RUN dialog box. Then, write “regedit” in the textbox and press Enter on the keyboard to open Registry Editor. Next, go to the “HKEY_LOCAL_MACHINE > SOFTWARE > Microsoft > Windows > CurrentVersion > Shell Extensions” route. In the “Shell Extensions”, create a new key named “Blocked”. In “Blocked”, create a string value: “{7AD84985-87B4-4a16-BE58-8B72A5B390F7}”. Then, restart the PC, and the Cast to Devices option will be removed.
Source: linuxhint.com