How to Record the Screen on Windows 11
Windows users can also record the screen with its built-in tools including “Xbox Game Bar” and “Snipping Tool”. The app “Xbox Game Bar” is supported on both Windows 10 and 11. However, it has only a drawback that it does not record the entire screen.
On the other hand, the “Snipping Tool” app can capture the entire screen. The “Sniping Tool” app only comes pre-installed on Windows 11 and later versions. There are other third-party apps that can record the screen on Windows 11 and will be discussed in this article.
How to Record the Screen on Windows 11?
These are the screen recording methods on Windows:
- Method 1: Snipping Tool
- Method 2: Xbox Game Bar
- Method 3: PowerPoint
- Method 4: ClipChamp
- Method 5: OBS Studio
- Conclusion
Method 1: Snipping Tool
The “Snipping Tool” is a screen recording application that can record videos and capture screenshots. Users prefer to use the “Snipping Tool” app instead of third-party applications.
Step 1: Launch Snipping Tool
First, open the “Snipping Tool” app via the Start menu:

Step 2: Create New Recording
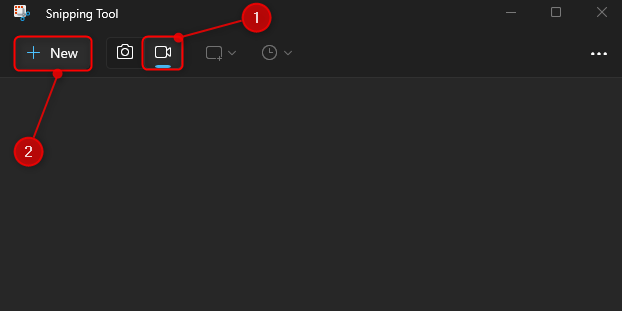
First, click on the “video” icon to enable the video recording and then click on the “New” button to start the new recording:
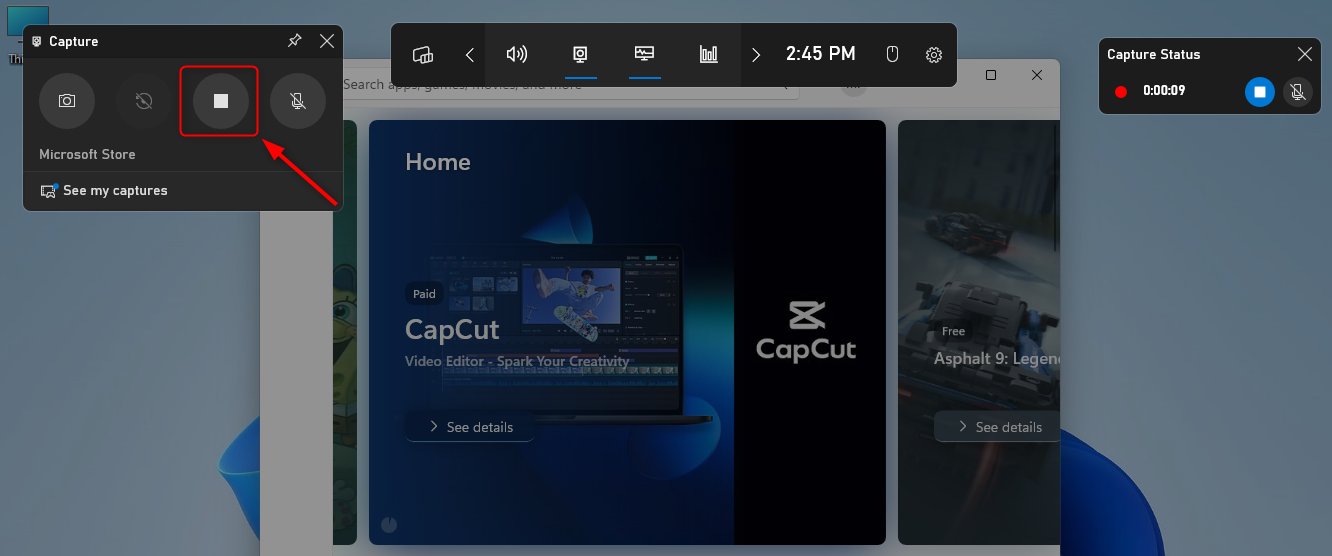
Step 3: Select the Recording Area and Start Recording
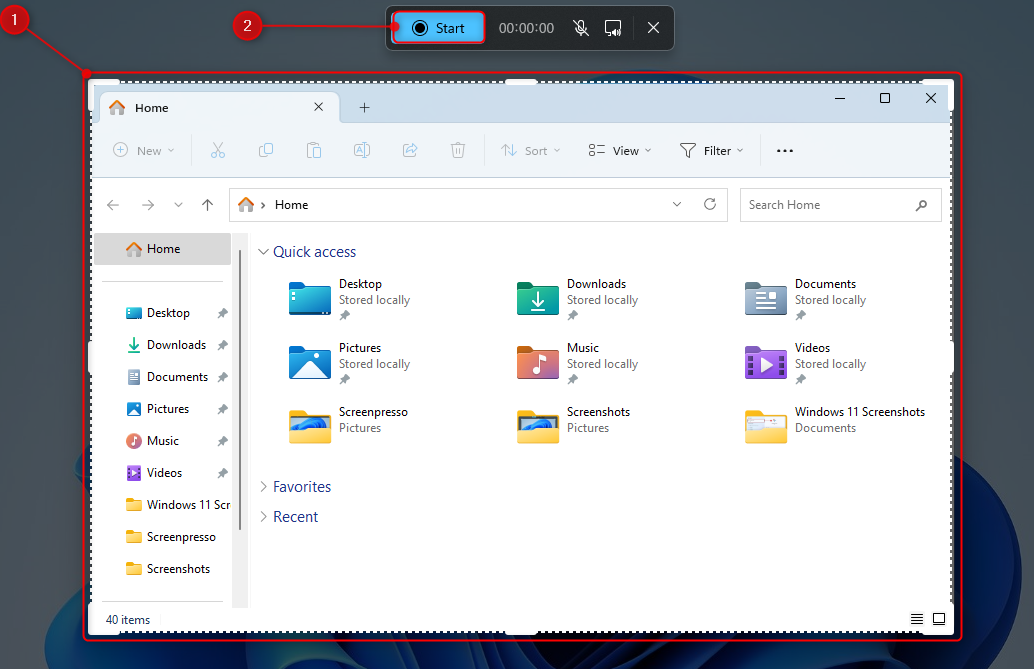
First, select the recording area by dragging the mouse, and then click on the “Start” button to start screen recording on Windows 11:
Method 2: Xbox Game Bar
The “Xbox Game Bar” is a Windows built-in application that is used to capture screenshots and record screens when playing games. It is mostly utilized by gamers when they want to save their gameplay to stream on YouTube later. The record screen on Windows 11 using the “Xbox Game Bar” application, check the instructions below.
Step 1: Launch Xbox Game Bar
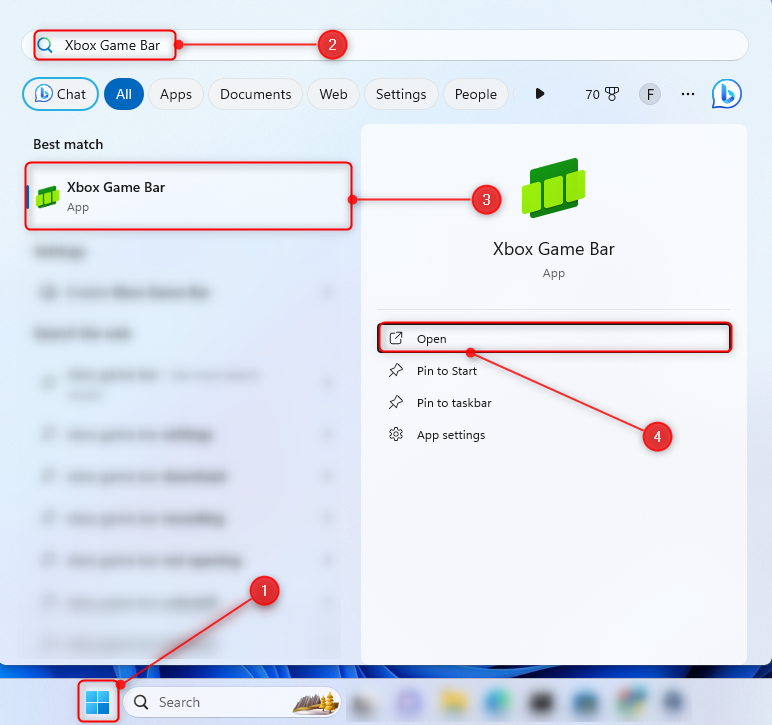
First, open the “Xbox Game Bar” app via the Start menu:
Step 2: Start Recording
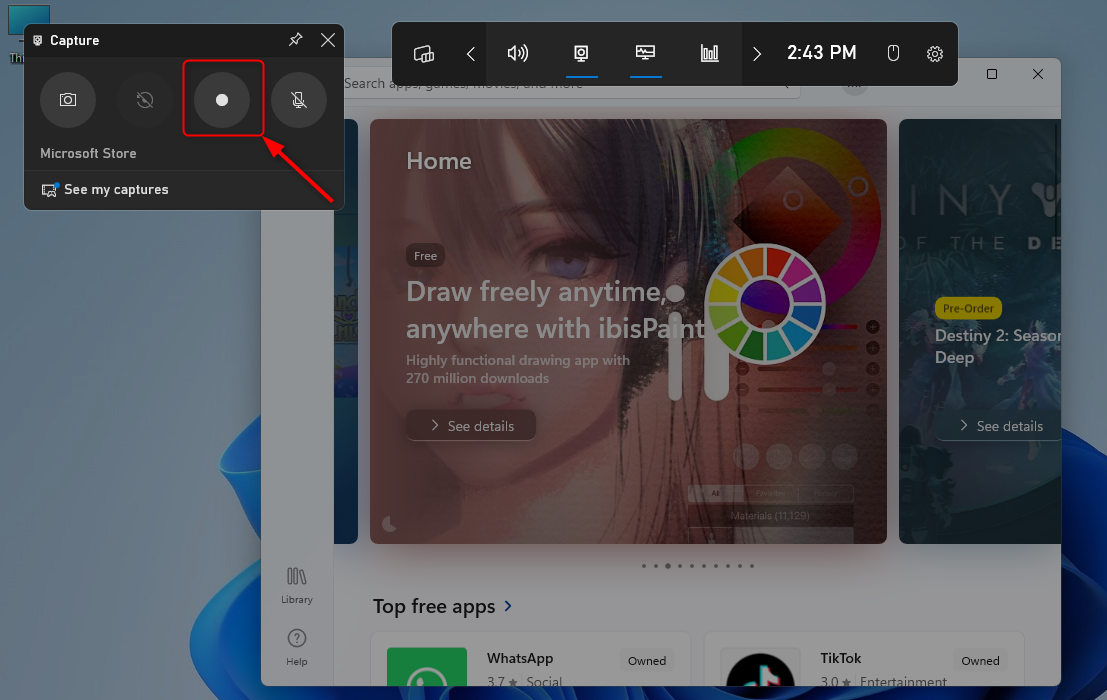
First, open any window you want to record, then, press the “Windows+G” shortcut key or open the “Xbox Game Bar” via the Start menu. Then, hit the highlighted area to start video recording:
Step 3: Stop the Screen Recording
Once you are done with video recording, simply click on the highlighted stop button:
Step 4: Locate the Recorded Video
In order to find the recorded video, simply navigate to the “Captures” folder located in the “Videos” folder:

Method 3: PowerPoint
PowerPoint is one of the Office suite applications that is generally used to create and present slides or presentations. However, it can also record Windows screens. To record the screen on Windows using the PowerPoint application, check the steps provided below.
Step 1: Launch PowerPoint
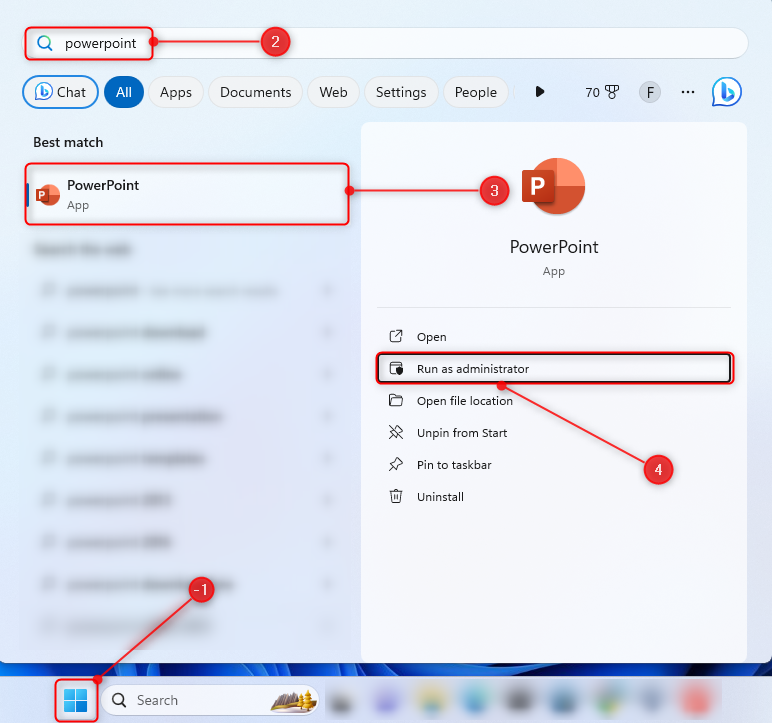
First, move to the Start menu, search, and open “PowerPoint” as an administrator:
Step 2: Launch the Blank Presentation
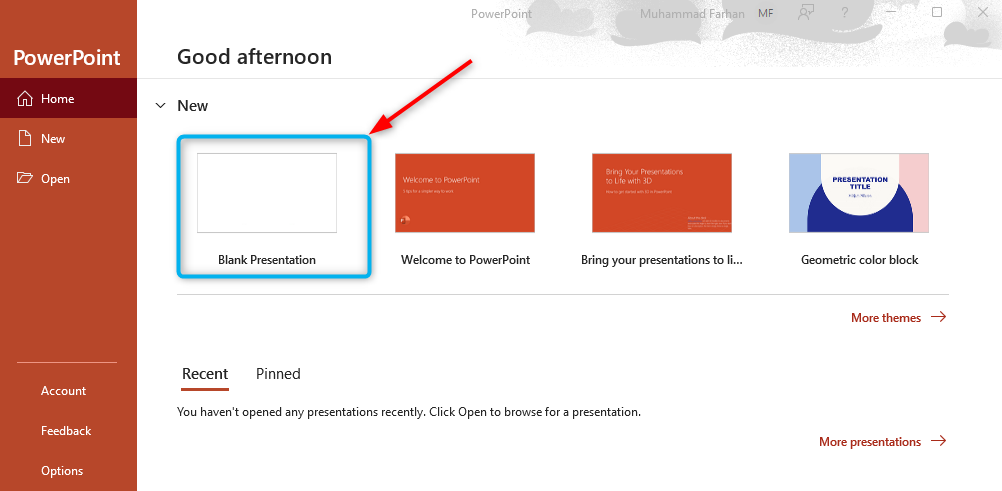
Click on the “Blank Presentation” to open the window to record screen:
Step 3: Start Screen Recording
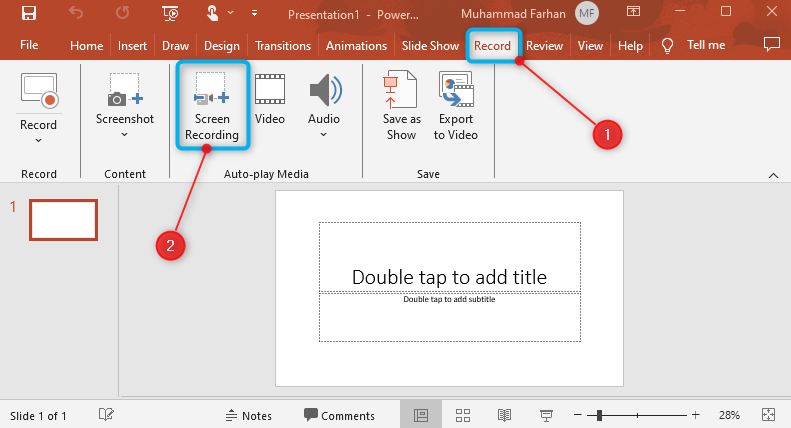
First, switch to the “Record” tab, then click on the “Screen Recording” button:
First, decide whether you want to record the audio, or want to include the pointer in the screen recording or not. Then. click on the “Select Area” button to select the screen area for recording:

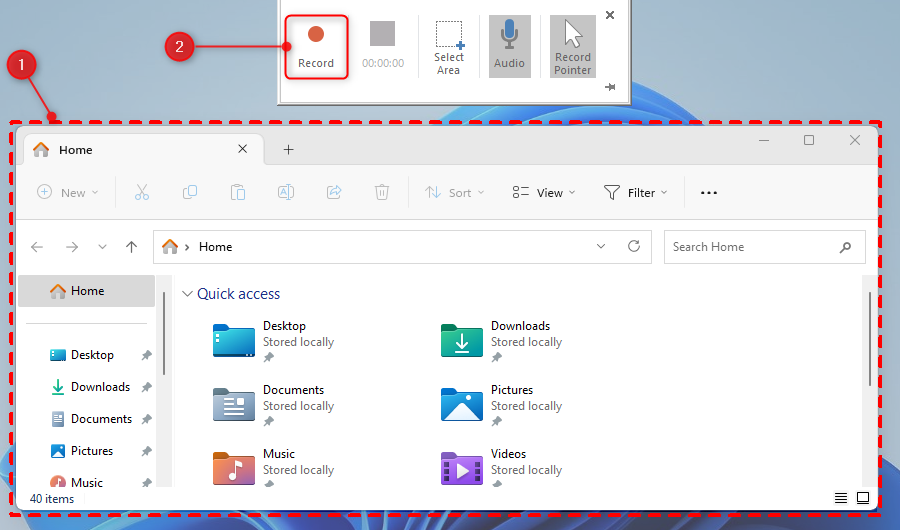
Step 4: Select Area and Start Recording
First, select the area of screen and then click on the “Record” button to start recording:
As it can be observed that the countdown has started for screen recording:
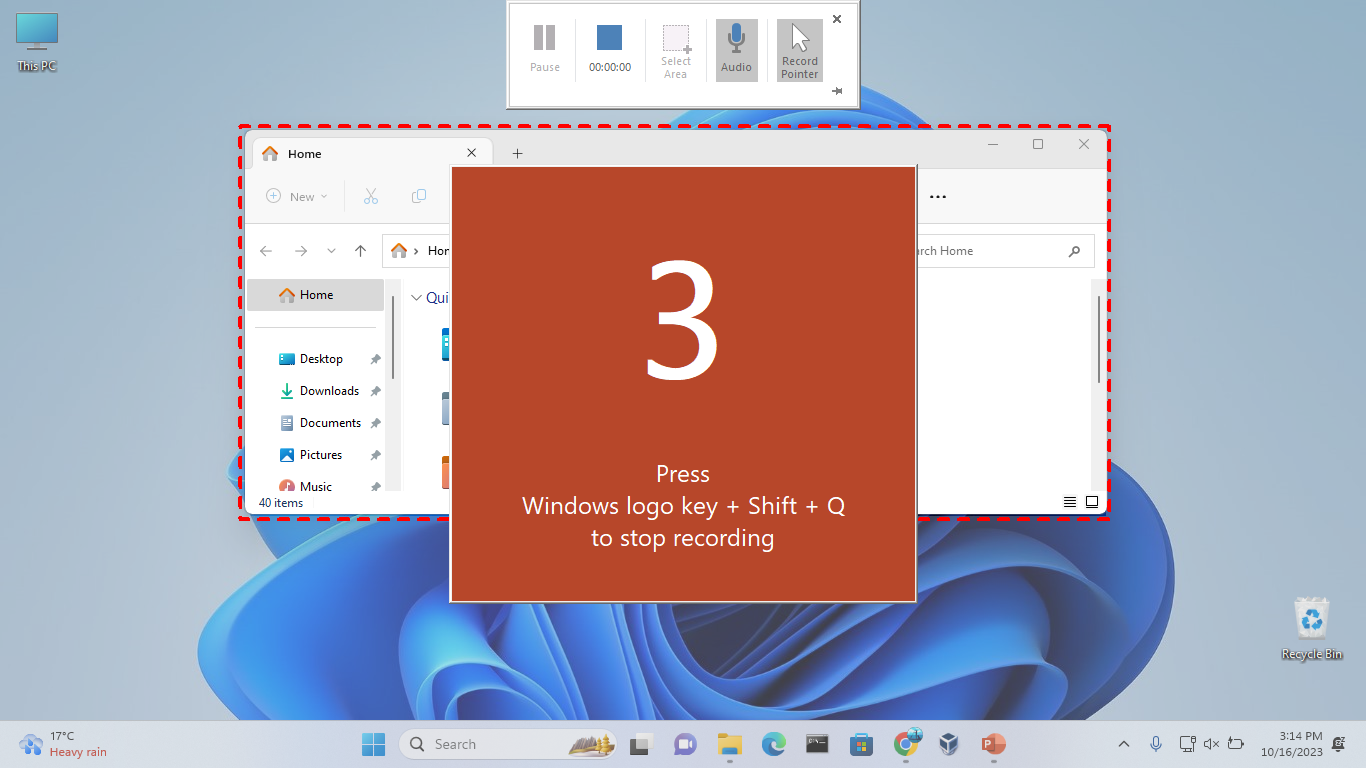
Step 5: Stop Recording
To stop the screen recording, simply click on the highlighted stop button:

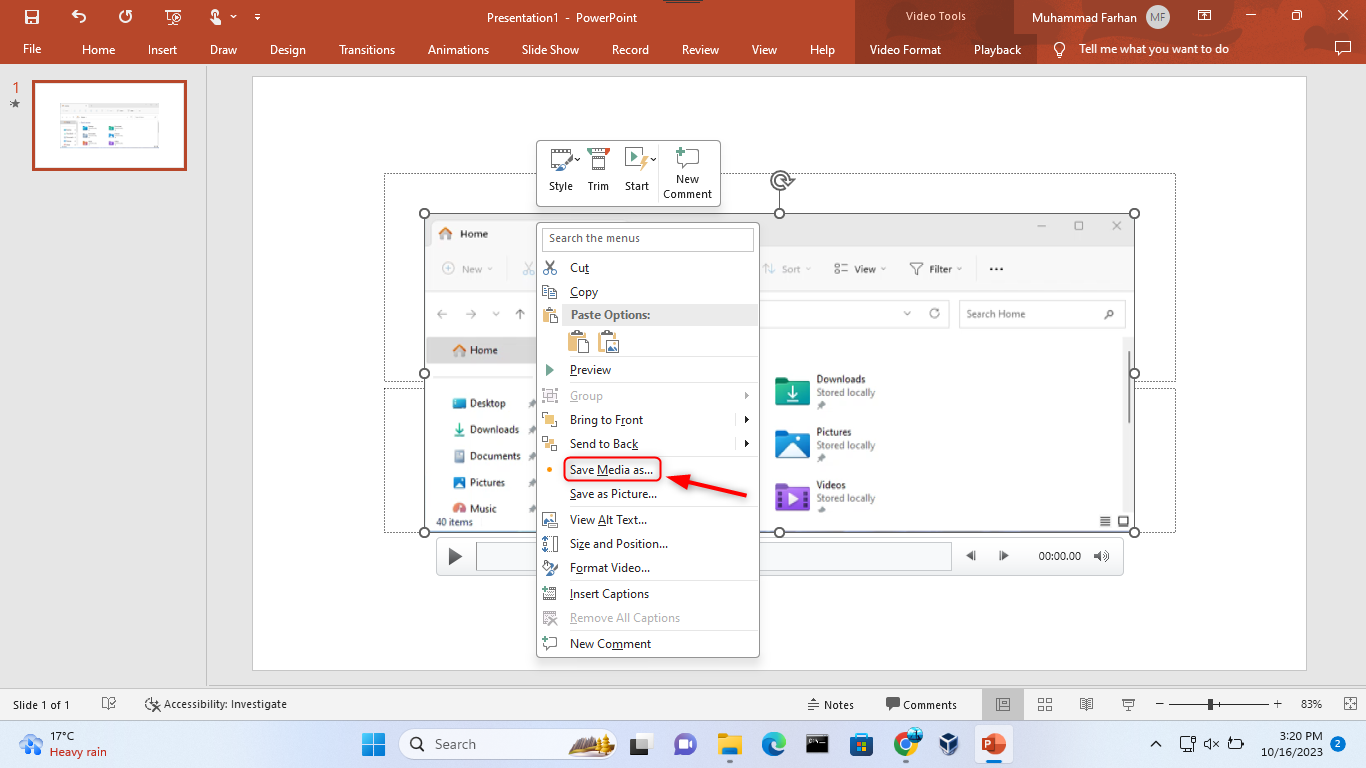
Step 6: Save Screen Recording
After stopping the recording, right click on the recorded video, and select the “Save Media as…” button:
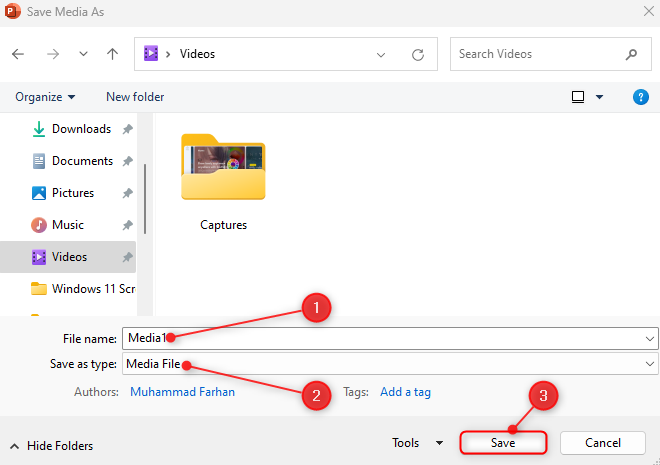
Select the location, type the file name, select the file type, and click on the “Save” button:
Method 4: ClipChamp
The “ClipChamp” is another third-party application that can be used to record screens on Windows. Basically, it is a video editing application. However, it has the recording feature screen on Windows. To record the screen on Windows 11, check the steps given below.
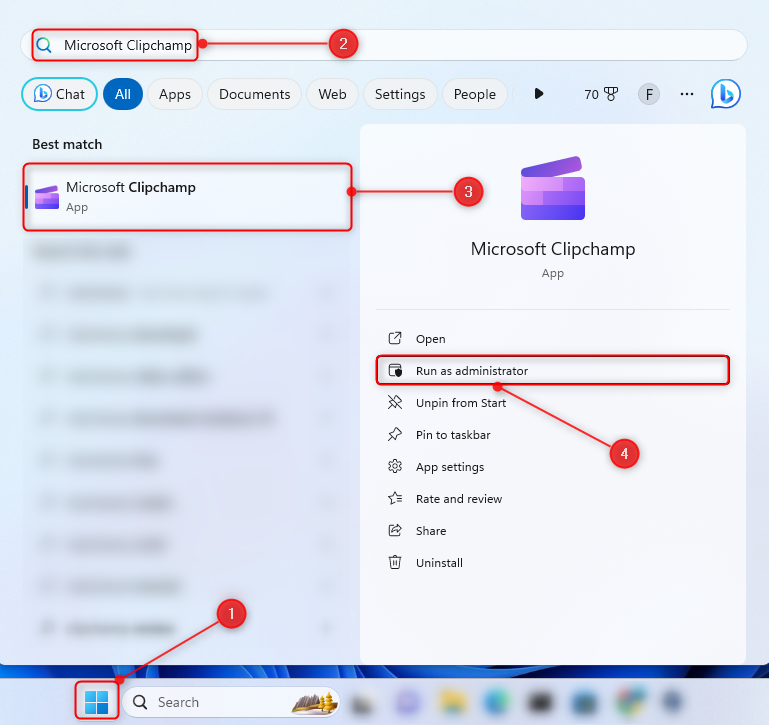
Step 1: Launch Microsoft Clipchamp App
First, move to the Start menu, search, and open the “Microsoft Clipchamp” app as an administrator:
Click on the “Create a new video” option:

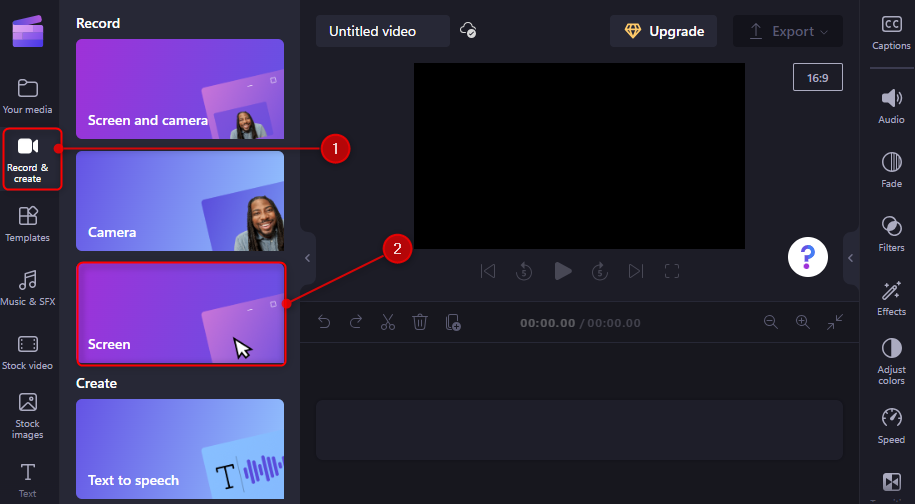
Move to the “Record & create” section, and then click on the “Screen” option:
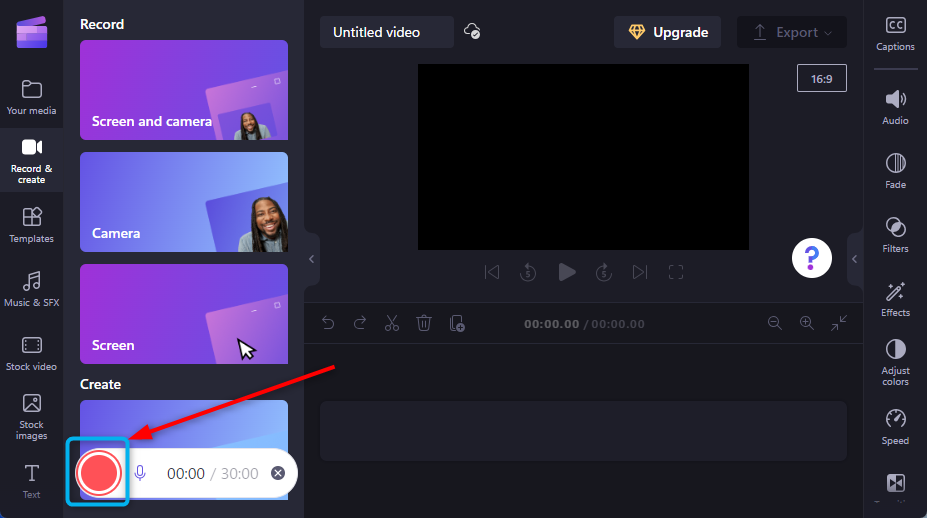
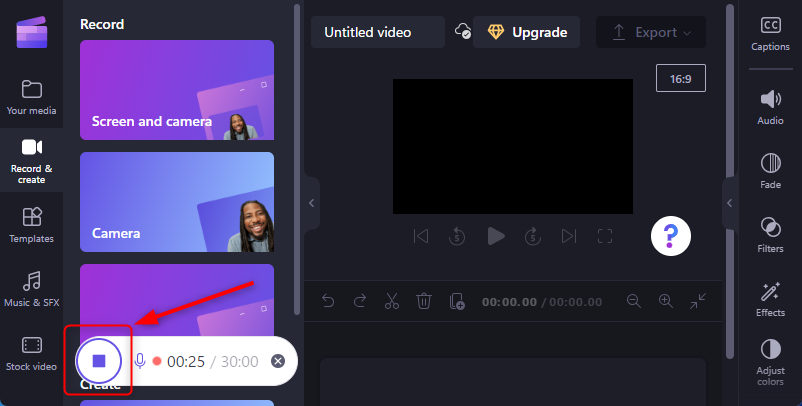
Click on the highlighted record button to start recording:
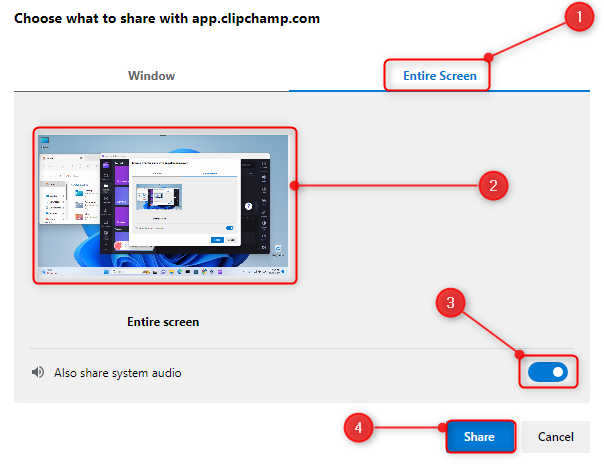
Select an individual window, or an entire screen to record. But we will record the entire screen. For that reason, first, switch to the “Entire Screen” tab, select the screen, turn on the “Also share system audio” toggle and lastly click on the “Share” button to start recording:
Click on the highlighted purple button to stop screen recording:
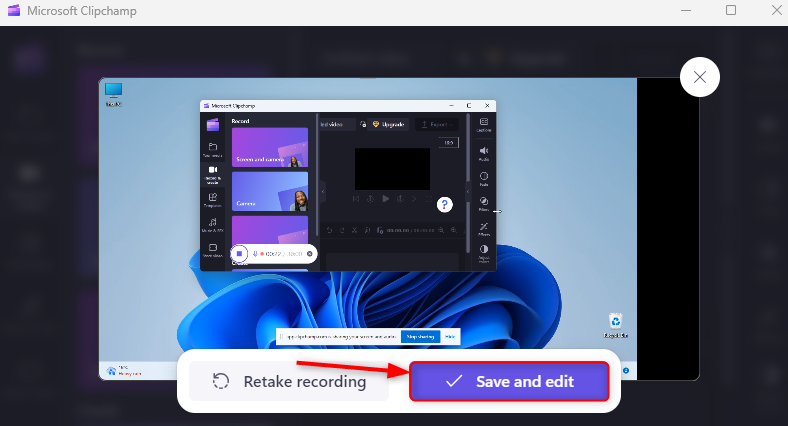
Click on the “Save and edit” button to save the screen recording:
Method 5: OBS Studio
The “OBS Studio” is also a third-party application that can record screens on Windows 11. To record the screen on Windows using the OBS studio application check the steps given below.
Step 1: Install OBS Studio App
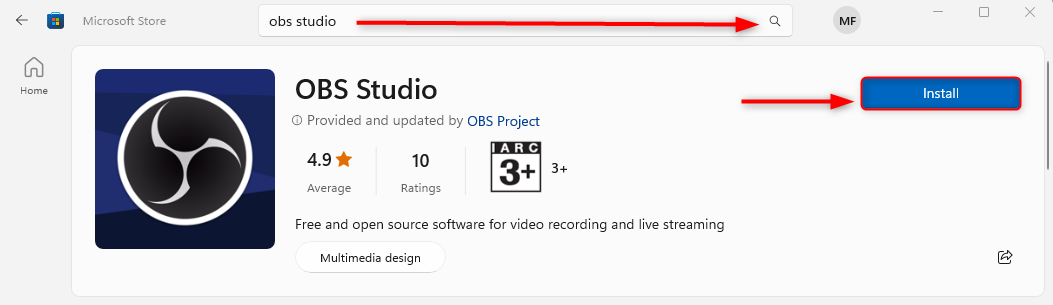
First, launch “Microsoft Store”, search for the “OBS Studio” app then install it by clicking on the “Install” button:
Step 2: Launch OBS Studio App
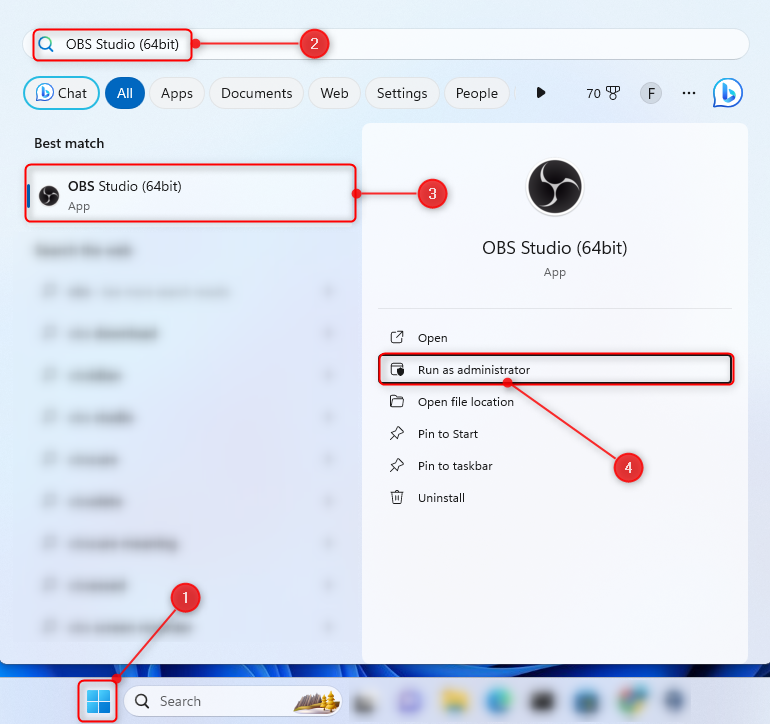
First, navigate to the Start menu, search and open the “OBS Studio” app as an administrator:
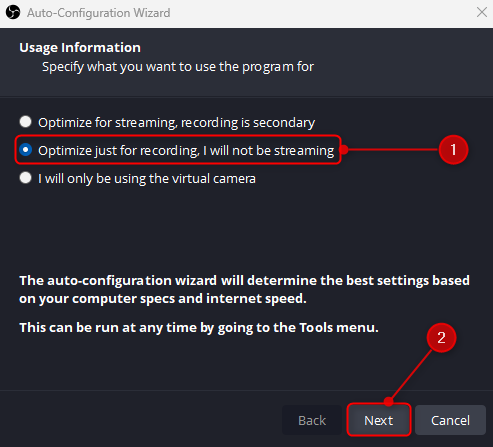
Step 3: Select Recording Option
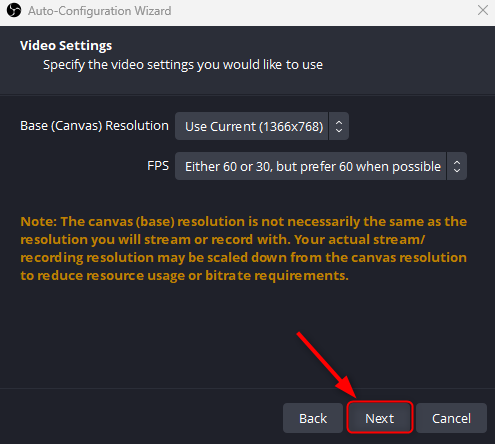
Select the highlighted option and hit the “Next” button:
Select the desired resolution and click on the “Next” button:
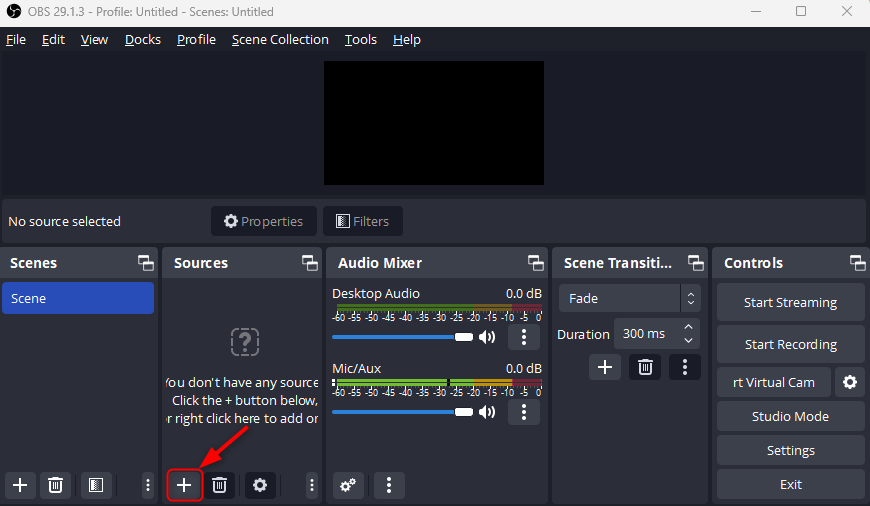
Step 4: Add Source
Click on the “+” plus button to add the source:
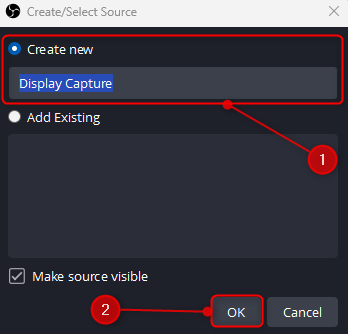
Select the “Display Capture” option to record the screen display:

Name the source name and click on the “OK” button:
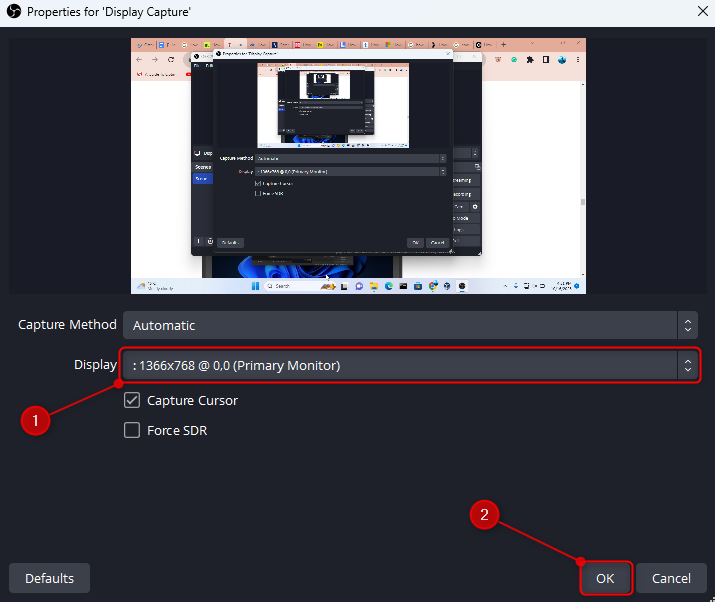
Step 5: Set the Properties for Display Capture
Set the display size for the primary monitor and hit the “OK” button:
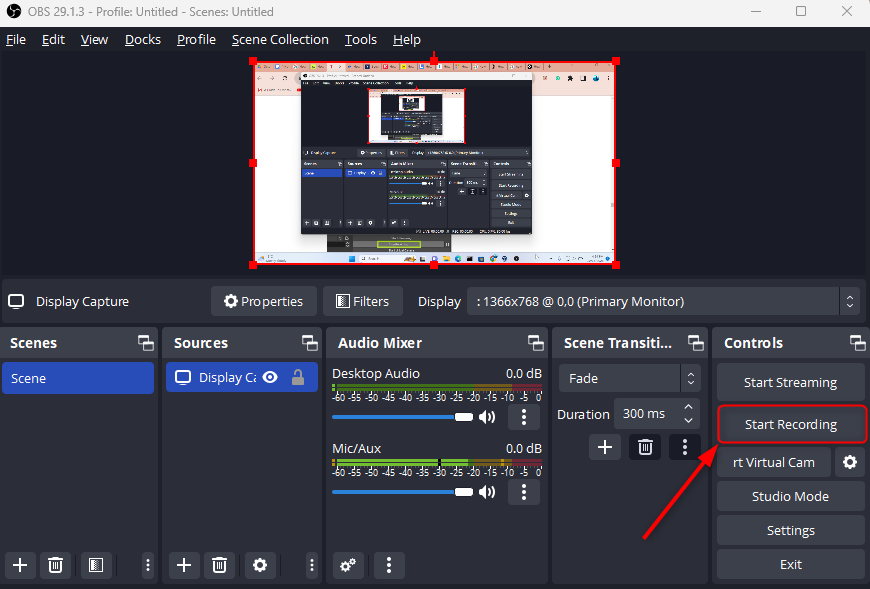
Step 6: Start Recording
Hit the highlighted button to start recording:
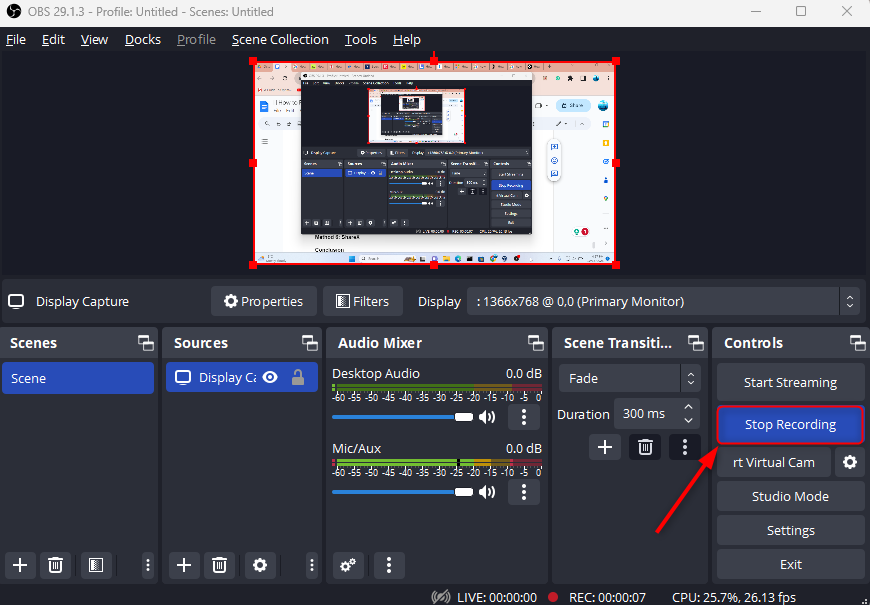
Step 7: Stop the Screen Recording
To stop recording, hit the highlighted button:
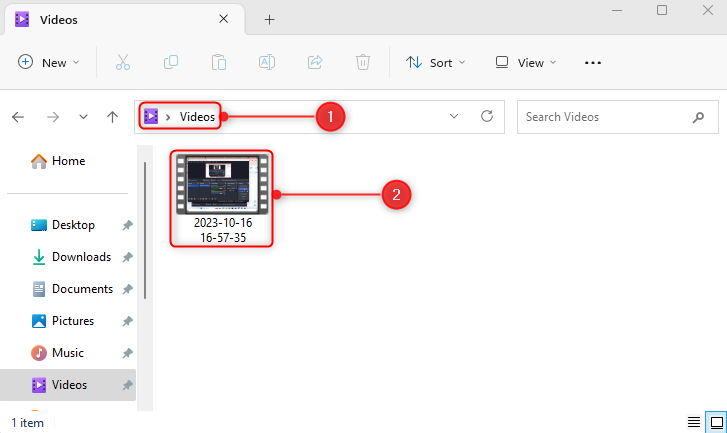
The recording video will be saved in the “Videos” folder:
Conclusion
To record the screen on Windows 11, first, open the “Snipping Tool” app. Then, click on the “Video” icon, and then hit the “New” button. After that, select the screen area and hit the “Start” button to start the screen recording. There are several other methods to record the screen on Windows, which are discussed in this article.
Source: linuxhint.com