How to Record Audio with Raspberry Pi
Follow this article’s guidance to find out a simple way to record audio with Raspberry Pi.
How to Record Audio with Raspberry Pi
The Raspberry Pi device doesn’t have a built-in microphone to record audio signals nor it does have an inbuilt speaker to play the recorded video. But it does have USB ports that allow users to connect an audio device and start performing audio-related activities like recording, listening and much more. To start recording audio with Raspberry Pi, you must have the following hardware:
Hardware requirement:
Recording Audios
Once you have all the necessary hardware equipment, you can connect the microphone to the Raspberry Pi device and you can start recording by following the below-written steps:
Step 1: The first step to record audio is to plug a USB microphone into a USB port of Raspberry Pi device so that you can generate audio signals through it.
Step 2: Then to ensure that if the microphone is connected correctly, run the below-written command:
If in the output you have identified your microphone it means it is rightly detected by Raspberry Pi.
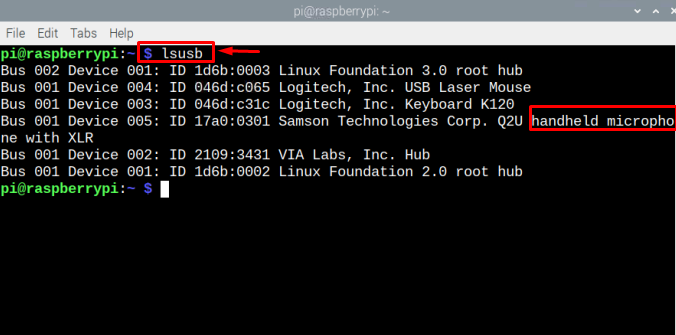
Step 3: To start recording, you will require the device number and card number of the attached microphone. So, in order to find that, run the below-mentioned command:

Step 4: Then finally by using the below-written command syntax, you can record the sound for the defined duration:
Syntax
Example
Note: Remember that duration is in seconds.

As soon as the above command is run, the recording will start and you can speak to record the signal.
Play the Recorded File
In the previous steps, the audio recording process is completed but if you won’t hear the recorded audio, follow the steps written below:
Step 1: Firstly, connect the speaker or headphones to your Raspberry Pi device so that you can hear the audio through it.
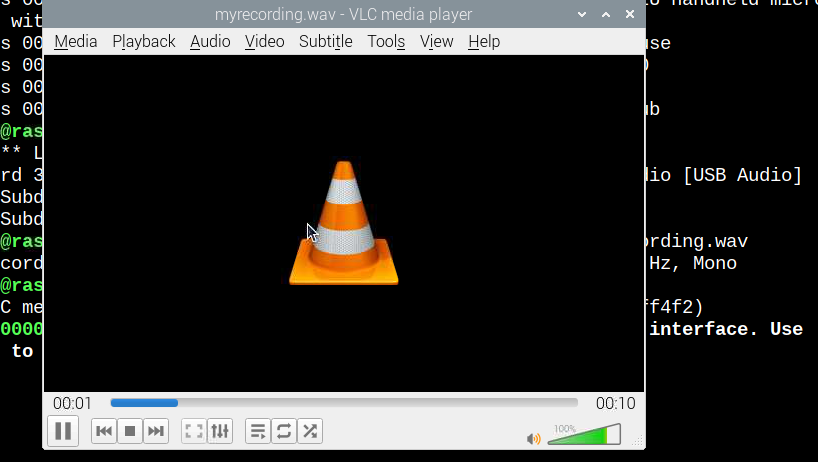
Step 2: VLC (the default media player) will be used to play audio. Just access the file with the VLC media player using the below-mentioned command:

By running the above command with the audio filename, the VLC media player will start playing it, and you can hear it.
Note: You must connect headphone or speakers with Raspberry Pi to listen the audio.
Conclusion
To record the audio with Raspberry, the USB ports of Raspberry Pi are used. Just connect a USB microphone to it and detect the device using lsusb command. Once it is connected correctly, identify the device number and card number, then use that card number and device number with the arecord -l command to record the audio for a particular duration. The recorded file can then be accessed through the default media player on Raspberry Pi.
Source: linuxhint.com