How to Re-enable Windows Defender
If the Windows Defender software is disabled, the user is not alerted upon any cyberattack which poses a great threat of data being compromised. Hackers often disable the Windows Defender using the Windows Group Policy as users generally do not know how to re-enable it.
This article will provide the solution for enabling Windows Defender using Group Policy and Registry Editor.
Re-enabling the Windows Defender With Group Policy
To re-enable Windows Defender from the group policy, follow the steps shown below.
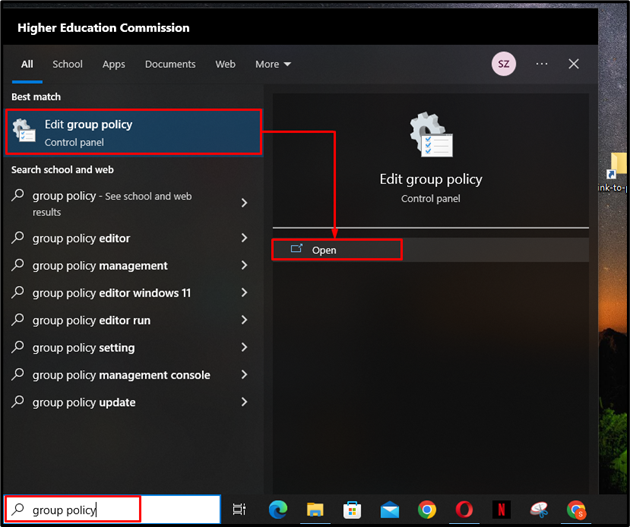
Step 1: Open Group Policy Editor
In the Windows start menu search, type “group policy” and open “Edit Group Policy”:
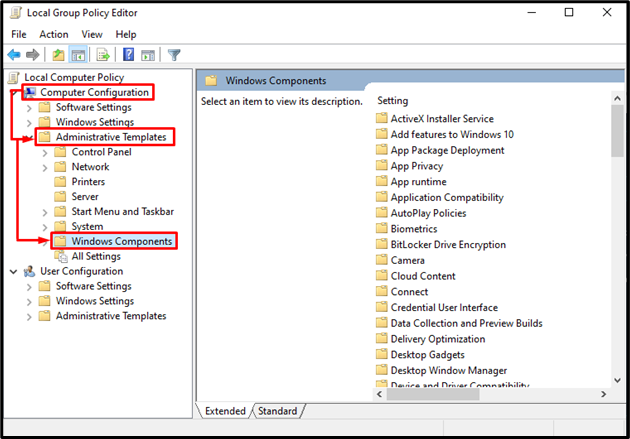
Step 2: Go to Windows Component
Once the local group policy editor is opened, go to the “Computer Configuration > Administrative Templates > Windows Components” route:
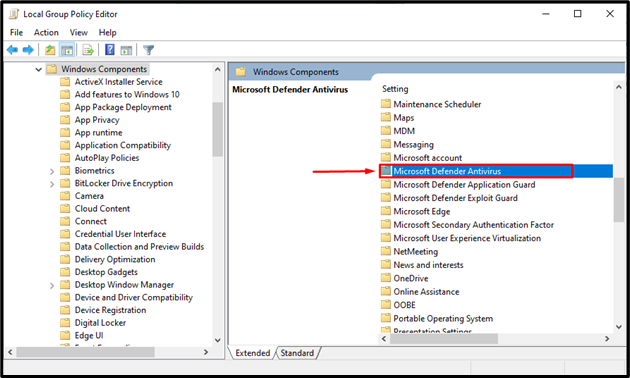
Step 3: Enable Windows Defender
In Windows Components, scroll down in the right-side panel of the screen and double-click on the “Microsoft Defender Antivirus” folder:
Next, open the “Turn off Microsoft Defender Antivirus” file by double-clicking on it:
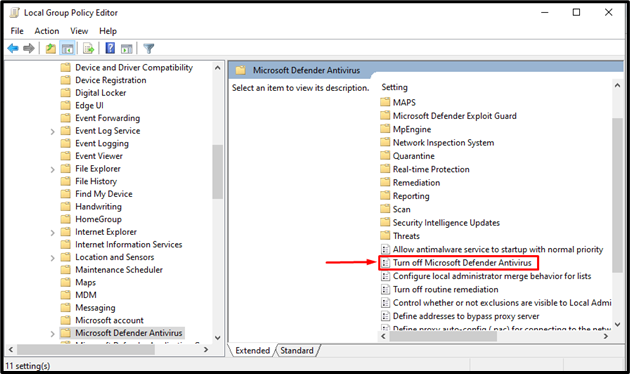
Once it is opened, click on the “Disable” radio button to disable the turn-off settings and hit the “Apply” button to save the changes:
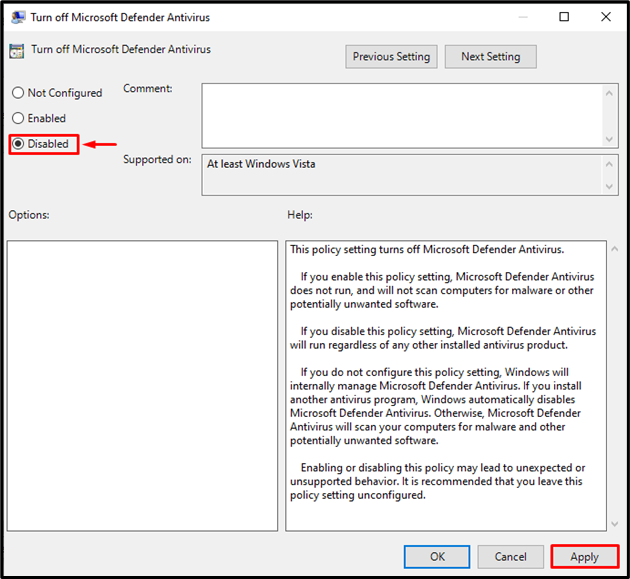
By doing this, the user will override the enabled turn-off settings and will be able to get alerts from the Windows Defender software.
Re-enabling Windows Defender With the Registry Editor
To re-enable the Windows Defender from the Windows Registry Editor, follow the steps shown below.
Step 1: Open Registry Editor
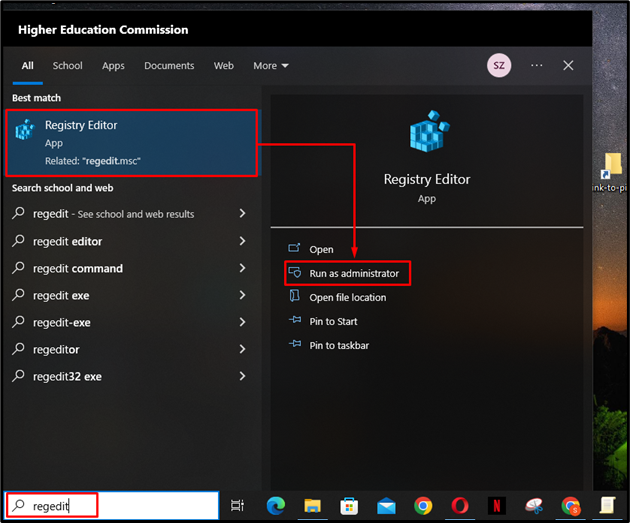
In the start menu, search “regedit” and open the “Registry Editor” as an administrator:
Step 2: Delete DisableAntiSpyware
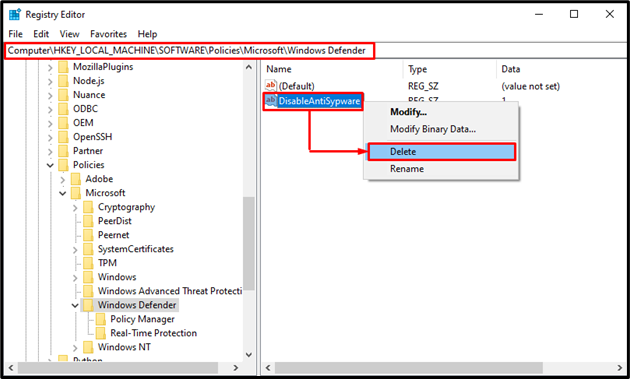
Once the registry editor is opened, go to the “HKEY_LOCAL_MACHINE > SOFTWARE > Policies > Microsoft > Windows Defender” route and right-click on the “DisableAntiSpyware” string value to delete it:
Step 3: Delete the DisableRealtimeMonitoring
Next, go to the following route “HKEY_LOCAL_MACHINE > SOFTWARE > Policies > Microsoft > Windows Defender > Real-Time Protection” and right-click on the “DisableRealtimeMonitoring” to delete it:
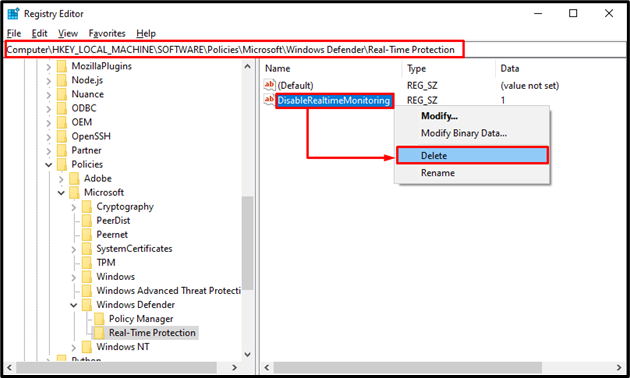
Upon doing so, all the functionalities of the Windows Defender will be re-enabled.
Conclusion
To re-enable Windows Defender, open the Group Policy Editor from the start menu. Then, go to the “Computer Configuration > Administrative Templates > Windows Components” route and open the “Microsoft Defender antivirus” component. Next, open the “Turn off Microsoft Defender Antivirus” file and select the “Disable” radio button. This article has provided comprehensive instructions for re-enabling the Windows Defender software.
Source: linuxhint.com