How to Protect Important Folders with Controlled Folder Access
Today’s writing teaches the following content:
- Understanding the Controlled Folder Access.
- How to Enable/Configure the Controlled Folder Access in Windows 10/11 From Windows Security?
- How to Enable/Configure Controlled Folder Access From Group Policy in Windows 10/11?
- How to Protect Important/Valuable Folders with Microsoft Controlled Folder Access?
Understanding the “Controlled Folder Access”
The “Controlled Folder Access” acts as the antimalware software embedded into Microsoft Windows to protect important folders from malicious attacks. It was included in Microsoft Windows back in 2017. It stops all the possible malware attacks on the critical folders that can also be configured.
How to Enable/Configure the “Controlled Folder Access” in Windows 10/11 From Windows Security?
“Windows Security” combines different tools in Microsoft Windows to make the security impenetrable. One of its features is “Controlled Folder Access”, and to enable it, follow these steps:
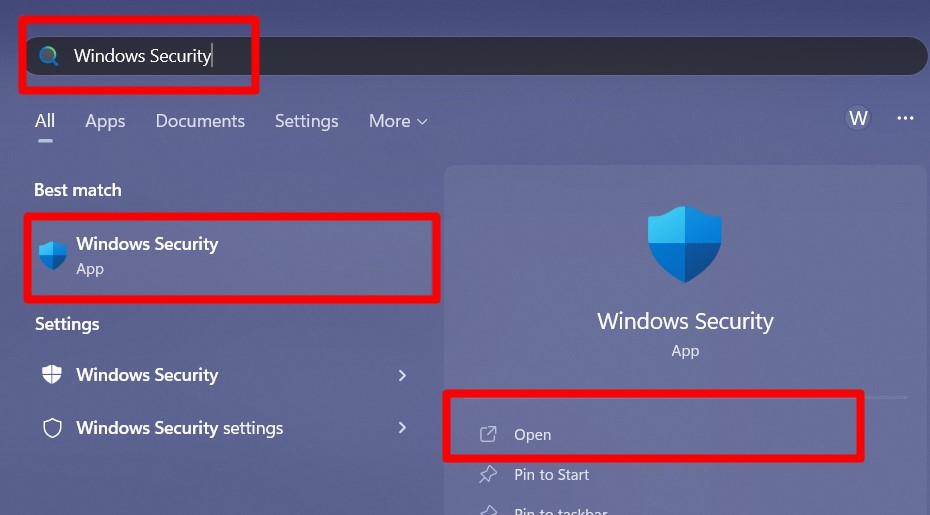
Step 1: Launch the “Windows Security” App
The “Windows Security” app is launched by pressing the “Windows” key and entering “Windows Security”:
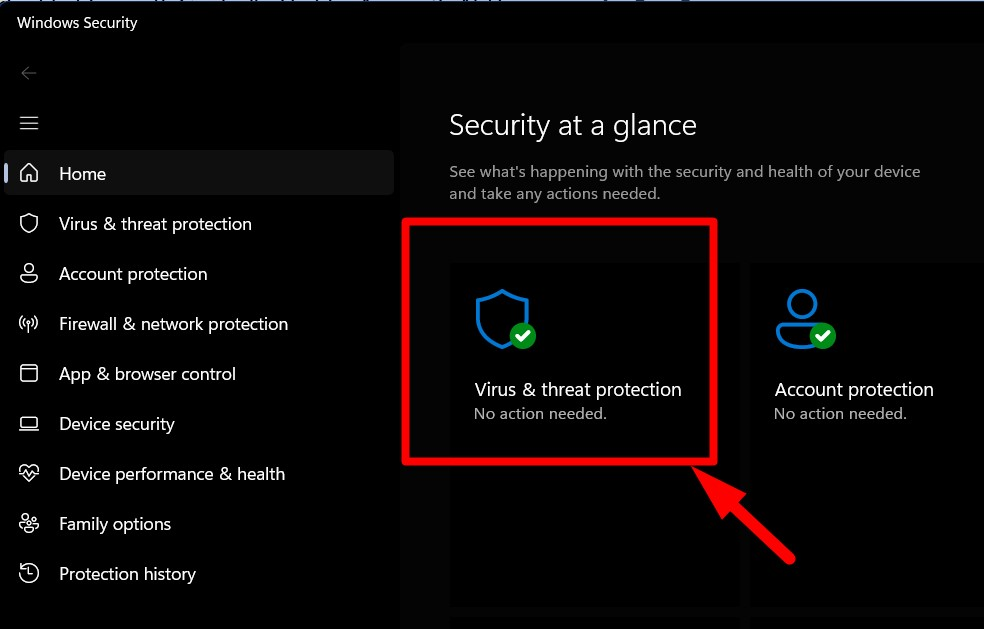
Step 2: Enable Controlled Folder Access
From “Windows Security”, select “Virus & threat protection”:
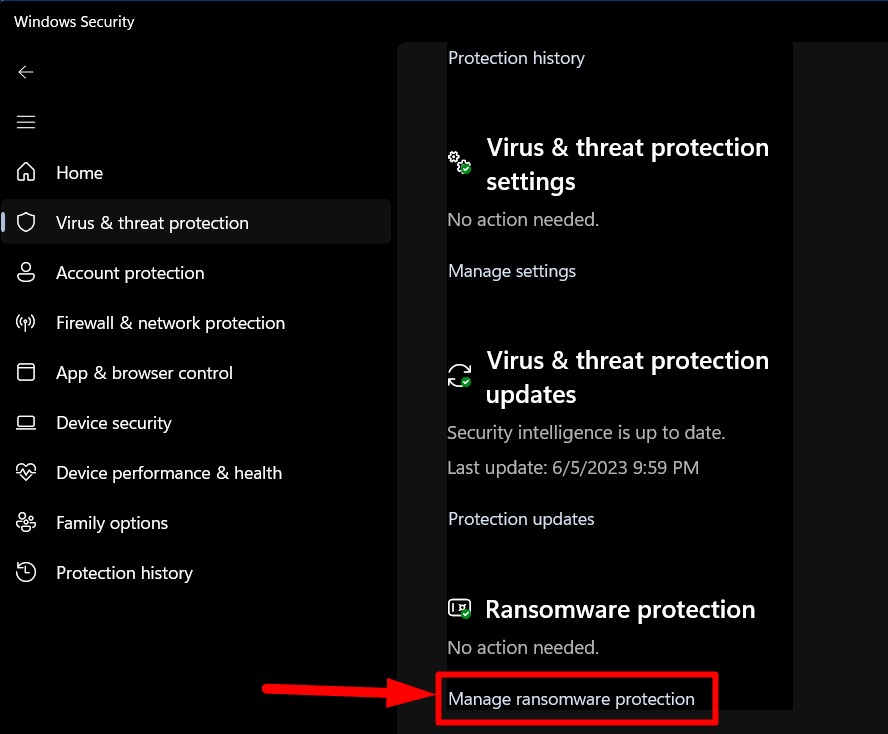
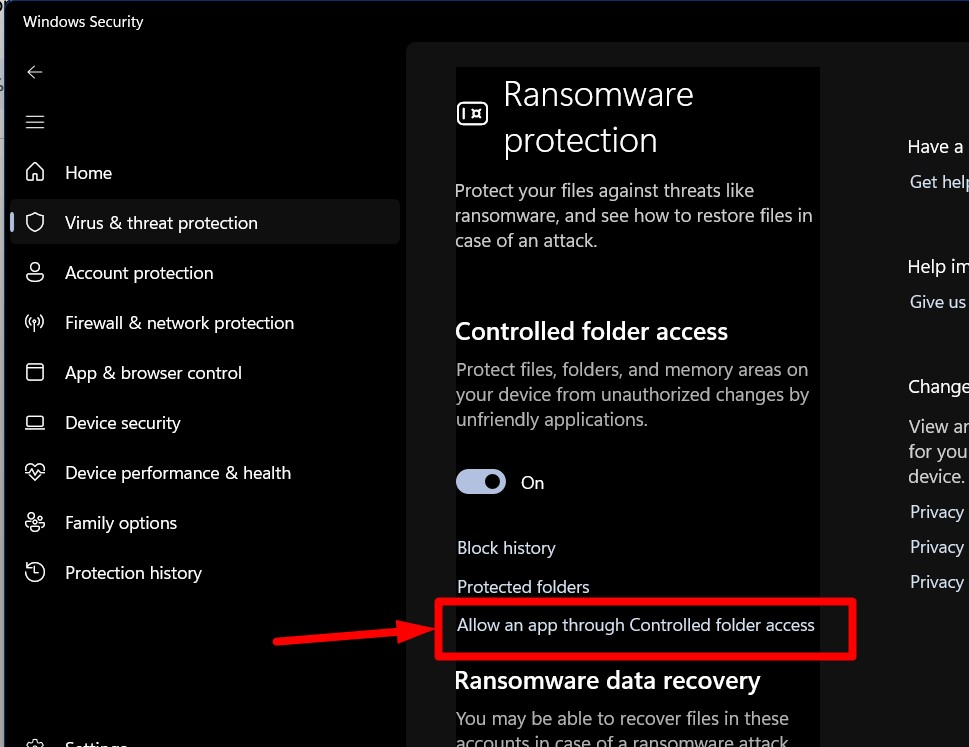
Now, scroll down, find the highlighted option in the “Ransomware protection” section, and click it:
The “Controlled Folder Access” option can now be seen. Trigger button against it to enable it if turned off:
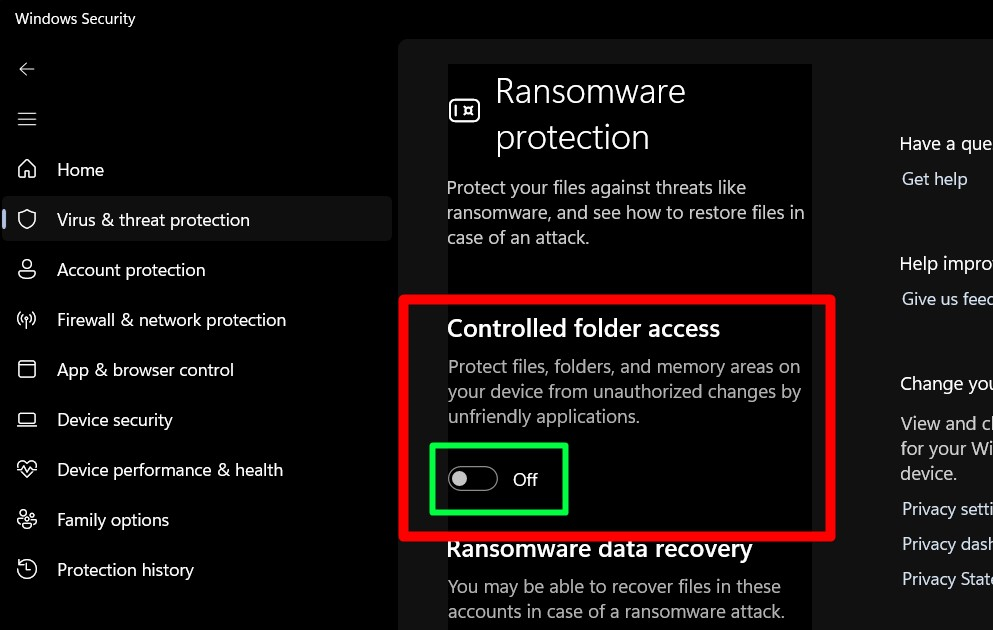
It is now enabled, and if you are using the “Group Policy”, try this.
How to Enable Controlled Folder Access From Group Policy in Windows 10/11?
The “Group Policy” is an ordered structure in Microsoft Windows that enables the administrators to manage the users in Active Directory from a single centralized location. The “Controlled Folder Access” can also be enabled/configured via the “Group Policy” by following these steps:
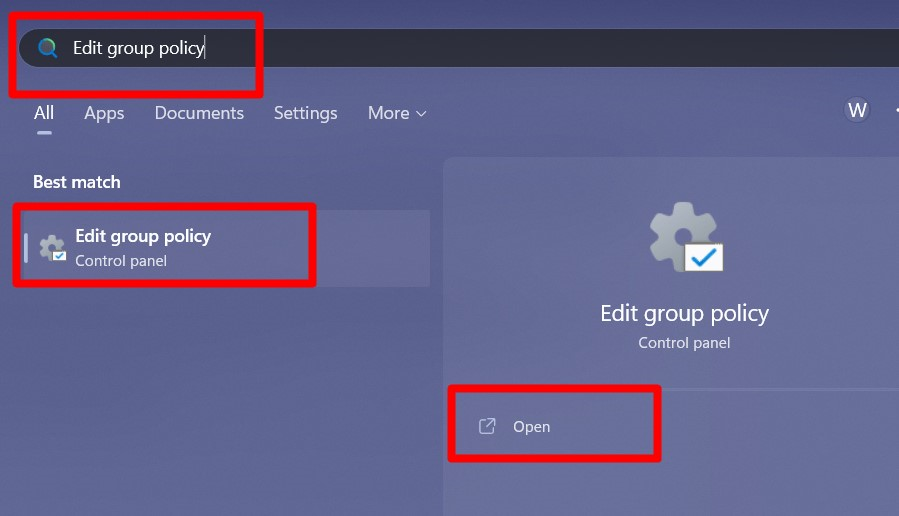
Step 1: Open the Windows “Group Policy Editor”
The “Group Policy Editor” is launched by pressing the “Windows” key and entering “Edit group policy”:
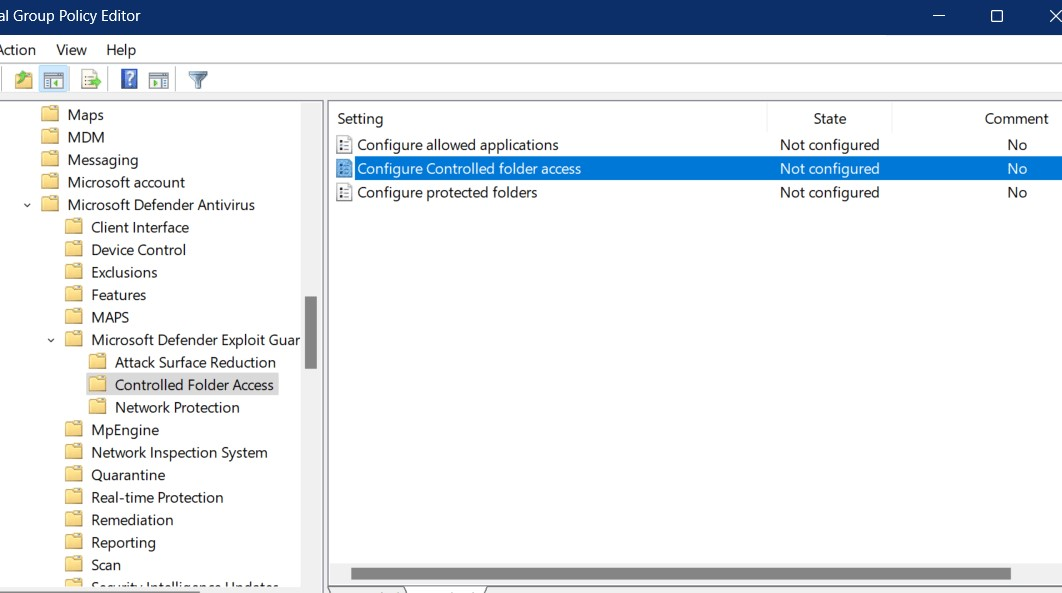
Step 2: Edit the Group Policy to Enable “Controlled Folder Access
From the “Group Policy”, follow the path “Computer Configuration > Administrative Templates > Windows Components > Microsoft Defender Antivirus > Microsoft Defender Exploit Guard > Controlled Folder Access”:
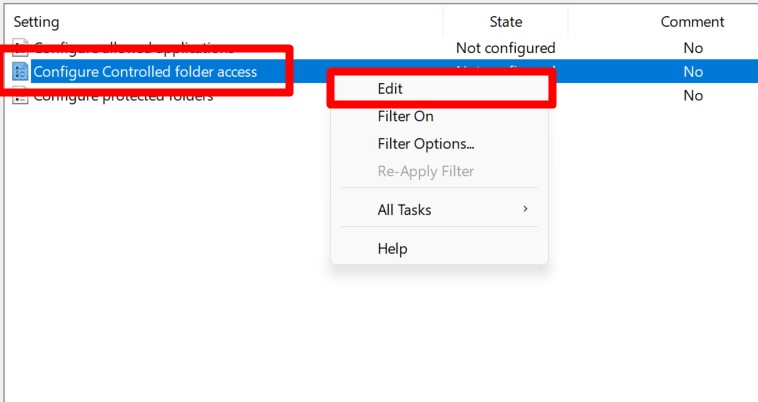
From here, right-click on the “Configure Controlled folder access” option and trigger “Edit”:
In the following window, “Enable” it by marking the highlighted checkbox and select “Block” from the drop-down under the “Configure the guard my folders feature” option and hit “OK”:
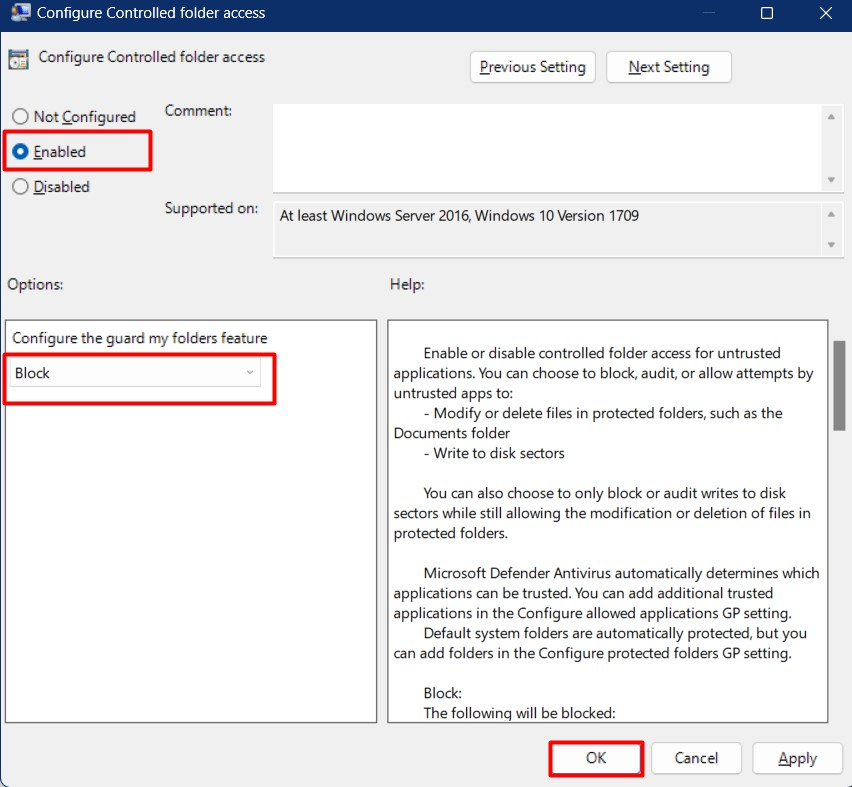
It will enable the “Controlled Folder Access” across all the “Active Directory” users.
How to Protect Important/Valuable Folders With Microsoft “Controlled Folder Access”?
Let’s get you started with what you can configure with the “Controlled Folder Access”:
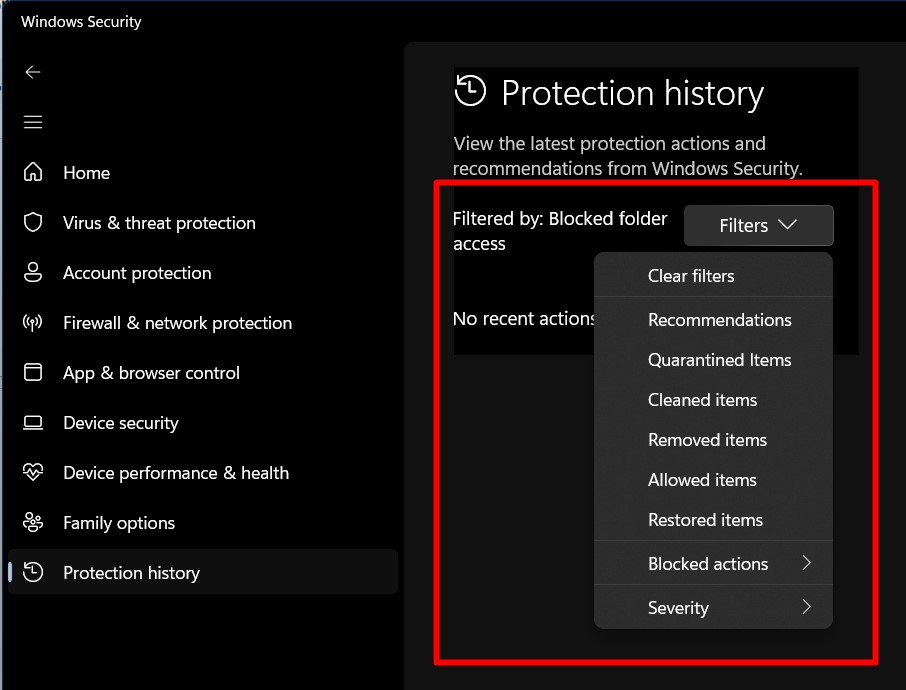
How to Check “Block History” in Controlled Folder Access?
The “Block history” in the “Controlled Folder Access” shows the app/software that was blocked. To view it, launch “Windows Security” and follow this path “Virus & threat protection => Manage ransomware protection => Block history”:

In the “Block history”, users can view the blocked apps/software using different folders:
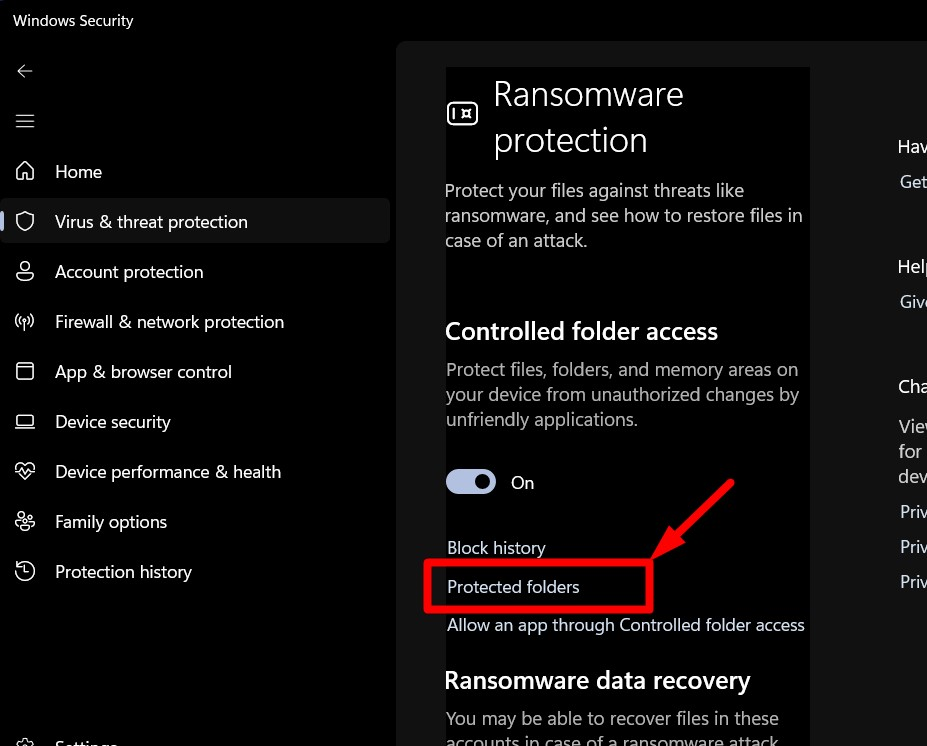
How to Add “New Locations” in Controlled Folder Access?
To add new locations in “Controlled Folder Access”, head to “Virus & threat protection => Manage ransomware protection => Protected folders”:
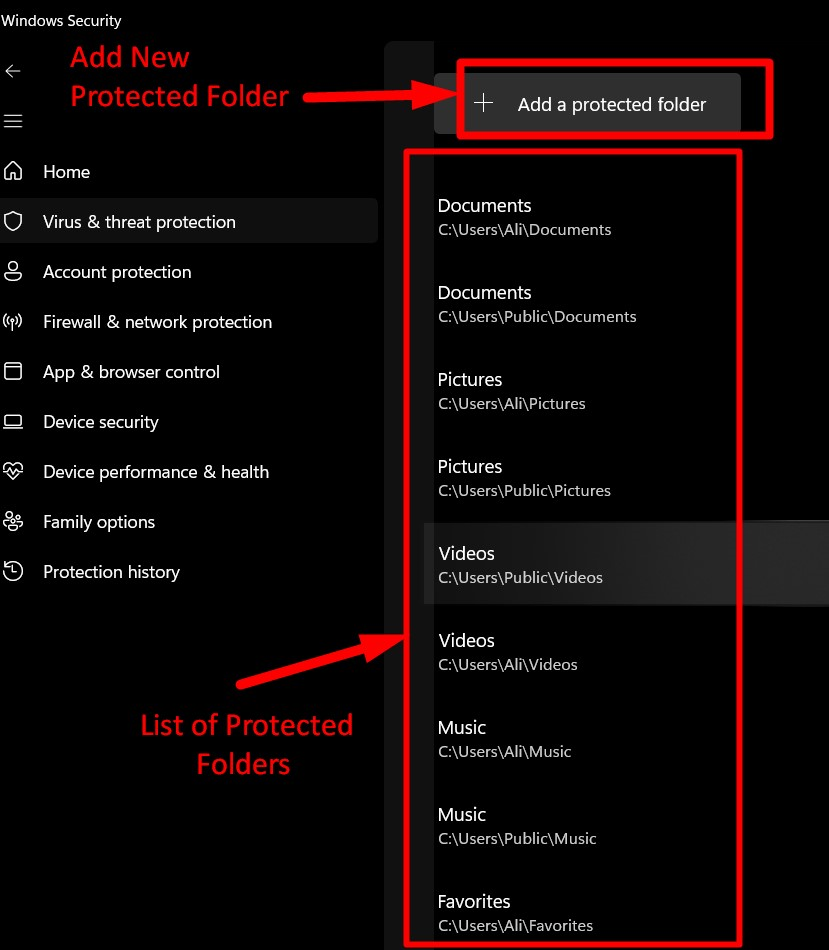
From the “Protected folders” window, the list of protected folders can be viewed, and by clicking the “+ Add a protected folder” option, users can add a new folder to the list:
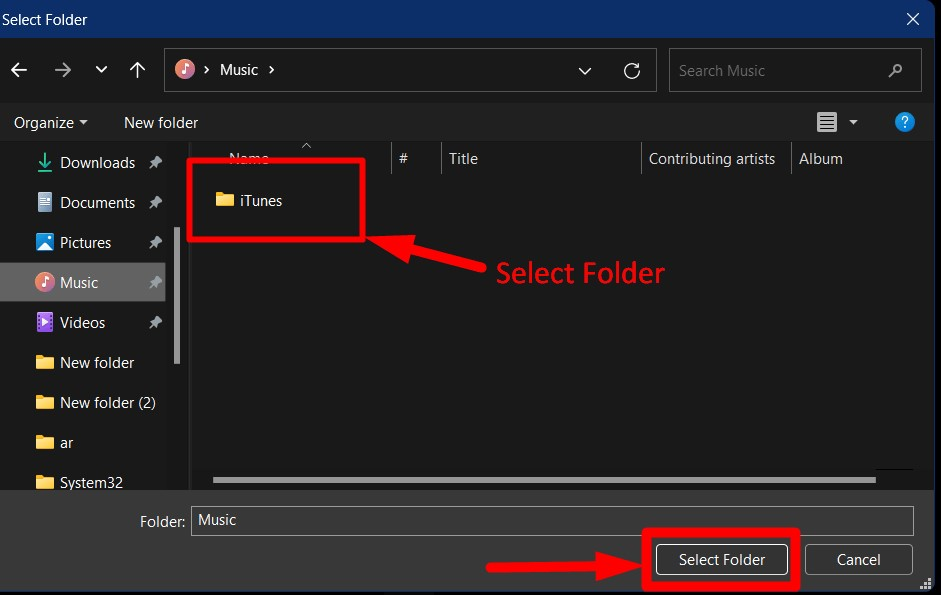
After doing so, users must navigate to the folder where they want to add in the list. Let’s suppose we are adding the “iTunes” folder to it. To do so, opt for the folder and hit “Select Folder”:
Once added, it can be removed by clicking on it and triggering “Remove”:

This is how you can “Add/Remove” from the list of “Protected folders” in “Controlled Folder Access”.
How to “Whitelist Apps” With Microsoft Controlled Folder Access?
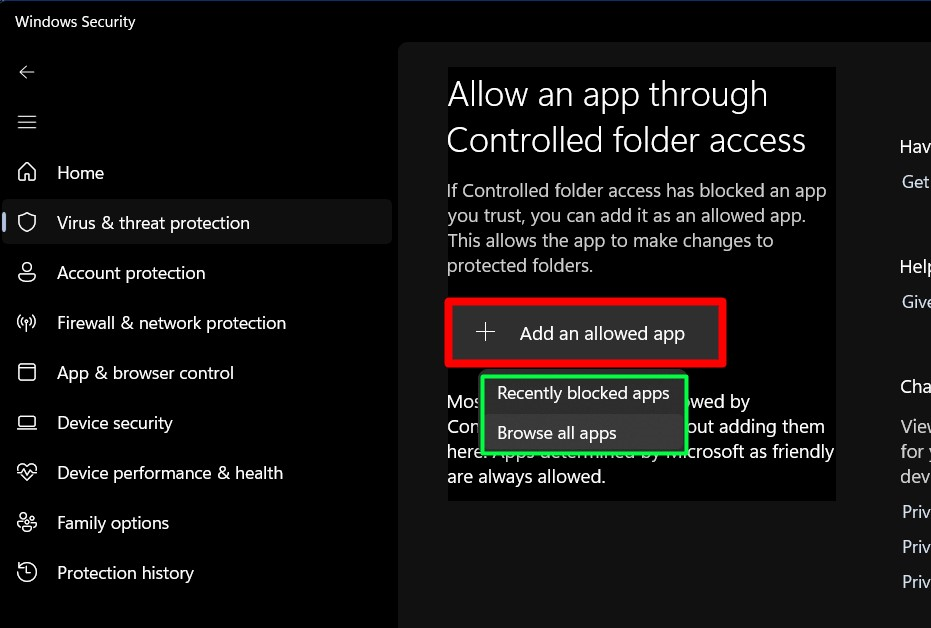
Some users may want to “Whitelist the Apps” and enable them to modify/delete the contents of the “Protected folders”. To do so, head to “Virus & threat protection => Manage ransomware protection => Allow an app through Controlled folder access”:
From the following window, trigger “Add an allowed app”, and you will be prompted to allow “Recently blocked apps” or “Browse all apps” for the new apps:
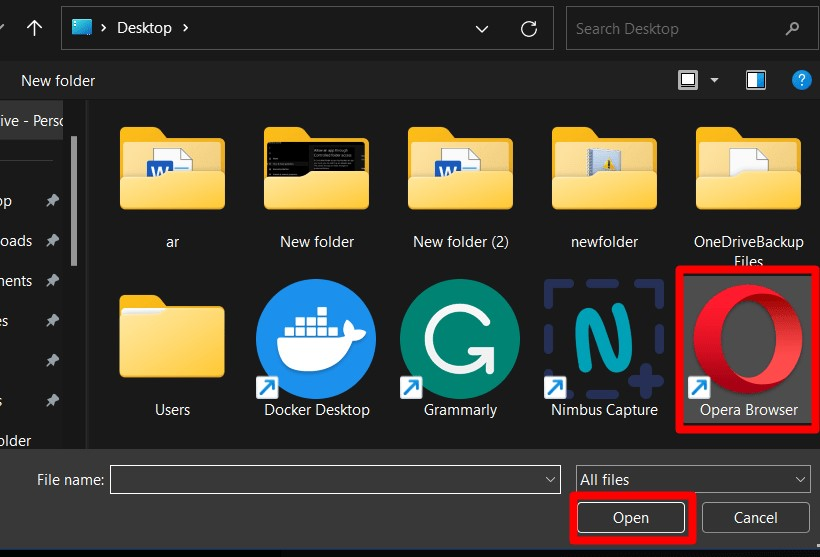
Let’s suppose we want to add “Opera Browser” to the “Whitelist” of the “Controlled Folder Access”, we’d browse for its location and hit “Open” to add it:
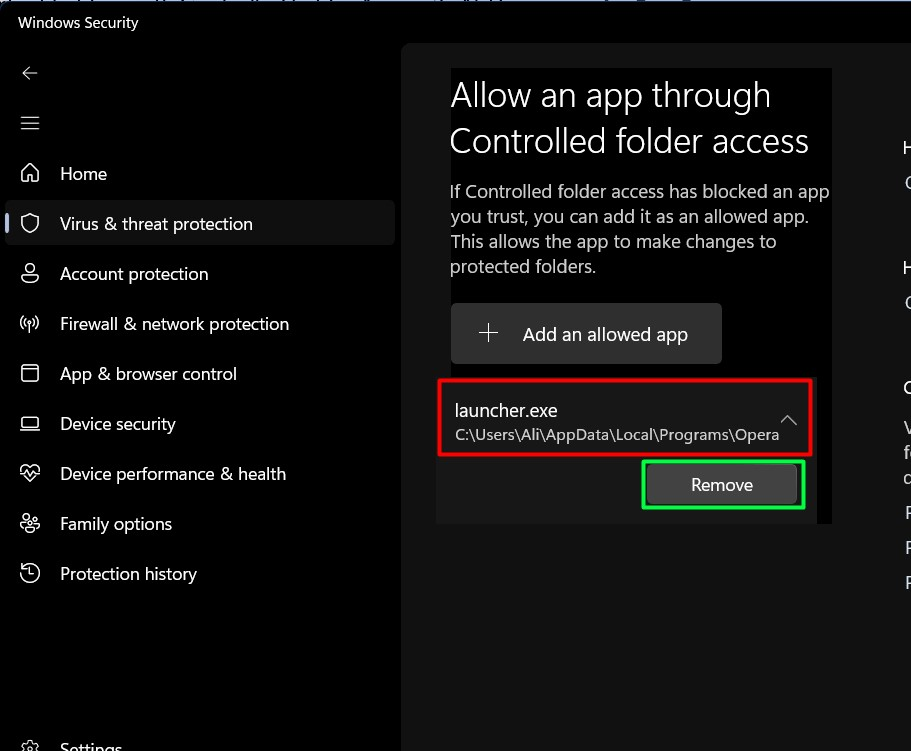
When added, it will be visible in the allowed apps. To remove it, click on the app and trigger “Remove”:
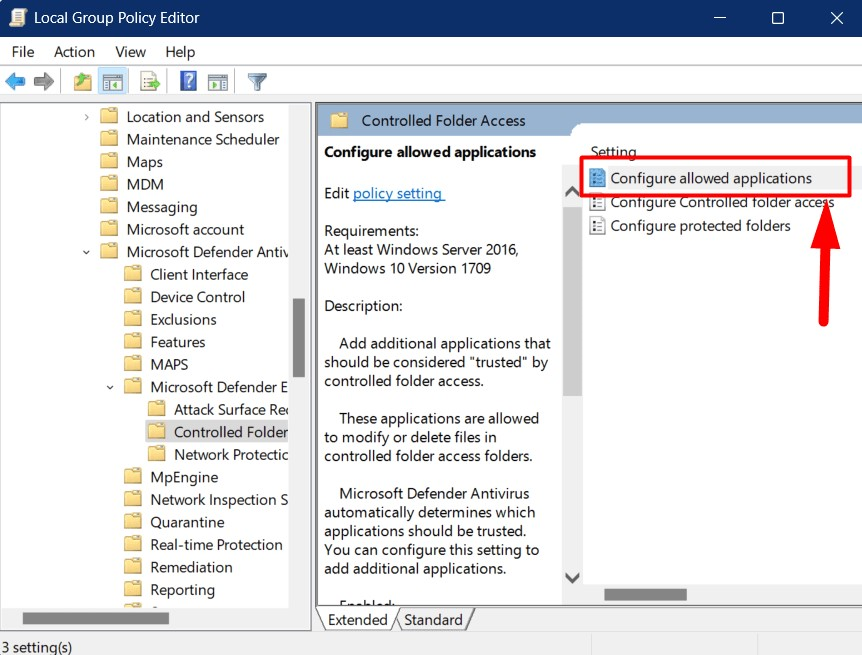
How to Configure “Allowed Applications” in the Controlled Folder Access From the Windows Group Policy?
If you are using the “Group Policy” and want to configure the allowed applications for the “Controlled Folder Access”, navigate to the path “Computer Configuration > Administrative Templates > Windows Components > Microsoft Defender Antivirus > Microsoft Defender Exploit Guard > Controlled Folder Access”. From the right pane, double-click “Configure allowed applications”:
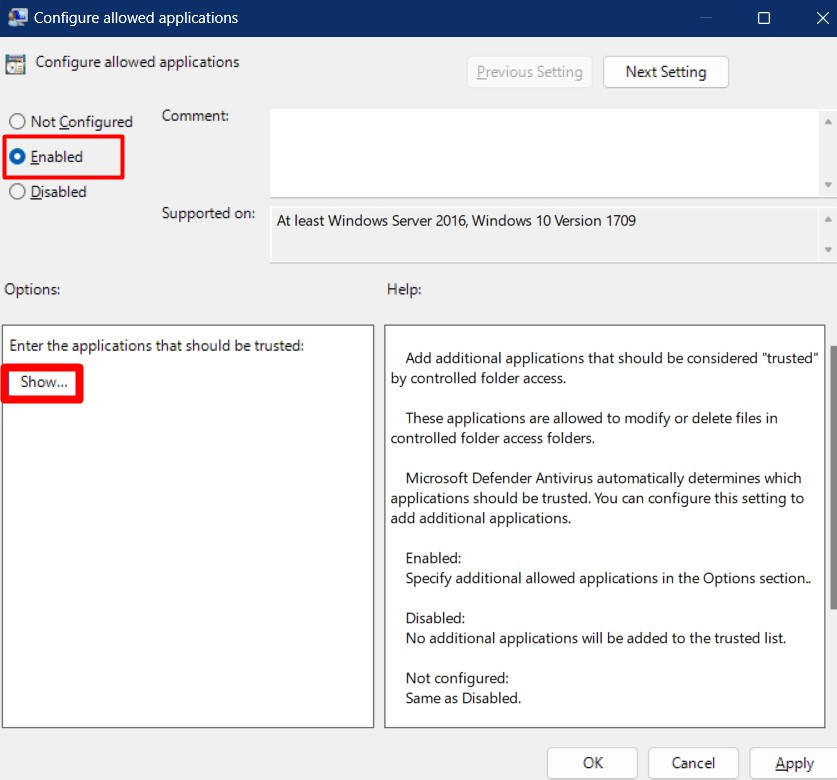
The following window will pop up where you must mark “Enabled” and trigger the “Show” option below:
Let’s suppose we want to add the “Opera browser”, we’d provide the full path to the “.exe” file and set its “Value” to “0”:
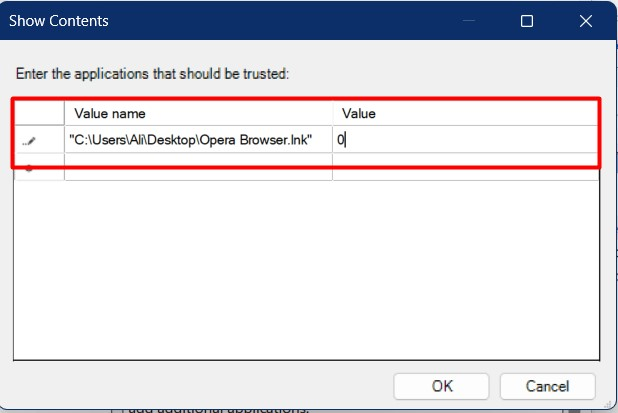
Hitting the “OK” button will add the specified application to the “Whitelist” of the “Controlled Folder Access”.
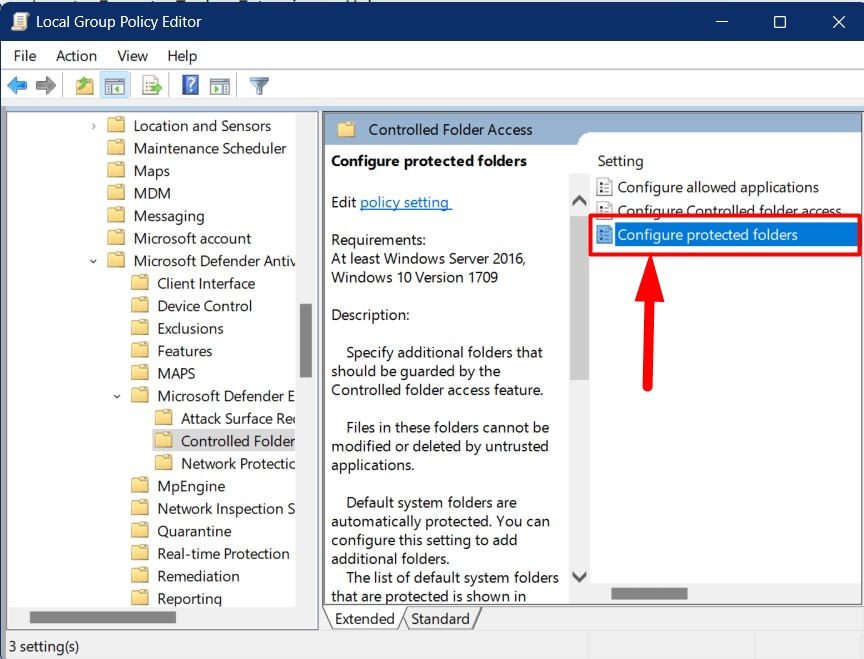
How to Add “More Folders” in Controlled Folder Access via the Windows Group Policy?
From the “Controlled Folder Access” in the “Group Policy,” select “Configure protected folders”:
From the following window, hit “Enabled” to enable it and trigger the “Show” button:
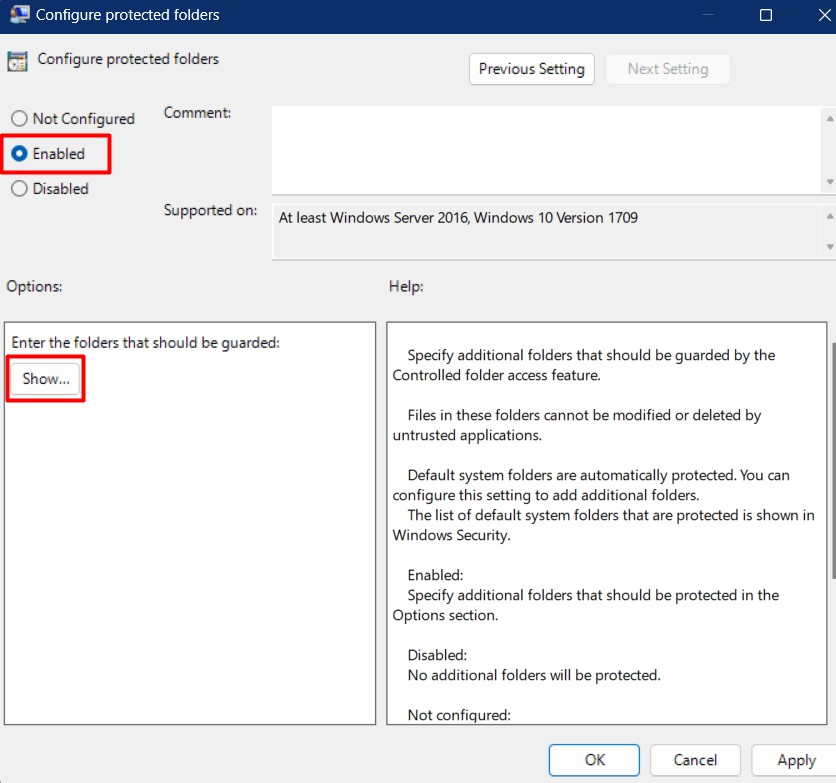
Here, you must paste the full path of the folder you want to add in the “Controlled Folder Access” and set its value to “1”:
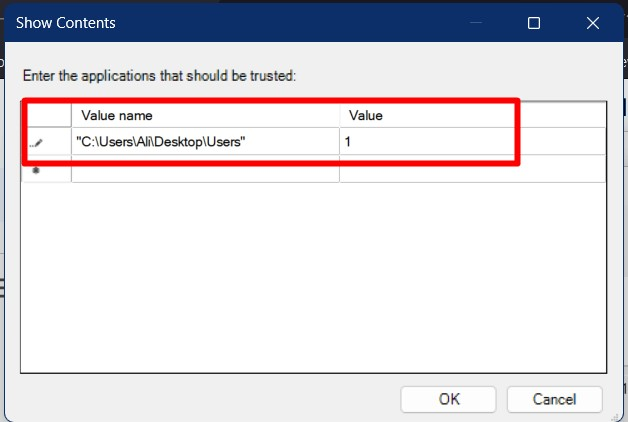
Hitting the “OK” button saves the changes, adding the specified folder to the “Controlled Folder Access”.
Conclusion
The “Controlled Folder Access” is a feature of Microsoft Windows that protects specific folders from malware attacks. It is added to “Windows Security” tools and can be configured from there under the “Ransomware management”. The system administrators can also configure it using the “Group Policy”. This guide explained the Controlled Folder Access’s significance and how to protect important folders with it.
Source: linuxhint.com