How to Pose in Roblox Profile?
In this tutorial, I will explain how you can pose in your Roblox profile and make it even more fun.
How to Pose in Roblox Profile?
To pose in your Roblox profile, follow the below-given steps:
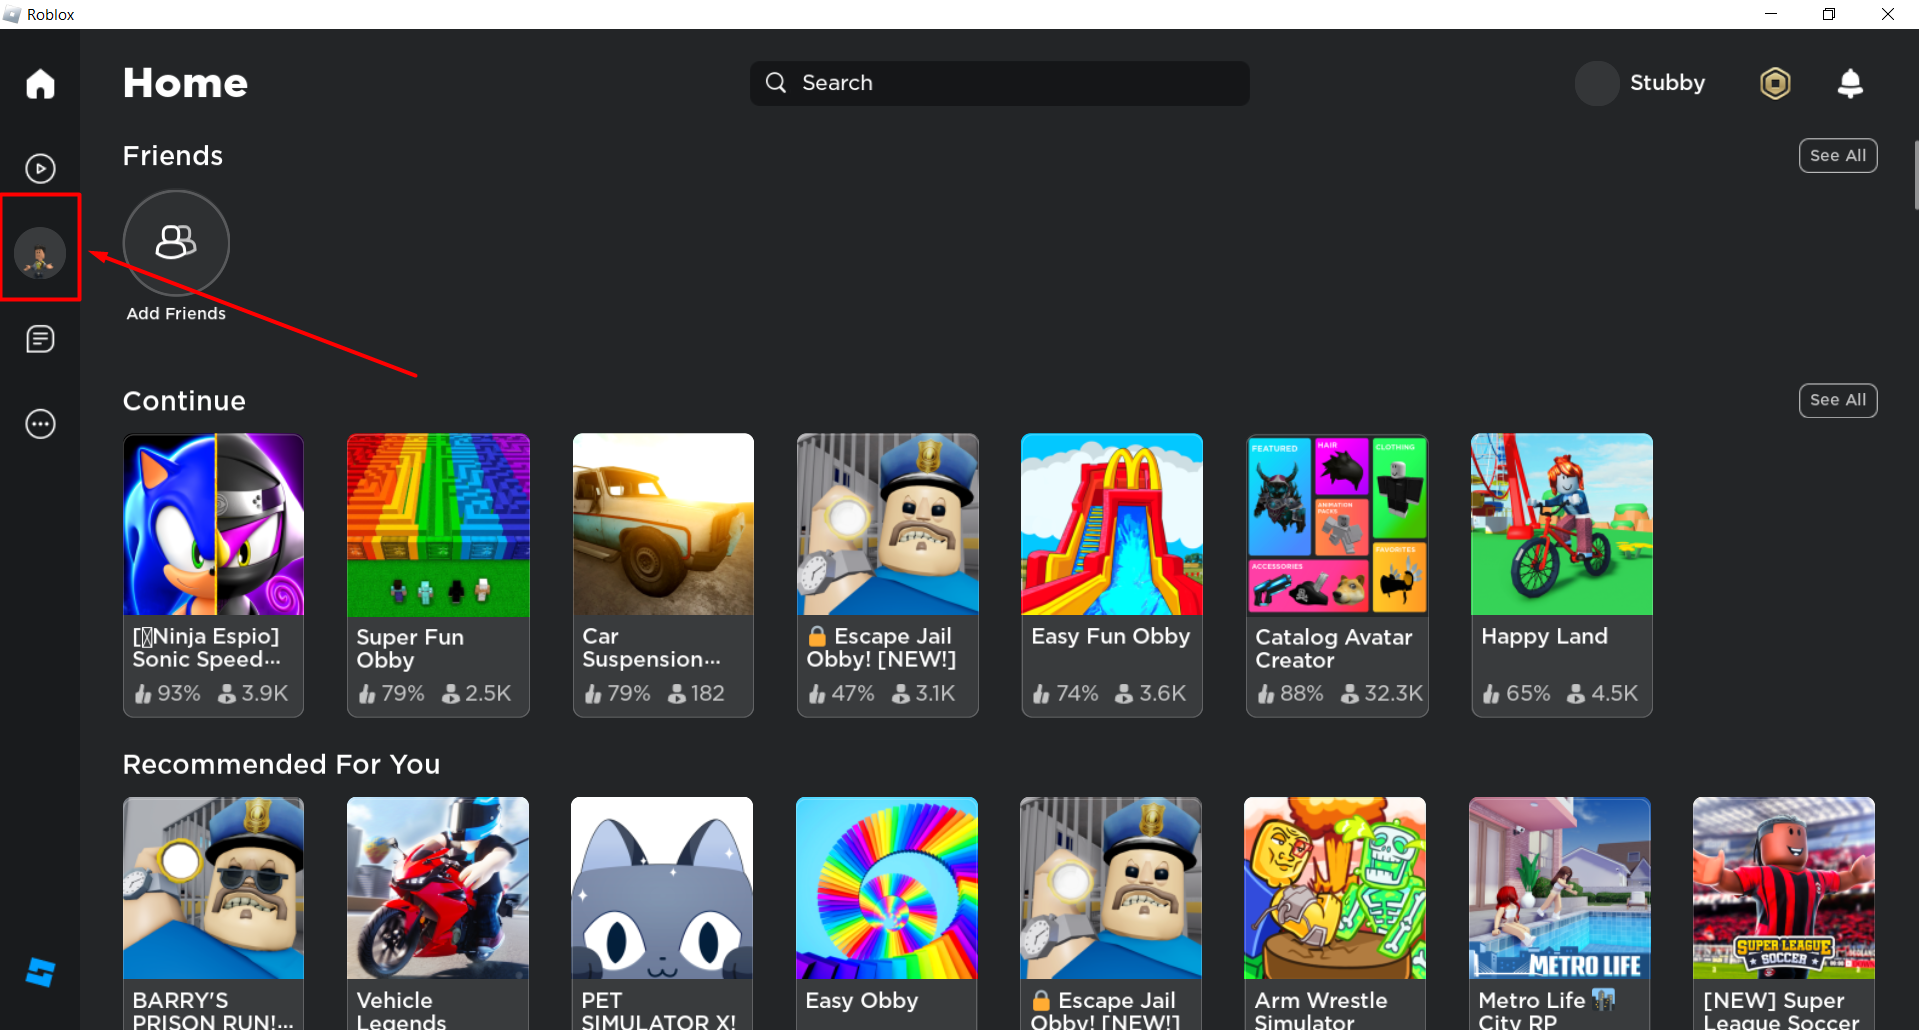
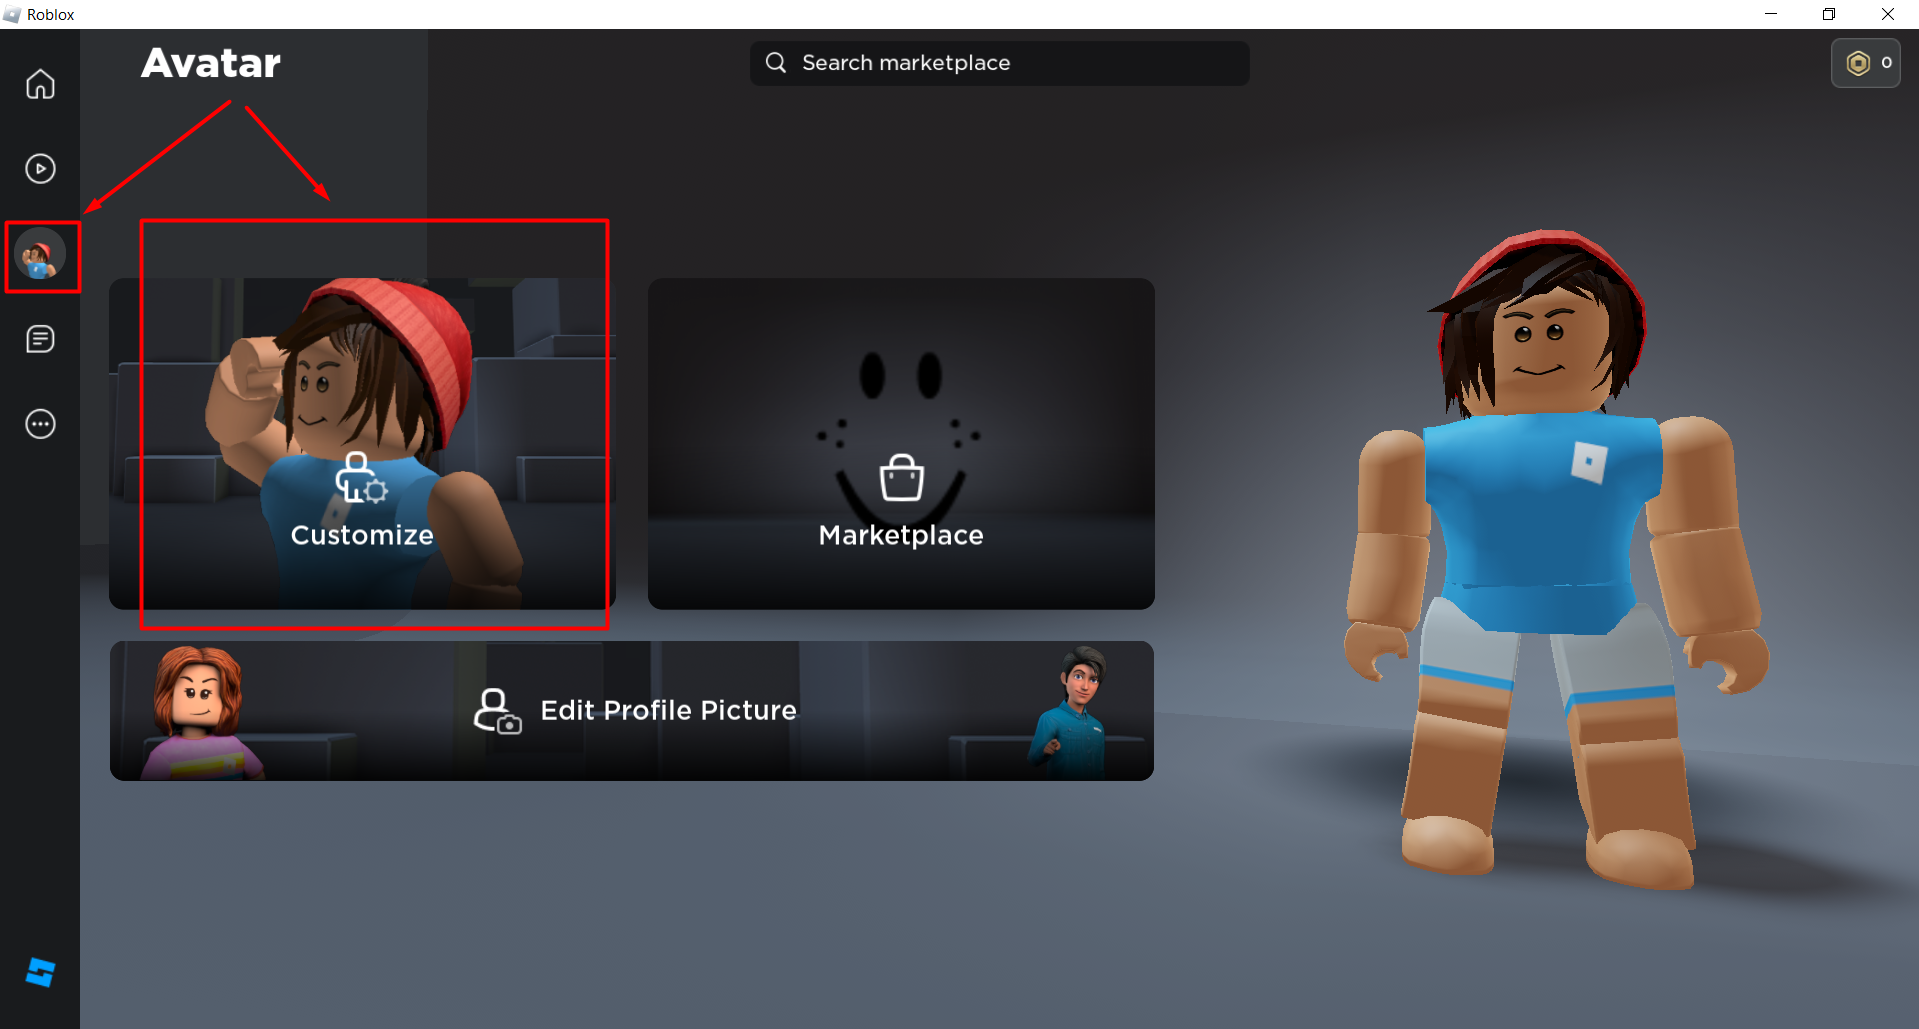
Step 1: Open Roblox, log in to your account and click on the avatar icon on the left side menu.
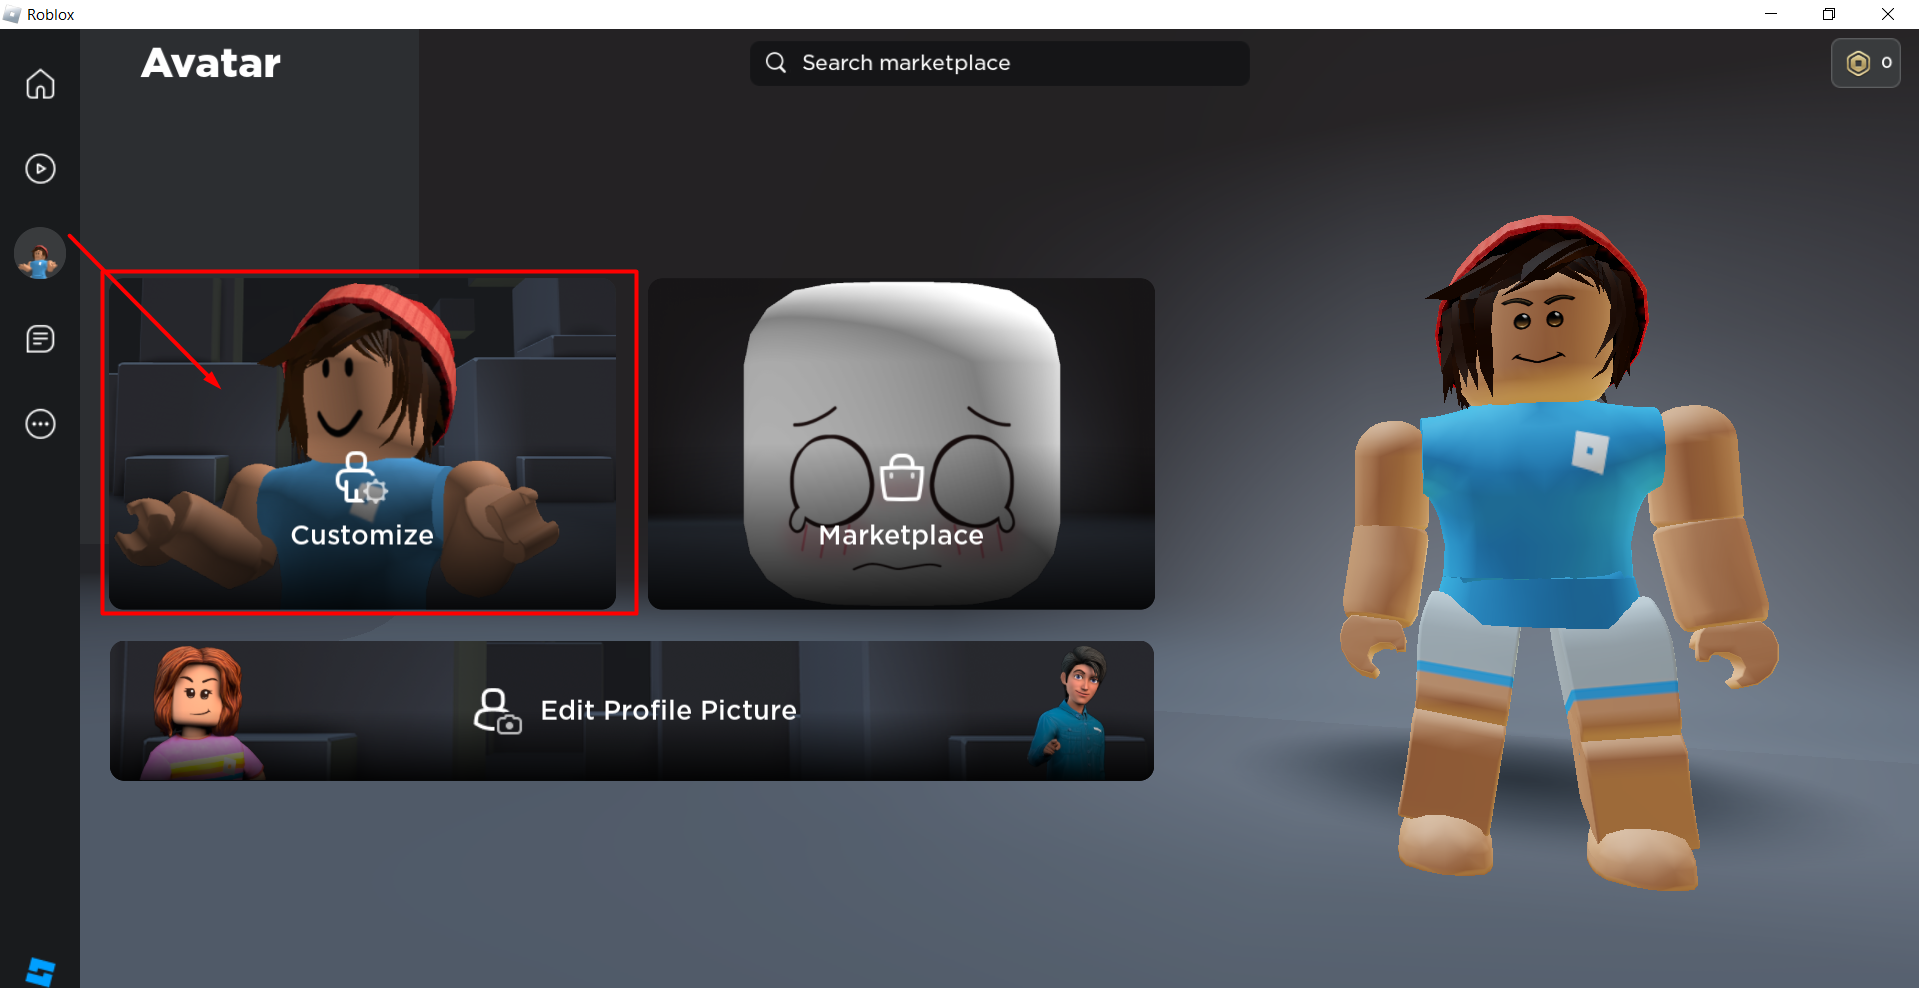
Step 2: Click on the “Customize” option in your “Avatar” window.
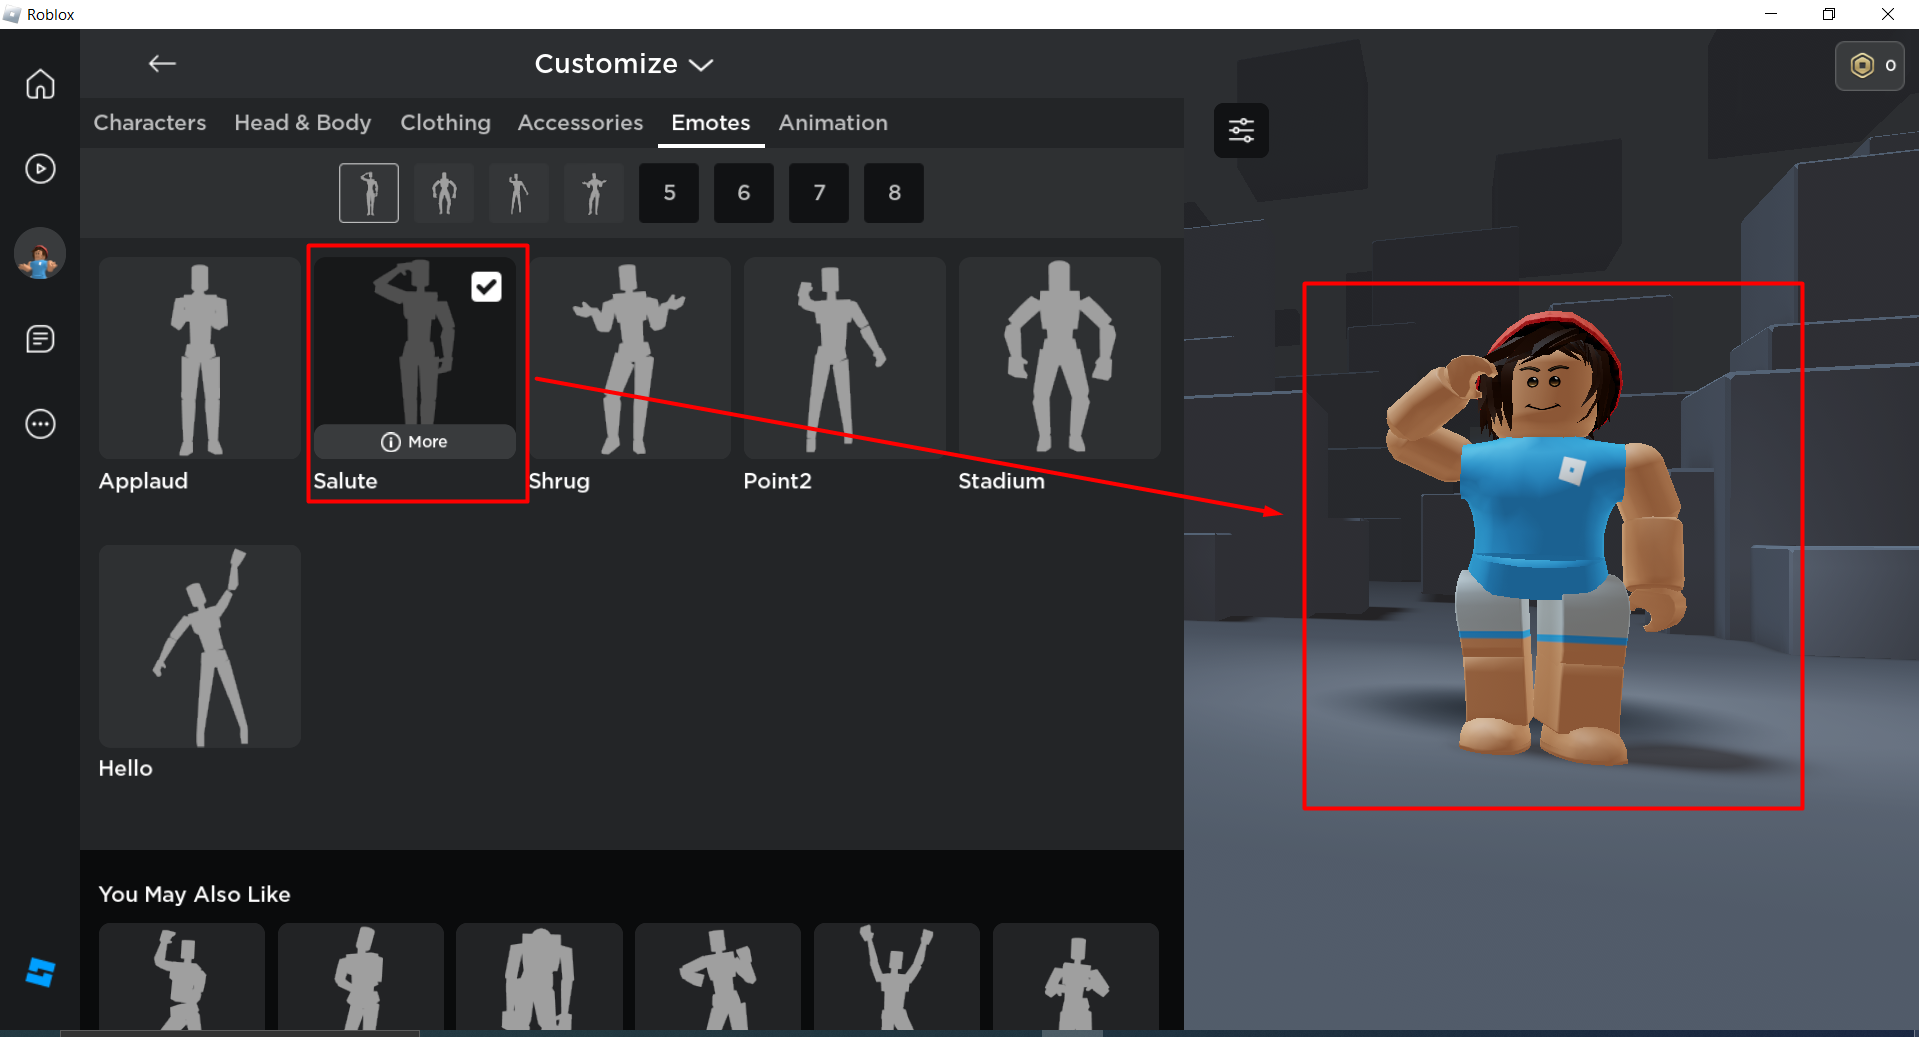
Step 3: In the “Emotes” menu under “Customize” windows, select or purchase your favorite “Emotes”.
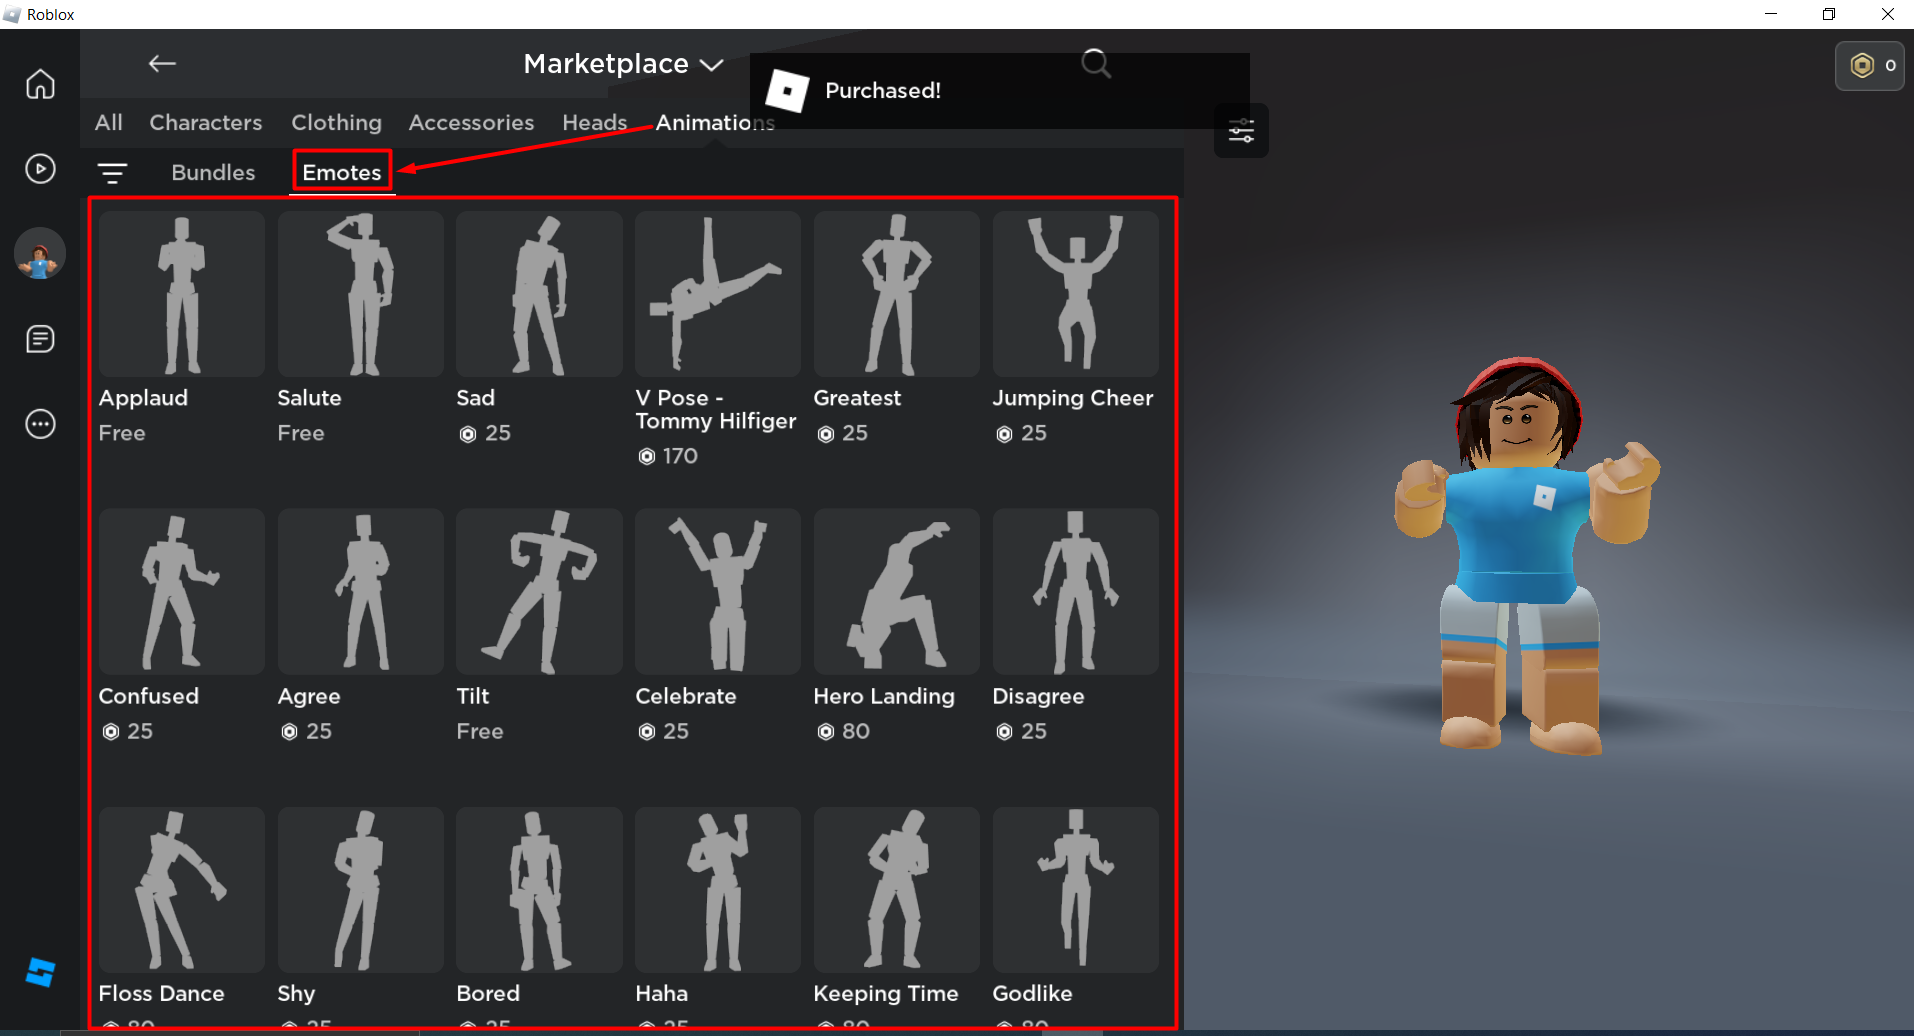
You can purchase more “Emotes” from “Marketplace”.
Step 4: Go back and select the “Edit Profile Picture” option from the “Avatar” window.
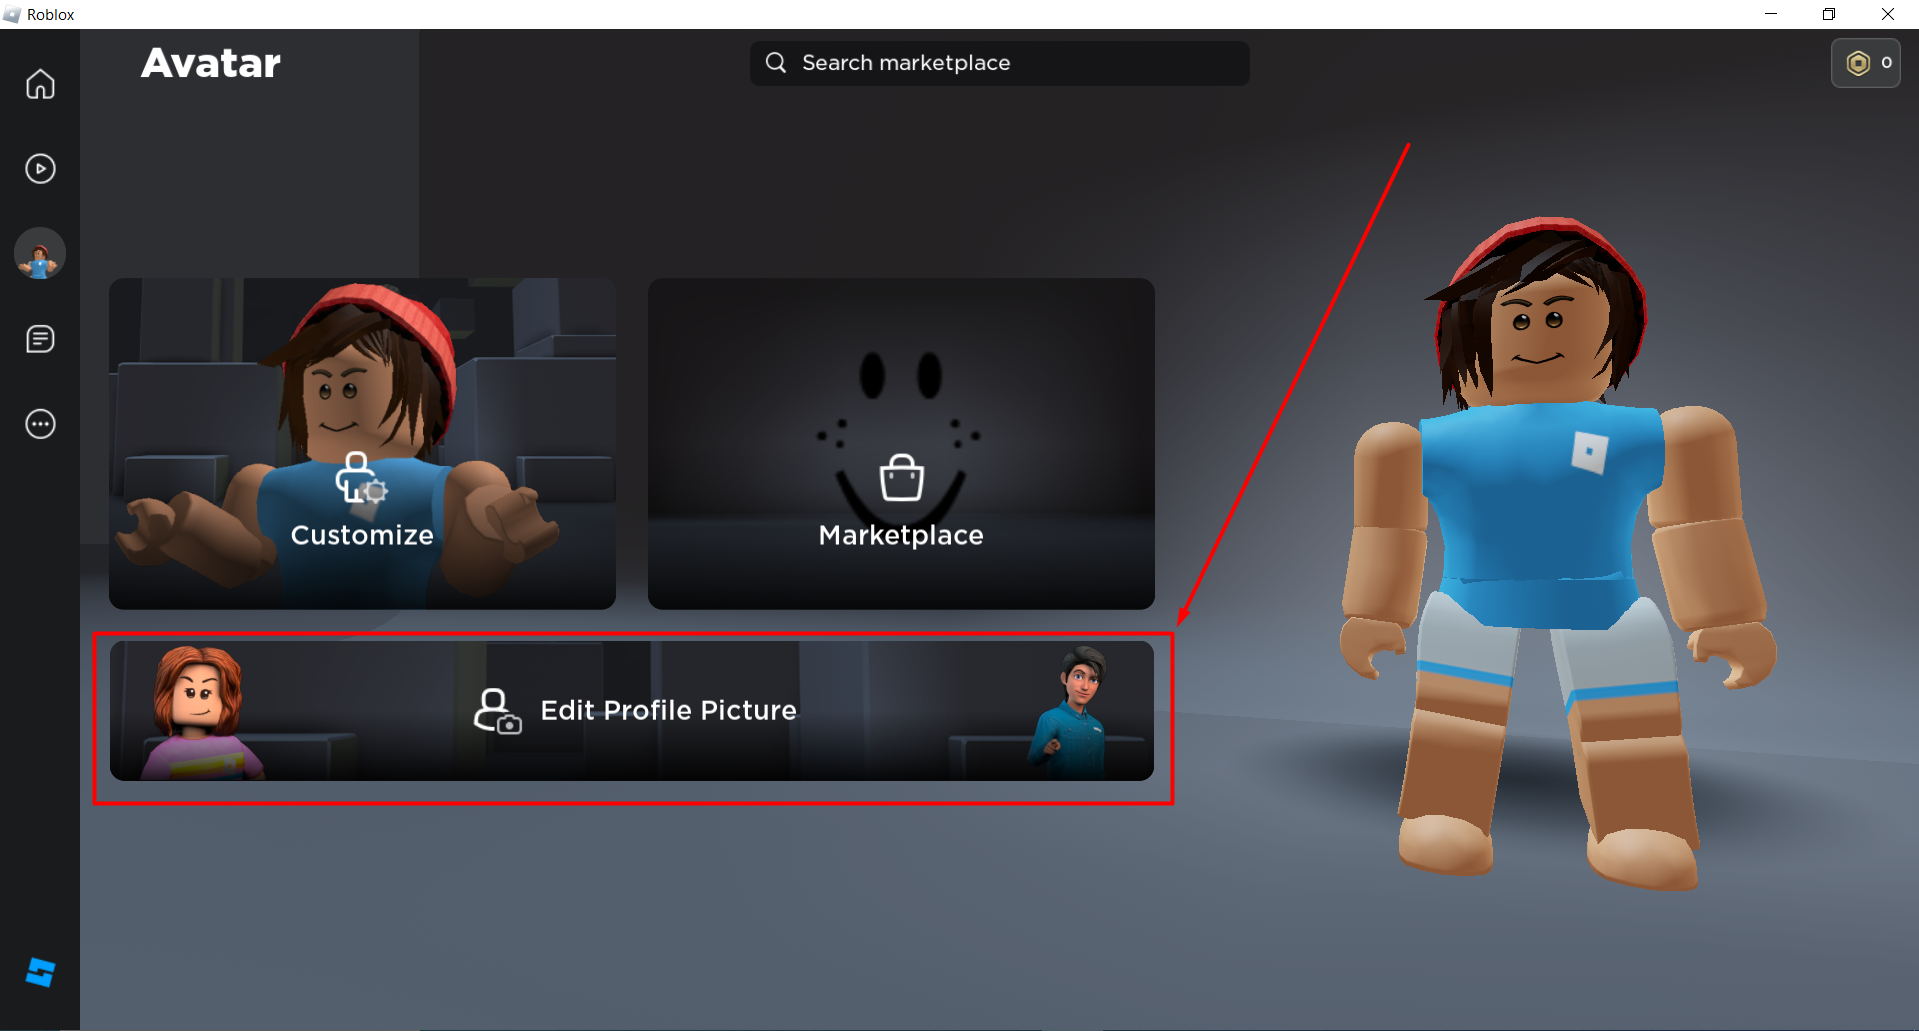
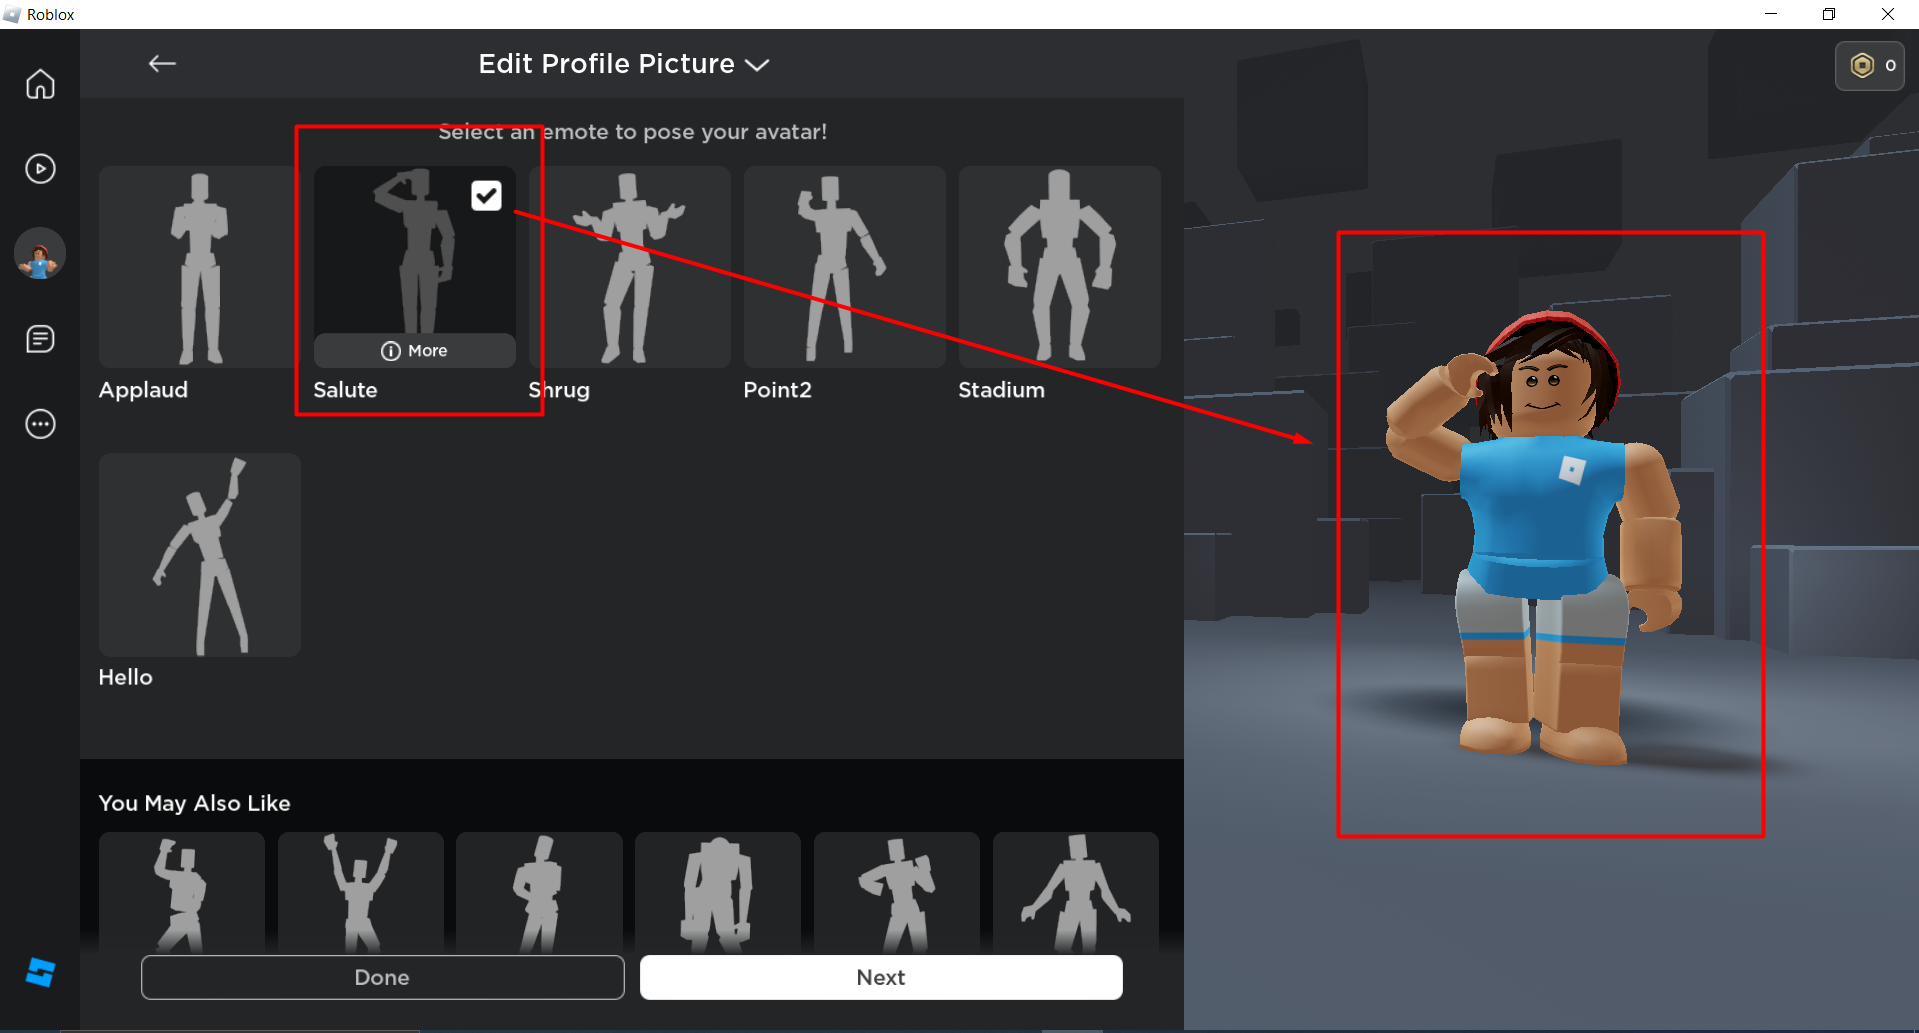
Step 5: Here, you can see all the Emotes that already have been purchased. Select your desired pose and click on “Next”.
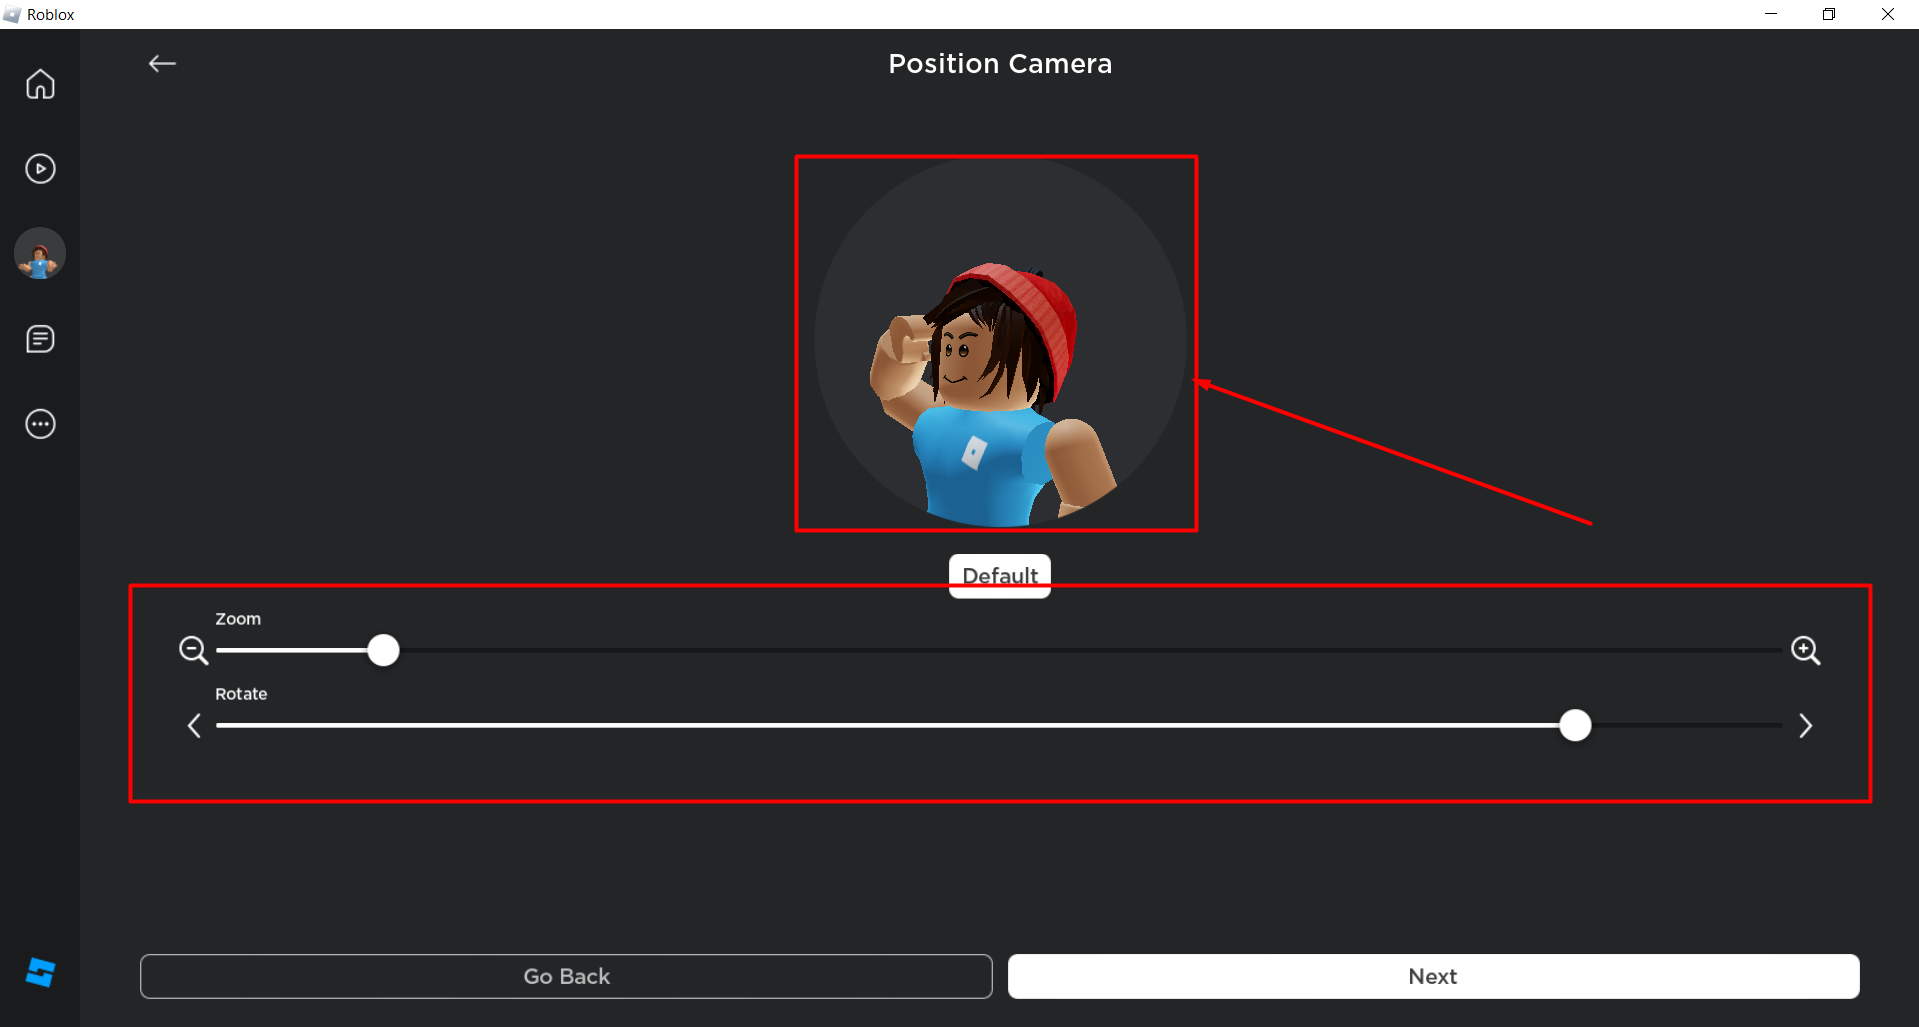
Step 6: In the “Position Camera” windows, use the “Zoom” and “Rotate” options to adjust your Avatar Pose accordingly and select “Next”.
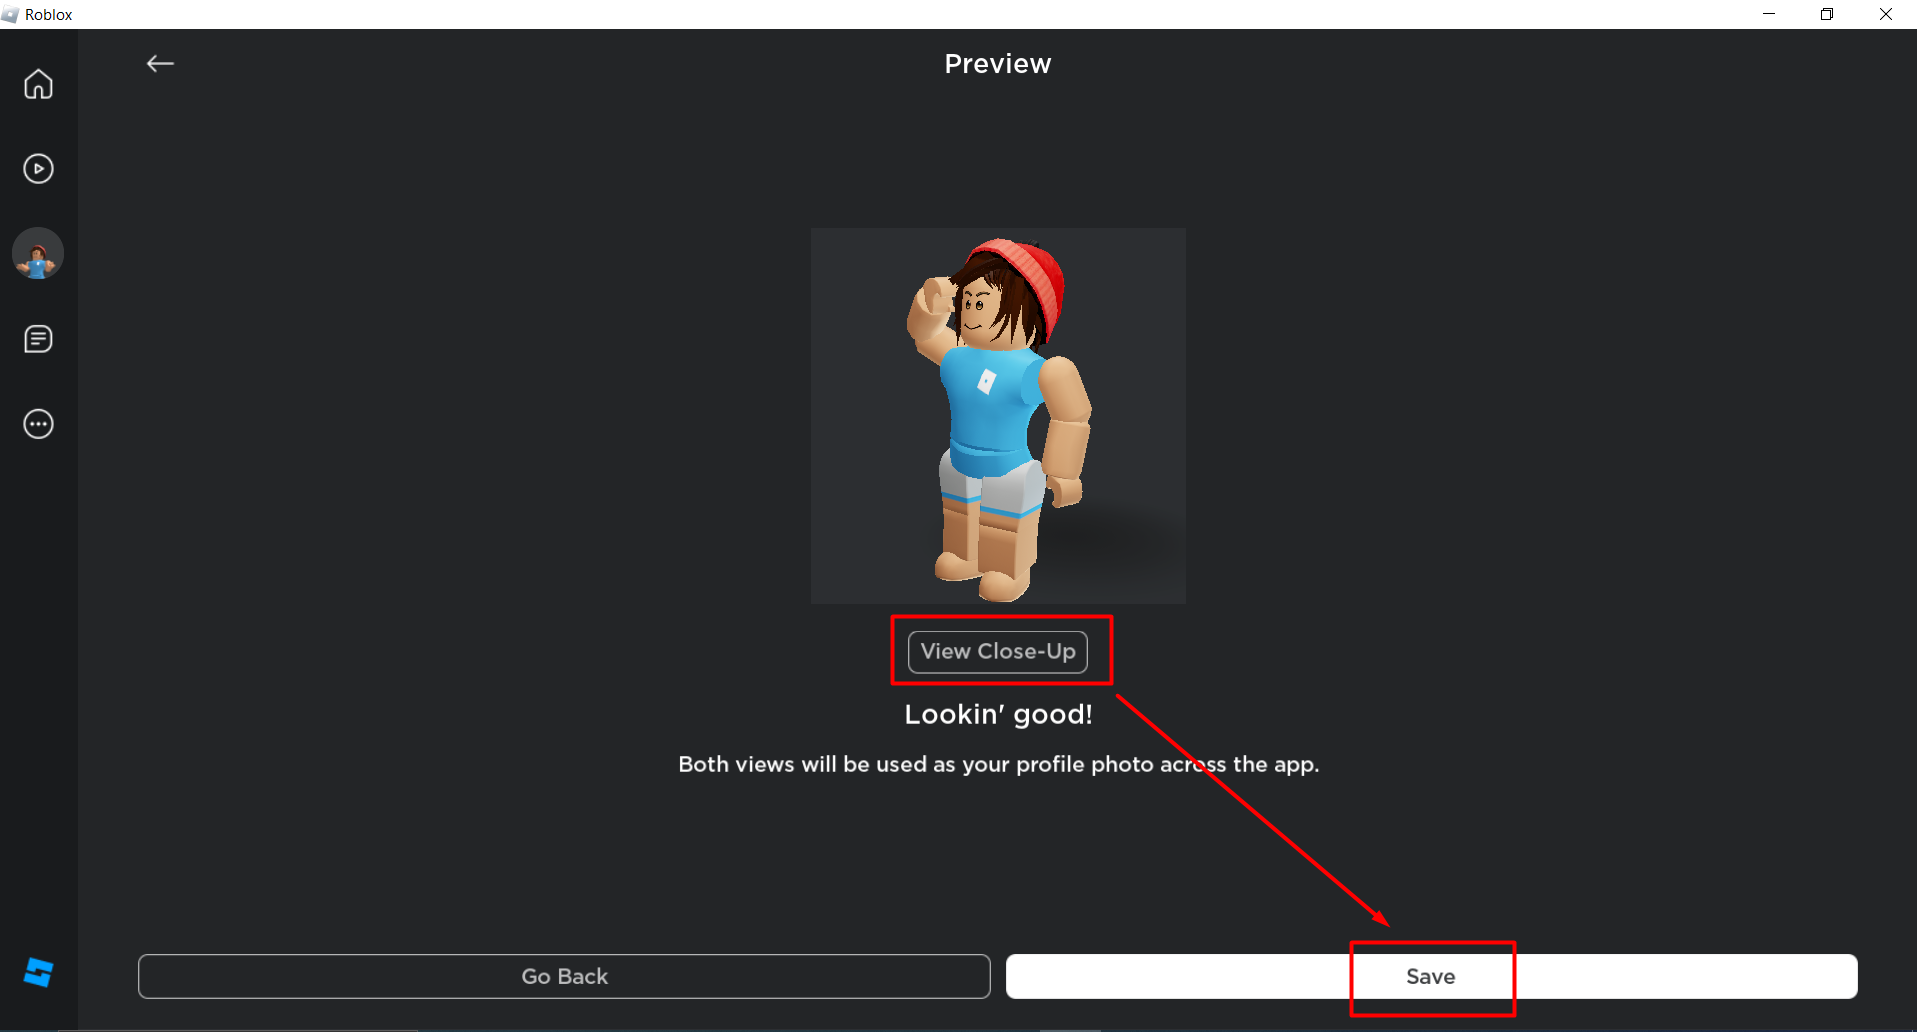
Step 7: Verify your profile picture and overall look from the “View Close-Up” or “View Full Avatar” button. Then click on the “Save” option.
You can easily verify the changes as they are visible on the “Avatar” icon and also on the “Customize” tab.
Note: You can perform the same steps on your mobile to pose in the Roblox profile.
Conclusion
Posing is a great way to add flare to your profile. In this guide, we have discussed how we can pose in Roblox using the “Emotes” and “Edit Profile Picture” options. Using the above-mentioned steps, we can have a unique pose and a characterized look on our profile. It enables the players to have a distinct identity of their character in Roblox.
Source: linuxhint.com