How to Navigate the MongoDB Shell
Installation
Before making a connection via the Mongo shell, it’s required to set up the MongoDB server, and it should be functioning. To do this, you can navigate through the official download page of MongoDB on the web, located within the “Products” section.
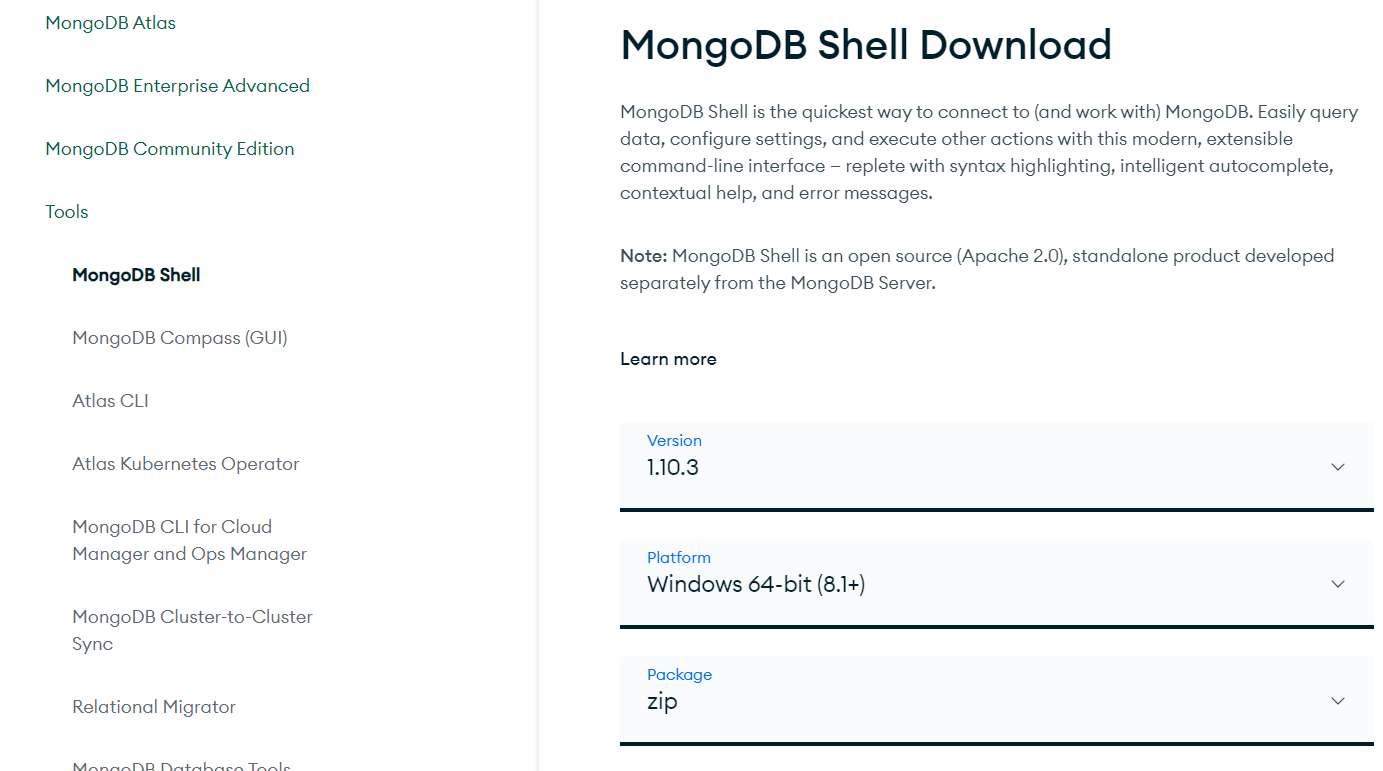
Look for the latest version of MongoDB suitable for your operating system. Download and then set up the required MongoDB file using the setup wizard. Although the MongoDB shell comes with the MongoDB Compass, it can be downloaded and installed separately. After downloading the “zip” file of the MongoDB shell, extract it into a folder of your choice.
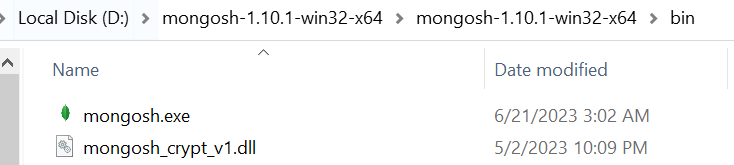
After extracting it, move within its “bin” folder and double-click on the mongosh.exe file, which is the MongoDB shell tool.
MongoDB Connection
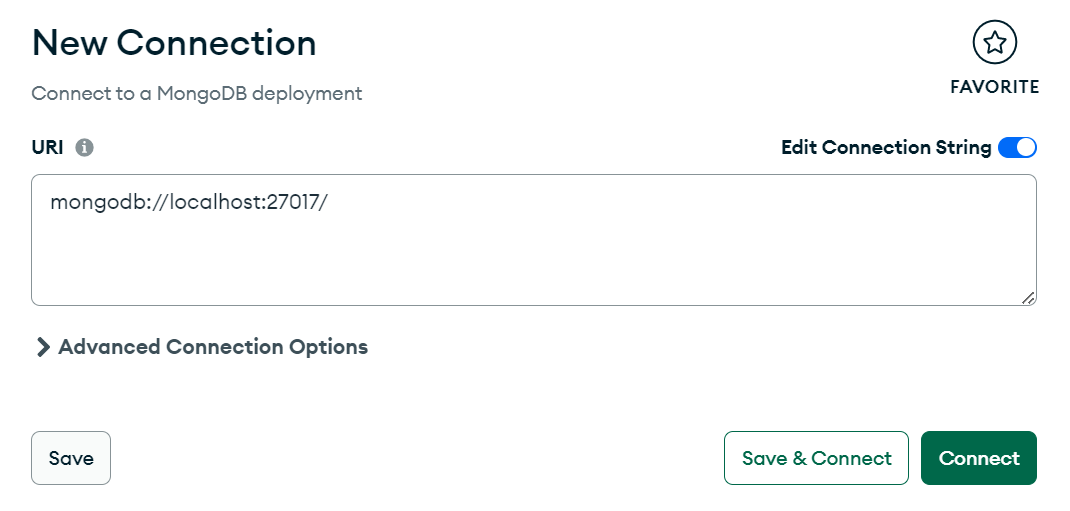
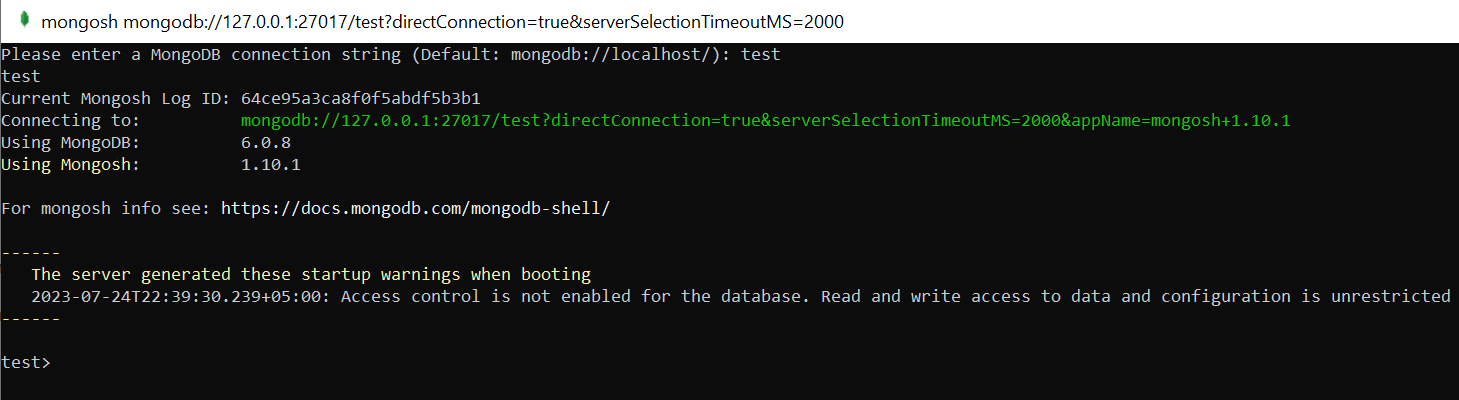
Before it launches, make sure you have a Mongo DB connection string set. This connection string should contain the localhost and the port number your MongoDB will be working on. Typically, the connection port of most computer systems is 27017.
You can create a new database using the MongoDB Compass. For instance, we have created a test database, and after launching the MongoDB shell, we added it as a connection string. You will see that the MongoDB shell has given a space to perform queries on the “test” database.
List Databases
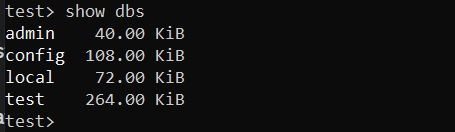
In the MongoDB shell, you can check for all the available databases to work with. To do this, execute the “show dbs” command, as shown. It will display all the built-in and user-defined databases, including the “test” database.
Switch Databases
Rather than staying and performing all the queries using one database, you can also use other databases. To do this, you have to switch databases with the help of a “use” command. This command must be utilized with the name of a database. For instance, we switched to the “local” database via the “use” query. Now, you can perform any query on the local database.

Also, you can simply execute the “db” query to look for the currently utilized database. This query will simply return the name of a database you have been working with, such as test.
![]()
List Collections
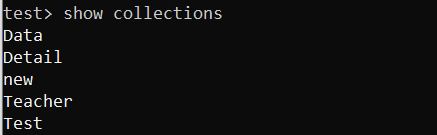
The above explanation was all about listing and switching databases. Now, to list all the available collections in the currently utilized database, you can also use the “show” instruction. This command should be used with the keyword “collections,” and you will get a list of all the available collections on your MongoDB shell screen. For instance, we executed this query to display our available collections and got a list of five collections.
Create Collections
Moving towards utilizing collections in MongoDB, you may find it difficult to use the old collections. Therefore, there is always a need and space for creating new collections in the database. Thus, to create a new collection in the MongoDB database, you can use the “db” instruction with the “createCollection” function. The function should contain the name of a collection to be created. For example, we have been using the “Dummy” collection as per the below query illustration. The output of this query should display the acknowledgment by printing {ok: 1} as output.
Insert Records in Collections
The very next step after creating a MongoDB collection is to add brand new records to it because without records, our collection is of no use. MongoDB provides you with multiple insert functions to deal with the insertion of new documents. The simplest function is “insert().”
For insertion, make sure to use the “db” query followed by the collection name, which in this case is “Dummy,” followed by the insert() function. This query takes multiple records at a time, but you can add a single record also. Each record should be enclosed within the {} brackets holding the field names, such as name, and their corresponding values, for example, “John.”

Now, if you want only to insert a single record, you may employ the insertOne() function that allows only 1 record for insertion. The acknowledgment shows the record insertion was successful for the “Dummy” collection.

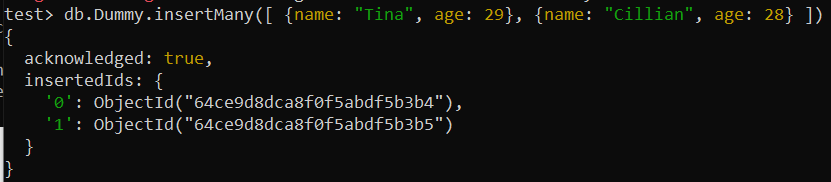
Although the insert() function is still usable, it is deprecated. Therefore, using the insertMany() function is recommended to insert multiple records into the collection. In our example, we have added two records in the collection using it at a time.
Display Records
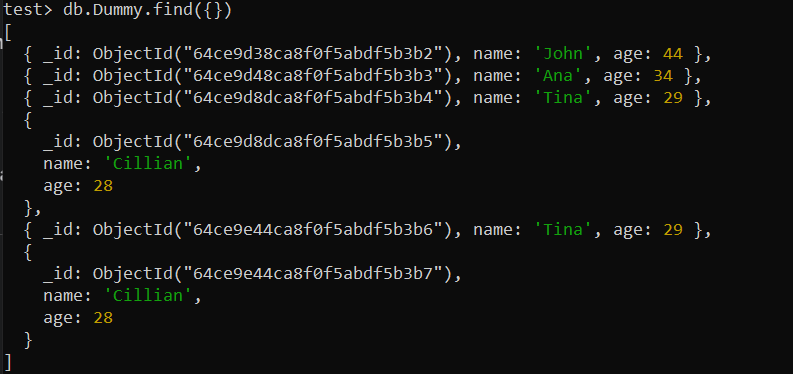
After inserting the required documents into the collection, the next step is to display those records on the MongoDB shell. For that, you just need the “find” function of MongoDB. You can simply use it to display all the records at once by not specifying any field, as follows:
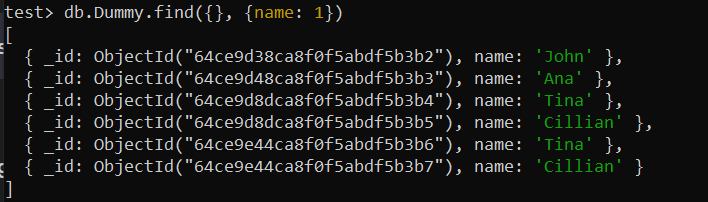
To display all the records for a specific field, set that field to “1” as follows:
To display a limited number of records, mention the condition according to your choice.

Update Records
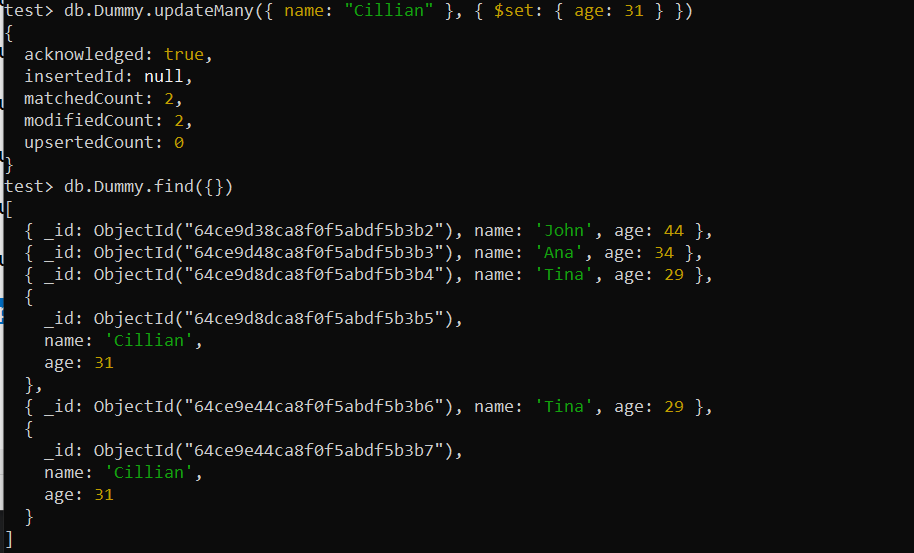
To modify existing records, you can use MongoDB’s update instruction to make changes according to your preference, both for single and multiple records.
test> db.Dummy.find({})
Delete Records
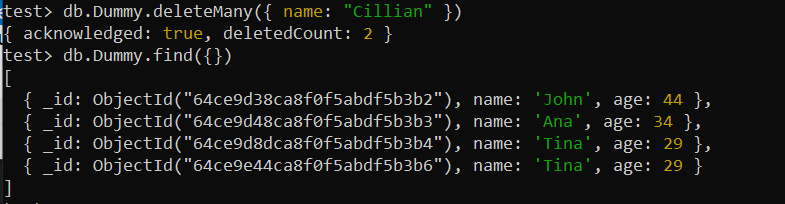
To remove and completely delete the existing collection records, MongoDB provides you with the delete() function.
test> db.Dummy.find({})
Conclusion
After going through the installation and connection of the MongoDB shell, we have elaborated on the ways to use and switch between its databases. The examples in this guide display the creation of database collections, the insertion of records, updating, deletion, and searching for records.
Source: linuxhint.com