How to Make a Read Only Channel in Discord
Discord is a digital platform that is utilized by different types of users to interact with people from all over the world. It also offers the functionality to make a read only channel in Discord. Read only channel was recently introduced as a new feature in the Discord application. In such type of a channel, only the host and admins are allowed to send messages and no other member can chat in it.
This blog will discuss the procedure to make a read only channel in Discord desktop and mobile application.
How to make a read only channel in Discord Desktop?
Follow the below instructions to make a read only channel in Discord desktop.
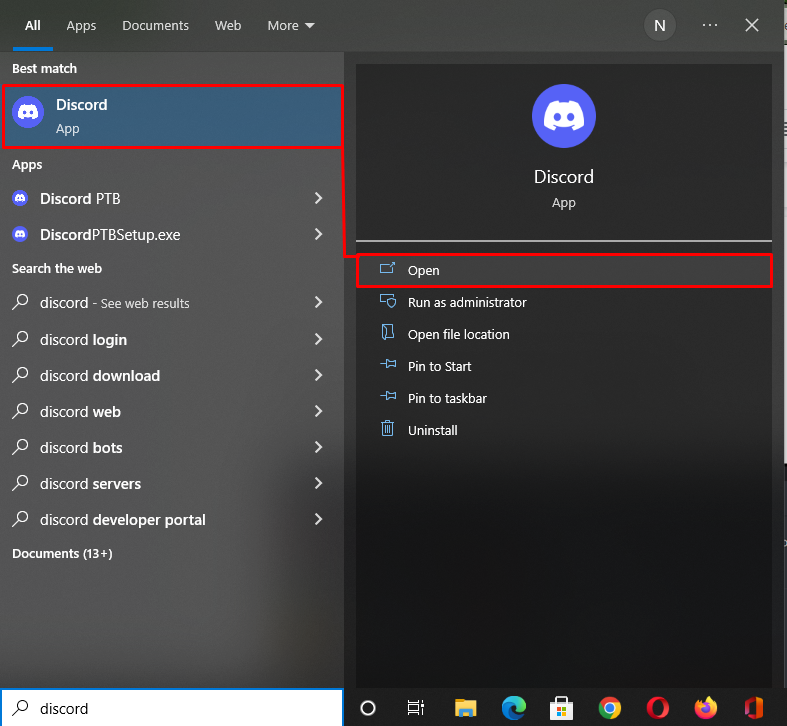
Step 1: Launch Discord
First of all, launch the “Discord” application on your system by using the “Startup” menu:
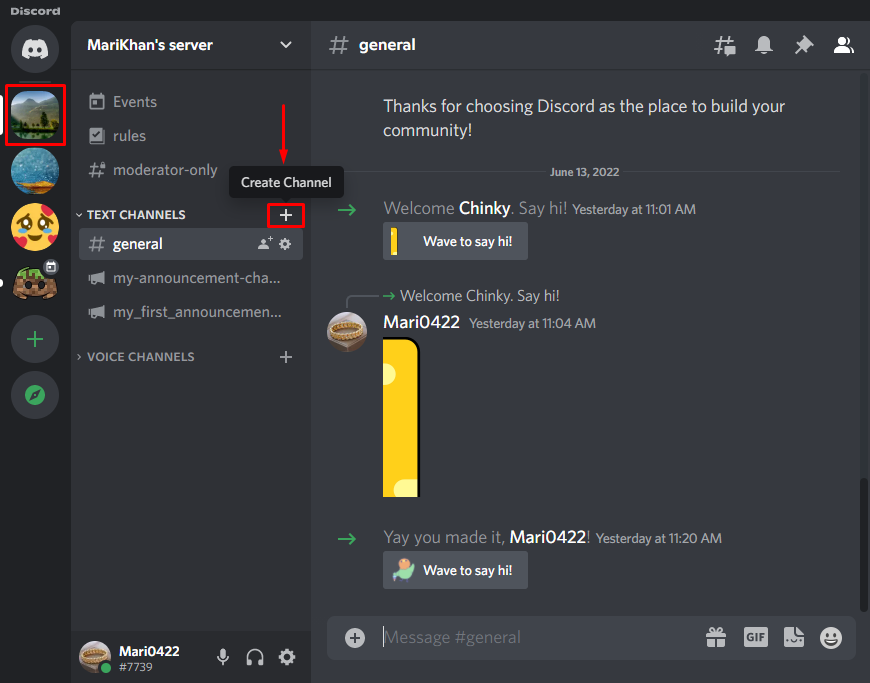
Step 2: Make read only Channel
Select the server and click on the “+” icon of the “Create Channel” option that is present next to the “TEXT CHANNELS”:
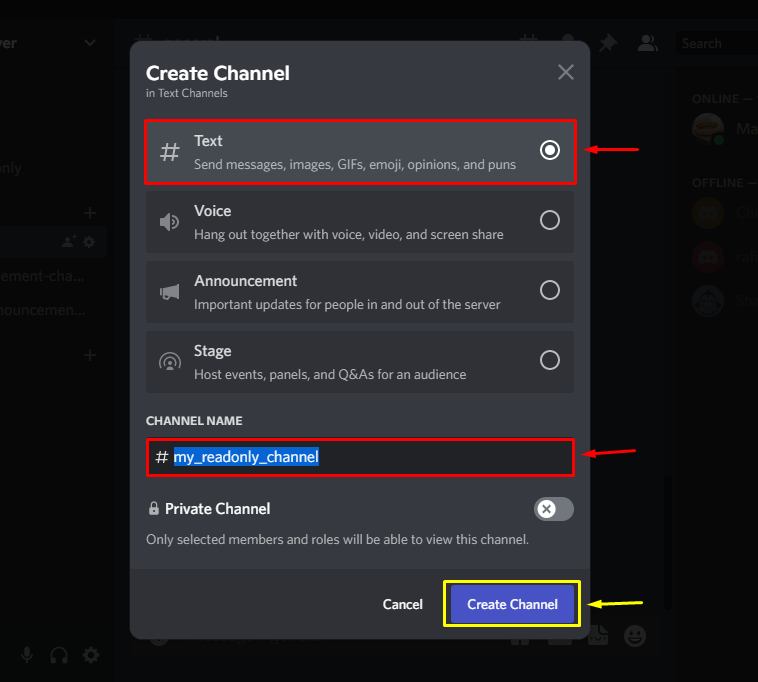
A pop-up window will now appear on your screen; mark “Text” as the channel type. Then, add the name of the channel inside the “CHANNEL NAME” field. In our case, we will make a read only channel named “My_readonly_channel” and hit the “Create Channel” button:
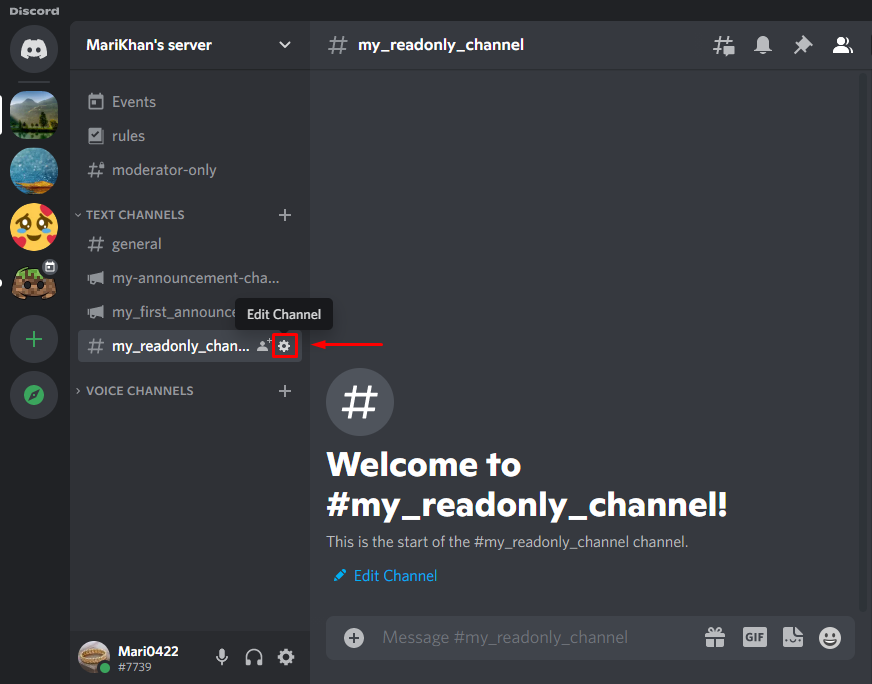
Step 3: Edit read only Channel
Go back to the main screen and view the newly created “My_readonly_channel” channel under the “TEXT CHANNELS”, then click on the gear icon to “Edit Channel”:
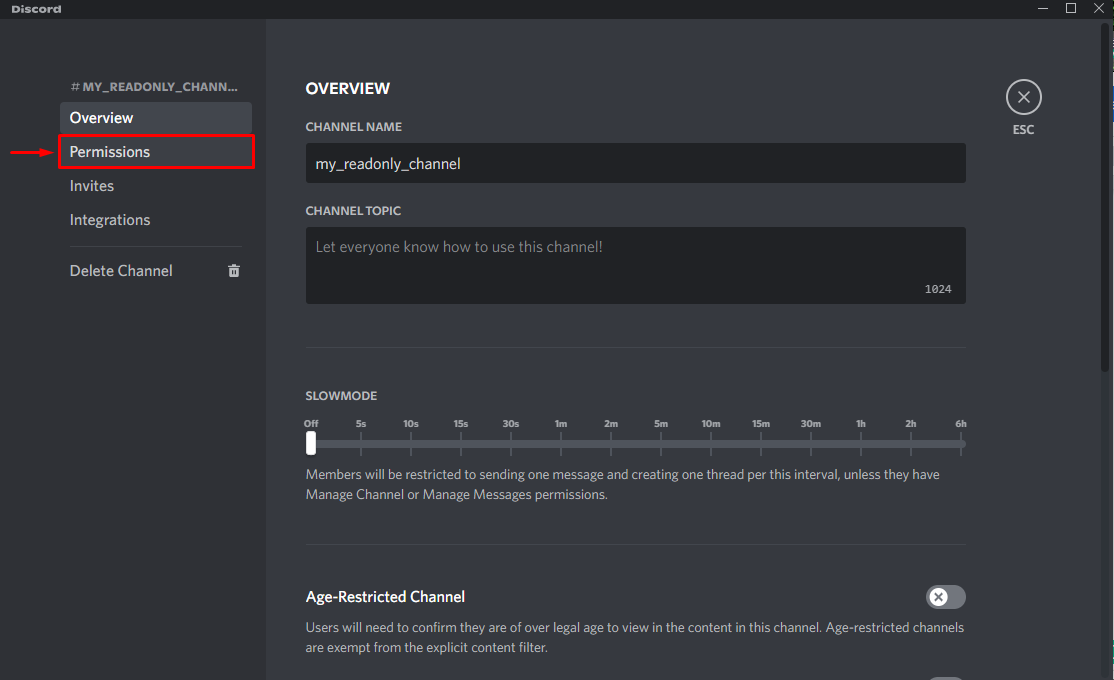
Step 4: Set Permissions
Now, click on the “Permissions” option from the left-side panel:
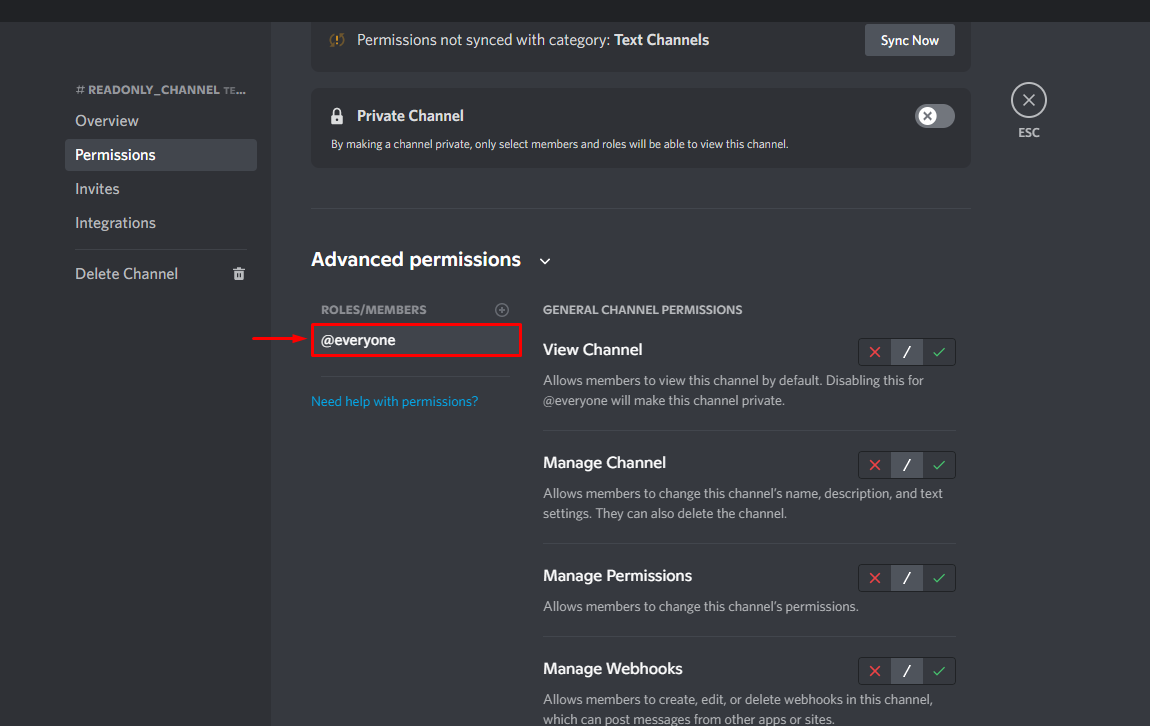
Next click on the “Advanced Permissions” section and enter the “ROLES/MEMBERS” field, choose who you want to disable from posting messages in your channel. In our case, we will select “@everyone”:
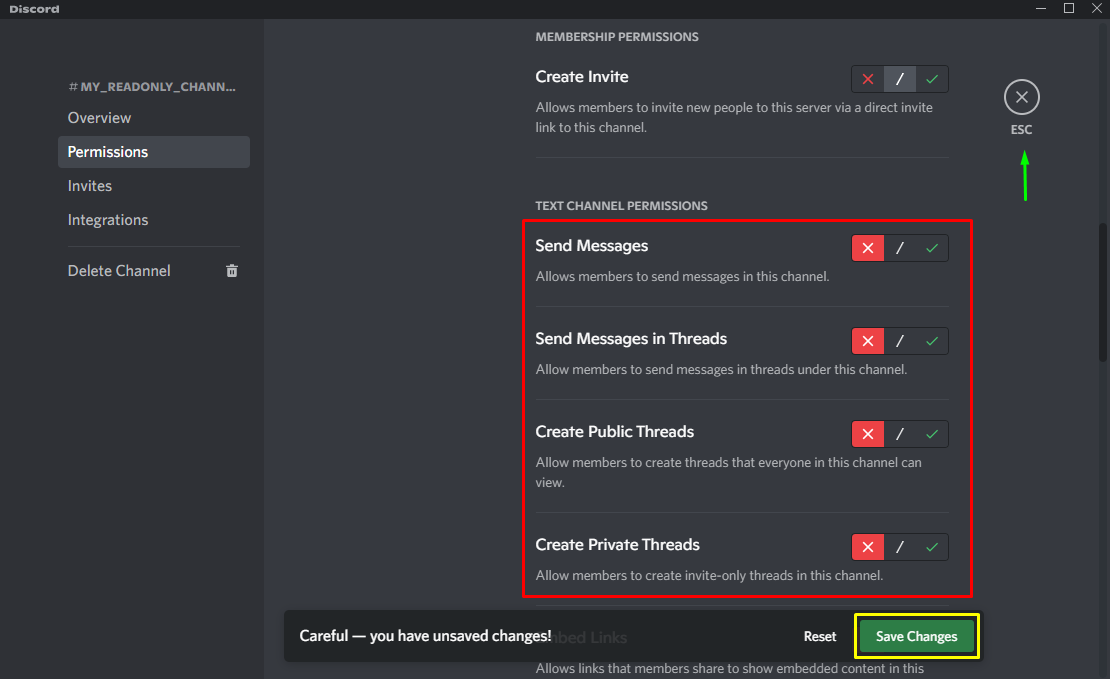
Then scroll down through the opened screen, and disable the below-highlighted option from “TEXT CHANNEL PERMISSIONS”. After doing so, click on the “Save Changes” button and press the “Esc” key for switching to the main Discord window:
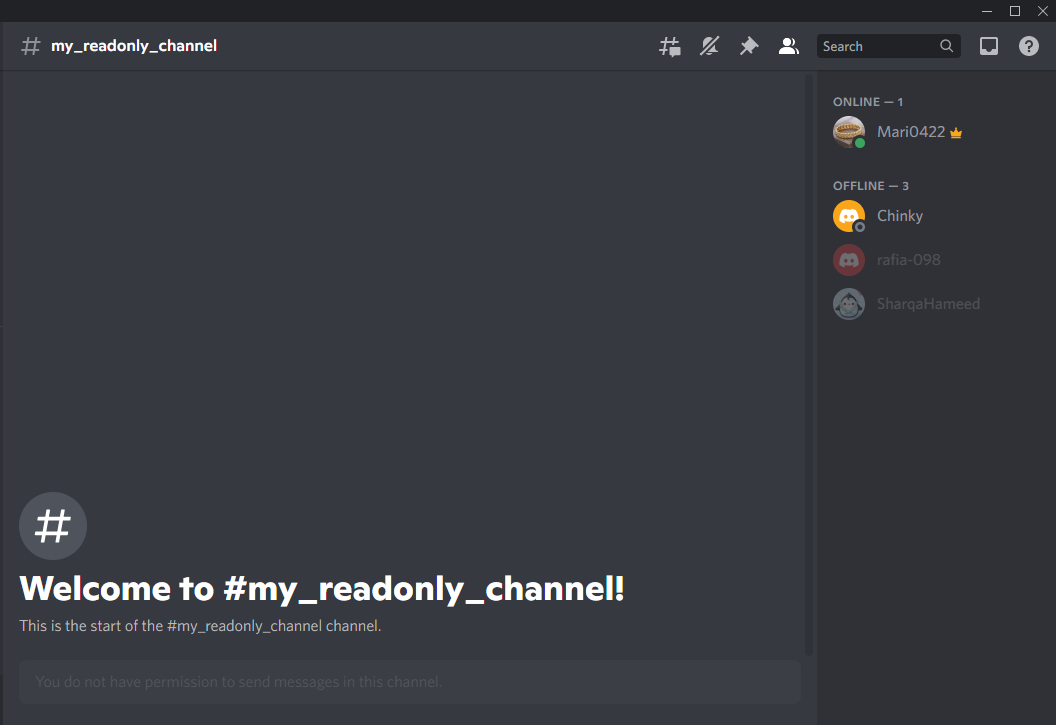
That’s all! We have successfully created a read only channel on the Discord server:
Now let’s check out the method of making a read only channel on the Discord mobile application.
How to make a read only channel in Discord Mobile?
Discord also allows its mobile users to make a read only channel on whichever server they want. To try it out, follow the below-given procedure.
Step 1: Open Discord
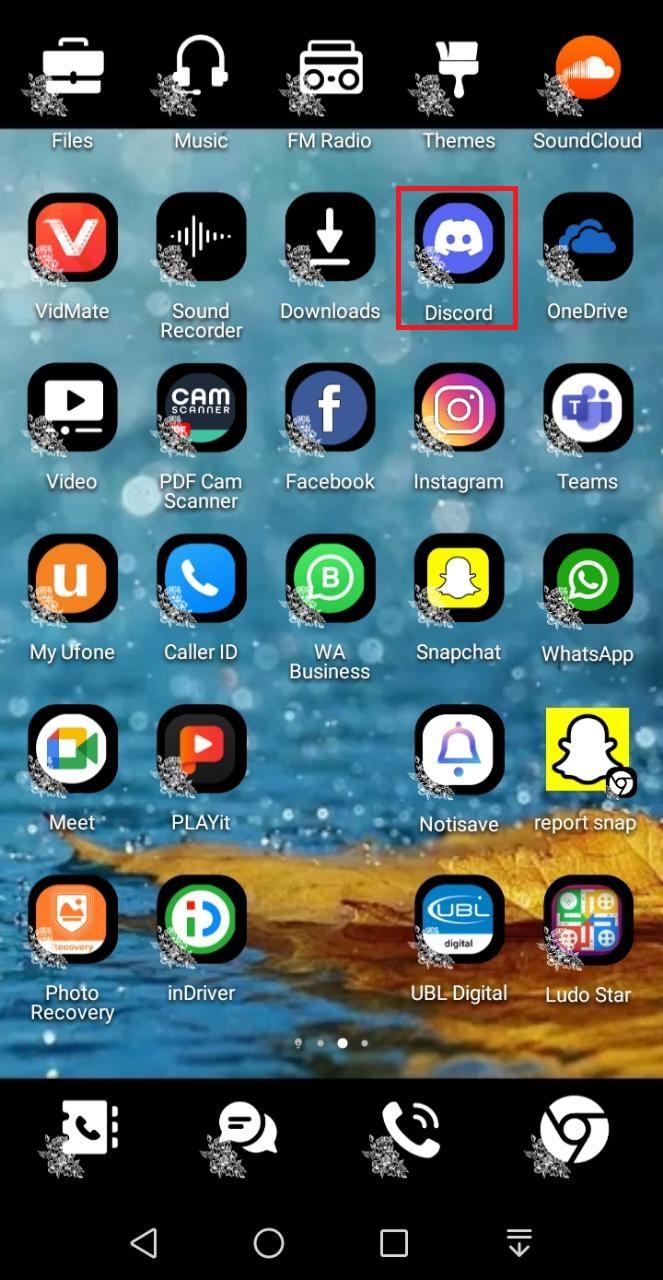
First of all, open the Discord application on your mobile:
Step 2: Make read only Channel
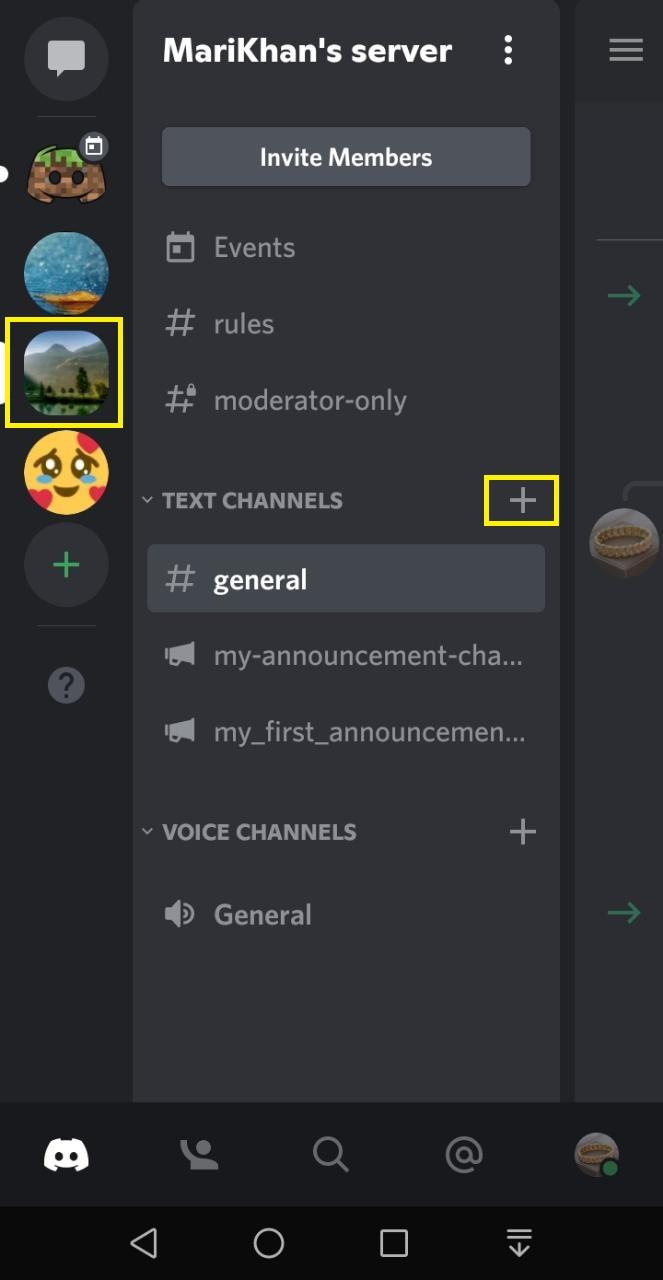
Select a Discord server and tap on the “+” icon to “Create Channel” present next to the “TEXT CHANNELS”:
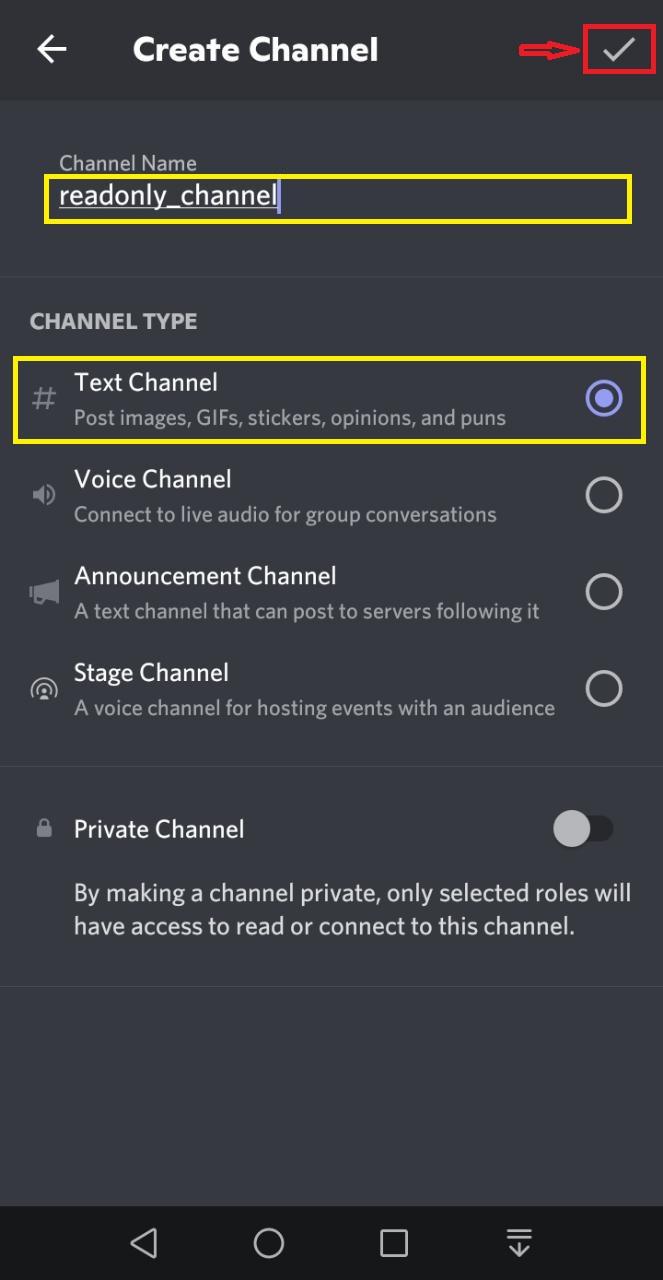
Specify the channel’s name in the “CHANNEL NAME” field and mark “CHANNEL TYPE” as “Text Channel”. In our case, we will make a read only channel named “My_readonly_channel” and tap on the highlighted “tick” icon:
Step 3: Edit read only Channel
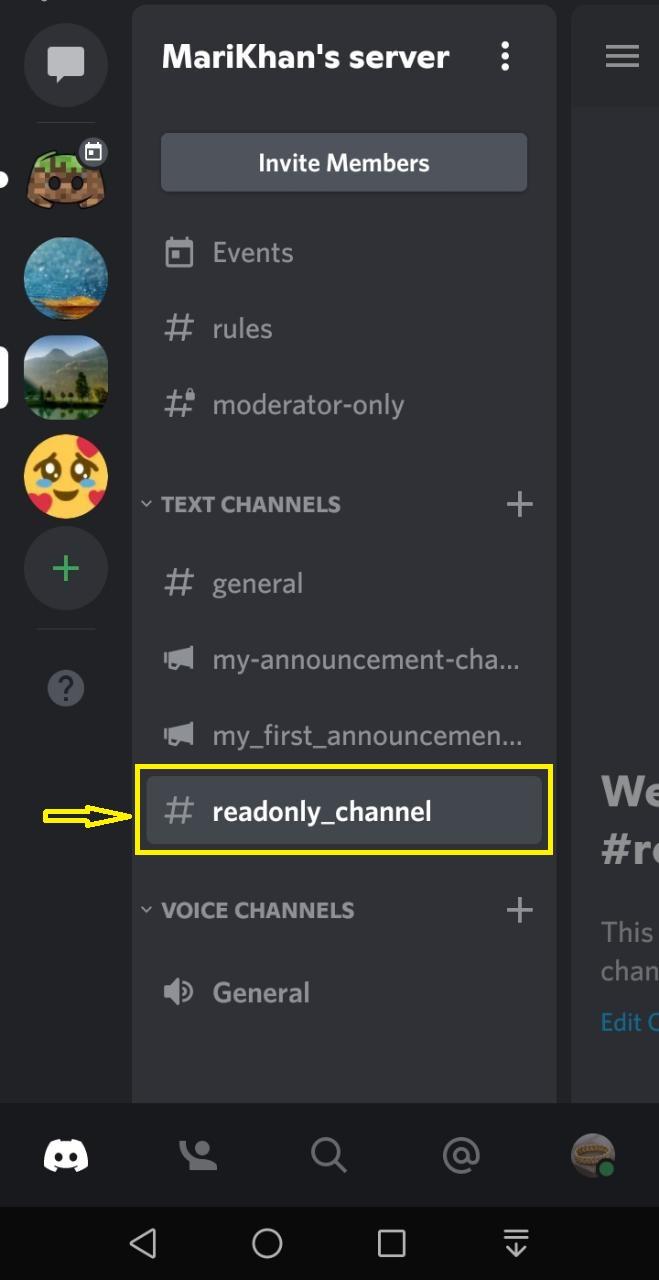
Go back to the Discord main screen, view the newly created “My_readonly_channel” channel under the “TEXT CHANNELS” category, and long-press on the newly created channel:
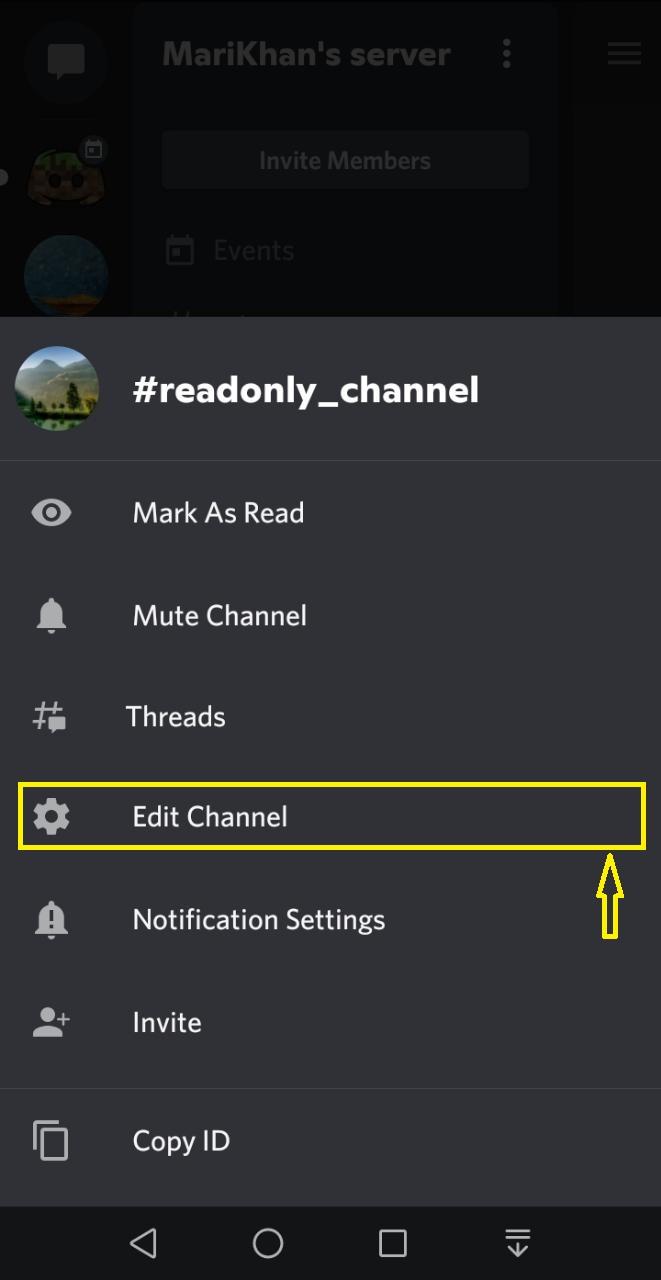
Next tap on the “Edit Channel” option:
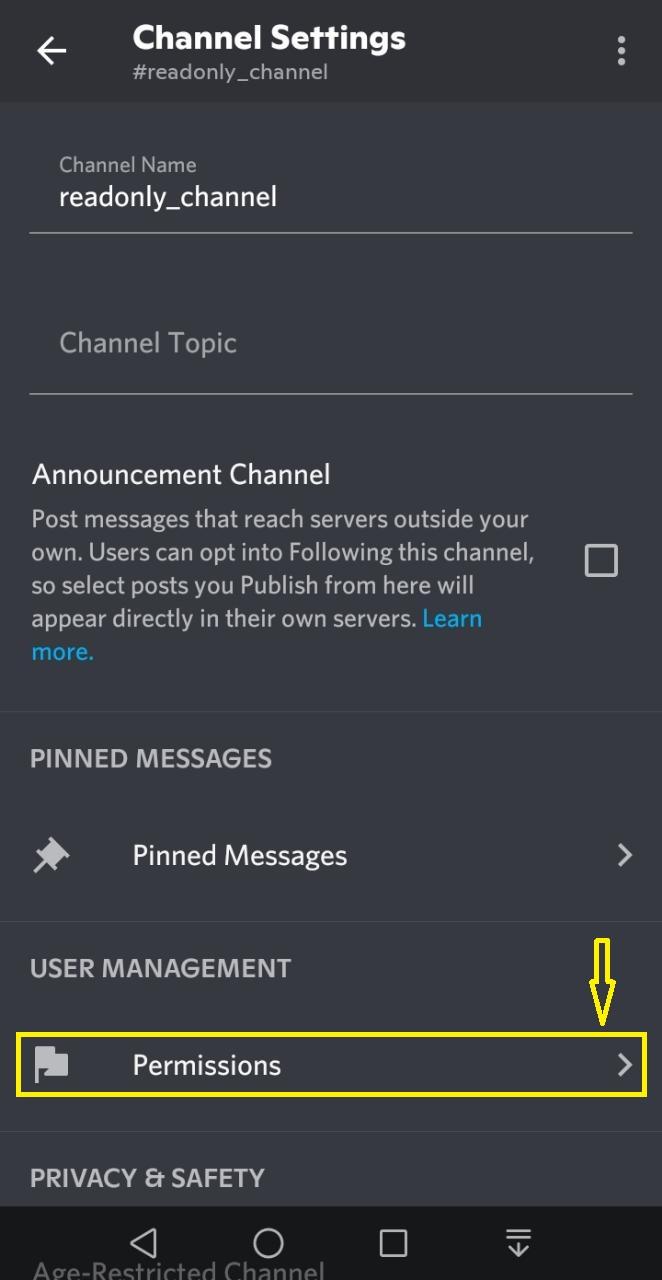
Step 4: Set Permissions
Tap on the “Permissions” option of the “USER MANAGEMENT” category:
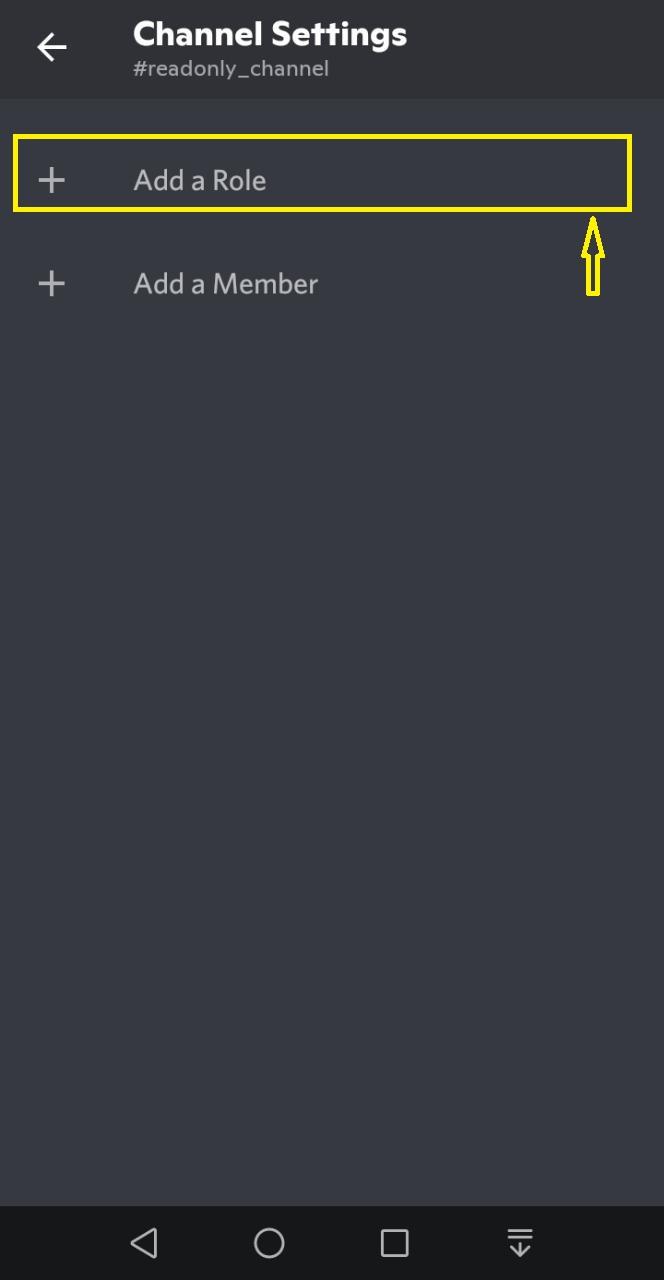
Then, tap on the “Add a Role” option:
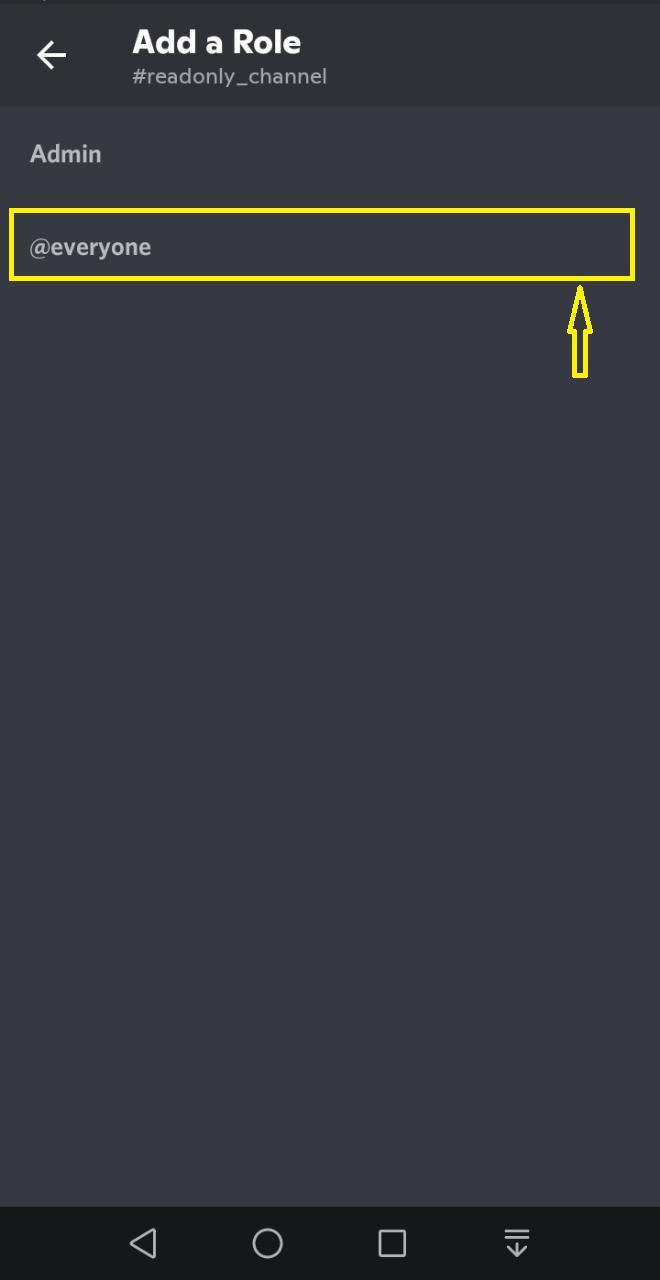
Choose who you want to disable from posting messages on your channel. In our case, we will select “@everyone”:
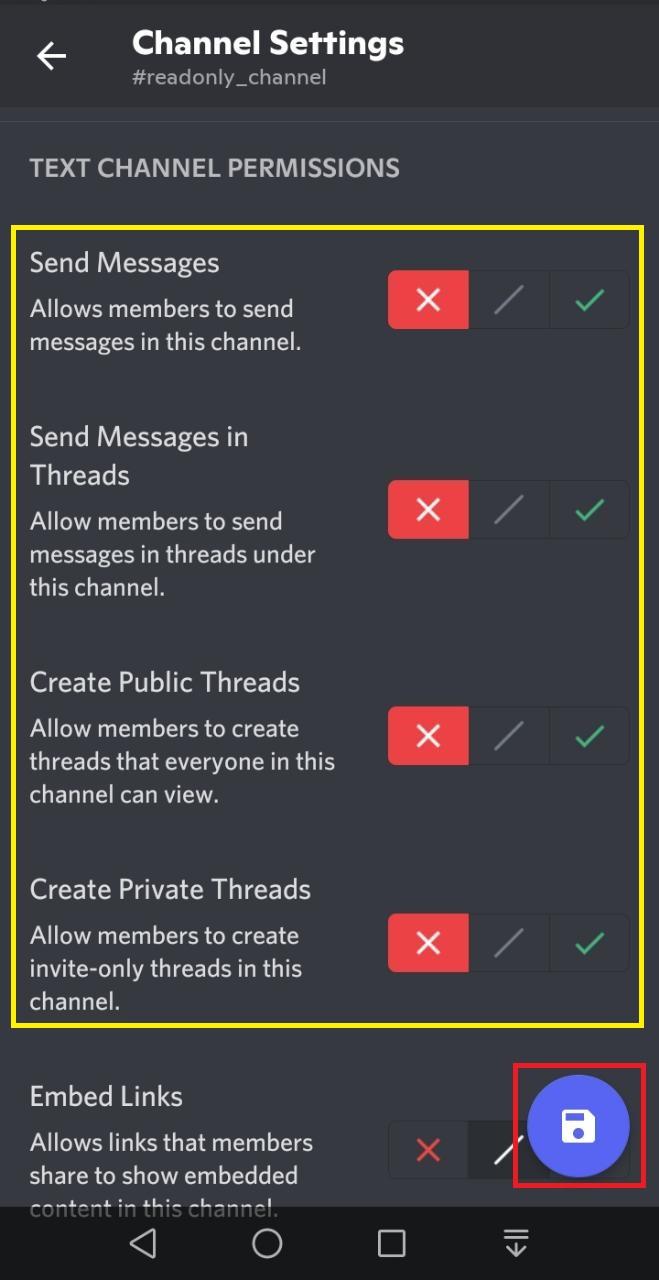
Scroll down the opened screen, and disable the below-highlighted option from the “TEXT CHANNEL PERMISSIONS” category. After doing so, tap on the below-highlighted icon to save changes:
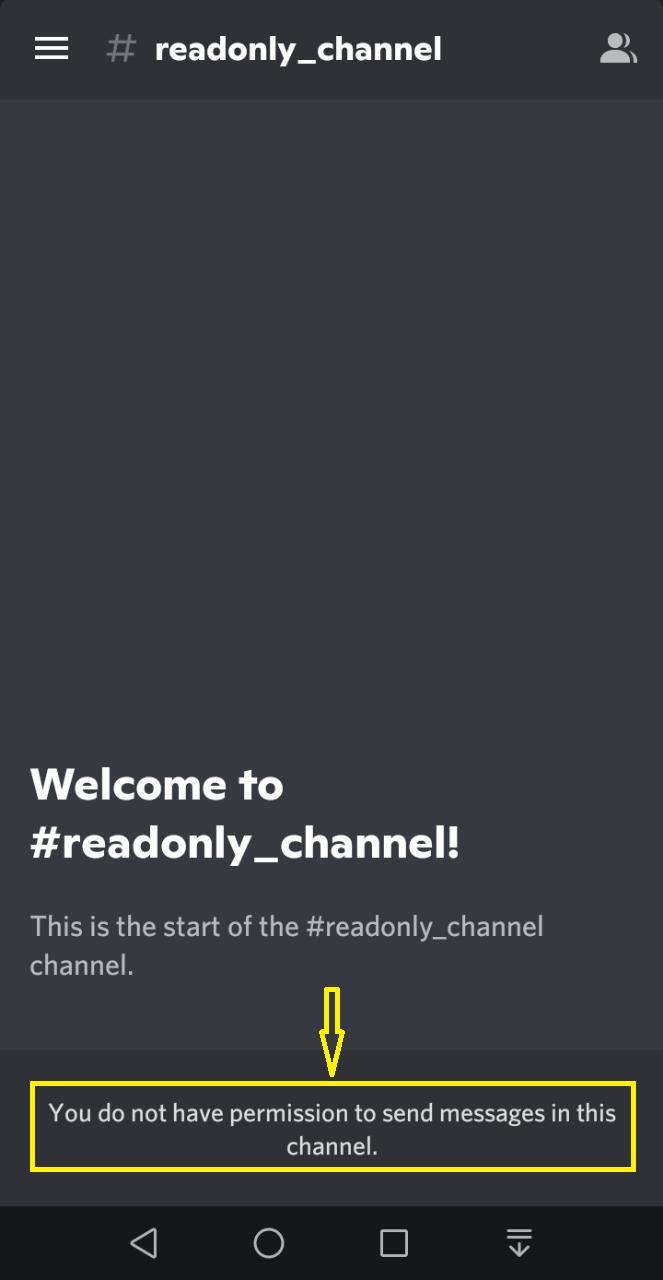
As you can see, we have successfully made a read only channel and the server members will not be able to send messages in this specified channel:
That was all about making a read only channel in Discord desktop and mobile applications. Give it a try on your system.
Conclusion
To make a read only channel in Discord desktop and mobile applications, firstly create a new channel. For this purpose, select a Discord server, click on the “+” icon beside the “TEXT CHANNELS”, set the Channel name, and click on the “Create Channel” button. After doing so, go back to the Discord main screen, click on the newly created server, set its permissions, and click on the “Save Changes” button. This blog demonstrated the method to make a read only channel in Discord desktop and mobile applications.
Source: linuxhint.com