How to Make a Rainbow Banner in Minecraft
Making a White Banner in Minecraft
Making a custom banner requires you to craft two necessary items which are as follows:
- Wool
- Stick
Let’s discuss these two items and how you can make them.
Making Wool in Minecraft
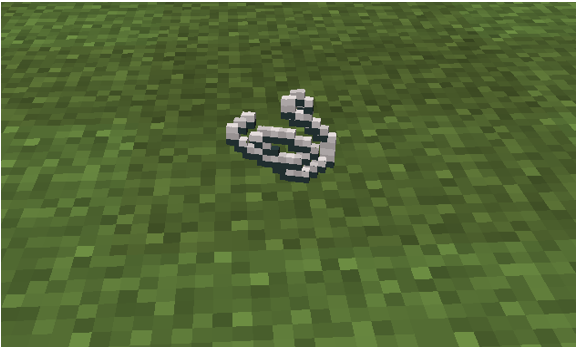
You need to gather 4 pieces of string to make wool that you can do this by killing spiders that usually spawn at night or in places with minimum to no light. They usually have a black body with red eyes and mouths that will attack you when the light level is 11 or below even if you don’t attack them first.
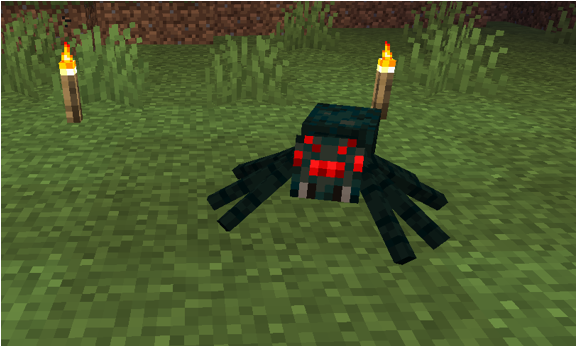
Killing them will drop 1 to 2 pieces of string so you need to kill around 2 spiders to make wool.
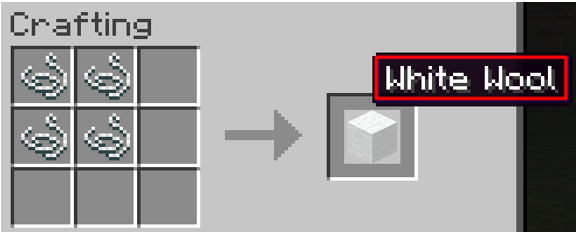
You can get more details about strings and their uses by reading this article. Now after getting the required quantity all that is left is to open a crafting table and place them inside it as shown:
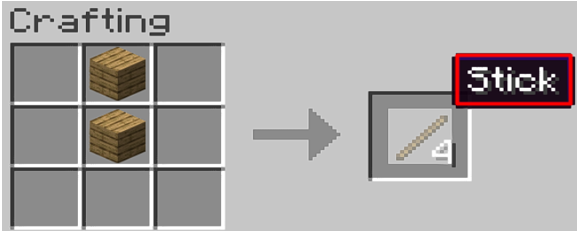
Making Sticks in Minecraft
Sticks can be made by using 2 wooden planks on the crafting table.
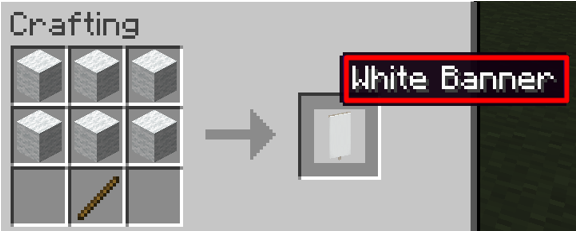
After acquiring the required items, you can make a basic white banner by following the recipe below:
You can get more details on how you can make a custom banner by reading this article.
How to Make a Colored Banner
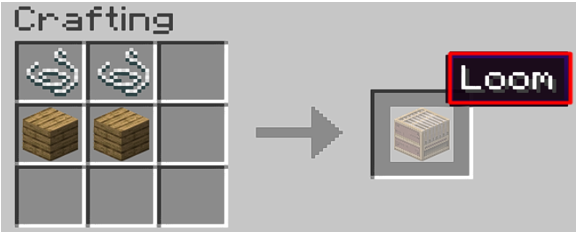
For making a colored banner you will need a loom and a dye of the color that you want to implement on the banner. To make a loom you will need 2 pieces of string and planks and the detailed process of making and using a loom has been discussed in this article.
How to Use a Loom to Make a Colored Banner
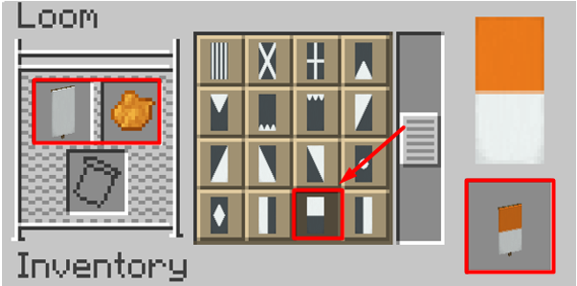
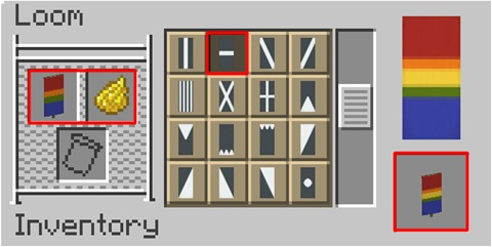
When you access the loom, you will see an interface as shown in the image below:
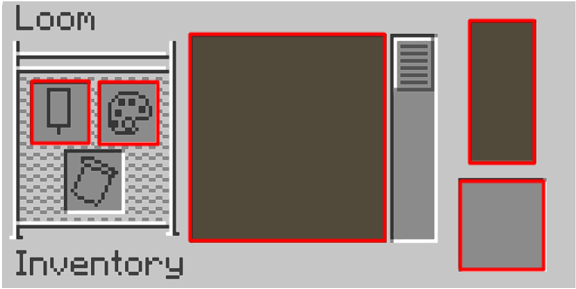
Starting from the left you need to place your banner on the first slot and the dye of your choice on the second slot. Doing that will provide you with multiple options for making a design on the banner that you can see on the right side whereas the output will be shown on the middle slot.

In the same way, you can use multiple dyes as well by applying any dye first and then placing that banner again on the left slot and applying any other dye there.
You got the basic idea of how you can apply multiple dyes on a banner now hold for a second and imagine how you can create a rainbow banner using the instruction mentioned above. Let me clarify this for you in the section below if you’re still unclear.
How to Make a Rainbow Pattern on a Banner
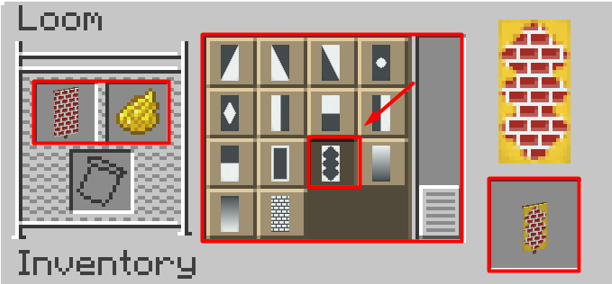
Step 1: Use the orange dye first and select the design shown below:
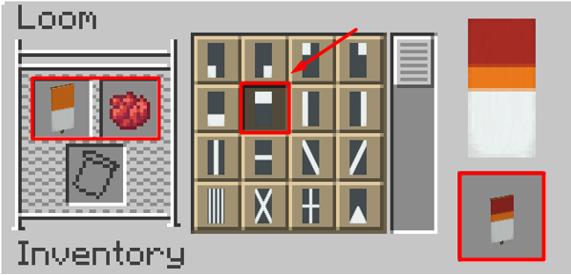
Step 2: Use the red dye now:
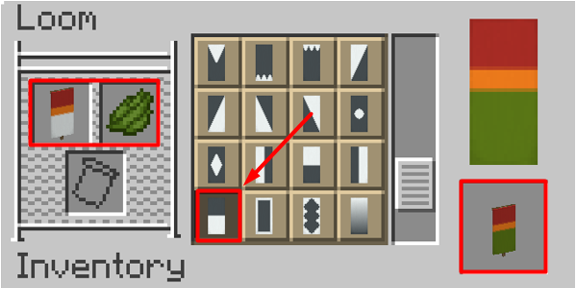
Step 3: Now start from the bottom and use a green dye by following the mentioned pattern.
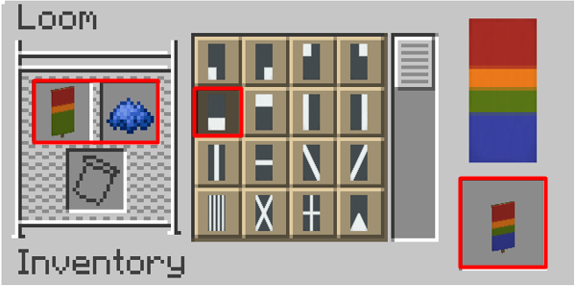
Step 4: In a similar way, now apply the blue dye using the pattern shown below:
Step 5:
This is the last step where you need to place the yellow dye with the selected pattern.
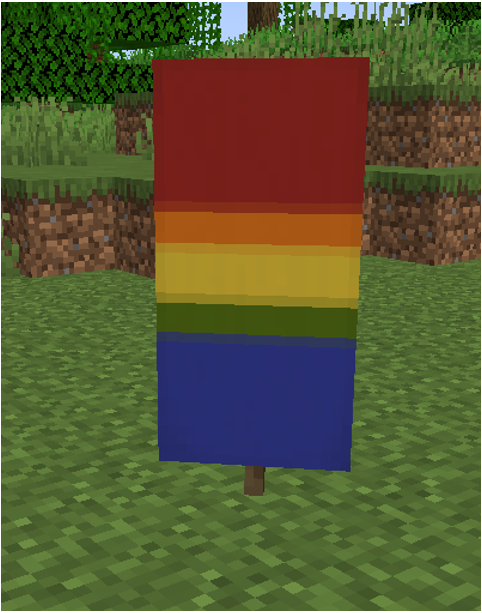
This is how a rainbow banner will be displayed when you place it on the ground.
Conclusion
A banner is just like a flag that represents you and your tribe that you can place anywhere closer to your surroundings. You can use any pattern or color to make a design of your choice and one such that you can implement on the banner is the rainbows that we have discussed in this article.
Source: linuxhint.com