How to Install Windows on a Laptop After Replacing a Hard Drive?
Things to Remember
- Backup all your data to cloud before you begin the process
- Create a recovery disk that your laptop will use to boot up the new driver
How to Install Windows on a Laptop After Replacing a Hard Drive?
The simplest way to install the windows on a laptop after replacing the hard drive is installing Windows with a USB Drive. The step-by-step process of installing Windows on a newly installed hard drive is mentioned below:
Installing Windows with a USB Drive
If you are replacing your hard drive and upgrading the window to achieve better performance, follow these steps to install windows with a USB drive on your laptop:
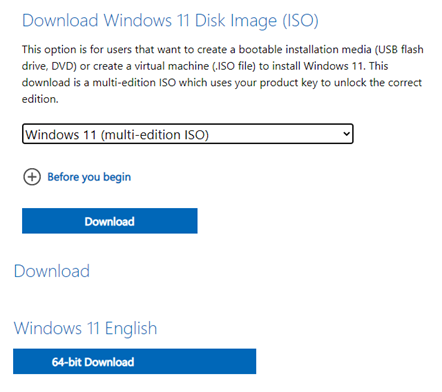
Step 1: Download the ISO file of windows in the USB drive:
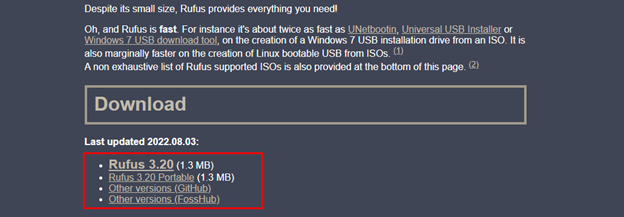
Step 2: Download Rufus from the official website to create a bootable USB:
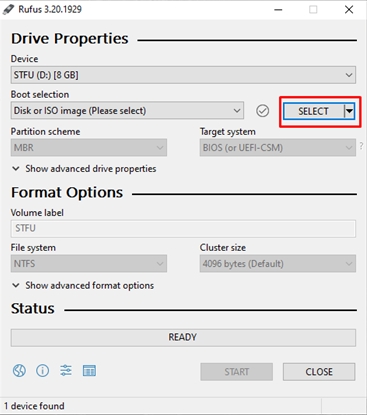
Step 3: In the device option select the USB drive and ISO file on your computer and click on the Select option:
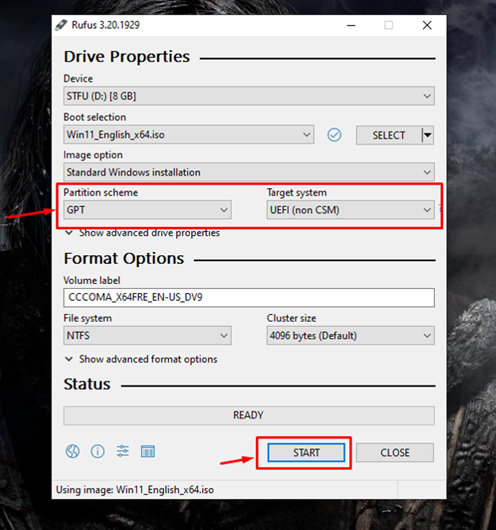
Step 4: If you have UEFI system then you have to select GPT partition otherwise for BIOS system select MBR:
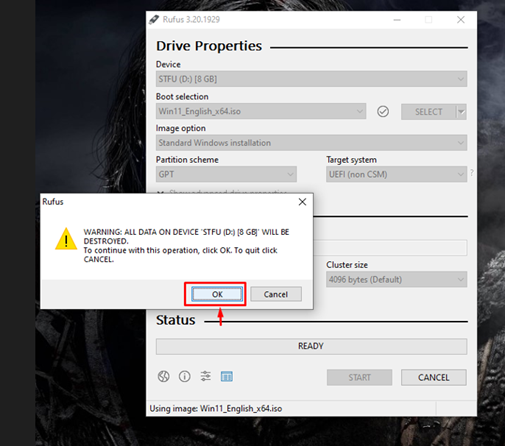
Step 5: In this step a pop-up screen will appear with the warning message click on OK to continue:
Step 6: The bootable process will start:

Step 7: Now install Windows on the new hard drive.
Step 8: Connect the Windows installation USB drive with laptop and turn it on.
Step 9: Laptop will boot the USB drive if not then input BIOS and set the computer to Boot from USB drive.
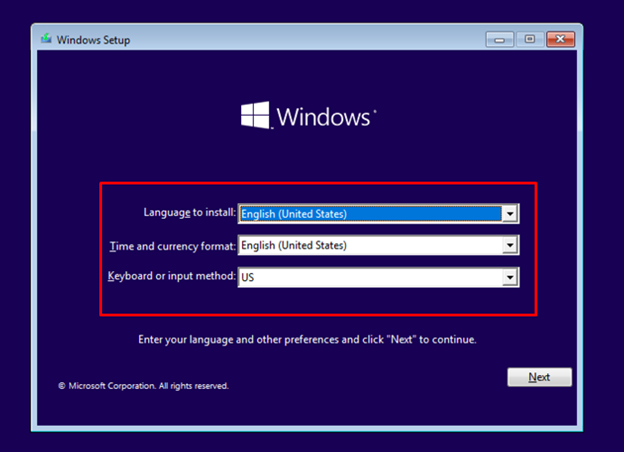
Step 10: Select the different options i.e., language, time and keyboard or input method:
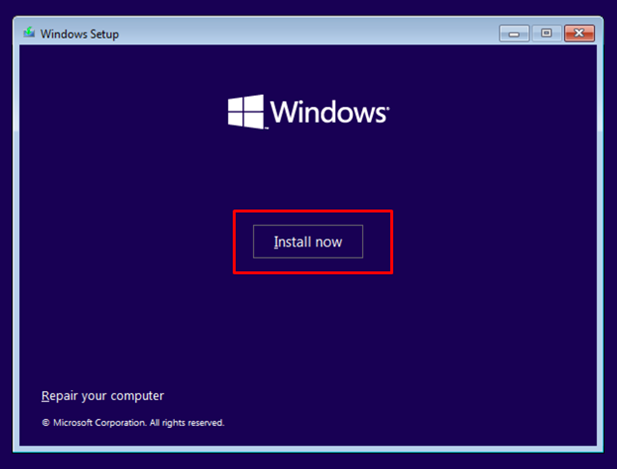
Step 11: Click on the Install Now button:
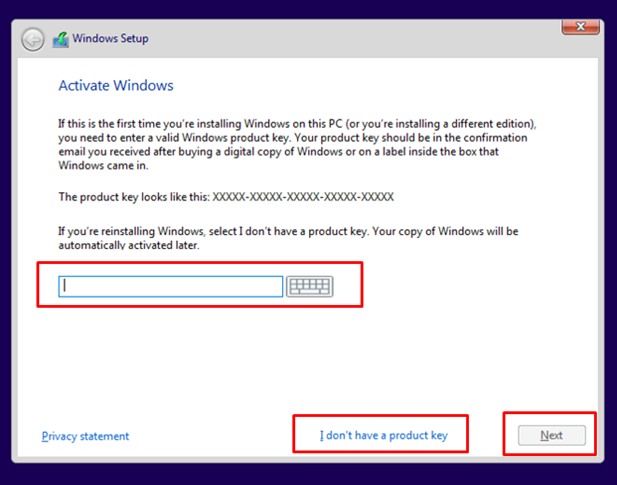
Step 12: Enter the Windows 10 license key or select “I don’t have product key”:
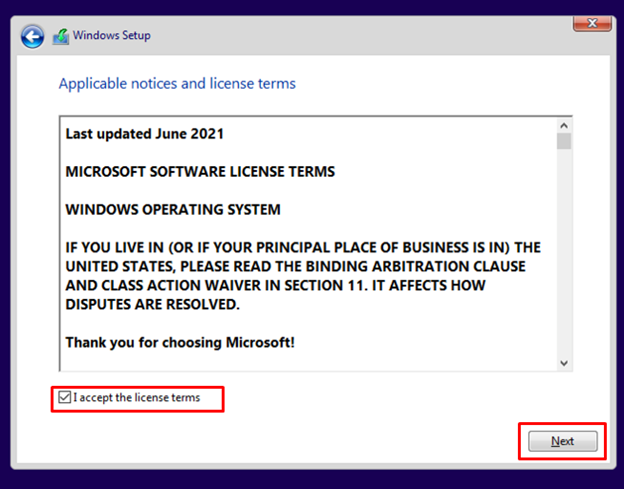
Step 13: Check the terms and conditions and accept the License and select Next:
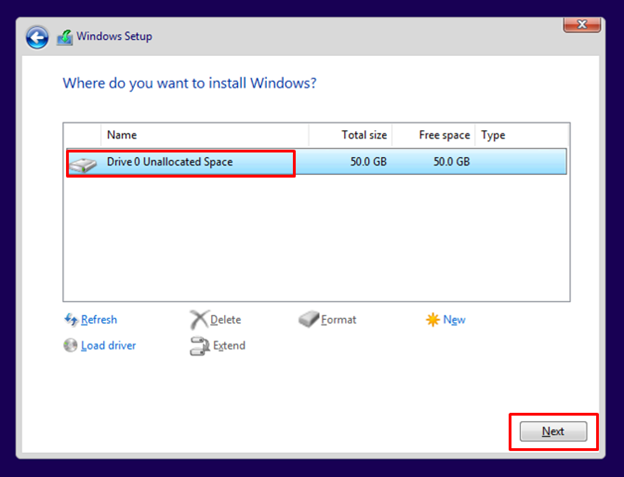
Step 14: Select the preferred drive location:
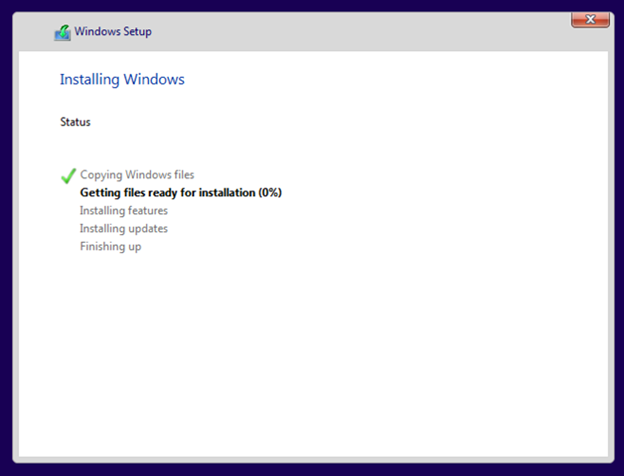
Step 15: Windows will start installing on your hard drive and the installation process depends on the speed of your hard drive and your laptop processor.
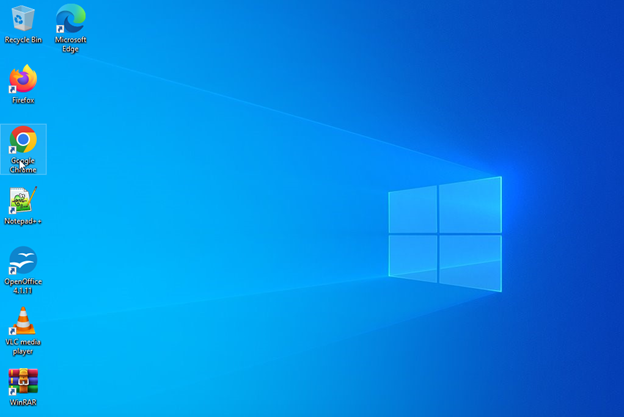
Step 16: Now sign in to your computer with your Microsoft account and your laptop is ready to use.
Conclusion
To achieve better results and performance when your hard drive gets full, simply upgrade your hard drive with an SSD or another hard drive and install a new Windows on your laptop. The simplest way to install windows on your laptop is through a USB drive. To install windows on your laptop, follow the above-mentioned information.
Source: linuxhint.com