How to Install the Gnome Tweak Tool on Ubuntu 22.04
Installation of Tweak Tool on Ubuntu
To install Tweak Tool on Ubuntu, you must adhere to the detailed instructions provided below.
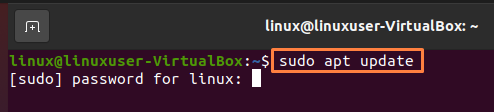
Step 1: Update System Repositories
You can press “CTRL+ALT+T” to launch the terminal on your Ubuntu computer. After opening the terminal, updating your system is strongly advised before adding any new tools. By doing this, you not only make sure that your new packages are installed without issue but also that your system is prepared to handle the most recent updates. You must run the command provided below to update the system repositories and press the Enter key to accomplish that:
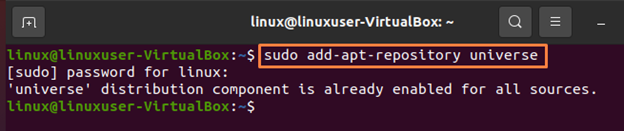
Step 2: Activation of “Universe Repository”
Checking whether the Universe repository is enabled on your system is the next thing you should do when your system has successfully been upgraded. Run the following command at the command prompt to check if the system’s universe repository is enabled or not:
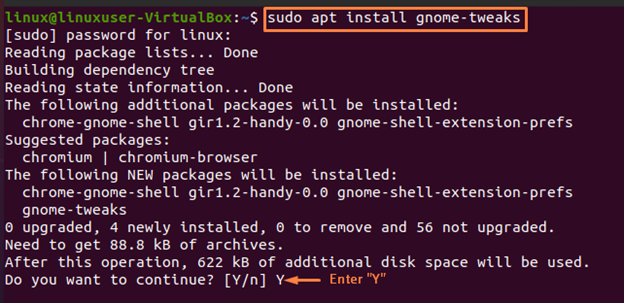
Step 3: Installation of Tweak Tool
The Tweak tool may be installed on Ubuntu in the next step by using the following command:
The installation of the Tweak tool will take some time to complete; therefore, you’ll need to wait:
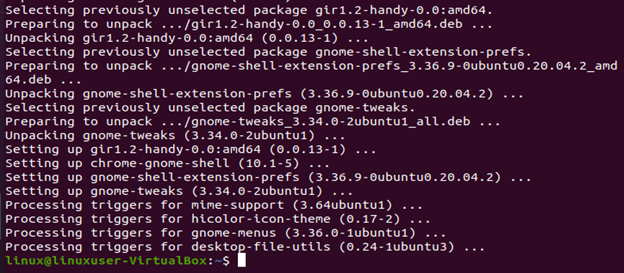
The output is error-free, which means we were successful in setting up the Tweak tool on our Ubuntu system.
Step 4: Launch the Tweak Tool
The Tweak tool is ready for usage if you attentively follow the procedures above. Run “gnome-tweaks” in the terminal to bring it up:
![]()
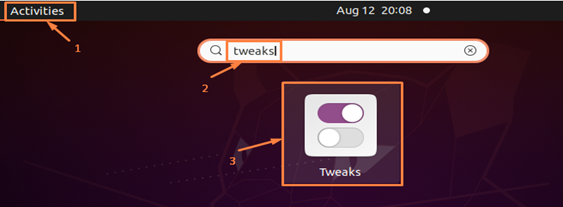
In addition, you can look for the “tweaks” tool under “Activities” and access it there:
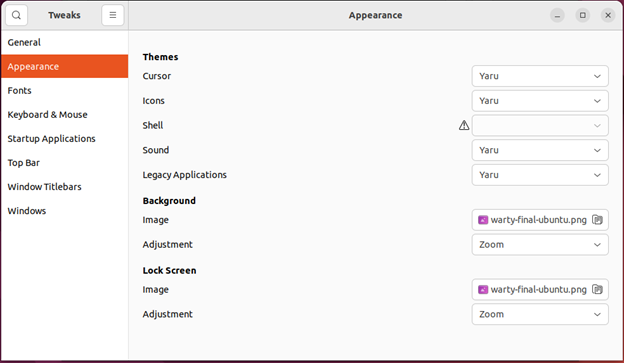
The GUI for the Tweak tool will look like this:
Step 5: Install Additional Extensions
This step can also be considered an optional step. The Tweak tool also has the ability to add new extensions, which can be used to improve the system even further. To see if the gnome-shell-extensions are available, type the command below:
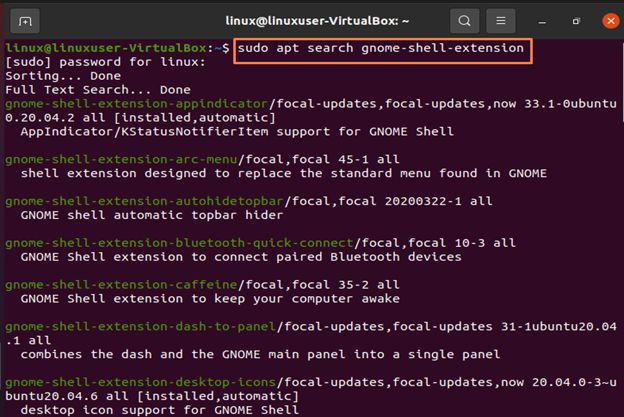
When this command has finished running, your terminal will display a list of all the Gnome Tweak Tool extensions that are currently available.
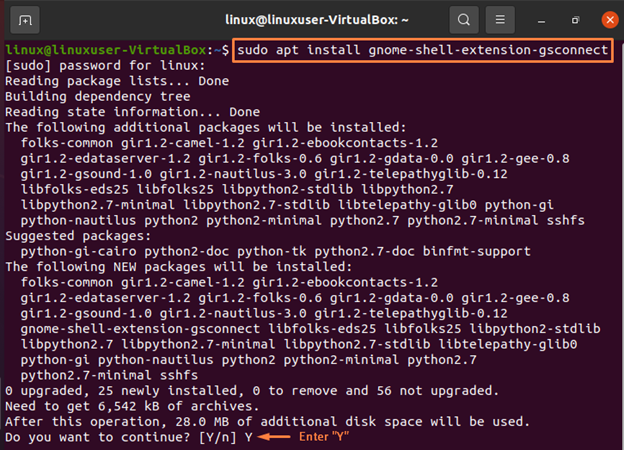
You can install a single tweak extension or all accessible extensions at once, depending on your needs. For instance, issue the following command in order to install the “gnome-shell-extension-gsconnect” extension:
In order to install each extension for Ubuntu’s Tweak tool, simply issue the command below:
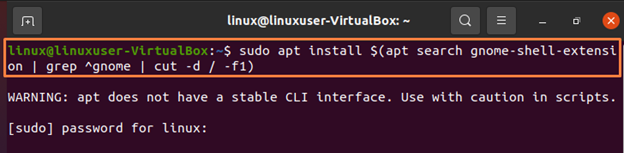
This command will take some time to complete since it needs to enable all of the Gnome Tweak Tool’s available extensions. If there are no errors, then we have successfully installed every Tweak tool extension.
How to Remove Tweak Tool From Ubuntu
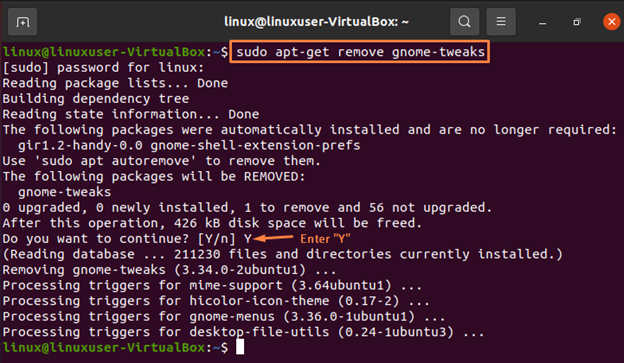
To uninstall the Tweak tool on Ubuntu, just issue the command shown below:
Conclusion
By doing so, you can quickly install the Gnome Tweak Tool and its extensions on your Ubuntu system and then personalize your Ubuntu system’s interface. Using the aforementioned commands, you can also look for new tweak tool extensions in the repository.
Source: linuxhint.com