How to Install TeamSpeak on Linux
TeamSpeak is a great application that uses VoIP to facilitate audio communication on a chat channel. Besides, it is a free voice conferencing application that supports Linux and other systems. It is an alternative to software like Discord. With TeamSpeak, you can get in touch with people via text and speech, especially for gamers who need to communicate among themselves.
Moreover, TeamSpeak works for meetings, conferences, and online courses. There are different ways to install TeamSpeak on Linux and we will cover three common methods in this guide.
Install TeamSpeak on Linux in Three Ways
We will cover three ways of installing the TeamSpeak Client on Ubuntu. The methods below work for Debian systems and Ubuntu:
1.Using the Installer
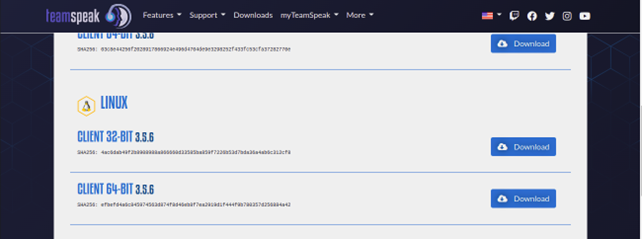
TeamSpeak client has an installer for 32 and 64-bit architecture available for download from its official website. Make sure you download the appropriate version and you can use the uname -m command to confirm your machine version.
Click here to open the download page, choose the appropriate architecture, and click the Download button.
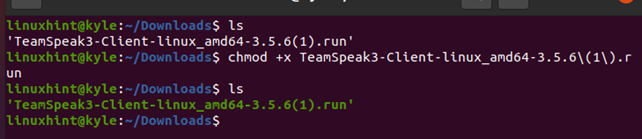
Make the downloaded file executable by navigating to the download directory and changing the file permissions, as shown.
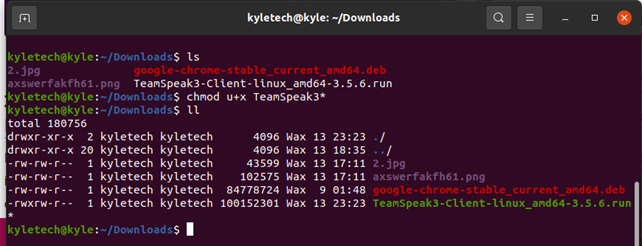
Making the file executable allows running it on your Linux and you can confirm the permissions using the long listing command.
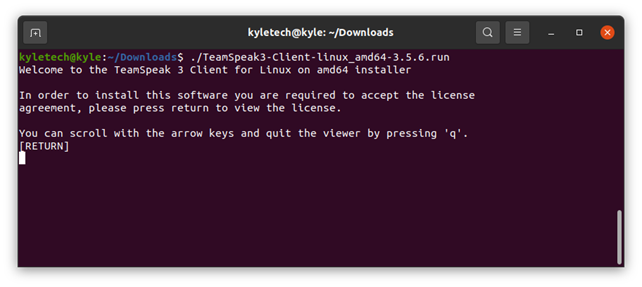
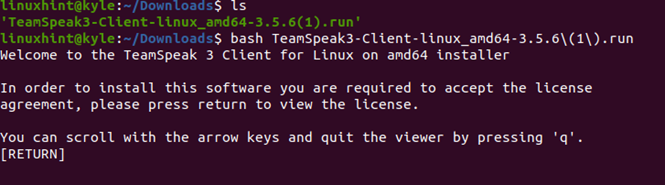
The next thing is to install the software and you can do that by running the installation script.
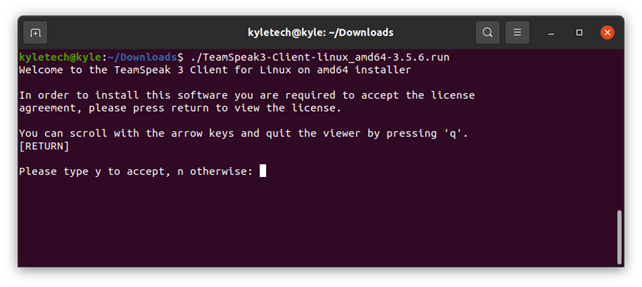
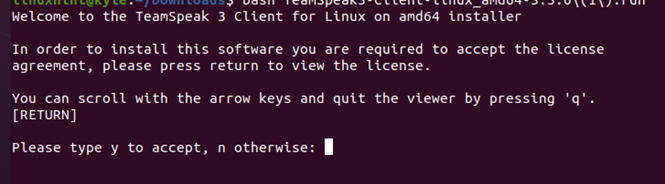
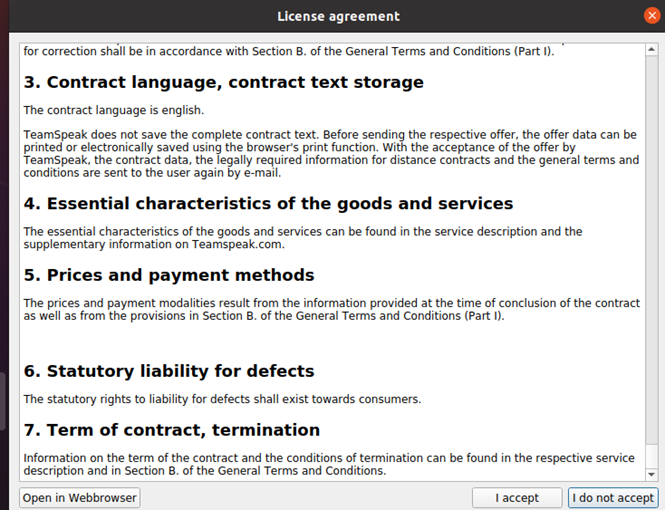
You will need to accept the license agreement on the screen. For this, press the Enter key to view the license text, navigate using the arrow keys, and use q to exit the license text.
When prompted to proceed with the installation, type “y” to accept and TeamSpeak will successfully install on your system.
To better and easily access TeamSpeak, you must create a launcher and shortcut. If the steps are properly followed, your TeamSpeak should be in the Downloads/, which is not safe. Therefore, it is best to move it to another place using the command below.
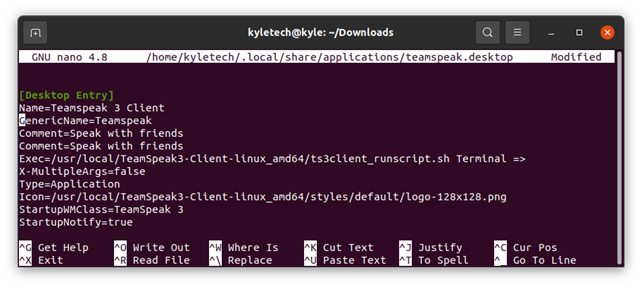
Next, let us create a shortcut launcher. For this, you need to create a new file using an editor. In our case, we are using a nano editor. Name the file any name provided you remember it such as teamspeak.desktop
Once you have the file opened with nano, insert the lines below.
Save and exit the file. TeamSpeak should now be available in your applications.
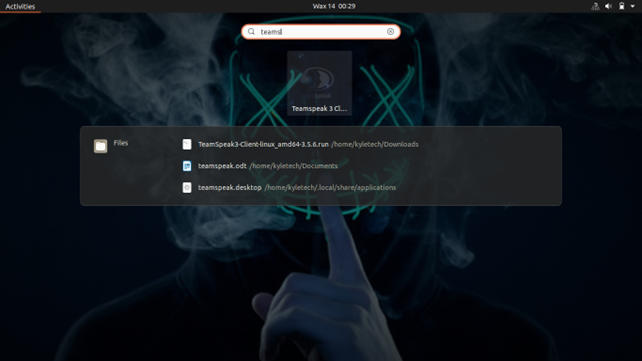
To create a desktop shortcut, run the command below.
The name should match the one you named the file above using nano editor.

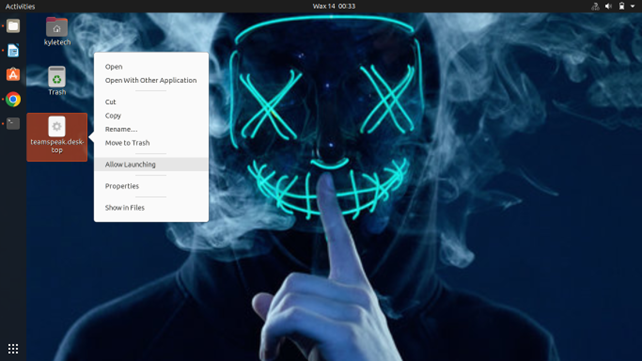
Open your Desktop and right-click the file to enable the Allow Launching option.
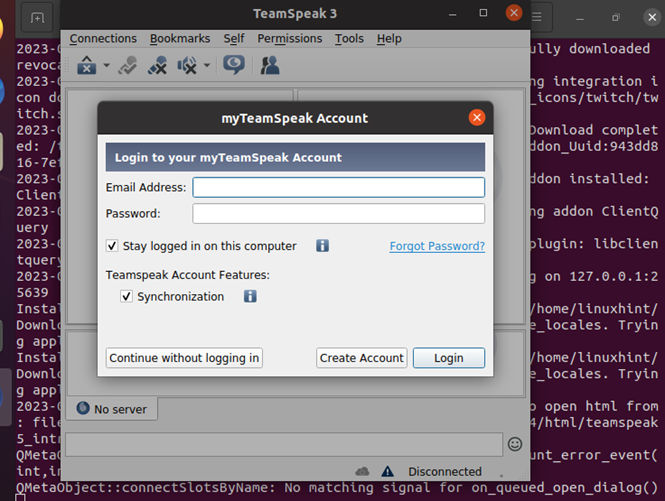
TeamSpeak is now successfully installed on your system. When you open it, you should see a screen like the one below, confirming the installation was successful.
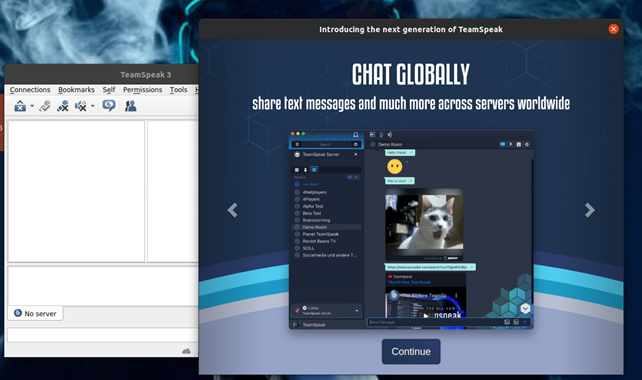
You will also need to enter your email and password for logging in during sessions.
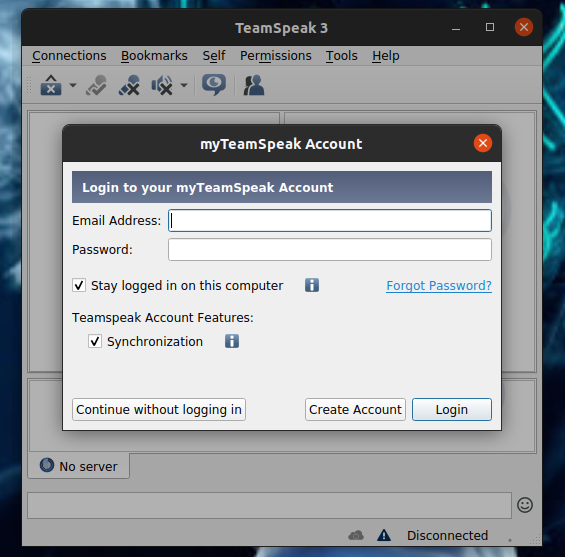
Optionally, you can click the Continue without logging in button, and you will only need a username to identify you to your friends. If the first method doesn’t work for your case, consider trying the other methods.
2. Using the Install Script
TeamSpeak3 has an installation script that you can use to run the program on your system quickly. For this method, start by downloading the TeamSpeak3 installer for your system architecture. Verify your architecture using the uname -m command to ensure you download the correct installer.
Once you download the file, make it executable using the chmod command.
Once you make the script executable, use the bash command to run it.
Press the enter keyboard key to continue with the installation. Again, press Y to accept the installation and extraction of TeamSpeak3 files.
Once the script executes, you will get a message that it has completed uncompressing the file.

To install TeamSpeak3, change your directory to the created TeamSpeak3 folder.

Next, run the ts3client_runscript.sh script to open the installer.

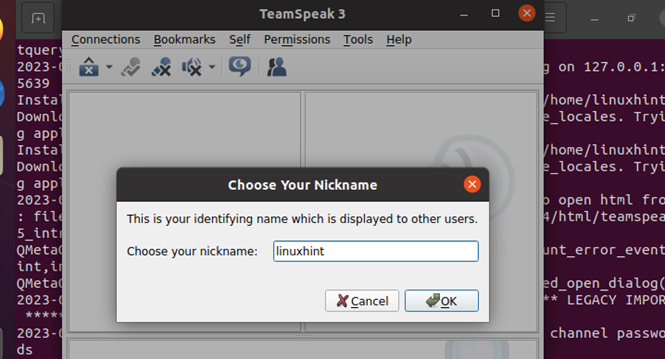
The TeamSpeak3 login window will appear. Enter your credentials or skip the login.
You must choose a nickname to continue to the TeamSpeak3 dashboard.
Once you accept the license agreement, you will have TeamSpeak3 installed and running on your system.
This is how to install TeamSpeak3 using its installation script.
3. Using PPA
The method above should work with all Linux systems. However, if you find it complicated, there is a solution involving using PPA.
First, open your terminal and execute the command below.
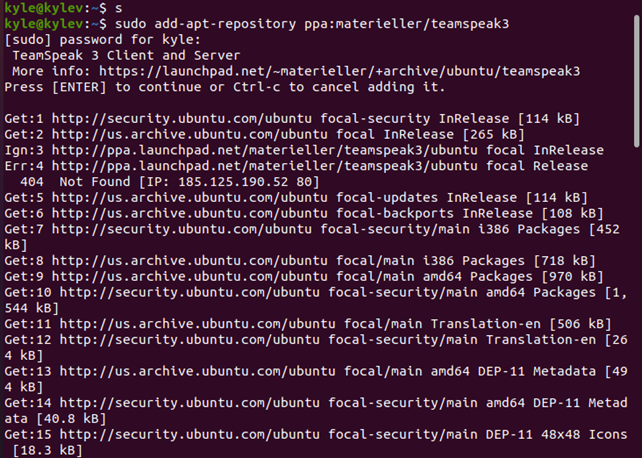
The command adds the TeamSpeak PPA to your Linux system. Once it completes, you need to update the system.
Once all updates are complete, install TeamSpeak using the command below.
Note that not all systems work with PPA to install TeamSpeak. If you encounter any errors, use the method above. It should work fine. Nevertheless, you can now launch TeamSpeak from your applications.
Conclusion
This guide covered how to install TeamSpeak on Ubuntu using three ways. One of the methods covered will work for your system and you will soon start enjoying the comfort of TeamSpeak. With TeamSpeak installed, you can connect to your server and catch up with your friends.
Source: linuxhint.com