How to Install OpenJDK on CentOS V8
Java is a superior programming language and most devices are built using Java from desktop applications to different systems. You can choose Oracle Java or OpenJDK when installing Java on your CentOS 8. The Oracle version offers some premium features and is not free. But the OpenJDK is freely available for installation.
Today’s post focuses on the steps for installing OpenJDK on CentOS V8.
Installing OpenJDK on CentOS 8
CentOS is ideal for programming and when you want to create Java applications, you can utilize its two default Java versions, Java 11 or Java 8, available in its repository. When you install OpenJDK, you can set which Java version to use as your default option, including exporting its path to make it available to applications you build on your CentOS 8.
For this tutorial, we will install OpenJDK 11 and later set it as our default Java.
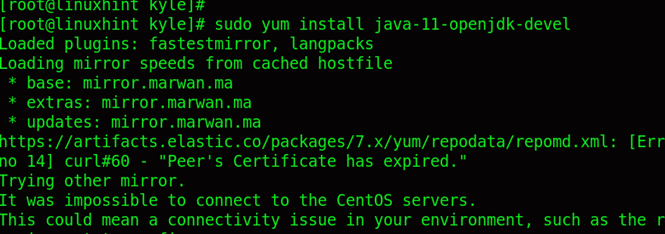
To install OpenJDK 11, run the command below with administrator privileges. Also, we are using the YUM package manager. Use the DNF.
Once you execute the command, the system will locate the available OpenJDK 11 in the closest mirror to your region, download it and install it.
When prompted to authorize the installation, press Y for the installation to proceed.
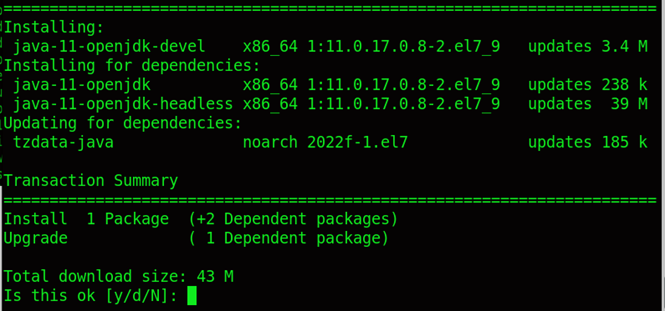
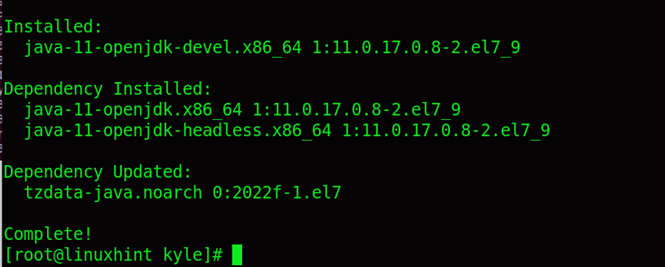
YUM will download the specified OpenJDK and its dependencies. Once it has everything required for the installation, it will install OpenJDK and display an output similar to the one below, confirming that it has been installed and the dependencies installed alongside it.
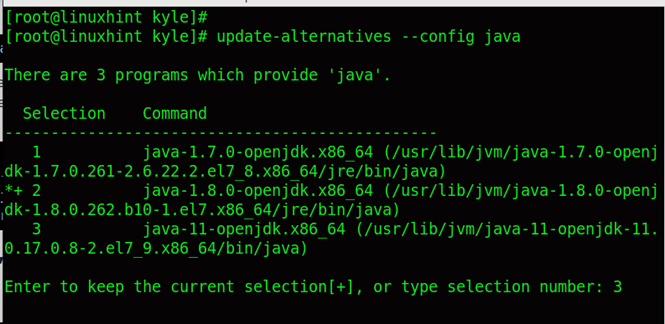
At this point, your default Java version has not yet been changed. We must configure it to set the installed OpenJDK 11 as our default Java.
For that, use the updates-alternatives command.
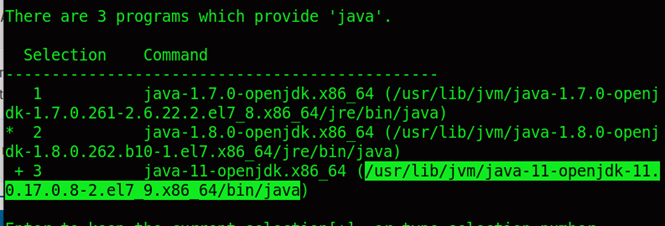
Executing the command will display the available Java versions on your system. For our case, we can note that we have three Java versions installed.
We aim to select OpenJDK 11 as the default option. So, we will type its selection number in the terminal prompt and press the Enter key. Ensure you use the correct selection number for your case. For this example, OpenJDK 11 has a select number of 3.
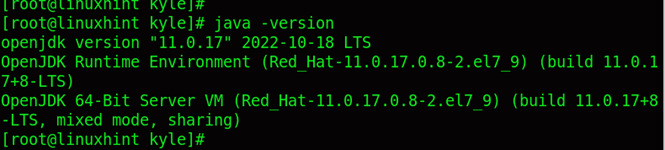
Once you have selected the default Java version, verify the change by checking the Java version on your CentOS 8.
We have installed OpenJDK 11 and set it as the default Java version.
So far, our installation is working correctly. However, when you want to run Java applications on your CentOS and want them to use the default set Java version, you must set the JAVA_HOME environment variable.
Any Java application will use the environment variable you define for your Java version to run on your system. First, we must get the location of the OpenJDK that you want to set its variable. So, use the updates-alternatives command to list its location.
In our case, we are focusing on OpenJDK 11. So, copy the highlighted path.
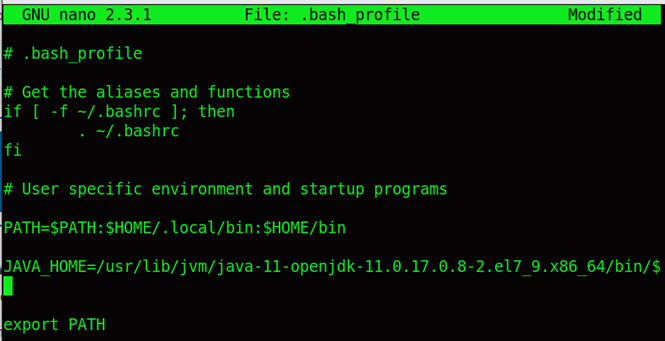
Next, use an editor of your choice to open the .bash_profile and paste the copied path to the OpenJDK at the bottom of the file.
Use the format JAVA_HOME=”/the-path/” then save and exit the file.
The last step is to verify that our newly added environment variable is working. For that, use the echo command to check if it gives the correct path for the JAVA_HOME environment variable.

The output confirms that we added the environment variable successfully. That is how to install OpenJDK on CentOS 8 and set its environment variable for your system.
Conclusion
Java is essential and commonly used by most programmers. For a CentOS 8 user, you can comfortably install OpenJDK in your system, configure the default Java version and set the environment variable to be accessed by all Java applications using the steps presented in this guide.
Source: linuxhint.com