How to Install .MSI Using PowerShell
This tutorial will present a thorough guide to install the .MSI file using PowerShell.
How to Install .MSI Using PowerShell?
To install the .MSI using PowerShell, check out any of the provided approaches:
Method 1: Install “.MSI” File in PowerShell in Standard Mode
To install the “.MSI” file using the “Start-Process” command, utilize the following command:
In the above-mentioned code:
- We have used the “Start-Process” command to install more processes.
- After that, specify the “.MSI” file path installer file to execute it:

As a result, the processing of installing the .MSI package will start in the background.
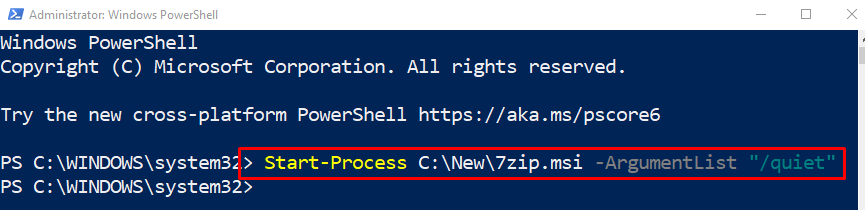
Method 2: Quietly Install “.MSI” File in PowerShell
The “.MSI” file can be installed quietly/silently using the “/quiet” argument with the relevant file path:
In the above-mentioned command, we have assigned the “/quiet” to “-ArgumentList” to install the “.MSI” file silently:
That was all about installing .MSI using PowerShell.
Conclusion
To install the “.MSI” file using PowerShell, use the “Start-Process” cmdlet. After that, add the path of the installer and execute the complete command on the console. Moreover, the “.MSI” file can be installed via executing the installer in silent mode. This tutorial has demonstrated several methods to install the “.MSI” file using PowerShell in different ways.
Source: linuxhint.com