How to Install MongoDB on Windows
Download MongoDB Server
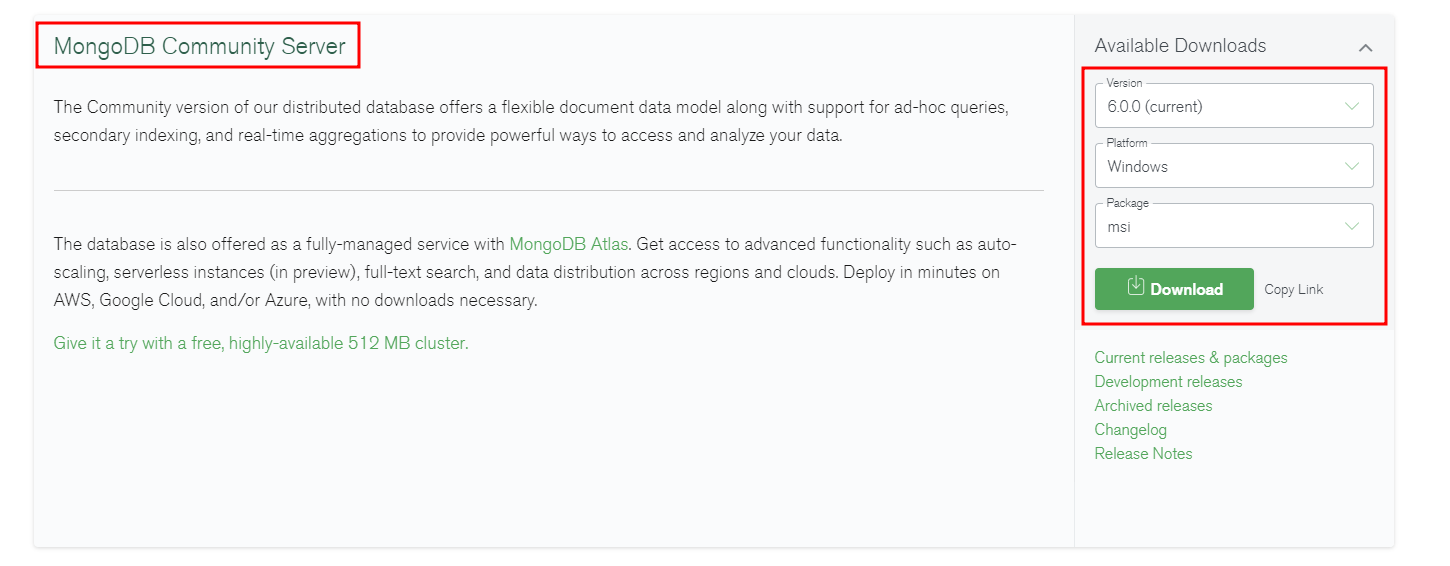
Start by downloading the MongoDB Community Server Edition. Navigate to the download link as provided below:
https://www.mongodb.com/try/download/community
Select Community Server and select the platform as Windows. Next, choose the MSI installer package and proceed with the download process.
Installation Process
Once the download is complete, navigate into your Downloads folder and open the downloaded MSI file. This will initiate the installation process using the provided setup wizard.

Choose the setup type based on the features you wish to include. For a simple and quick setup, select complete and click next.

In the next step, configure the service options. These settings configure how the MongoDB service is set up and configured on your machine.

Once you are content with the selected settings, click next to proceed.
Choose “install MongoDB” compass. This allows you to include the MongoDB Graphical manager in your machine.

To finish, choose the “Install” option to continue.

Upon completion, close the installer by selecting the “Finish” option.
Keep in mind that you may need to restart your system.

Restart your system to apply the changes.

Install Mongosh
The MongoDB Community Installer package does not include the MongoDB Shell. Therefore, we will need to download and install it separately.
Navigate to the link below to download the Mongo Shell installer package.
https://www.mongodb.com/try/download/shell
Select “MongoDB Shell” and ensure the platform is set to “Windows 64-bit (8.1+)(MSI).”
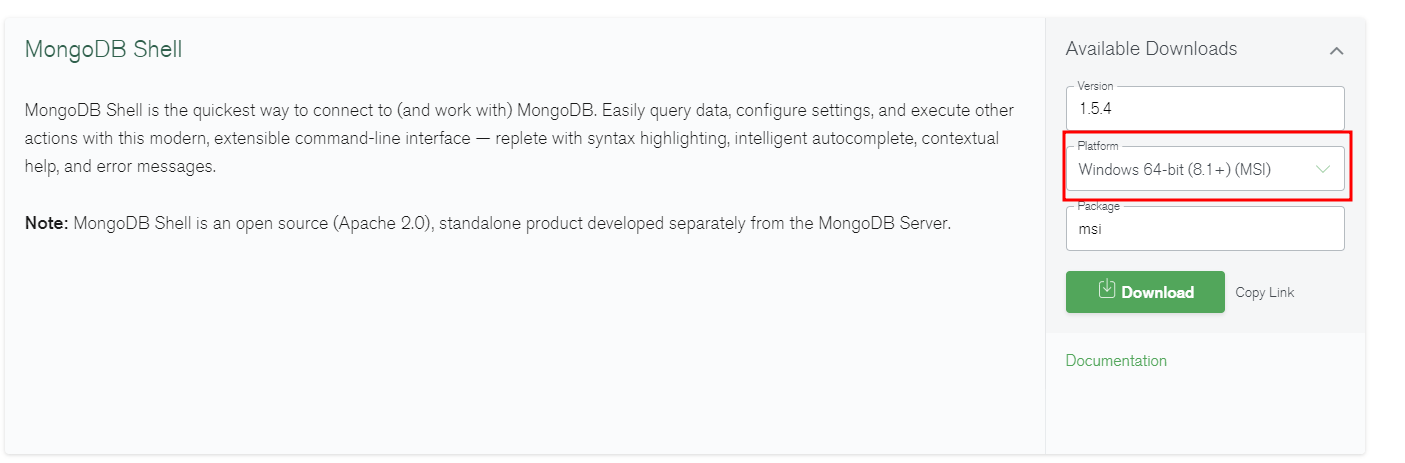
Proceed with the download and save the MSI file on your computer.
Upon completion, launch the installer and follow the provided directives.

Next, select the Destination folder. Finally, if you wish to install the MongoDB shell for all users, unselect the”Install Just For You” option.
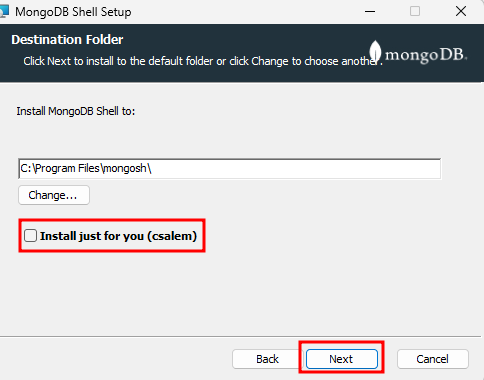
NOTE: Disabling the “install for you” option will require administrator privileges.
Lastly, click Install to process the installation.

Once complete, launch your Windows Command Prompt and run the command:
The command should return the installed MongoDB Shell version.

Congratulations, you have successfully installed MongoDB Server and MongoDB Shell on your Windows machine.
Next Steps
In this tutorial, you have successfully downloaded and installed the MongoDB Server and MongoDB Shell on your machine. To learn MongoDB, check our tutorials to discover more.
See you in the next one.
Source: linuxhint.com