How to Install KVM on Linux Mint 21?
“Today, we will learn how to install KVM on Linux Mint 21 using the command line. KVM is a complete virtualization solution for Linux on x86 hardware. Using this, we can easily create Virtual Machines just like we do in VMware or VirtualBox. The best part about KVM is that it is open source and more efficient than its rival virtualization solutions.”
We have used basic Linux commands implemented on Linux Mint’s Terminal to install KVM. Let’s see how it is done!
Guide
Following are the steps involved in installing KVM on Linux Mint 21:
Step 1: Update and Upgrade Linux Mint
Before installing KVM, it is recommended to update your system and upgrade it. The following commands will help us in updating and upgrading our Linux Mint machine:
![]()
![]()
Step 2: Check System Compatibility With KVM
Next, we need to check whether KVM is compatible with our system or not. If it is not compatible, then we’ll keep running into errors.
![]()
Output:
![]()
If you get an output above 0, that means KVM is compatible with your system and can be easily installed. In our case, we got an 8. This means we can install KVM on our system.
Step 3: Install KVM
Now that we have made sure that KVM can be installed, let’s install it by executing this command:
![]()
Step 4: Add Your User to the KVM and Libvirt Group
It is now time to add your user to KVM and libvirt group to set up KVM so that you don’t run into any permissions-related errors. Add the user to the KVM group like this::
![]()
Add the user to the libvirt group with this command:
![]()
How to Create a Virtual Machine(VM) in KVM?
Now that we have installed KVM let’s see how we can create a VM on it. First, download the iso you want to create a VM of. We have downloaded an iso for Ubuntu 20.04.
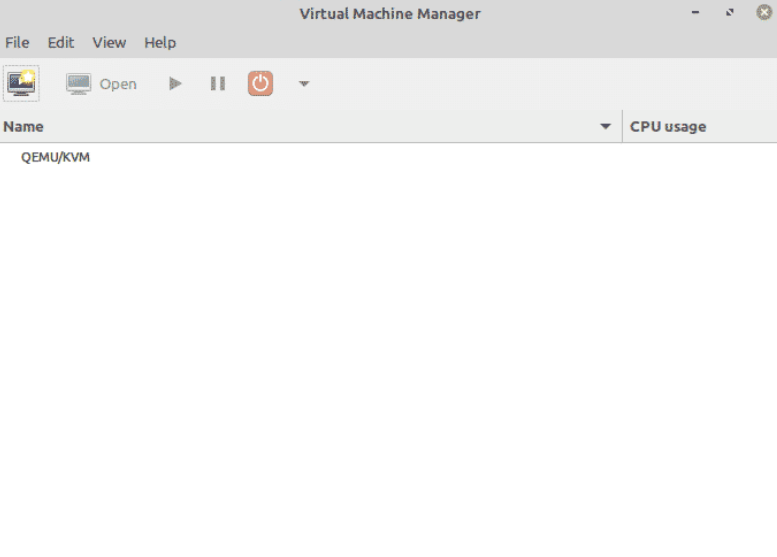
Now open Virtual Machine Manager on your machine. This is how the interface will appear:
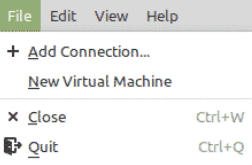
Click on File; you will see a list of options to choose from. Now click on New Virtual Machine:
This window will open with a list of options to choose from for your VM:
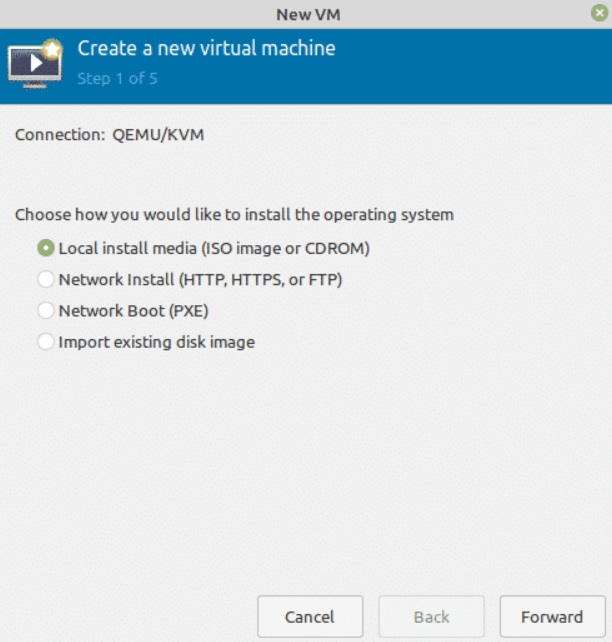
Please select the first option, as it allows you to create a VM using an ISO image. Once selected, click Forward.
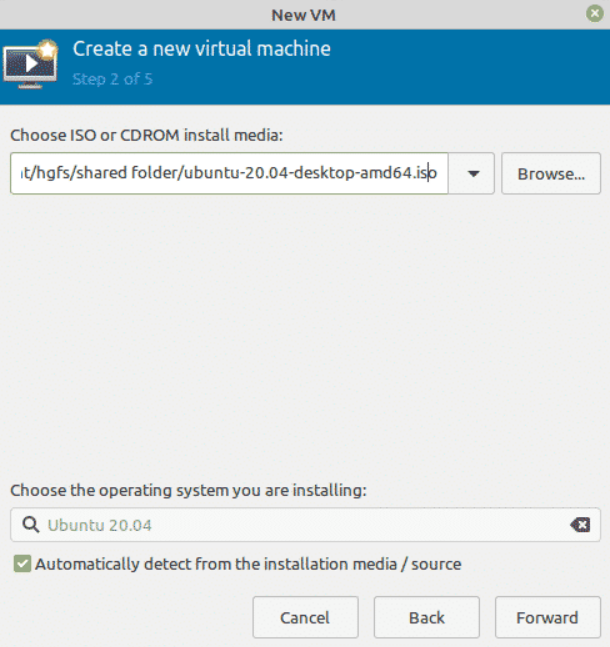
Now select the iso that you downloaded, as shown below:
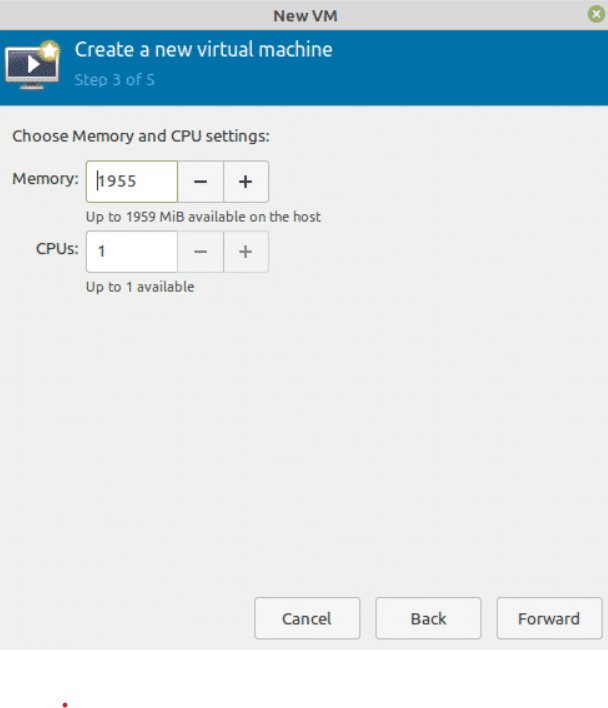
After that, allot memory and CPU utilization for the VM like this:
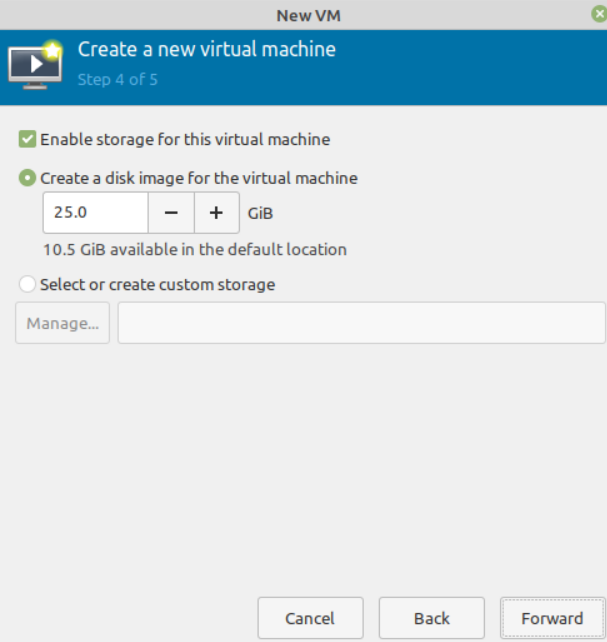
Next, allot storage to the VM:
Now, give the VM a name. For example, if the VM is Ubuntu, you can name it Ubuntu, followed by its version.
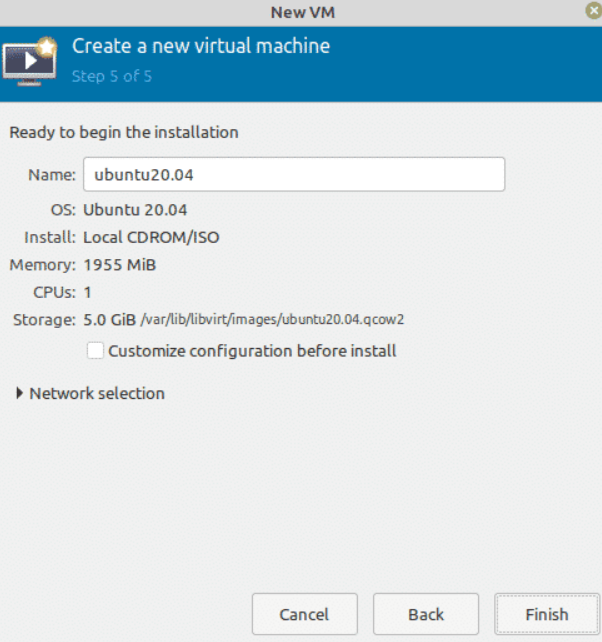
These are all the settings that were required. Click on Finish to finish the VM setup. The VM creation process will begin after that.
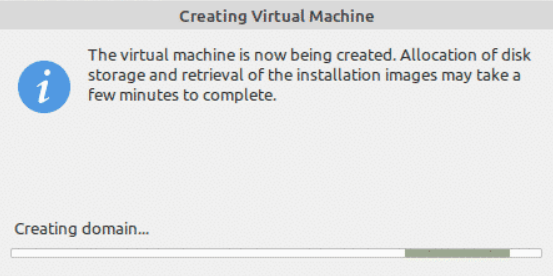
Once the VM is created, a new window will open for OS installation. You can then install the OS easily.
Conclusion
In today’s guide, we saw in detail how to install KVM on Linux Mint 21. We began by updating and upgrading the system. Then we verified KVM compatibility. Afterward, we installed KVM on our machine. In the end, we also saw how to create a Virtual Machine on KVM.
Source: linuxhint.com