How To Install Inkscape 1.3 on Ubuntu
This tutorial will help you install Inkscape 1.3 or upgrade the application to the latest version on Ubuntu. Inkscape is the professional illustrator and vector graphic editor from the free software community. We thank you Inkscape Developers for developing Inkscape continuously and congratulate the users to use it. Happy drawing!
Subscribe to UbuntuBuzz Telegram Channel to get article updates.
Checking
$ lsb_release -a
$ dpkg -l inkscape
$ apt-cache policy inkscape
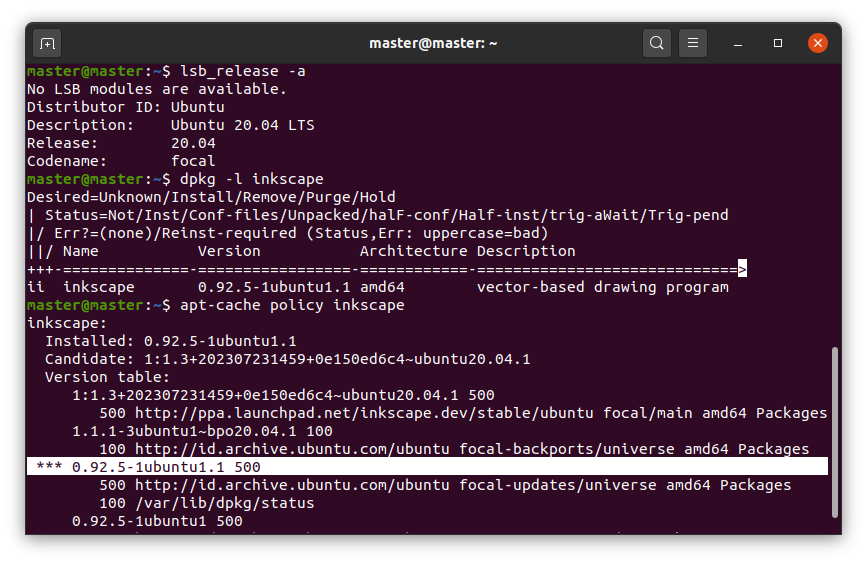
First command will show your Ubuntu version and codename. For example 22.04 and focal fossa. This information is required for choosing a suitable PPA of Inkscape.
Second command will show you whether an Inkscape software version is installed or not on your system.
Third command will show you same information in details. For example, the line begins with triple stars (***) indicate installed version. See example below.
Installation
$ sudo add-apt-repository ppa:inkscape.dev/stable
$ sudo apt update
$ sudo apt install inkscape
First command will add a new repository called PPA into your Ubuntu system. If your Ubuntu version is supported, you will be asked to [ENTER]. Otherwise, yours is not supported and you should not use the PPA (please consider upgrading your OS).
Second command refreshes your Ubuntu system to acknowledge the new PPA.
Third command installs Inkscape 1.3 or upgrade an existing one.
References
This article is licensed under CC BY-SA 3.0.
Source: Ubuntu Buzz !


