How to Install Homebrew on Mac
Homebrew is a free package management system used to install, remove, and update the packages on macOS using terminal commands. Homebrew simplifies the installation of packages on macOS and assists the developers to streamline their work. This tutorial is a guide on how to install and use Homebrew on a Mac. Since Homebrew is a terminal-based package manager you must know the function of the terminal on Mac.
Terminal, also known as command line interface is an app that allows you to interact with the system in a non-graphical way. Terminal can be intimidating for anyone who is new to it but still it has a lot of potential as it lets you automate tasks you perform on your system.
Homebrew commands make it easy to install open-source packages and developer tools on Macs as Macs do not come with the package manager. Let’s find out how to install Homebrew on a Mac:
Prerequisites
The following prerequisites are needed to install Homebrew on a Mac:
- A system with macOS (Mojave and later)
- User with administrative privileges
How to install Homebrew on Mac
Installing Homebrew on a Mac is a 2 steps process:
- Installing Xcode Command Line Tools
- Installing Homebrew
Homebrew functionality depends upon Xcode Command Line tools, it needs to be installed before installing Homebrew. Let’s find out how to install Xcode Command Line Tools Mac.
1: How to install Xcode Command Line Tools on Mac
To install the Homebrew on a Mac you need to have Xcode Command Line Tools installed on your system as Homebrew needs these tools to function.
Xcode is an IDE from Apple to develop iOS, iPadOS and macOS based applications, if it is already installed on your system then you don’t need to install Xcode Command Line Tools. But if it is not installed then you do not need to install the entire Xcode IDE as it would take approximately 10GB of storage, instead install the Xcode Command Line Tools.
First open terminal on your Mac by pressing Command + Space Bar keys, search terminal and then hit Enter to open it:

Type the following command to check if the Xcode Command Line Tools are installed or not:
The above command prints the active developer directory, if you get an error, then that means the Xcode Command Line Tools are not installed:

To install Xcode Command Line Tools use the command given below:
A dialog box will appear click Install:

Agree the License Agreement:
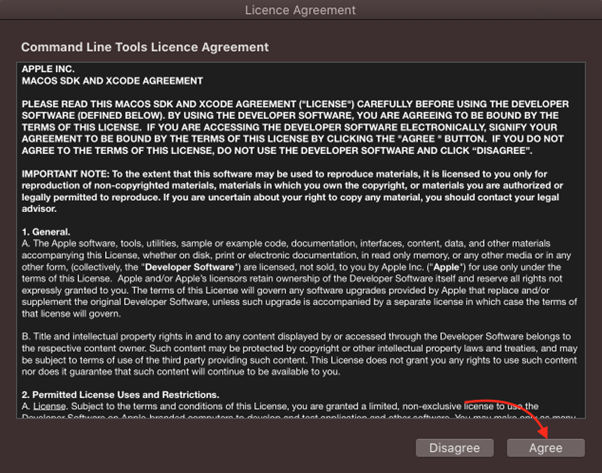
The downloading will begin:

Click Done when the downloading is finished:

Verify the installation of Xcode Command Line Tools using:

To check developer path use:

The Xcode Command Lines Tools have been installed on your system and now move towards the next step.
How to Install Homebrew on Mac
There are two main types of Macs are available:
- Intel-based Mac (Intel i5, i7)
- Apple Silicon based Mac (M1/M2)
The process of Homebrew installation on either type of machines is similar but Macs based on Apple Silicon require an additional step which will be discussed in the following section.
i: How to Install Homebrew on an Intel-based Mac
Execute the following command in the macOS terminal to begin Homebrew package manager installation:

The above script will install the Homebrew in the /usr/local/ directory.
ii: How to Install Homebrew on an M1 Mac
The above step will install Homebrew in /opt/homebrew/ directory if the Mac is Apple Silicon based (M1/M2).
On M1 or M2 Macs there is an additional step to follow to install Homebrew. By default, the Homebrew is downloaded in the /opt/homebrew directory. This directory is not part of the environment variable ($PATH).
To make this directory a part of environment variable execute the following command on Apple Silicon based Macs:
eval "$(/opt/homebrew/bin/brew shellenv)"
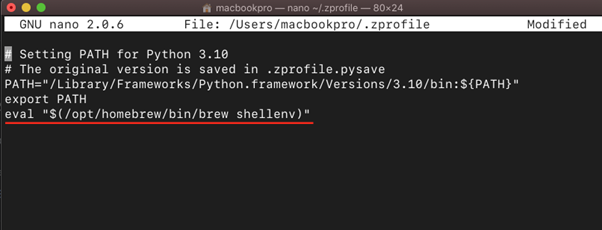
Alternatively, open the zprofile file in the nano editor using command:
![]()
Now, add the following line in the file and save it:
Note: The Homebrew installation guide in this article is for macOS 11.X Big Sur. Homebrew is not officially supported on the older versions of macOS, but it may work on macOS Mojave and Catalina.
To verify the Homebrew installation, use the command given below:

To update the Homebrew to the latest version, use:

For help related to Homebrew, execute:

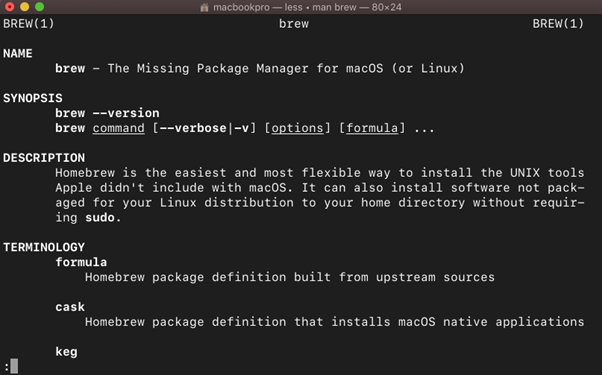
To read the Homebrew man page use:
How to Use Homebrew on Mac
Homebrew comes with tons of commands to manage packages, some commonly used commands are discussed in the following section:
Installing Package
To install a formula or package, use the following syntax:
Note: For Homebrew packages formula term is used; it provides instructions for Homebrew to install packages.
For example, to install the wget utility replace the <package_name> with the wget in the above command:
![]()
Installing Casks
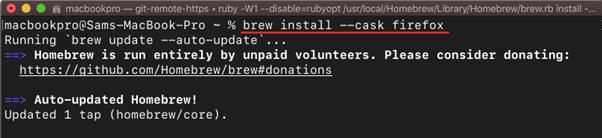
You can also install GUI based apps using Homebrew, for that use the following syntax:
Note: To install the macOS native packages, Homebrew uses cask definition.
For example, to install Firefox browser, use:
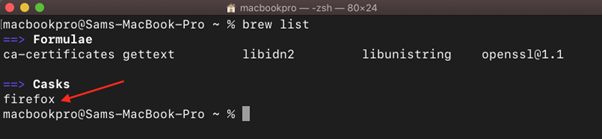
Listing Installed Packages
To check the installed packages, we can list the Homebrew installed packages using:

Uninstalling Packages
To uninstall the Homebrew package, follow the syntax given-below:
To remove wget package use:

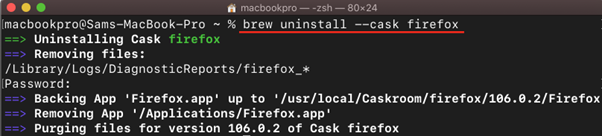
To remove a cask use the following syntax:
To delete Firefox cask replace the <package_name>:
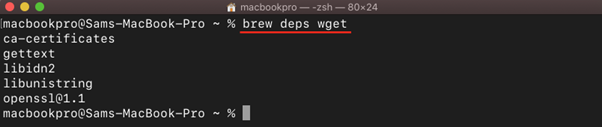
Checking Package Dependencies
To check the dependencies of a specific package, use the command mentioned below:
For example, to check the dependencies of wget, execute:
Updating Packages
To update a specific Homebrew package, use the following syntax:
Listing Outdated Packages
To list the outdated packages, use the following command in the terminal:
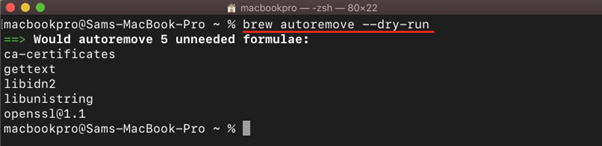
Removing Unnecessary Dependencies
To remove unwanted dependencies, use:
Listing Homebrew Errors and Warnings
To list Homebrew errors and issues, use the command given below:

How to Uninstall Homebrew from Mac
If you no longer need a package manager for your Mac running macOS Mojave or later then Homebrew can easily be removed using the below given command:
How to Uninstall Xcode Command Line Tools
To uninstall Xcode Command Line Tools run the command given below in the terminal:

Conclusion
macOS does not come with any package manager, most of the software is installed using GUI. Homebrew is a package manager that makes it easy to install packages on macOS through the command line interface. It is quite handy in installing developer tools and even native macOS open-source GUI applications.
Source: linuxhint.com