How to Install GNOME Screenshot Utility on Raspberry Pi
GNOME Screenshot is a lightweight tool used by Linux users to take screenshots on their systems. It’s one of the most valuable tools that allow you to capture an entire window, desired window, and selected area screenshots on your system.
If you are looking for a screenshot tool for your Raspberry Pi system, you can easily install this tool using this article’s guidelines.
How to Install GNOME Screenshot Utility on Raspberry Pi
The GNOME Screenshot utility can easily be installed on all Linux systems, including the Raspberry Pi system and you can follow the below-mentioned steps to install it on Raspberry Pi.
Step 1: Update Raspberry Pi Packages
You can install the GNOME Screenshot utility from the official Raspberry Pi source list; however, before the installation, you must update packages to get the latest version of the GNOME Screenshot.

In my case, the packages are already upgraded on the Raspberry Pi system.
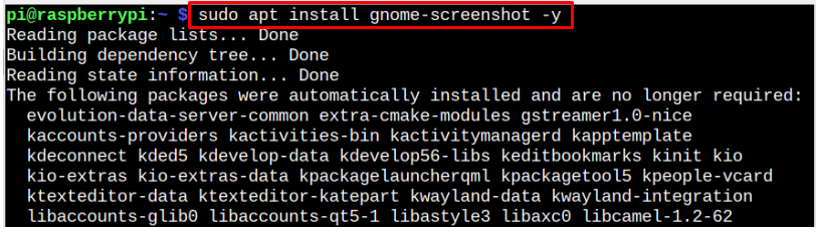
Step 2: Install GNOME Screenshot Utility on Raspberry Pi
With the Raspberry Pi sources list updated, you can run the following command to install GNOME Screenshot utility on your Raspberry Pi system:
Step 3: Check GNOME Screenshot Version
You can also check the GNOME Screenshot version on your Raspberry Pi system from the following command:

Step 4: Open GNOME Screenshot Utility on Raspberry Pi
To open GNOME Screenshot utility on Raspberry Pi, go to the “Accessories” option and click on the “Screenshot” option.
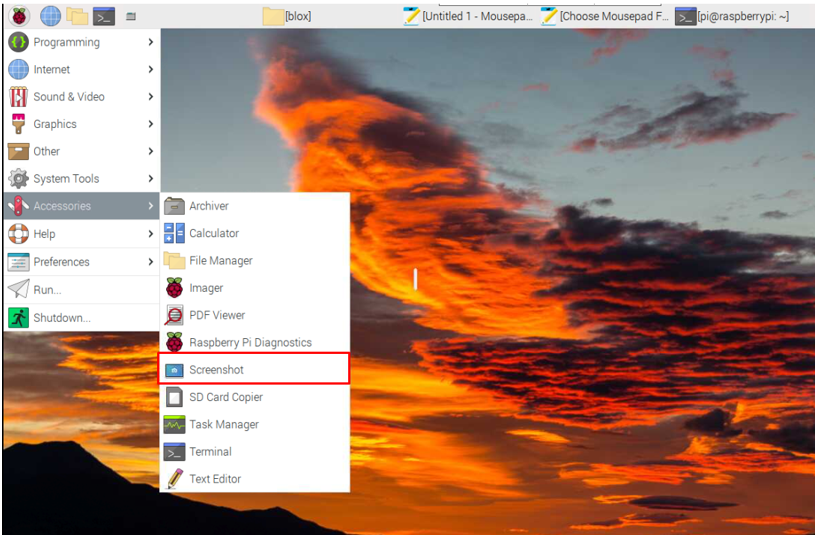
This opens the GNOME Screenshot utility on your system desktop.
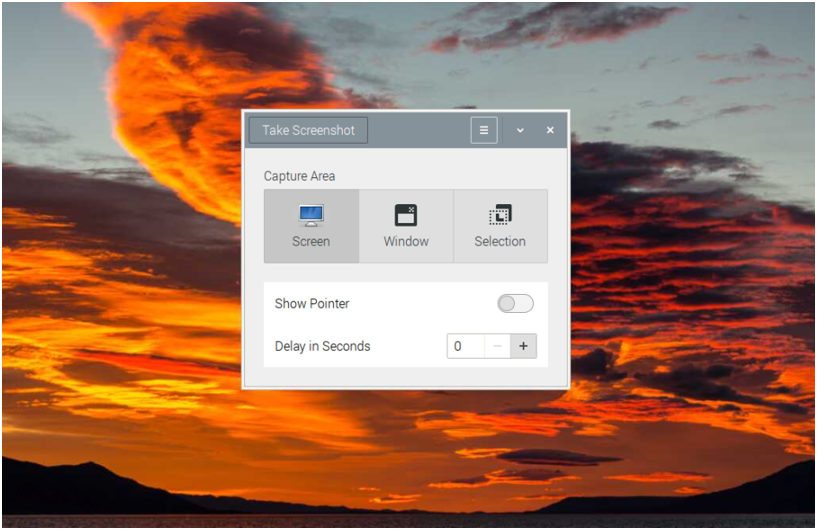
Step 5: Take Screenshot Through GNOME Screenshot Utility
To take a full windows screenshot, select the Capture Area as Screen and hit the “Take Screenshot” button.
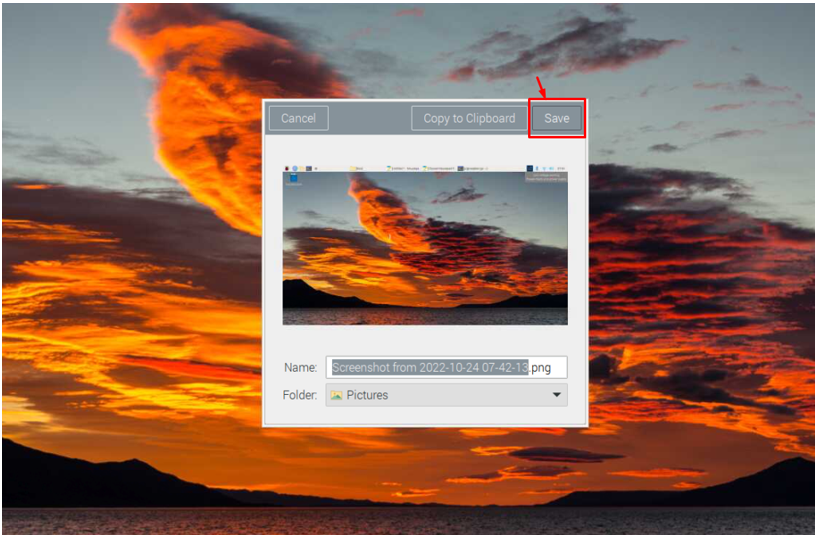
You can apply the same method for selected windows and desired area screenshots. After taking the screenshot, name the file and select the “Save” button to save it in the “Pictures” directory of the Raspberry Pi system.
This way, you can easily take screenshots of your tasks because, from now on, you will have a tool installed on your Raspberry Pi system.
Conclusion
GNOME Screenshot Utility makes it easier for Raspberry Pi users to take a screenshot of their tasks on their systems. You can install this utility from the Raspberry Pi repository via the apt command, which requires updating the packages first to install the latest version on your system. After the installation, you can run the GNOME Screenshot utility from the “Accessories” section of the Raspberry Pi main menu and take a screenshot of an area you like.
Source: linuxhint.com