How to Install GNOME Desktop Environment on Raspberry Pi
Installing another desktop environment on a Raspberry Pi device is fun, especially for those previously using the Raspberry Pi OS on their systems. In that case, switching to another desktop environment like GNOME is beneficial because of its elegant and simple look that enables you to launch any application easily. Besides its friendly environment, it also includes several useful applications and games that push you further towards replacing it with your previous desktop environment without losing your data.
This article will show you how to install the GNOME desktop environment on your Raspberry Pi system and easily switch to the installed OS within seconds.
How to Install GNOME Desktop Environment on Raspberry Pi
To install the GNOME desktop environment on Raspberry Pi, use the following steps:
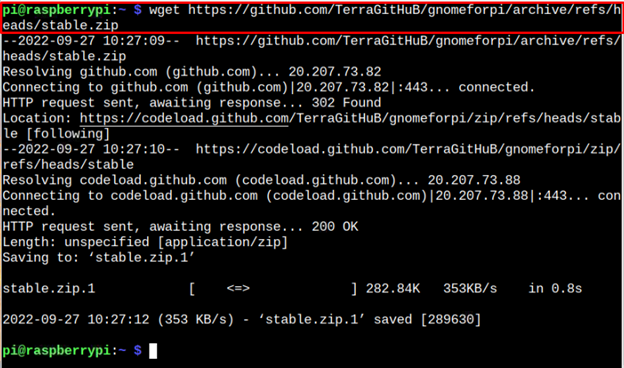
Step 1: Download GNOME Desktop Stable Setup File on Raspberry Pi
First, you should need to retrieve the GNOME desktop environment setup file on Raspberry Pi from the GitHub website using the following command:
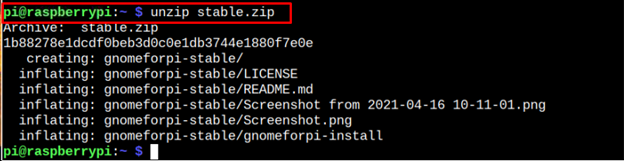
Step 2: Unzip the GNOME Desktop Setup File on Raspberry Pi
Since the GNOME desktop setup file has .zip extension, you should extract the file content through the following command:
Step 3: Open the GNOME Desktop Directory
The above command extracts the files and places them into the directory “gnomeforpi-stable” and to open this directory, you should apply the following command:
![]()
Step 4: Perform GNOME Desktop Environment Installation
To begin installing GNOME desktop environment on your Raspberry Pi system, you should execute the script file “gnomeforpi-install” inside the gnome directory using the following command:
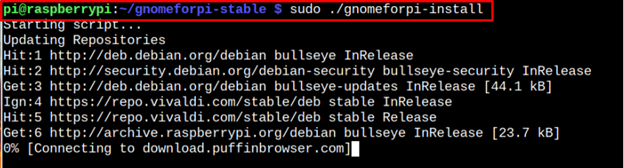
The above script file will begin installing the GNOME desktop environment on your Raspberry Pi system and you have to wait till it completes the installation process.
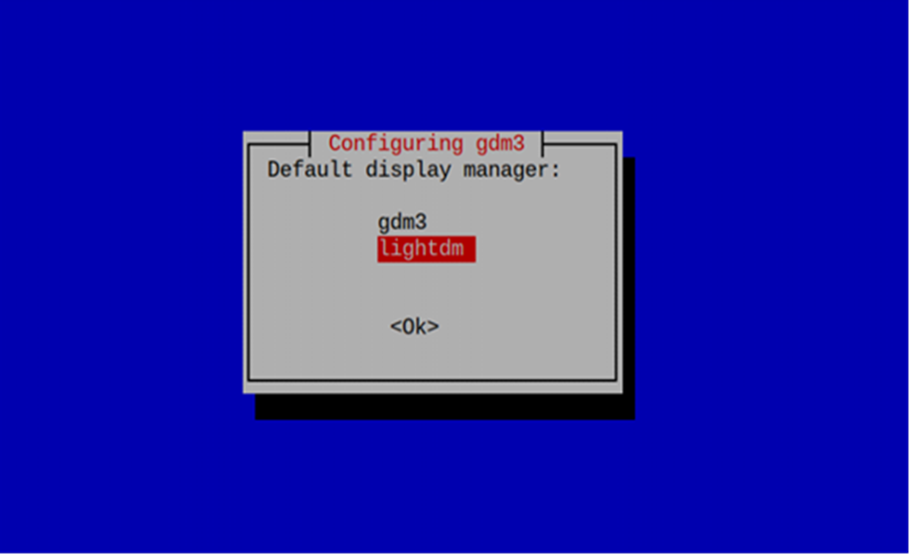
During the installation, the process may need your confirmation to allow configuring the display manager that presents users with the login screen and you have to confirm it by pressing the enter button.
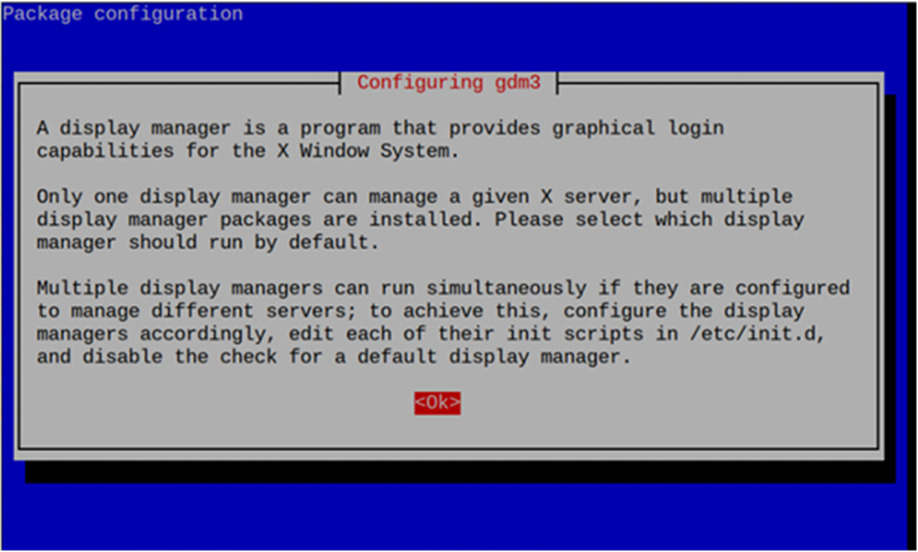
Then choose the display manager and it’s better to go with lightdm since you are installing the GNOME desktop environment on your Raspberry Pi device because it utilizes less memory.
Step 5: Switch to GNOME Desktop Environment From Raspberry Pi System
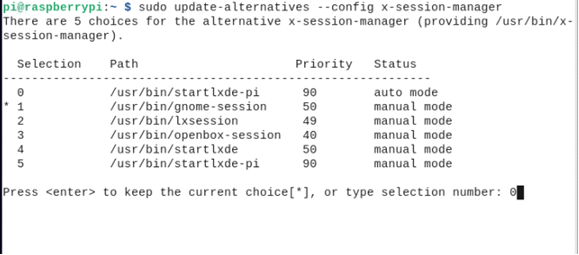
If you have successfully installed the GNOME desktop environment on your Raspberry Pi operating system, you should apply the following command to pick the desktop session you want to load:
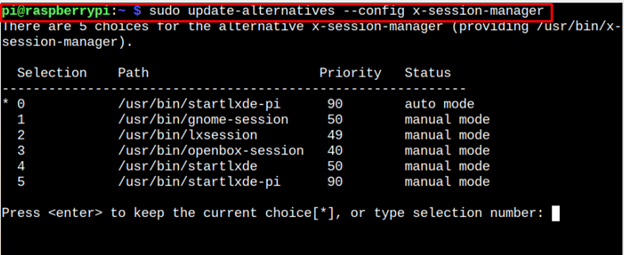
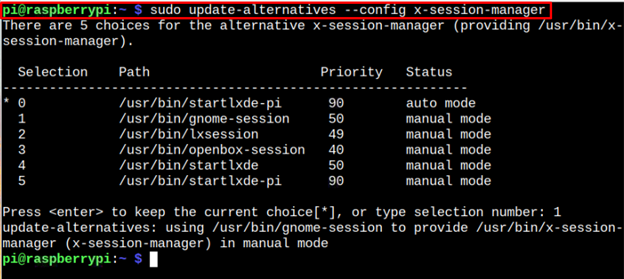
Since you are now switching to GNOME desktop environment, you should pick the option gnome-session, which is “1” in our case.
Reboot your device to see the GNOME desktop environment when it restarts.
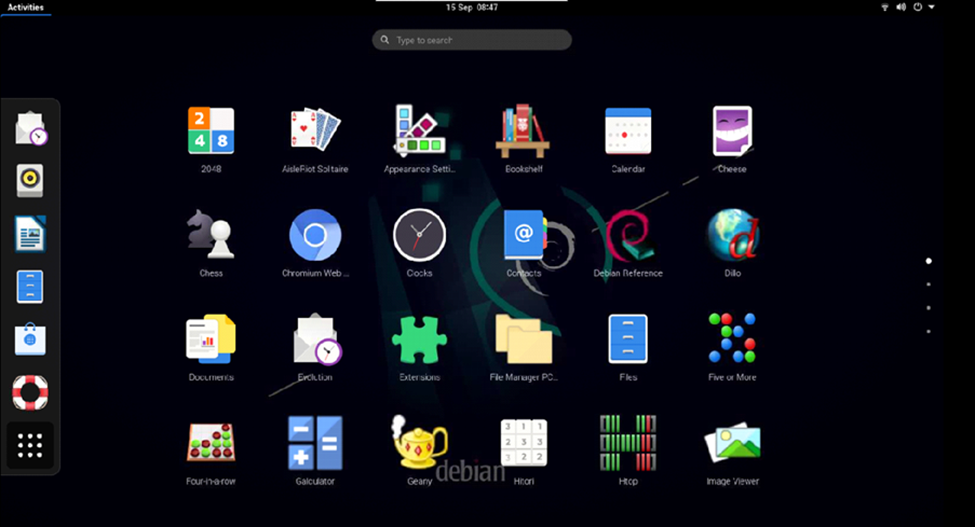
The GNOME desktop mode will look like this, as shown in the above image and you will see that several applications have already been installed within the operating system. Moreover, it saves your previous Raspberry Pi settings and you can switch back to the system by applying the same command again and hitting enter on the “0” option.

Conclusion
The GNOME desktop environment is a simple and user-friendly environment for Raspberry Pi users that includes several useful applications for everyday use. Using the step-by-step instructions, you can install this desktop environment on your previous Raspberry Pi desktop. Once the desktop environment is installed, you can switch to the environment by opening the session manager on your Raspberry Pi terminal and choosing the GNOME desktop environment to load when your system reboots.
Source: linuxhint.com