How to Install ESP8266 in Arduino IDE
This article covers the ESP8266 installation in Arduino IDE.
Table of Content
Installing the ESP8266 Board in Arduino IDE
- Step 1: Open the Arduino IDE
- Step 2: Go to Arduino Preferences
- Step 3: Enter the ESP8266 Board Manager URL
- Step 4: Open the Boards Manager
- Step 5: Install the ESP8266 Board
- Step 6: Select the ESP8266 Board
How to Program ESP8266 Using Arduino IDE
Understanding ESP8266
The ESP8266 is a Wi-Fi module that can connect and exchange data with other devices inside a wireless network. It’s based on the ESP8266EX chip, which is a low-cost, low-power SoC (System on Chip) that combines a microcontroller, Wi-Fi radio, and memory.
To program ESP8266, we can use different languages and compilers including the Arduino IDE. The ESP8266 can also be used with other microcontrollers, such as the Arduino using which we can add Wi-Fi communication in different Arduino-based projects.
Installing the ESP8266 Board in Arduino IDE
To use the ESP8266 with the Arduino IDE, you’ll need to install the ESP8266 board in the IDE. Follow the steps explained to install ESP8266 in Arduino IDE:
Step 1: Open the Arduino IDE
First, open the Arduino IDE on your computer.
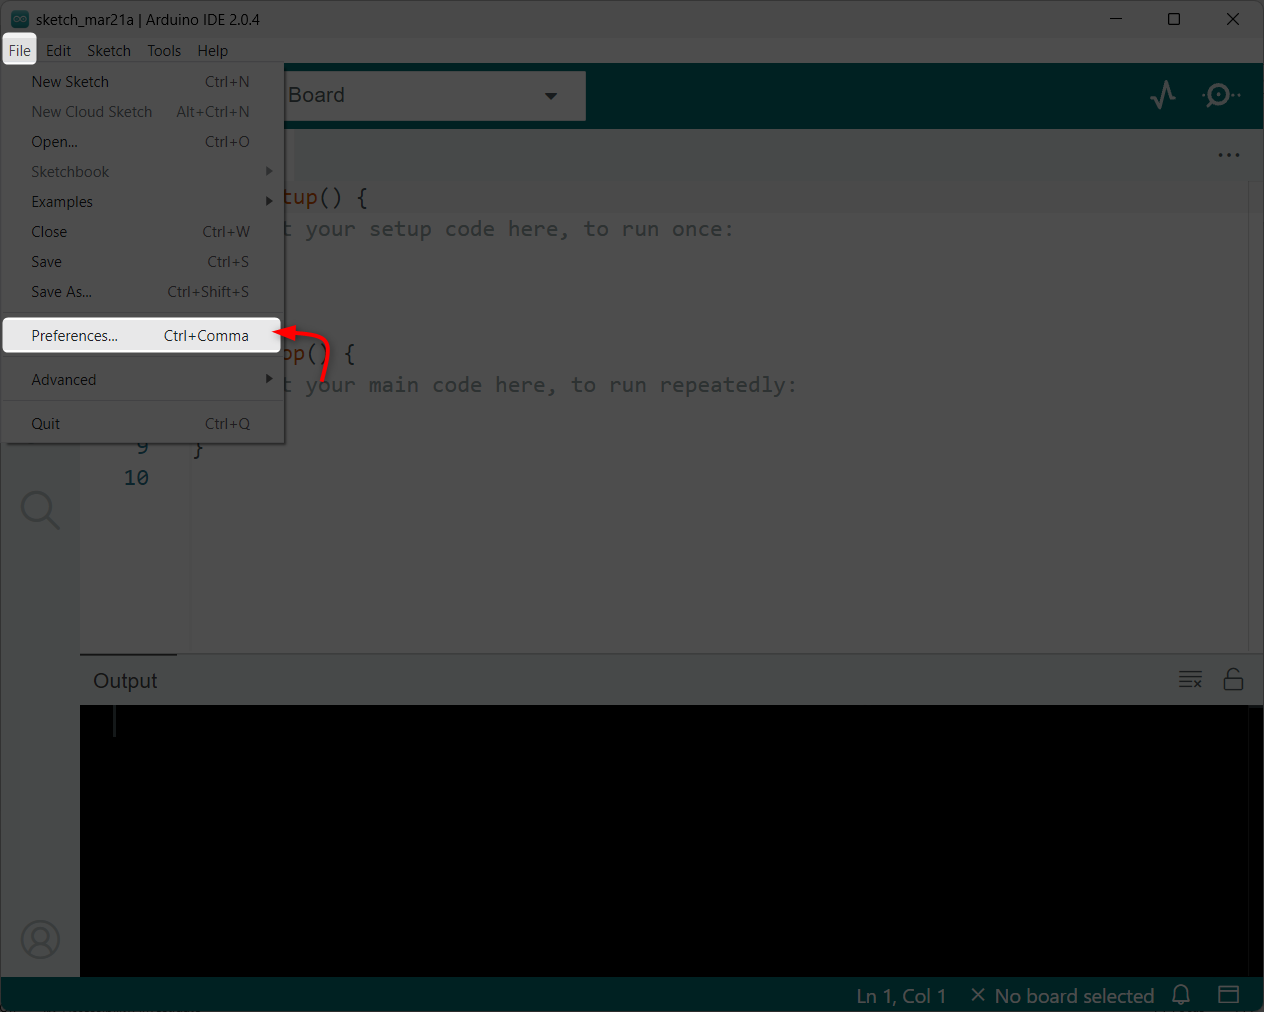
Step 2: Go to Arduino Preferences
Next, click on the “File” menu and select “Preferences” from the drop-down menu or press “CTRL+ Comma”. This will open the Preferences window.
Step 3: Enter the ESP8266 Board Manager URL
In the Preferences window, look for the “Additional Boards Manager URLs” field. In this field, enter the following URL:
Note: If you already have the ESP32 boards URLs, separate them with commas as follows:
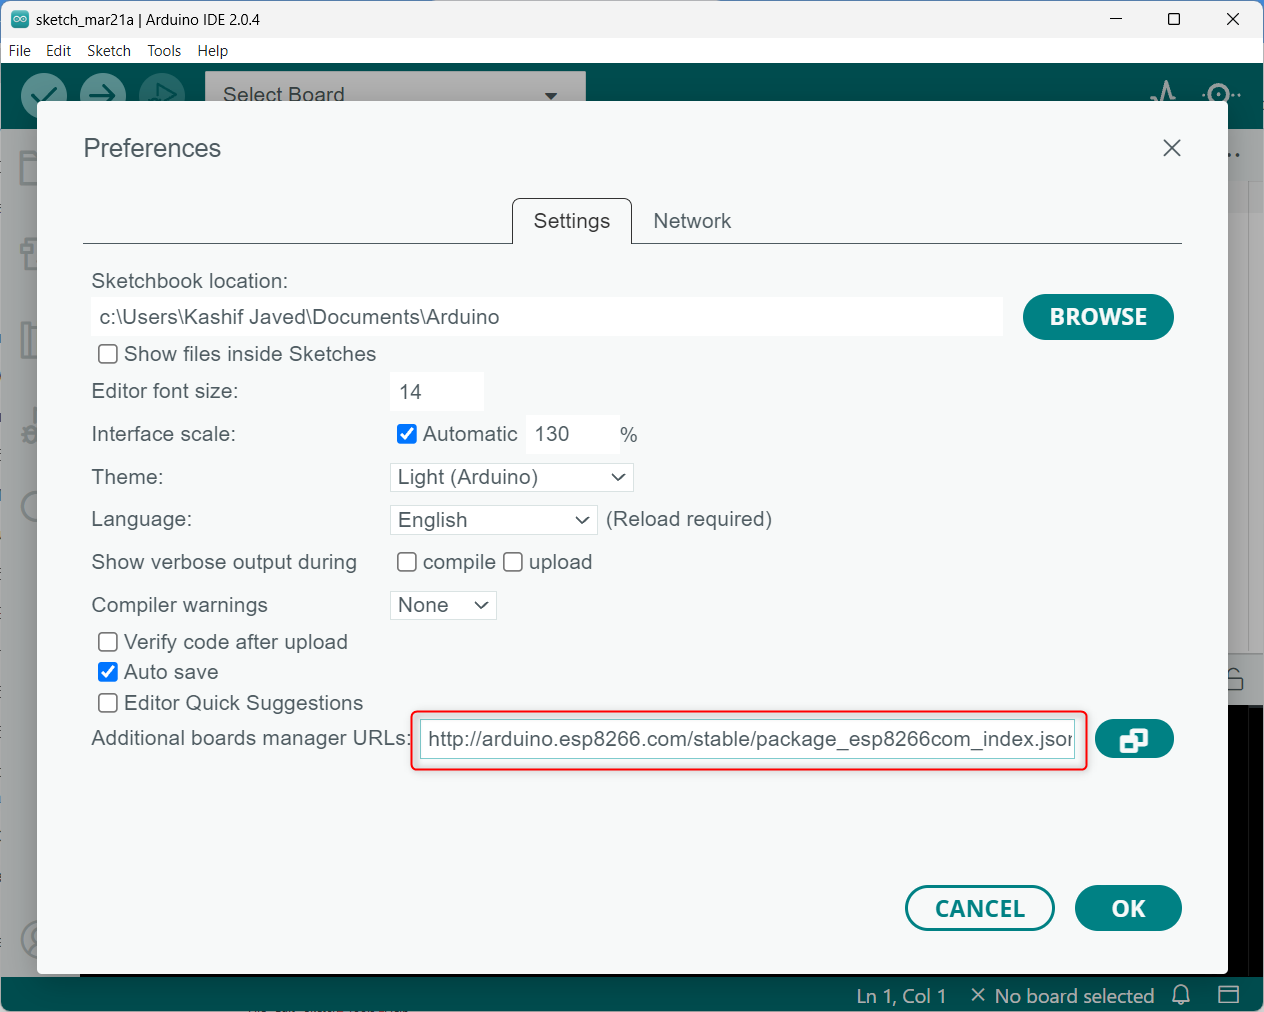
Once you’ve entered the URL, click the “OK” button to save the changes.
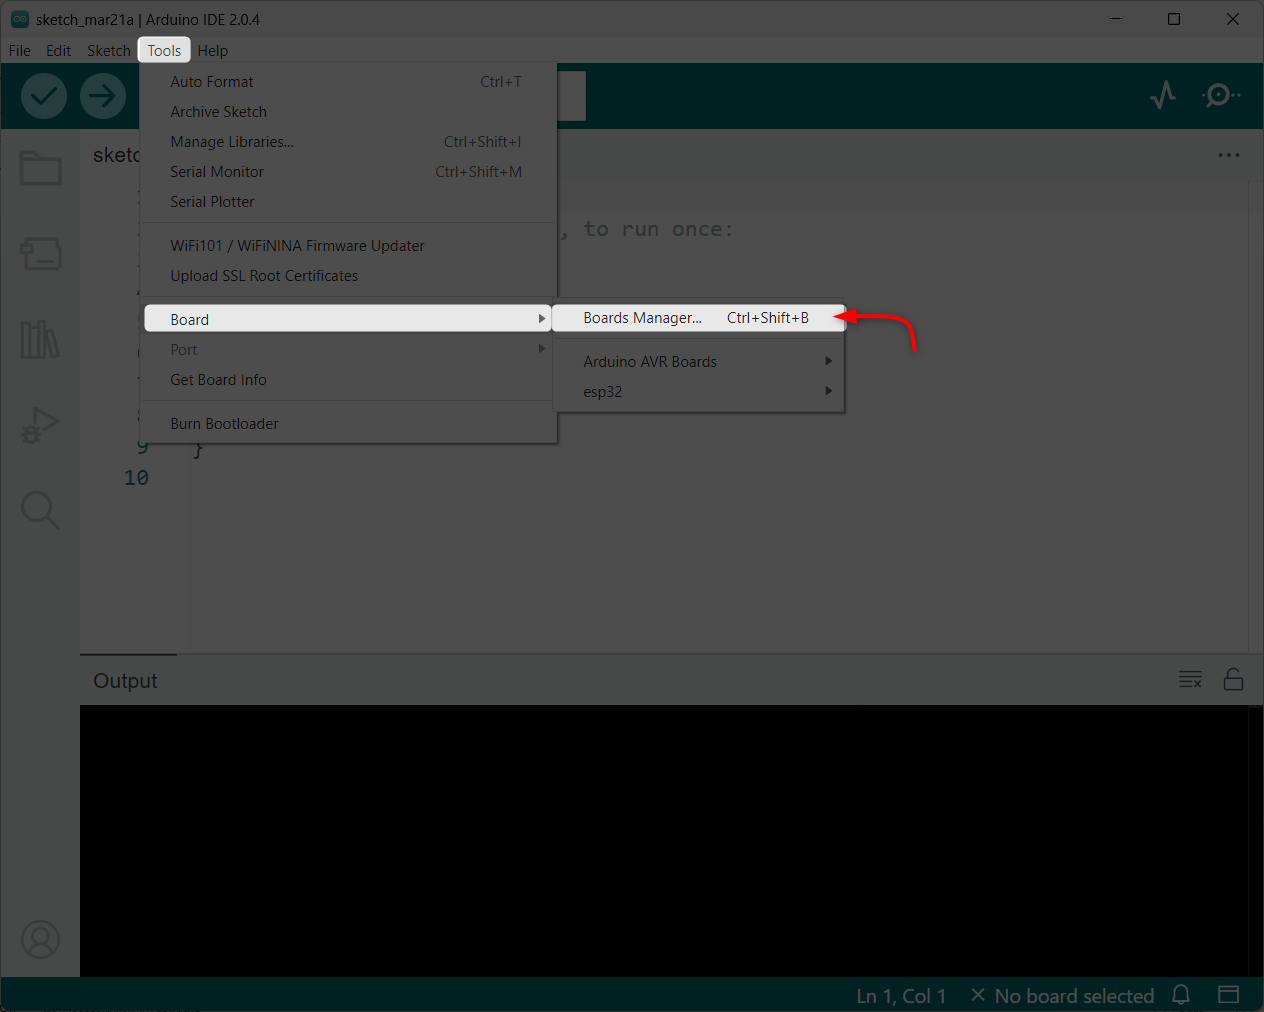
Step 4: Open the Boards Manager
Now, go to the “Tools” menu and select “Boards” from the drop-down menu. Then, select “Boards Manager” from the sub-menu.
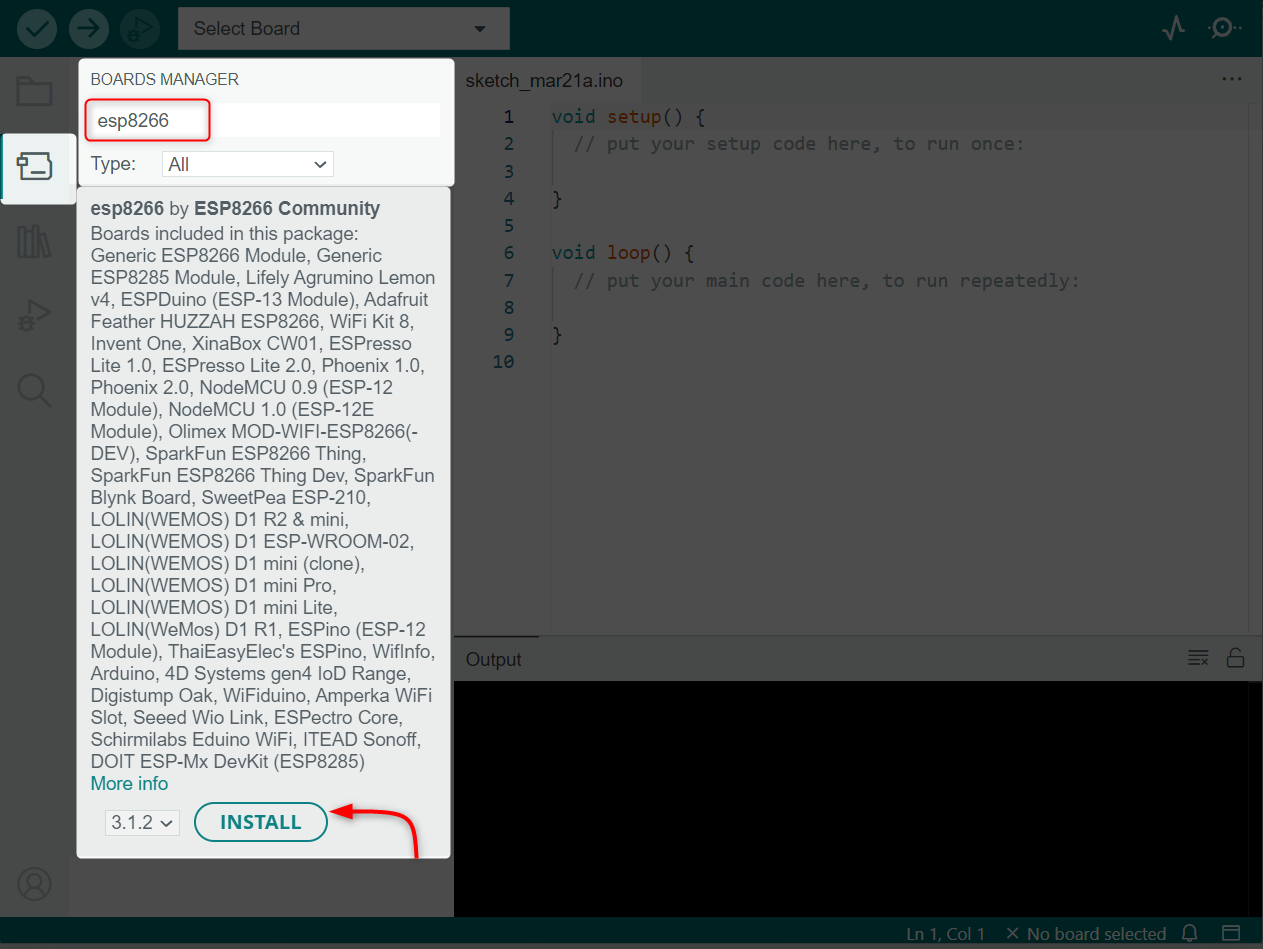
Step 5: Install the ESP8266 Board
Now search for “esp8266”. You should see an entry for “esp8266 by ESP8266 Community”. Click on this entry, then click “Install” to begin the ESP8266 installation in Arduino IDE.
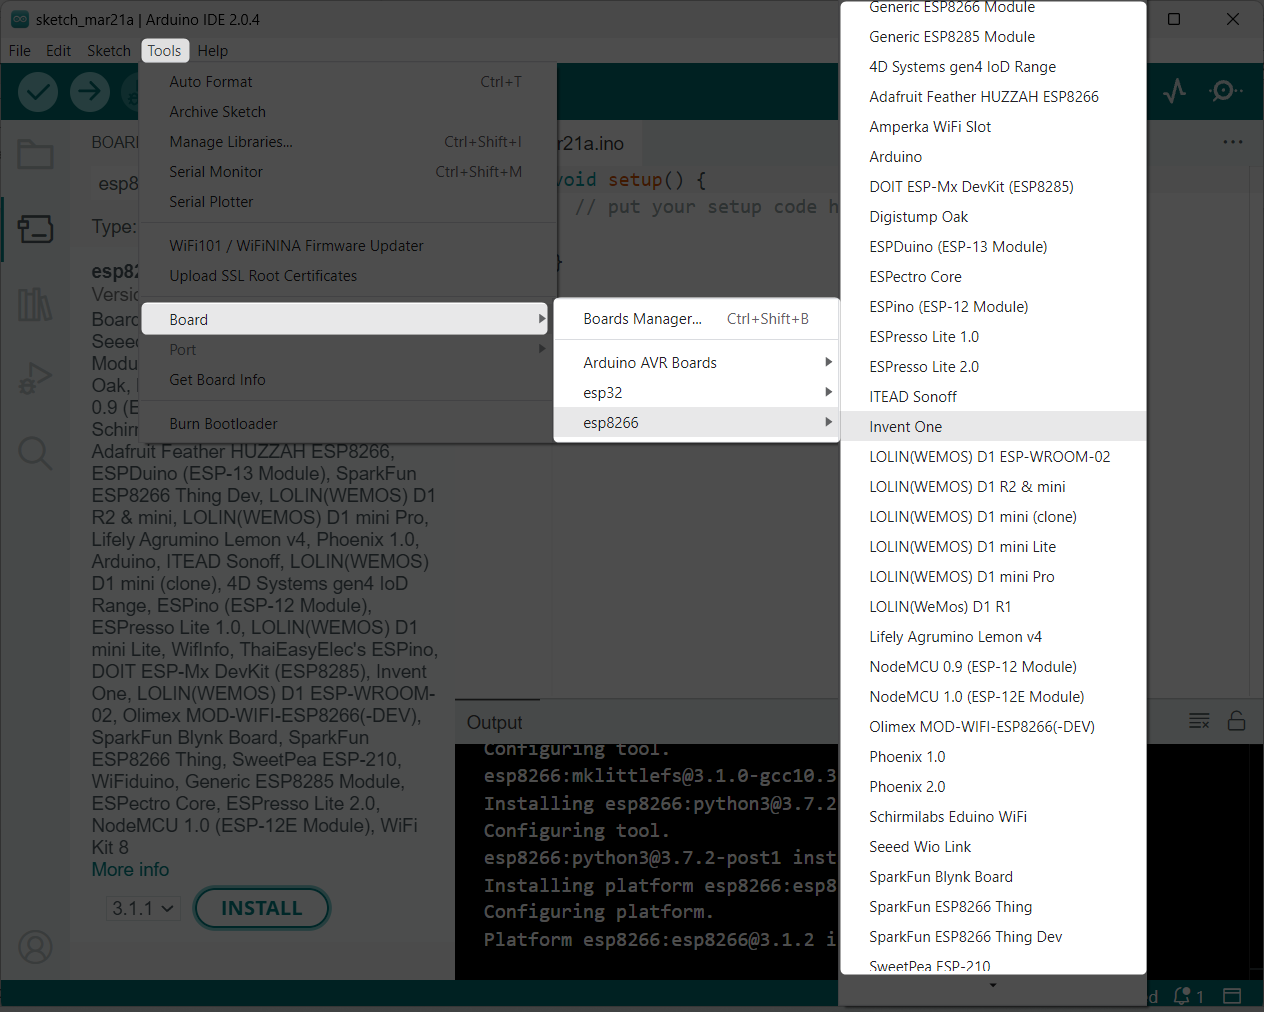
Step 6: Select the ESP8266 Board
After completing the installation process, go to “Tools” and select “Board”. Then, select whichever board you are going to use.
How to Program ESP8266 Using Arduino IDE
To program ESP8266 using Arduino IDE, the USB to Serial drivers must be installed in our system. Most of the time ESP8266 comes with CP2102 or CH340 serial driver chips. Both have separate drivers that must be installed in order to establish serial communication between ESP8266 and Arduino IDE.
Detailed instructions for installing these drivers can be found here:
Conclusion
The ESP8266 board in IDE can be installed using the JSON file. We just have to add it in the additional board manager inside the preferences settings. Once you’ve installed the board, you’ll be able to program the ESP8266 with the help of Arduino IDE.
Source: linuxhint.com