How To Install Eclipse with WindowBuilder on Ubuntu
This tutorial will help you install Eclipse with its visual development tool Window Builder. With this, you can develop computer applications in Java programming language rapidly by drag and drop aside from writing code and produce high quality Graphical User Interface (GUI) applications. Now let’s install it!
Subscribe to UbuntuBuzz Telegram Channel to get article updates.
Requirements
- Ubuntu 20.04 or later
- OpenJDK 11
- JRE 11
- Eclipse 2022-09
- WindowBuilder 1.11
Install Eclipse
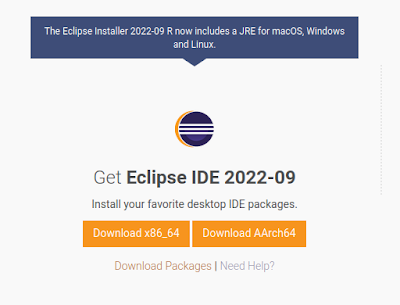
1. Visit https://www.eclipse.org/downloads.
2. Select Eclipse Installer for GNU/Linux operating system for x86_64.
3. You downloaded Eclipse program file in .tar.gz format. For our operating system, the file will look like eclipse-inst-jre-linux64.tar.gz.
4. Extract the file and you’ll get a folder named similarly eclipse-inst-jre-linux64/.
5. Within the folder, there is a eclipse-installer/ folder.
6. Within the folder, there is an executable eclipse-inst file.
7. In this folder, run command line via Terminal:
$ ./eclipse-inst
8. Eclipse Installer window will open.
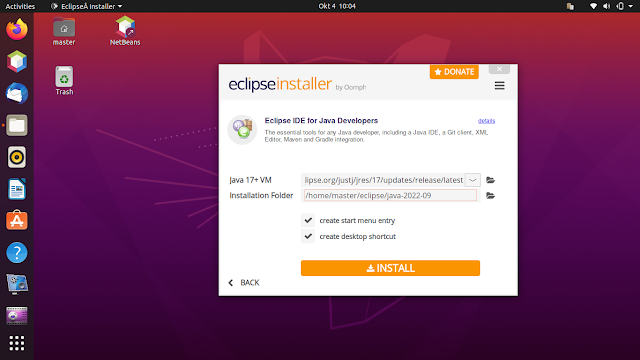
9. Click INSTALL and follow the guidance so it will download necessary files and finished. For instance, in our system Eclipse will be installed in the directory /home/master/eclipse/ where ‘master’ is our username.
10. Eclipse installed.
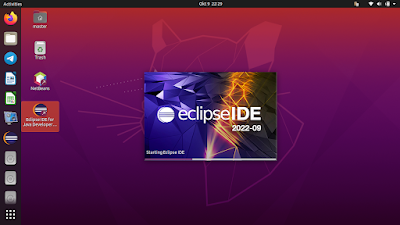
11. Run Eclipse from the applications menu.

Install Eclipse’s GUI Designer
1. Copy the link https://download.eclipse.org/windowbuilder/lastgoodbuild/.
2. Run Eclipse > click menu Help > Install New Software > Paste > click Add…
3. Check all packages listed under the link. They are ‘WindowBuilder‘ and ‘WindowBuilder XWT Support‘.
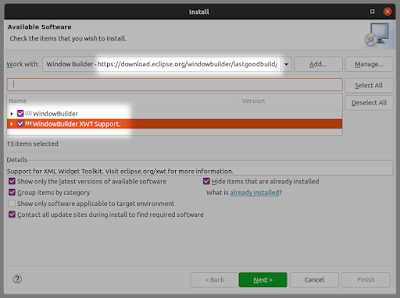
4. Click Next and let the installation finishes.
5. Once installed, Eclipse will have WindowBuilder, so close the Install dialog.
Open Eclipse GUI Designer
1. Run Eclipse.
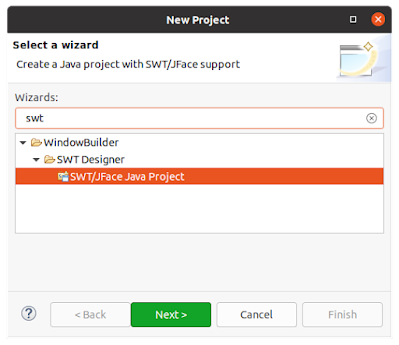
2. Go to menu File > New > Project > New Project dialog will open > select SWT/JFace Java Project option under SWT Designer under WindowBuilder category > click Next.
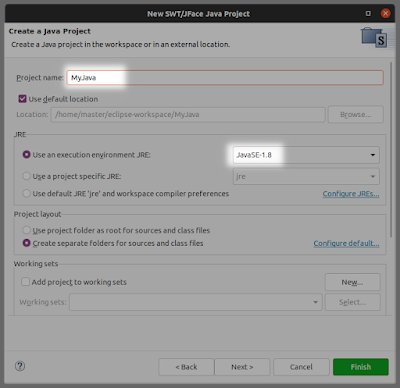
4. Write the name of the project MyJava.
5. Select JRE version JavaSE-1.8.
6. Click Finish.
7. A new project called MyJava will appear under Project Manager.
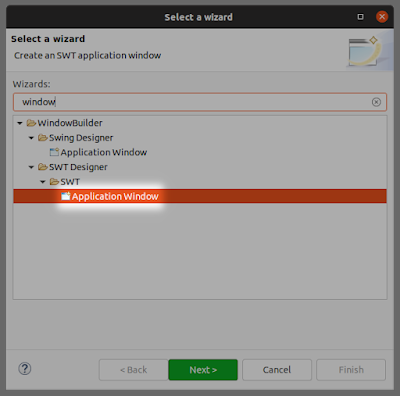
8. Right-click ‘src’ folder under MyJava > New > Other … > Select a wizard dialog will open > select Application Window under SWT under SWT Designer under Window Builder category > click Next.
9. Write a name for it MyWindow > click Finish.
10. A new class called MyWindow.java will appear as lines of codes under src in the project. Click Design tab to see the Window Builder. Click Source tab to see the source code again. See pictures below.
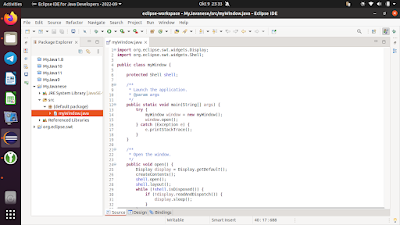
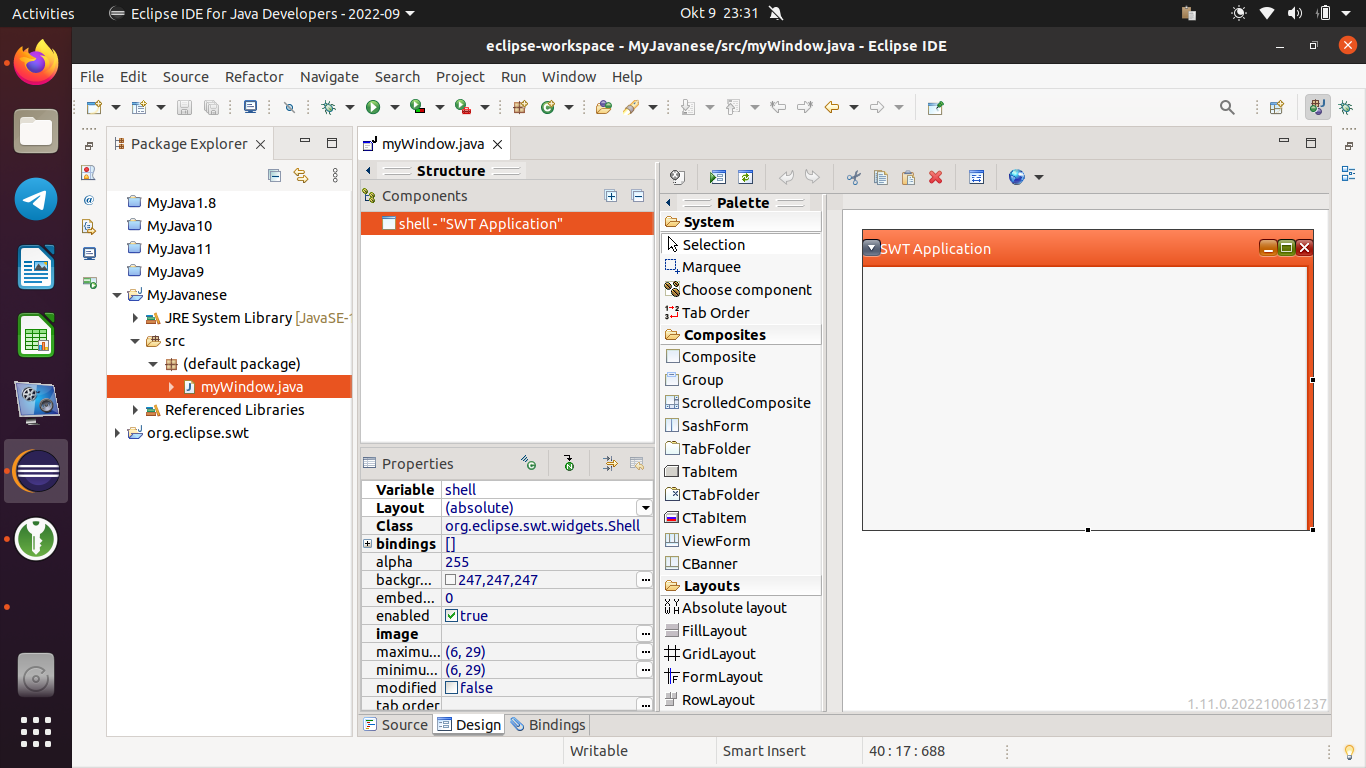
(Design view)
Now you can start rapid application development using WindowBuilder. Happy hacking!
References
Developing SWT Applications in Eclipse
[FAQ] How To Use SWT in Eclipse
Window Builder Tutorial — By Vogella
This article is licensed under CC BY-SA 3.0.
Source: Ubuntu Buzz !