How to Install Apache Subversion on Linux Mint 21
Apache subversion is a version control system that keeps track of changes in the files, folders, and directors of your Linux Mint 21. Not only that this also allows users to restore files to their previous versions and gives the whole history of all changes. Further if you are looking for an easy way to get Apache subversion on Linux Mint 21 then this guide is for you.
Installing Apache Subversion on Linux Mint 21
The subversion is often referred as svn and to install it on Linux Mint; just go through the below mentioned steps carefully:
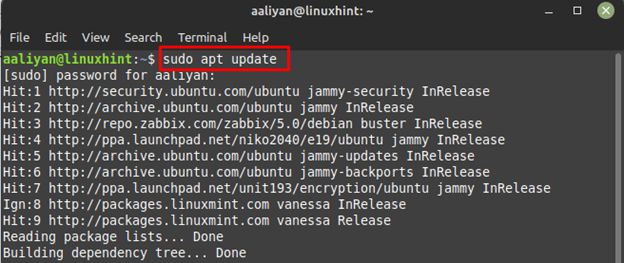
Step 1: For hassle free installation of svn update the packages list of the default package manager using:
Step 2: Next install Apache2 on Linux Mint through default package manager by executing:

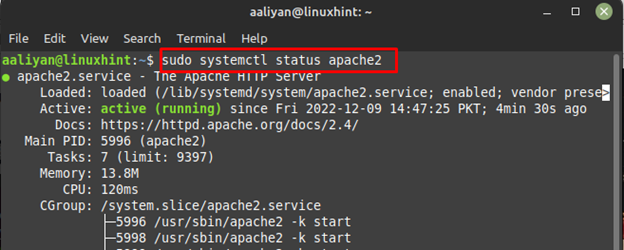
Now check the status of the service if its active and running and for that use:
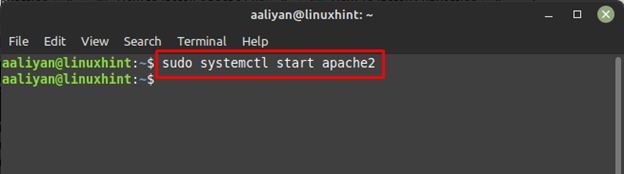
If it is not active, then start it by executing:
Step 3: Now just to be sure run the IP address of Linux Mint in the internet browser to see if Apache2 is working:

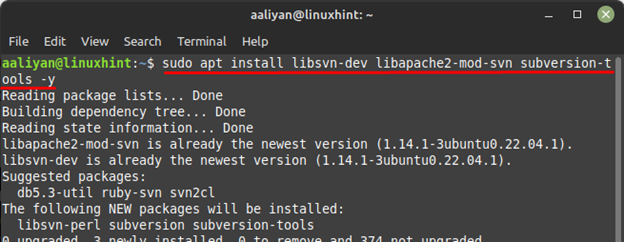
Step 4: Now, install the Apache Subversion using the default package manager of Linux Mint 21 by executing:
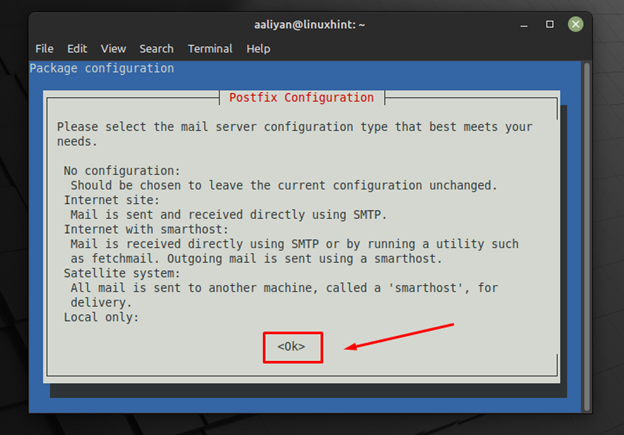
Next read the descriptions of configurations for postfix and select Ok:
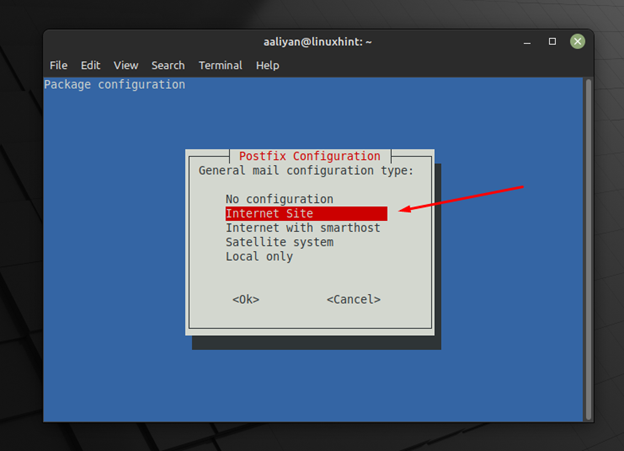
Now select the internet site option as a configuration for postfix and select Ok:
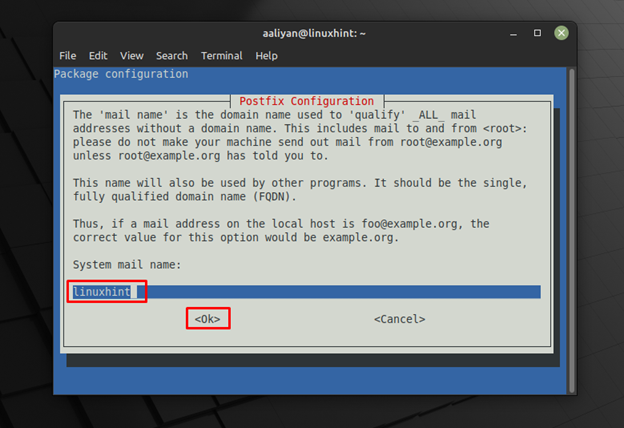
Now give the system mail name according to your preference and then click on OK to confirm the configuration, in my case I have given the name Linuxhint:
Step 5: Now enable the dav module of Apache by executing:

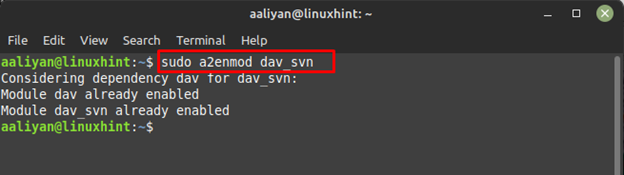
Next, enable the dav_svn module of Apache by executing:
Step 6: Now restart the Apache2 on Linux Mint to apply all the changes to it by using:

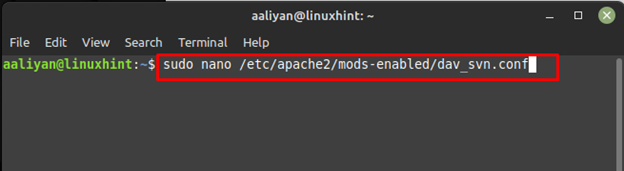
Step 7: Now open the configuration file for Apache dav_svn by executing:
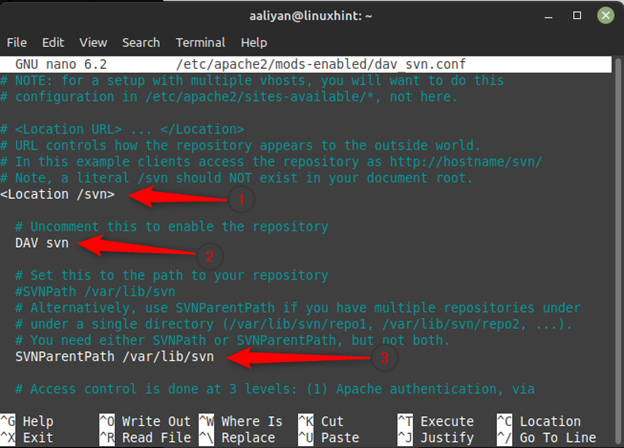
Now uncomment the below given lines first:
DAV svn
SVNParentPath /var/lib/svn
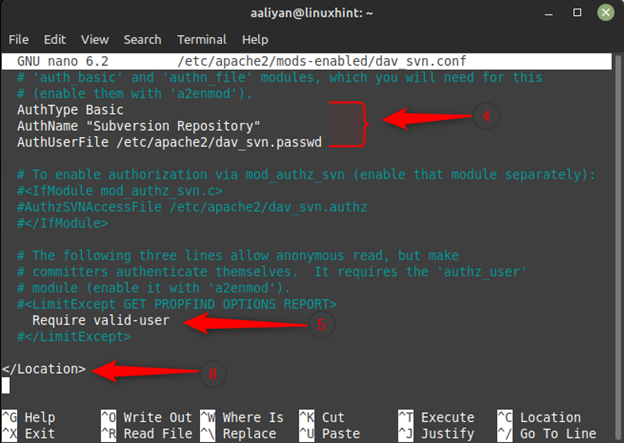
After that uncomment the other lines as well that are given below:
AuthName “Subversion Repository”
AuthUserFile /etc/apache2/dav_svn.passwd
Require valid-user
</Location>
Step 8: Next, create a directory named svn on Linux mint in opt directory using:

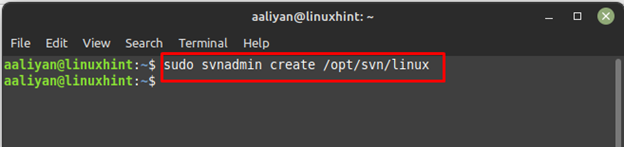
Step 9: Now create a repository and name it according to your preference as I have named it Linux by executing:
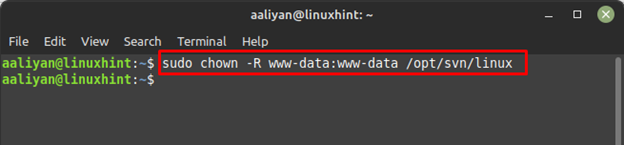
Step 10: Now change the ownership for directory we created above by executing:
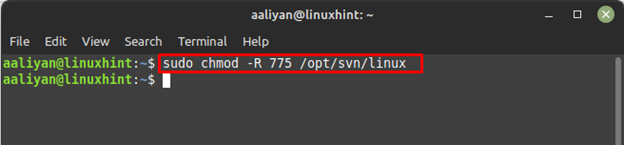
Next change the permissions for the svn directory using chmod command:
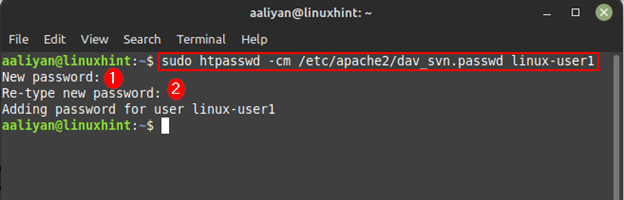
Step 11: Now it’s time to create svn users and set the password for it by executing the command:
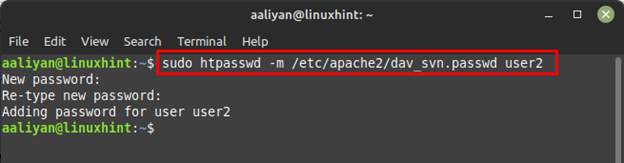
You can also create another user if you want to and for that execute:
Step 12: To apply the changes restart the Apache2 on Linux by executing:

Step 13: Now login to the Apache subversion for testing using the IP address along with the directory and repository name, below is the syntax for it:

So, this is how one can install Apache subversion on Linux Mint and track all the changes made to files and directories
Conclusion
Apache Subversion is a free to use open-source tool that Linux users can use to keep track of all the changes made in the files and directories of their systems or in any project. The installation process for getting Apache Subversion is though lengthy but is quite simple, this guide gives a detailed process for installing Apache Subversion on Linux Mint 21.
Source: linuxhint.com