How to Install and Use Wireshark on Raspberry Pi
How to Install and Use Wireshark on Raspberry Pi
Due to the growing demand for Wireshark, the Raspberry Pi developers include its repository into the official source list of your Raspberry Pi thus, it makes the installation process quite simple by using the following steps:
Step 1: Upgrade Raspberry Pi Packages
First, you must upgrade your current Raspberry Pi packages list through the following command so that you can install the latest version of software on your device.

The above command successfully upgrades the packages on your system.
Step 2: Install Wireshark on Raspberry Pi
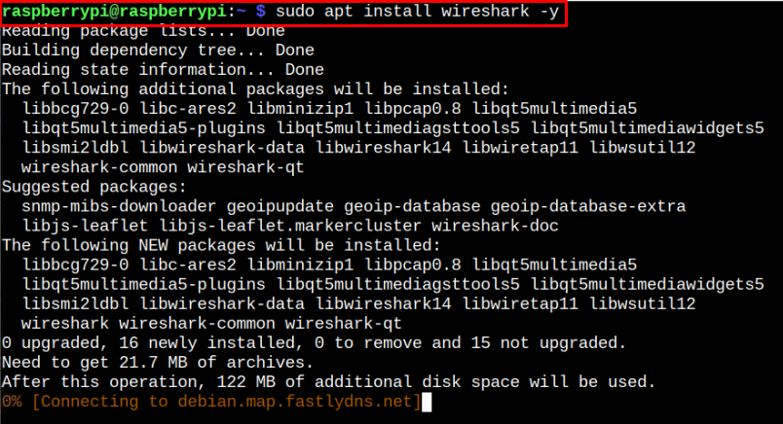
Once you successfully upgrade the Raspberry Pi system, you can apply the below-mentioned command to install Wireshark on your Raspberry Pi device:
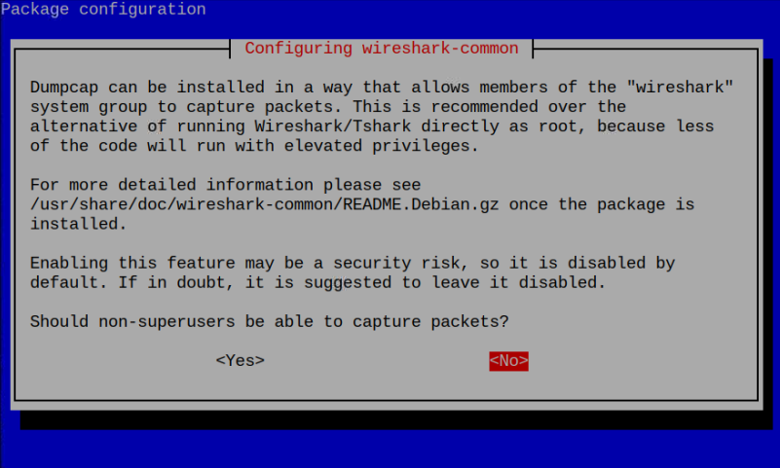
During the installation, a configuring window will appear on your Raspberry Pi terminal and to complete the installation, select the “NO” option as it is recommended.
Step 3: Run Wireshark on Raspberry Pi
After completing the installation of Wireshark on Raspberry Pi, you can run the application on your desktop using the following command:
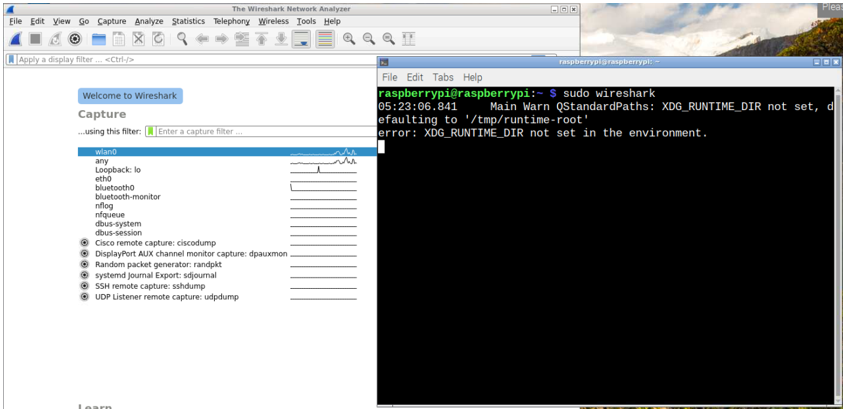
The reason we are using “sudo” command is that Wireshark allows only the current Raspberry Pi user to perform the network-related activities.
Step 4: Using Wireshark on Raspberry Pi
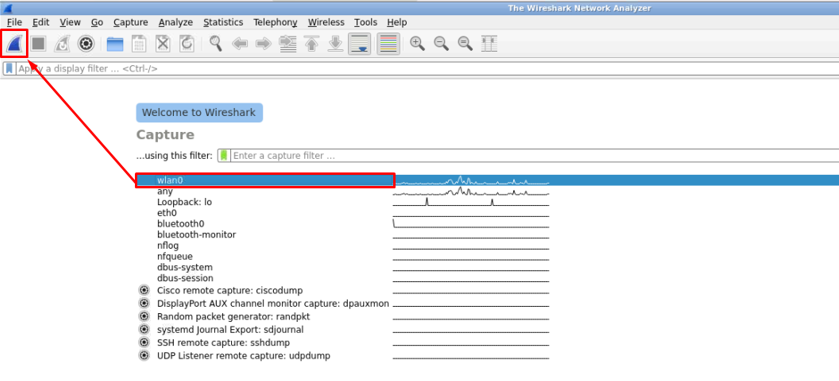
Once you open the Wireshark application, the first thing you have to do is to select your network interface to monitor the traffic. In our case, we have a Wireless connection, so we are picking “wlan0”. After the selection, click on the shark’s fin icon to monitor network traffic.
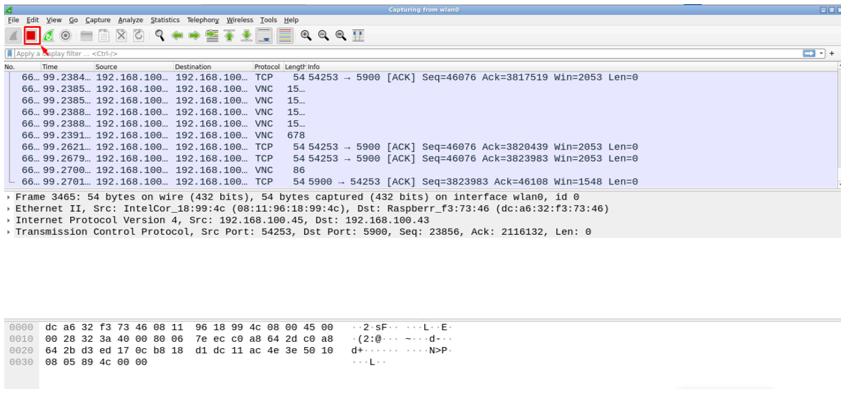
You will see three different parts combined together on a single window. The first part shows you the packet list, where you will see all captured packets on the network. The second part shows the packet details in a readable text format. The third part shows you the packet contents in bytes and hexadecimal format.

You will need to open any packet in the first section by double clicking it and you will get the macroscopic information of the selected packet.

The above output shows the source and destination addresses of the packet, port and sequence numbers. If you want to stop the network traffic monitoring, you can click on the red stop button.
Conclusion
Wireshark is a robust platform to monitor network traffic on different network interfaces and you can analyze the data packet from a network source right onto the software. The Wireshark installation can easily be done using the simple installation command mentioned above, and after completing the installation, you must select your network interface to start monitoring the network traffic. However, before installing this application, you must have enough knowledge of the networking as this will be quite helpful in understanding the working of this application.
Source: linuxhint.com