How to Install and Use Steam on Arch Linux
A digital distribution channel for programs and video games is called Steam. The Valve Corporation created and supported it. Steam may be downloaded from the official repositories and is installed on Arch Linux using the pacman development kit. One benefit of using Steam on Arch Linux is that it offers a practical method to download and manage the games. Additionally, it provides functions like online storage and automated upgrades. Steam has a sizable user and developer community which results in a diverse selection of games and applications that are being offered on the site. This article discusses how to set up and utilize Steam on Arch Linux.
Modify the Pacman Configuration File
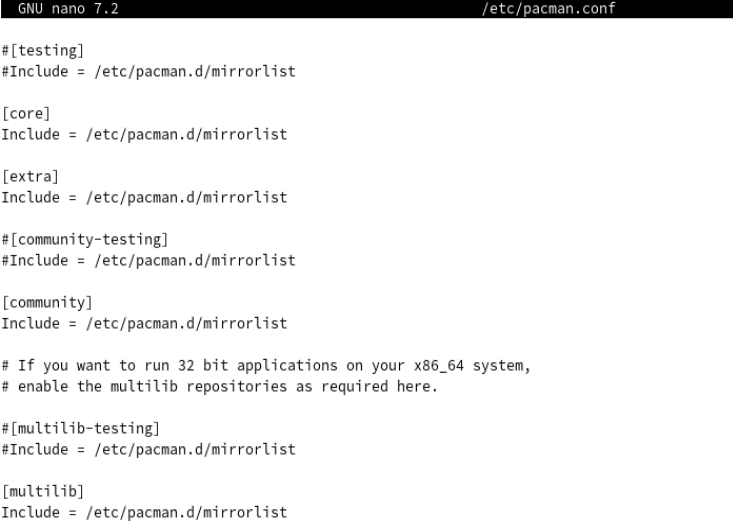
Before working with Steam, we should enable the multilib repository that is disabled by default. For this, we should modify the pacman configuration file. The following command uses the “nano” text editor to open and edit the “/etc/pacman.conf” file:
This file is a configuration file for the package manager on the system. It contains the settings that determine how pacman behaves when it is used to install, update, and manage the software packages on the system. Search for the following attached two lines and un-comment them. The changes that are done in this file are saved after the user exits the nano editor by saving the changes.
Include = /etc/pacman.d/mirrorlist
System Upgrade
It’s time to do a full system upgrade using the pacman utility. The command that is used for this is the –S option. Synchronize (download) the package databases from the –y server. Refresh all local -u package databases. Perform an upgrade of the packages. As a result, all installed packages are updated to the most recent version and are checked for updates. After synchronizing the package databases, the command starts the “full system upgrade” process.
:: Synchronizing package databases…
core is up to date
extra is up to date
community is up to date
multilib 164.9 KiB 52.5 KiB/s 00:03 [###########################################] 100%
:: Starting full system upgrade…
there is nothing to do
Install Steam
Now, it’s time to install the Steam package using the pacman utility followed by the “-S” option. The command starts by resolving the dependencies of the Steam package. It checks for any other packages that the Steam package depends on and needs to be installed for steam to work properly. After resolving the dependencies, it proceeds to download and install the package and its dependencies, showing the progress of the installation.
resolving dependencies…
:: There are 5 providers available for lib32-vulkan-driver:
:: Repository multilib
1) lib32-amdvlk 2) lib32-nvidia-utils 3) lib32-vulkan-intel 4) lib32-vulkan-radeon 5) lib32-vulkan-virtio
Enter a number (default=1):
looking for conflicting packages…
Packages (57) Size: 124.61 MiB
Total Installed Size: 488.00 MiB
:: Proceed with installation? [Y/n] y
:: Retrieving packages…
Optional dependencies for lib32-openssl
ca-certificates [installed]
Optional dependencies for lib32-mesa
Optional dependencies for steam
:: Running post-transaction hooks…
(1/4) Reloading device manager configuration…
(2/4) Arming ConditionNeedsUpdate…
(3/4) Updating icon theme caches…
(4/4) Updating the desktop file MIME type cache…
Launch Steam to Configure
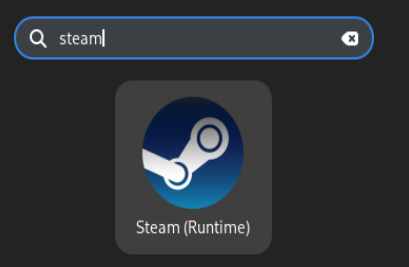
Search for the Steam utility in your activity search area as “steam”. The installed “Steam” utility will pop up. Tap on it to open it quickly.
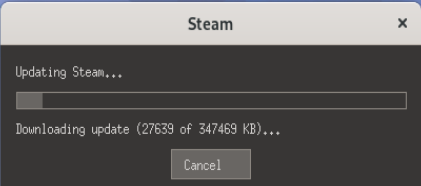
It might take more than 10 minutes to update the steam environment as the following dialog appears. Wait until it is ready for use.
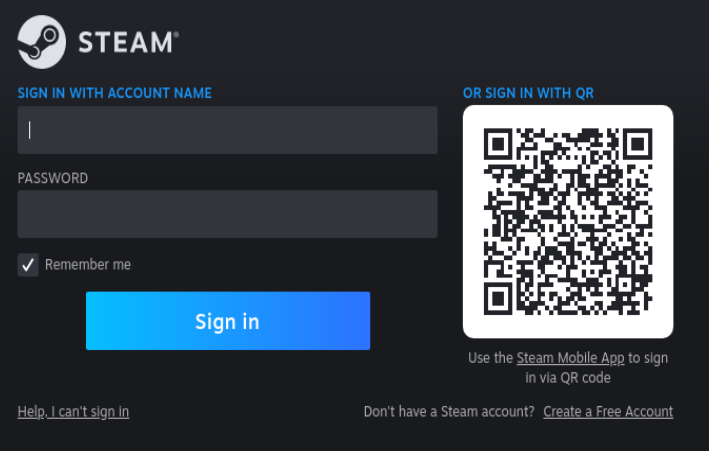
The following screen appears if you are using Steam for the first time in your Arch Linux system. This is a sign-in screen of Steam as you can see. You must register for a Steam account if you don’t have one. For that, tap the underlined “Create a Free Account” under the QR image or sign in with your username and password.
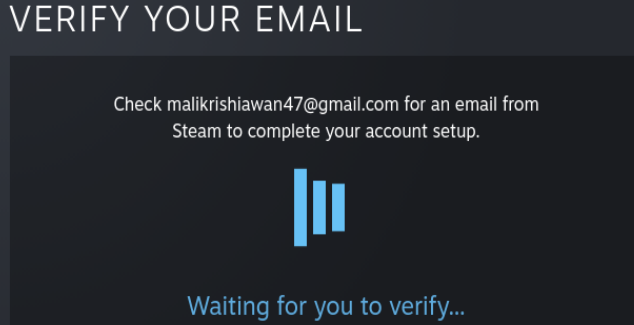
After creating an account, it needs your verification. For illustration, we provided it with a dummy email. It verifies it by sending an email. You need to open the email that is sent by the Steam platform in your Gmail to get verified.
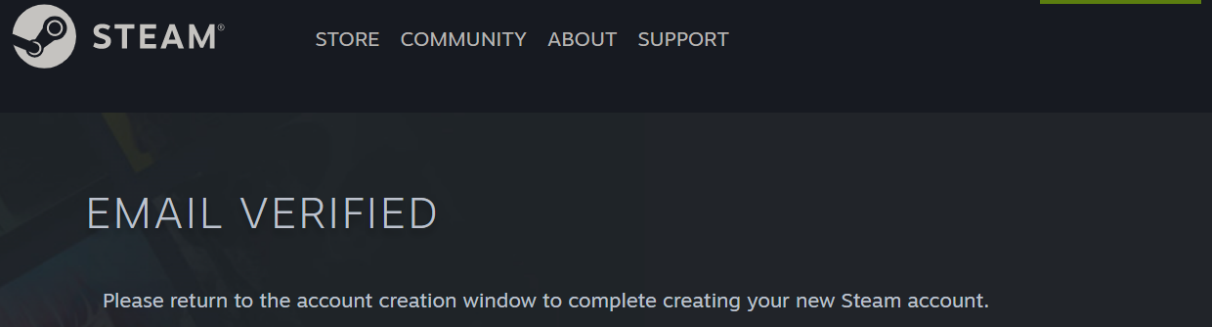
When your newly created account’s email address is successfully verified by the official Steam platform, you are then navigated to the following screen as shown in the image:
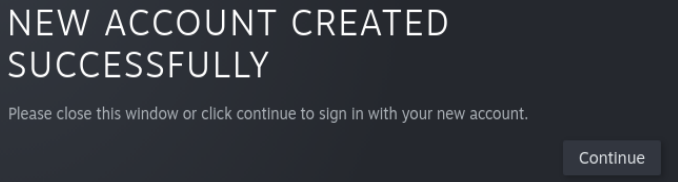
After the email verification, when you open the Steam utility that you just installed, you get the following success message on your screen. Tap “Continue” to open the Steam game area.
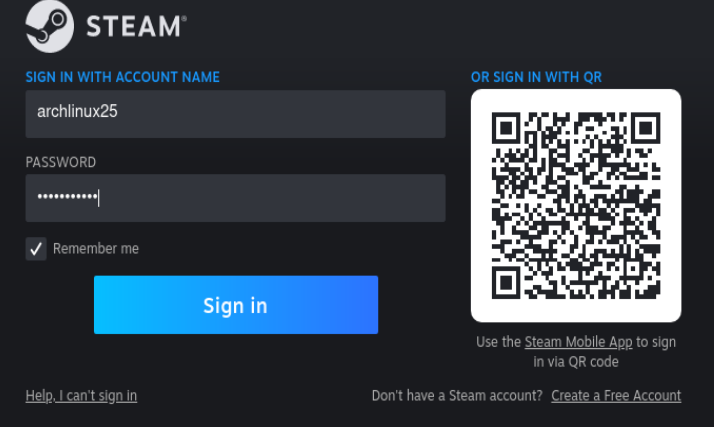
It requires you to log in from the newly made account using the username and password that you provided during the process of account creation as shown in the following:
Wait until you can access the Steam area.

Here is the home screen of the Steam platform that is opened in your Arch Linux. You can check for the games from the “GAMES” section under the “HOME” menu.

Set-up the Proton
By utilizing the Steam client, Valve Corporation’s Proton compatibility layer enables the Windows-only video games to operate on Linux-based systems. As opposed to using Wine on its own to run games, Proton gives the players an access to the features like built-in gamepad compatibility, enhanced visuals, and superior performance. Therefore, we use Proton to install and run the games on Steam within the Arch Linux which only works for Windows-like operating systems. For this, we need to set up a Proton in Arch Linux first. The command to install Proton starts with the “yay” utility followed by the “-S” option and the “proton” keyword. When the command is run, yay lists 5 providers that are available for the “proton” package. These providers are the different versions or variants of the package that are available in the AUR.
To choose a certain provider to deploy, the user is asked to input a number. The command also lists the providers that are available for other packages such as “afdko” and “python-ufonormalizer”. The user is prompted to select a provider for each of these packages. Finally, yay checks for conflicts and inner conflicts before installing the package. The package proton-1:7.0.6-2 is installed in this scenario. After installing the Proton utility, make sure to restart the Steam application that you just installed. Now, you will be able to install and run the games which you used to play in your Windows environment and which were not able to play on Linux before.
:: There are 5 providers available for proton:
:: Repository AUR
1) proton 2) proton-experimental 3) proton-ge-custom 4) proton-ge-custom-bin 5) proton-git
Enter a number (default=1):
:: There are 2 providers available for afdko:
:: Repository AUR
1) afdko 2) afdko-git
Enter a number (default=1):
==> 1
:: There are 2 providers available for python-ufonormalizer:
:: Repository AUR
1) python-ufonormalizer 2) python-ufonormalizer-git
Enter a number (default=1):
==> 1
:: There are 2 providers available for python-defcon:
:: Repository AUR
1) python-defcon 2) python-defcon-git
Enter a number (default=1):
==> 1
:: Checking for conflicts…
:: Checking for inner conflicts…
[Aur:1] proton-1:7.0.6-2
Conclusion
This guide explains the use of the Steam distribution channel for games in the Arch Linux System. For this, we modified the configuration file for the pacman package manager of Arch Linux to enable the multilib repository. After upgrading the Arch Linux system, we installed the Steam utility using the pacman package manager. After configuring it in our system and creating an account, we successfully launched it. Additionally, we also installed the proton utility in Arch Linux with the help of the “yay” utility to run the window-like games in the Arch Linux system.
Source: linuxhint.com