How to Install and Run Wiki.js on Raspberry Pi
In this guide, you will learn about:
- What is Wiki.js
- What are Features of Wiki.js
- Why is it Important to Install and Run Wiki.js on Raspberry Pi
- Prerequisites for Running Wiki.js on Raspberry Pi
- How to Install and Run Wiki.js on Raspberry Pi
- Conclusion
What is Wiki.js
Wiki.js is a free and open-source Wiki software written in JavaScript and uses the Node.js runtime environment. It is a powerful and versatile wiki platform that helps you create and edit content. It is often used to create and maintain knowledge bases, documentation and several other types of shared information. It is like a software that you can use to create and manage the wiki, as it provides various tools that help you edit pages, add images, files as well as manage users and permissions.
What are Features of Wiki.js
Wiki.js is a powerful tool that offers a wide range of features, some of them are given below:
- Search and Filtering
- Markdown Editor
- Authentication
- User Management and Permissions
- Built-in Search Engine
- Git Backed Storage
- Version Control and History
- Search and Filtering
- Global Navigation
- Themes and Customization
Why is it Important to Install and Run Wiki.js on Raspberry Pi
Wiki.js is a good choice for Raspberry Pi because:
- It is lightweight, efficient, and ideal for running on a low-powered device like Raspberry Pi.
- It can be easily installed and configured on your Raspberry Pi system.
- It has large community support, helping you in solving problems while working with Wiki.js on Raspberry Pi.
Prerequisites for Running Wiki.js on Raspberry Pi
To install Wiki.js on Raspberry Pi, you will need the following prerequisites:
- Raspberry Pi Device with Minimum 2GB RAM
- Raspberry Pi Operating System
- Complete Desktop Setup
- A Stable Ethernet or Wi-Fi Connection
How to Install and Run Wiki.js on Raspberry Pi
Installing and running Wiki.js on Raspberry Pi is straightforward process and can be done through the following steps:
Step 1: Upgrade Raspberry Pi Packages
Ensure the packages you installed on Raspberry Pi are up to date, if they are not, the following command should be used to upgrade them.
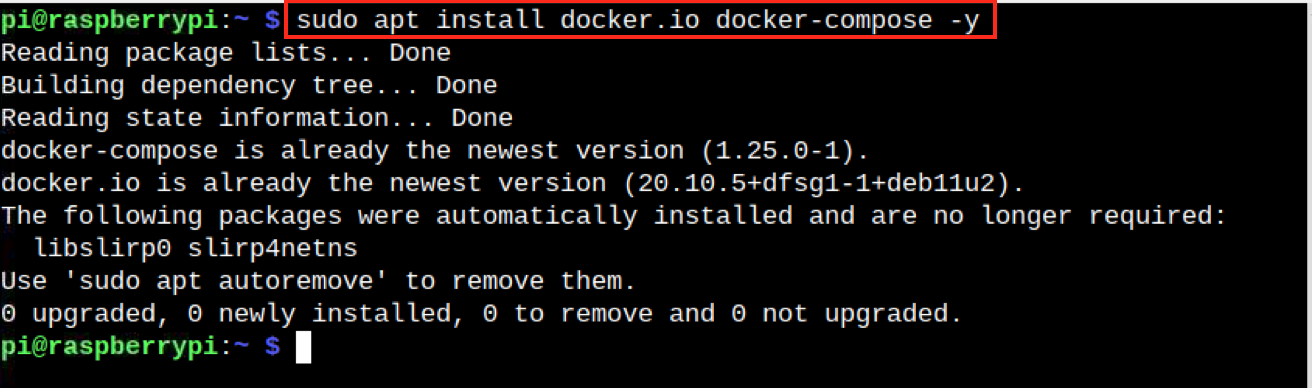
Step 2: Install Docker and Docker Compose on Raspberry Pi
You should also ensure Docker and Docker Compose installation on Raspberry Pi. There are multiple methods to install Docker and Docker Compose on Raspberry Pi; however, the most straightforward method to install them is through the apt package manager using the following command:
Step 3: Create a wikijs Directory
Now, create a wikijs directory on Raspberry Pi from the following command because you have to put all the contents of the installation in this directory.
Step 4: Navigate to wikijs Directory
You can navigate to the created wikijs directory on Raspberry Pi by using the following command:
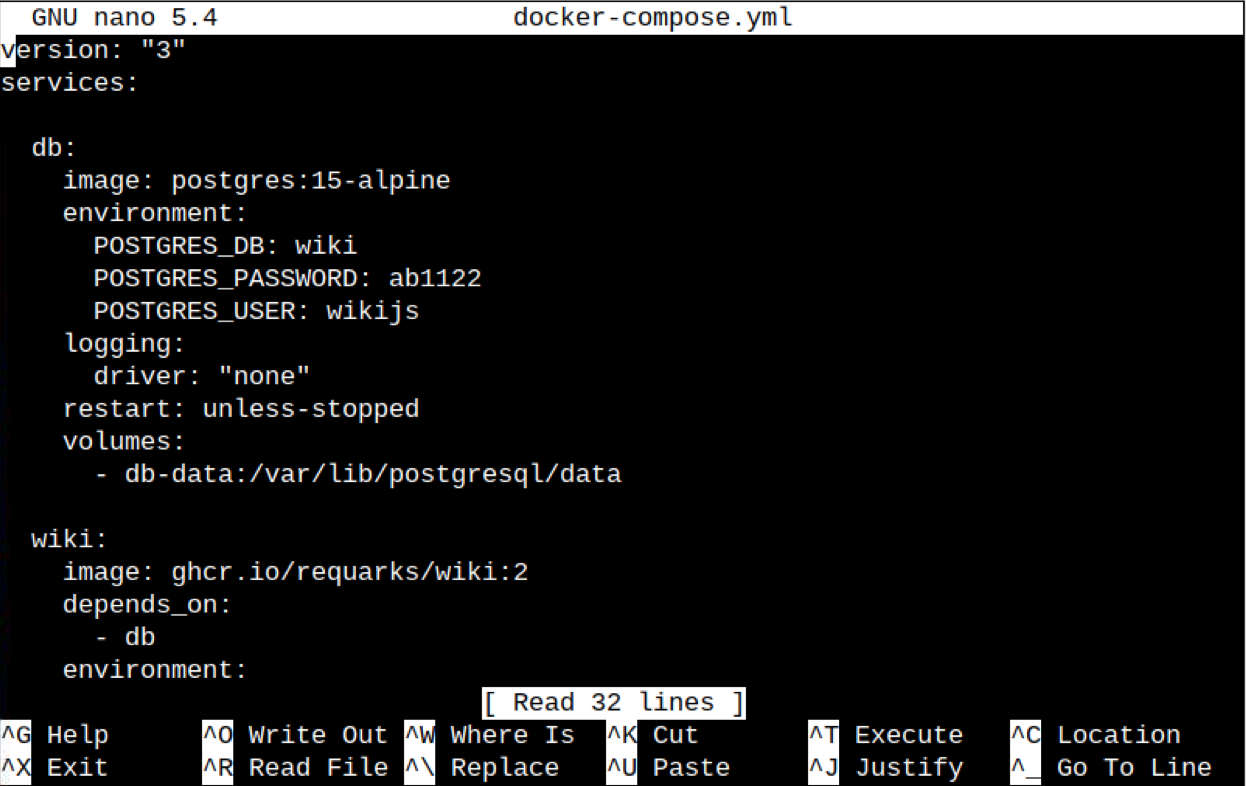
Step 5: Create a Docker Compose yml File
Inside the wikijs directory, you have to create a Docker yml file from the following command:
Then inside the file, add the following lines:
services:
db:
image: postgres:15-alpine
environment:
POSTGRES_DB: wiki
POSTGRES_PASSWORD: <your password>
POSTGRES_USER: wikijs
logging:
driver: "none"
restart: unless-stopped
volumes:
- db-data:/var/lib/postgresql/data
wiki:
image: ghcr.io/requarks/wiki:2
depends_on:
- db
environment:
DB_TYPE: postgres
DB_HOST: db
DB_PORT: 5432
DB_USER: wikijs
DB_PASS: <your password>
DB_NAME: wiki
restart: unless-stopped
ports:
- "80:3000"
volumes:
db-data:
Just replace the password of your choice in place of <your password> in the above-mentioned code, while the rest of the lines remain the same.
Step 6: Save the Changes
After replacing the password, save the file by pressing CTRL+X, add Y and press enter.
Step 7: Pull the Latest Version of Wiki.js and Postgres
Before moving towards accessing the Wiki.js interface, you have to run one final command provided below to pull the latest version of Wiki.js and Postgres on your Raspberry Pi system:

Wait till the process completes pulling up the files.
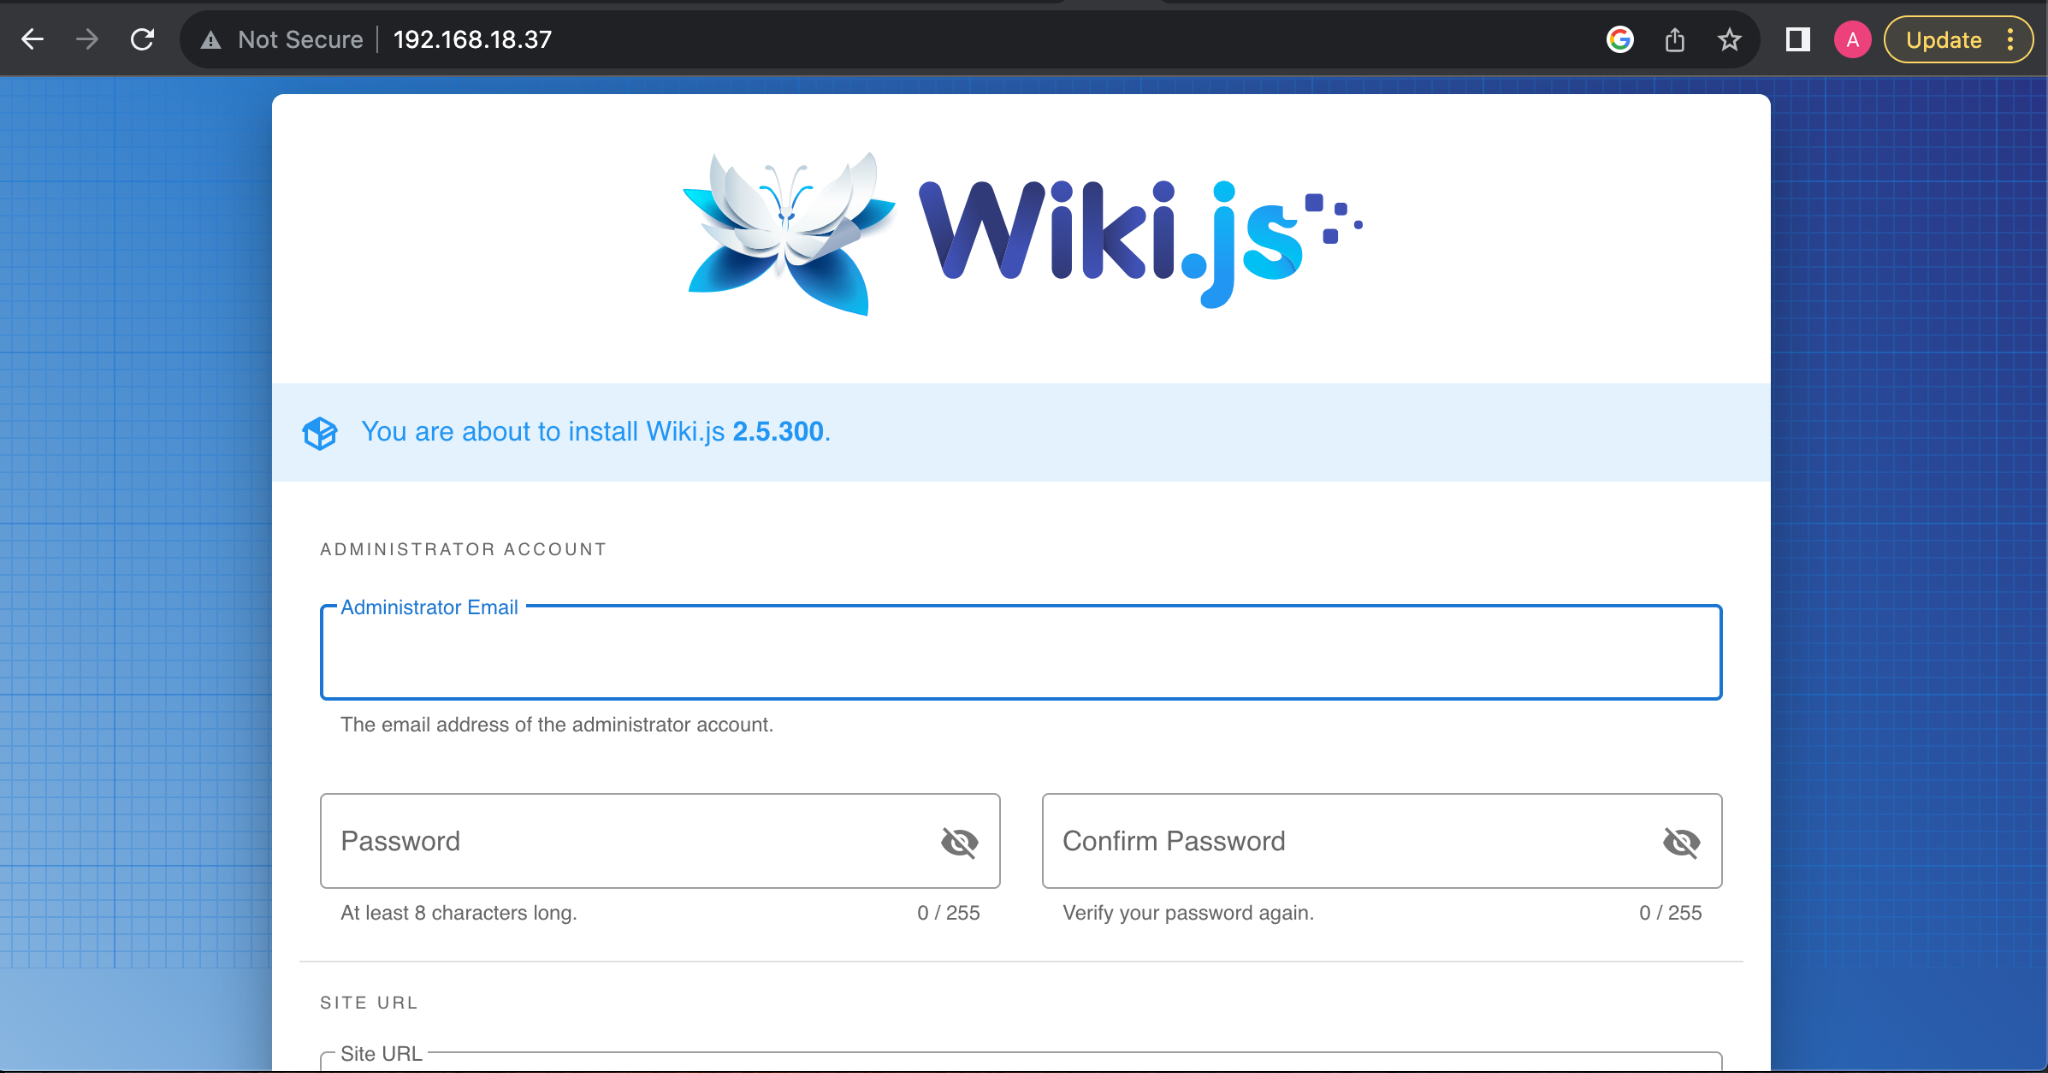
Step 8: Access Wiki.js Interface
After completing the pull operation, you can access the Wiki.js interface by running the following address in the browser.
Note: The IP address of Raspberry Pi can be found from the “hostname -I” or “ifconfig” commands.
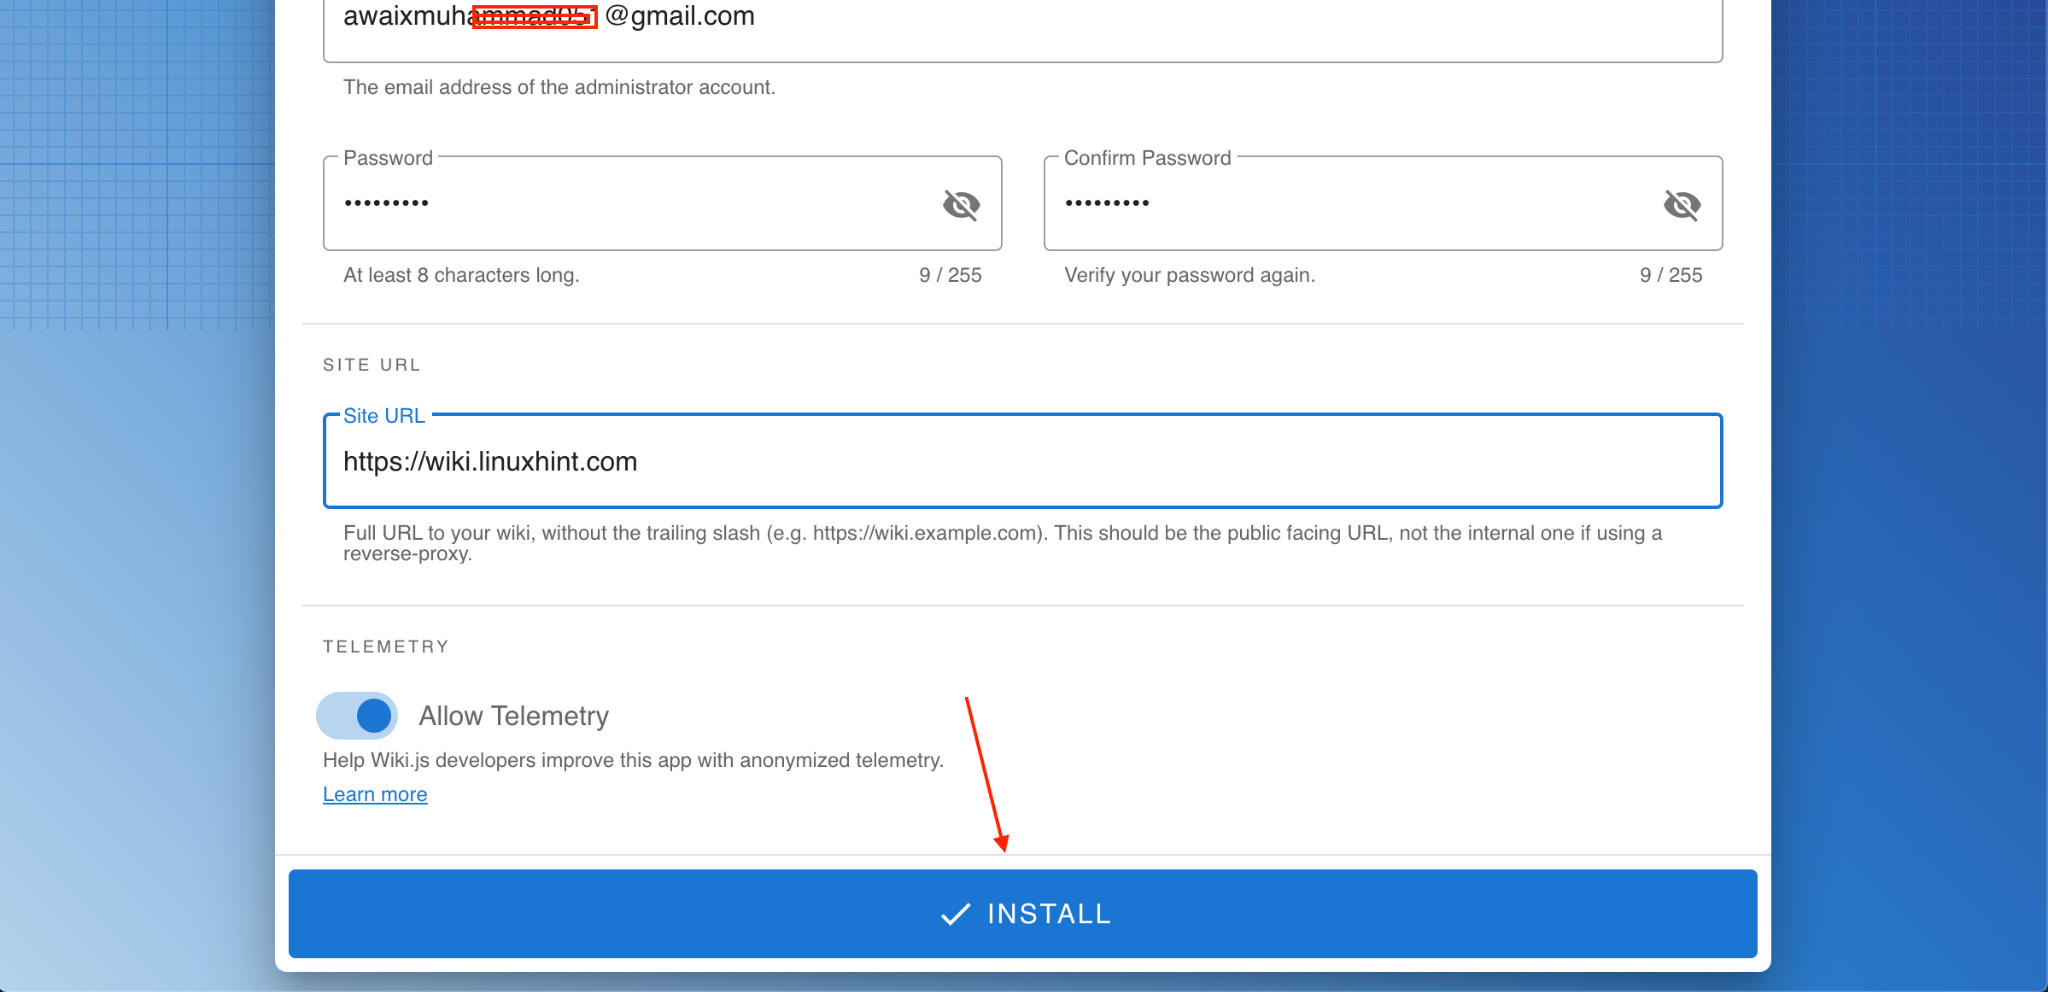
Step 9: Complete the Information
You must provide your administrator email, password and site URL, then click on the Install button to complete the installation of Wiki.js:
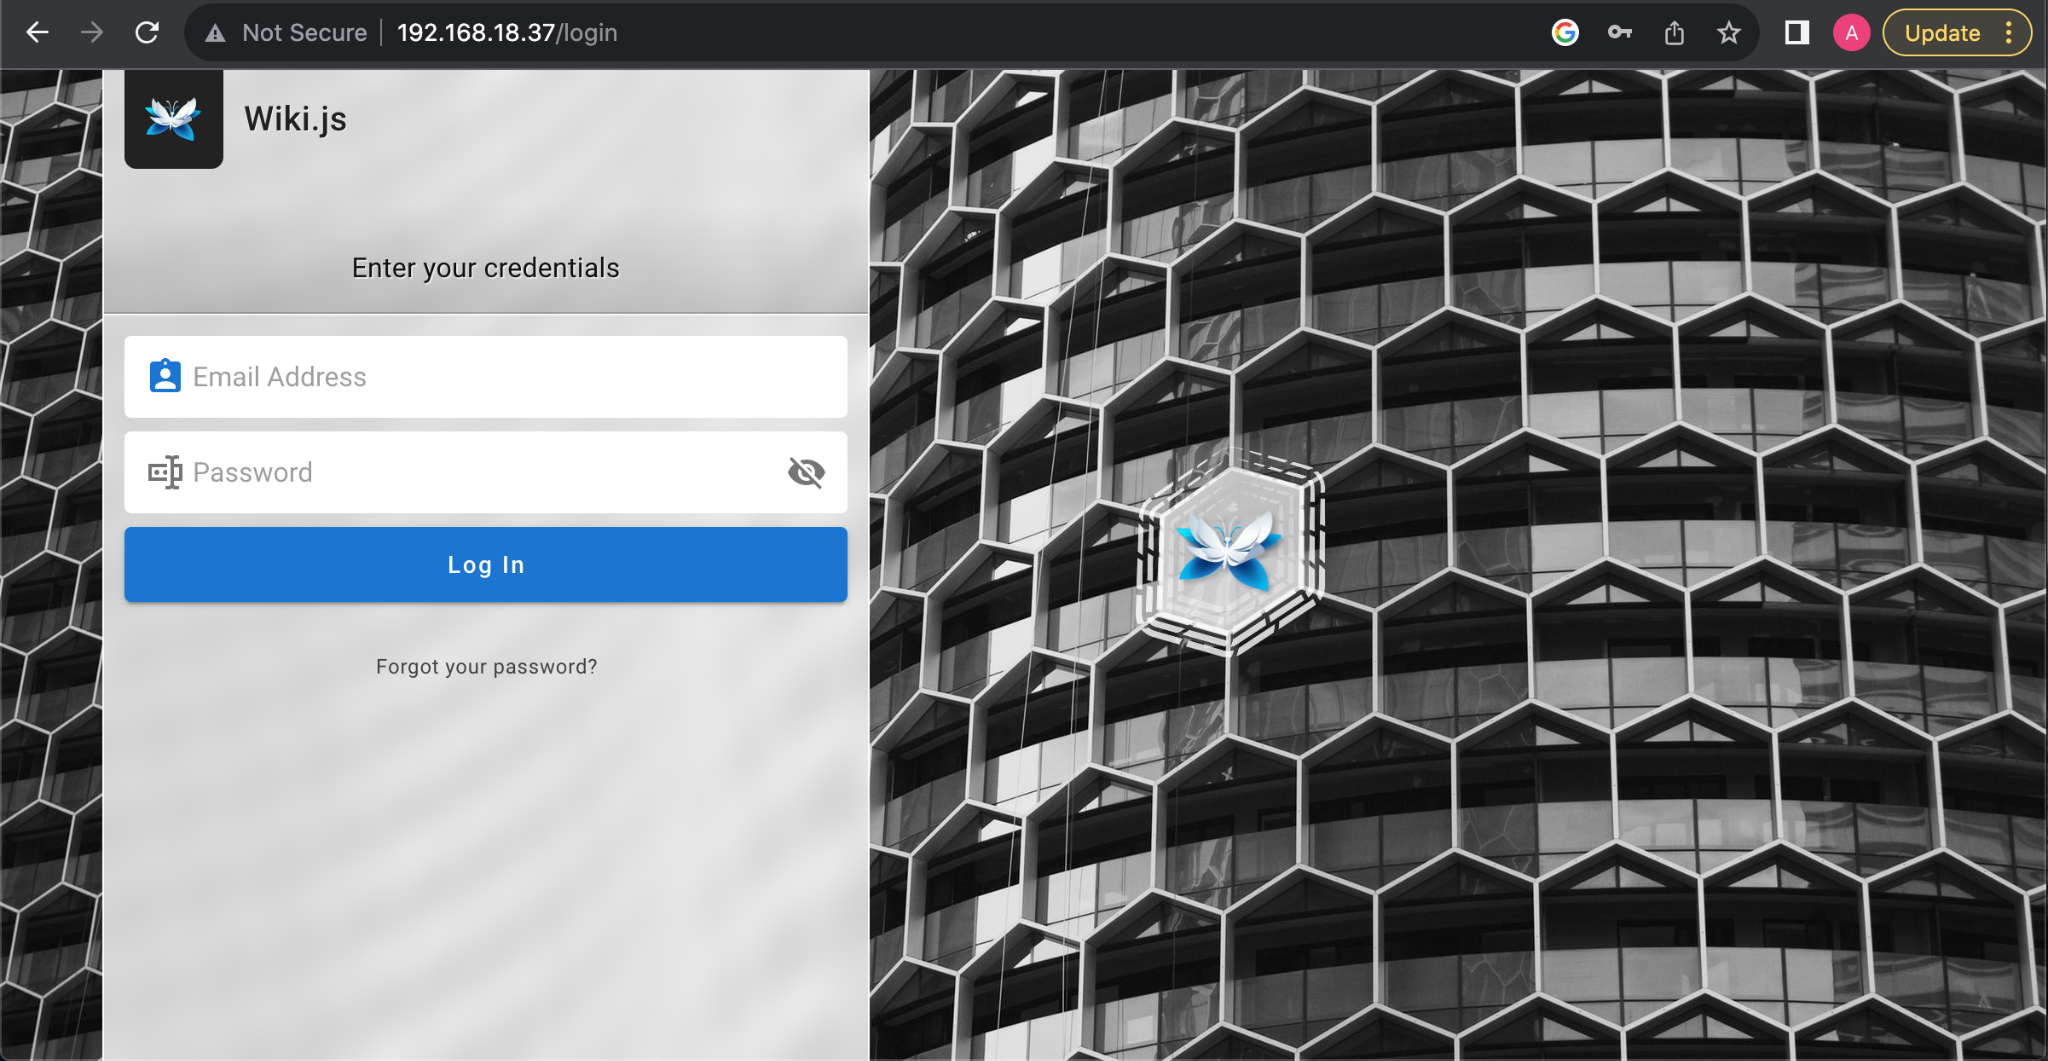
After the installation is completed, you will see the Wiki.js sign in page. Provide email and password to log in to Wiki.js:
Seeing the Wiki.js welcome page after the log in will ensure that Wiki.js is successfully installed and running on the Raspberry Pi system. You can browse the Wiki.js administration page or create a homepage by yourself.

Note: You must be aware of using it, you can get a complete guide from here.
Conclusion
Wiki.js is an effective platform for managing wiki and can be installed on Raspberry Pi within a few steps. You have to update packages on your system, then install Docker and Docker Compose later on since they are required for running Wiki.js. Afterward, you have to run the docker-compose command to pull the latest version of Wiki.js and Postgres on Raspberry Pi, then use the host IP address to access the Wiki.js webpage on the browser.
Source: linuxhint.com