How to Install and Run RetroPie as an App on Raspberry Pi
In this guide, you will learn about:
- Why is it Useful to Install RetroPie as an App on Raspberry Pi
- Prerequisites Required to Install RetroPie as an App on Raspberry Pi
- How to Install RetroPie as an App on Raspberry Pi
- How to Add Games to RetroPie on Raspberry Pi
- How to Run RetroPie at System Startup on Raspberry Pi
- How to Overclock Raspberry Pi to Improve RetroPie Performance
- Conclusion
Why is it Useful to Install RetroPie as an App on Raspberry Pi
RetroPie installation as a standalone operating system on Raspberry Pi devices is pretty straightforward and requires only the RetroPie image. However, some users prefer to use RetroPie as an app because they don’t want to dedicate the device only to gaming purposes. Installing RetroPie as an app will help users switch between the RetroPie and other desktop apps any time on their Raspberry Pi systems.
Prerequisites Required to Install RetroPie as an App on Raspberry Pi
To install RetroPie on Raspberry Pi, you will need:
- Raspberry Pi 4 or Raspberry Pi 5 Device
- Raspberry Pi Operating System 32 Bit
- Complete Raspberry Pi Desktop Setup
- Wi-Fi or Ethernet Connectivity
How to Install RetroPie as an App on Raspberry Pi
You can install RetroPie as an app on Raspberry Pi by using the following steps:
Step 1: Download RetroPie Source Directory
You will need to download the RetroPie source file designed for Raspberry Pi from the GitHub website through the following command:

Step 2: Navigate to RetroPie Source Directory
After downloading the RetroPie source directory, you can navigate to it through the following command:
Step 3: Allow Execute Permission to RetroPie Script File
Inside the source directory, you will find a RetroPie script file that may require the user’s permission to make the file executable. You can make this file executable by running the following command:
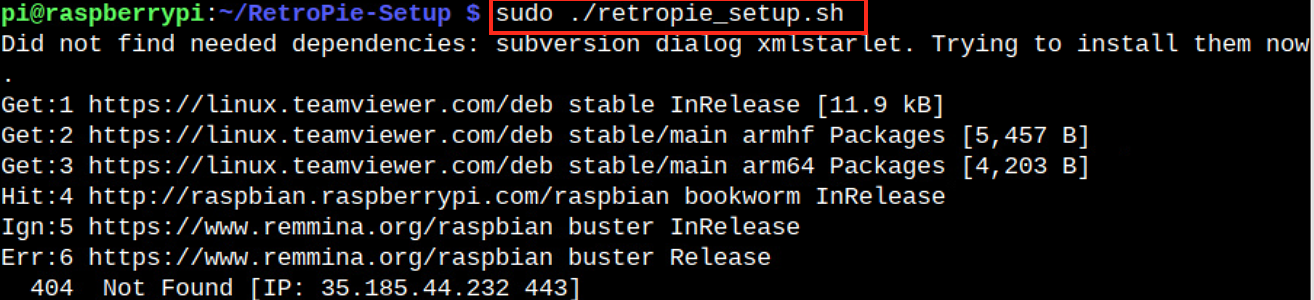
Step 4: Run the Script File
After you give the execute permission to the RetroPie script file, you can run it on Raspberry Pi from the following command:
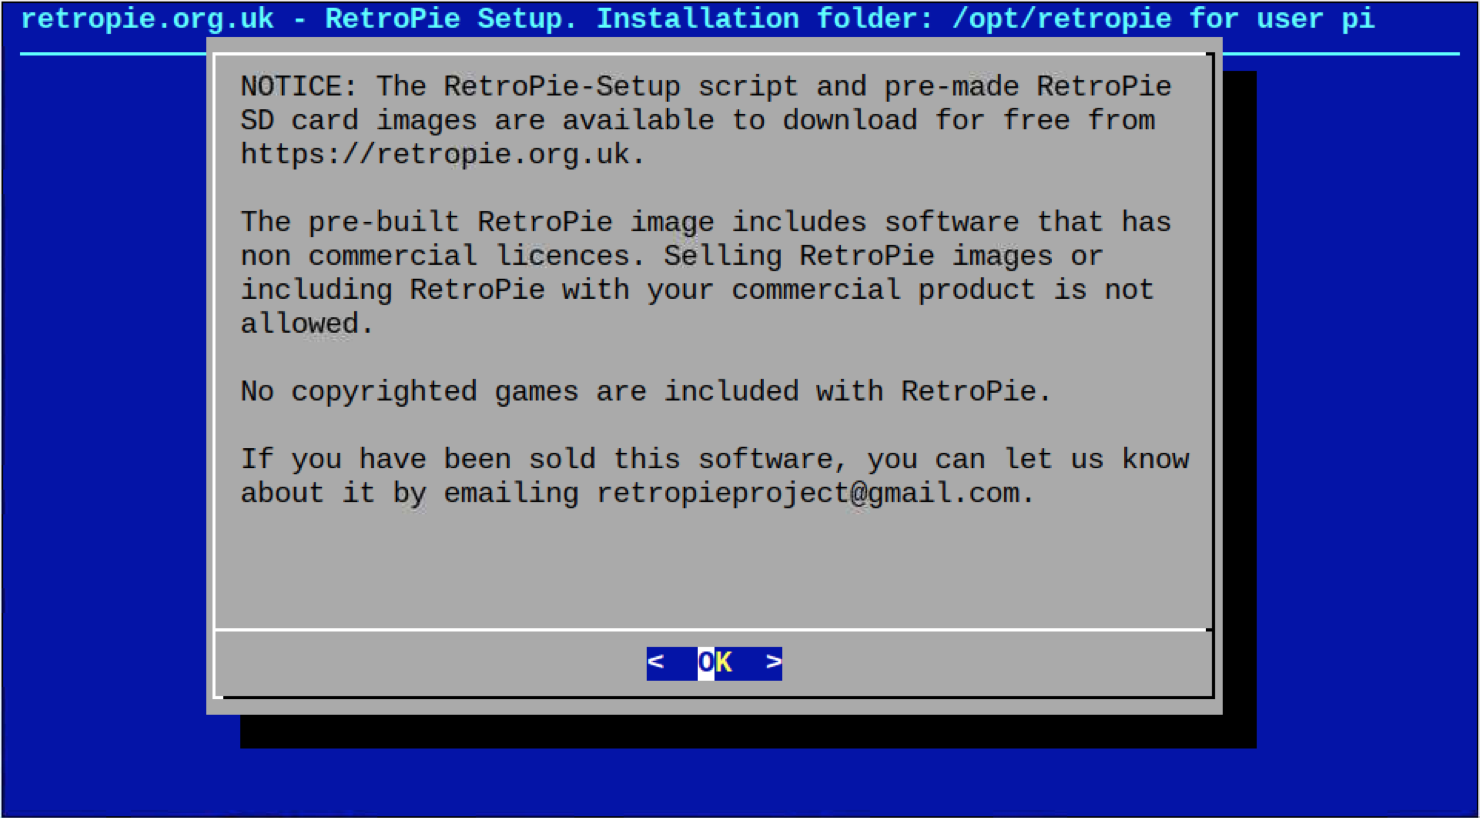
After you run the script, you will see the RetroPie Setup screen, press Enter to move forward:

Press Enter on the next prompt screen:
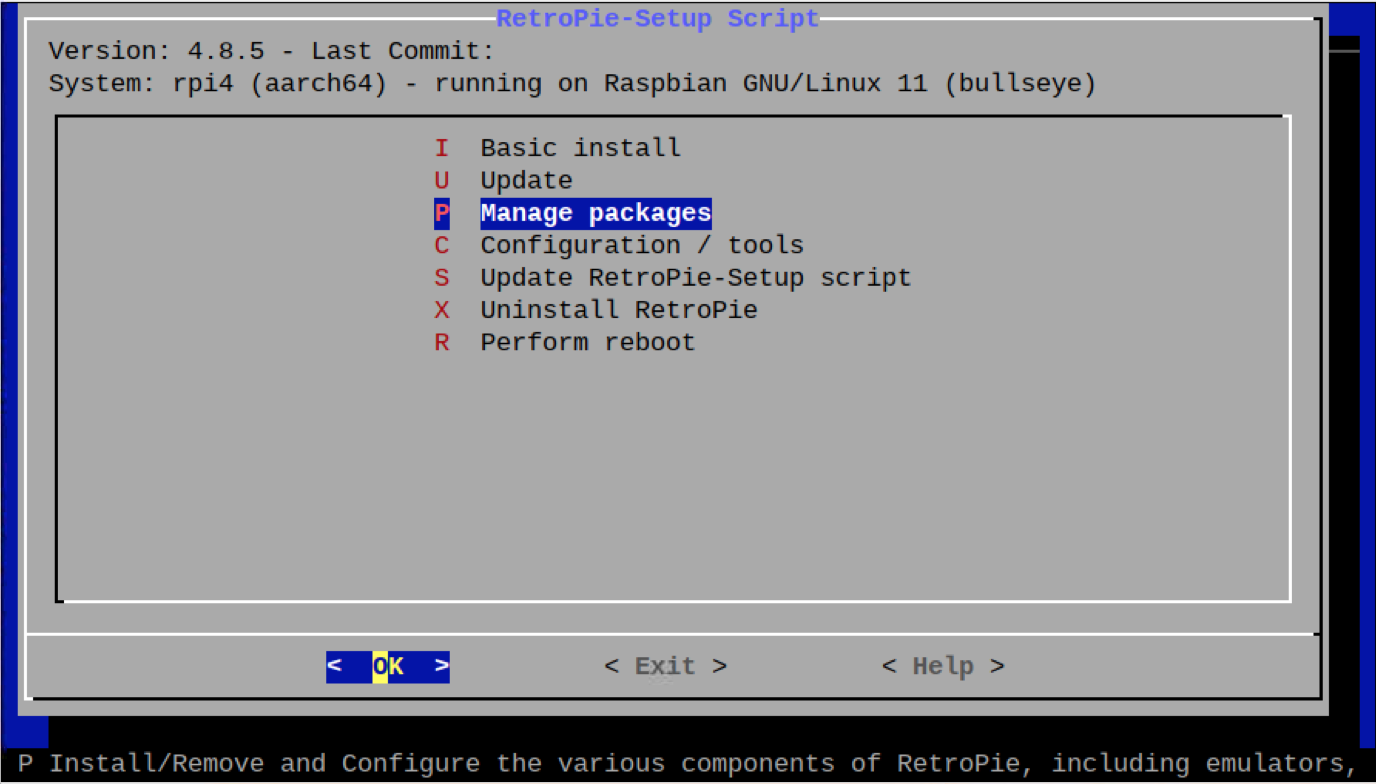
Now navigate to Manage packages option:
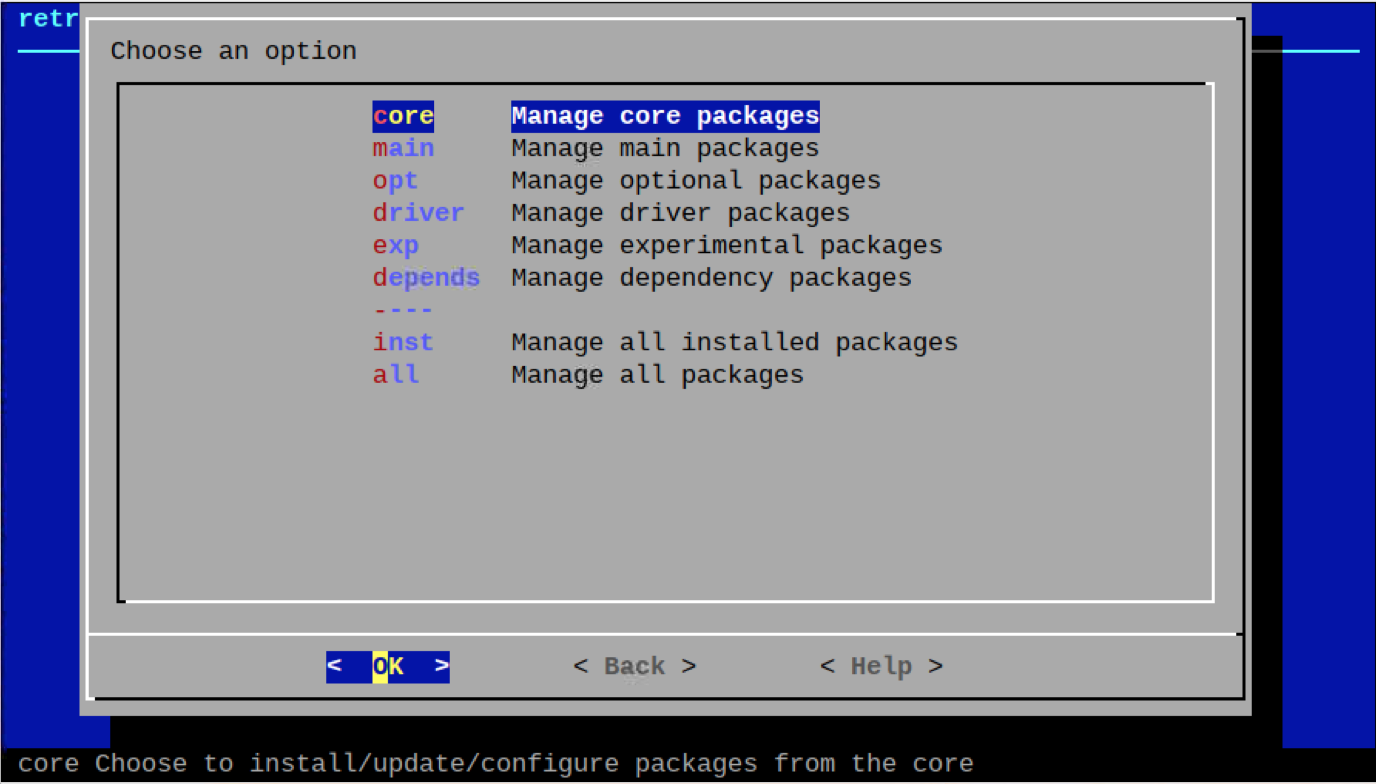
Select the Manage core packages option:
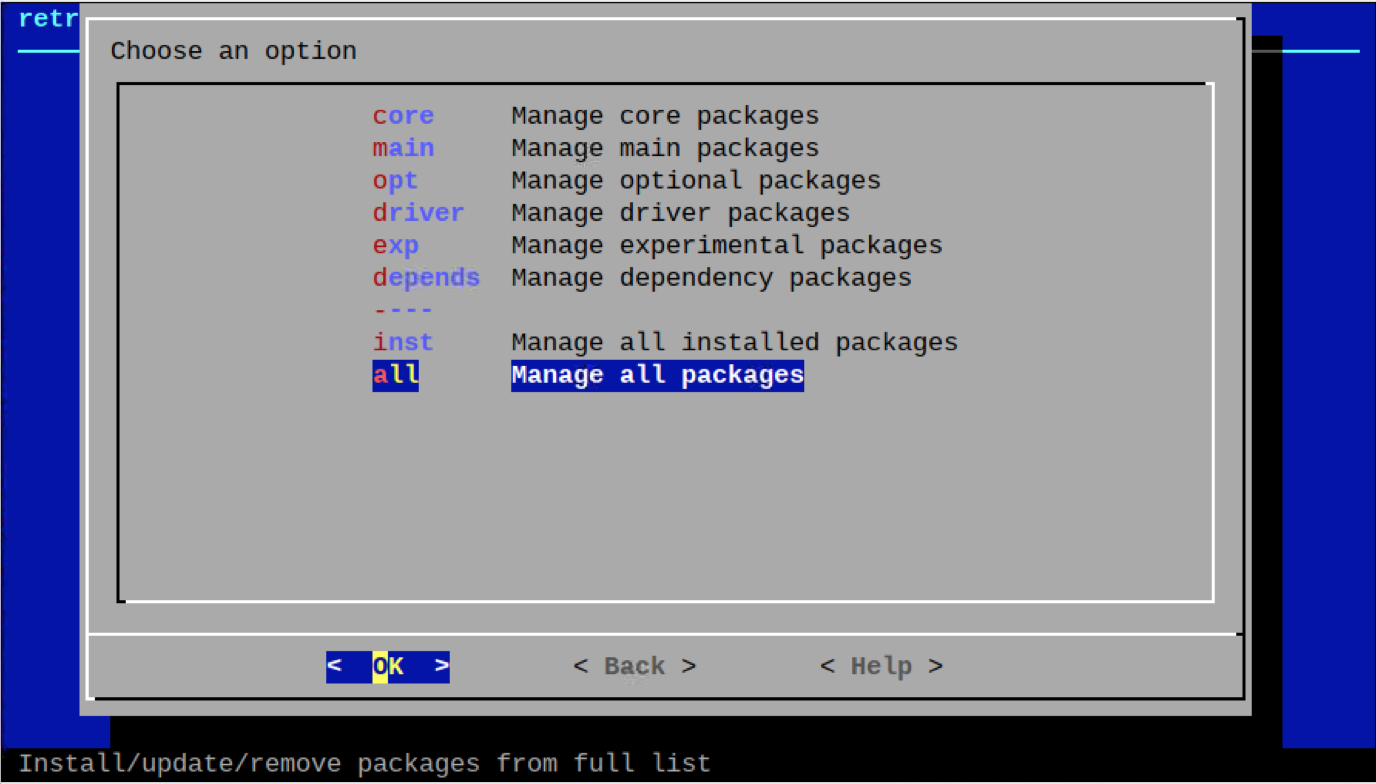
Then choose Manage all packages option:
Select Install all packages option from the menu:
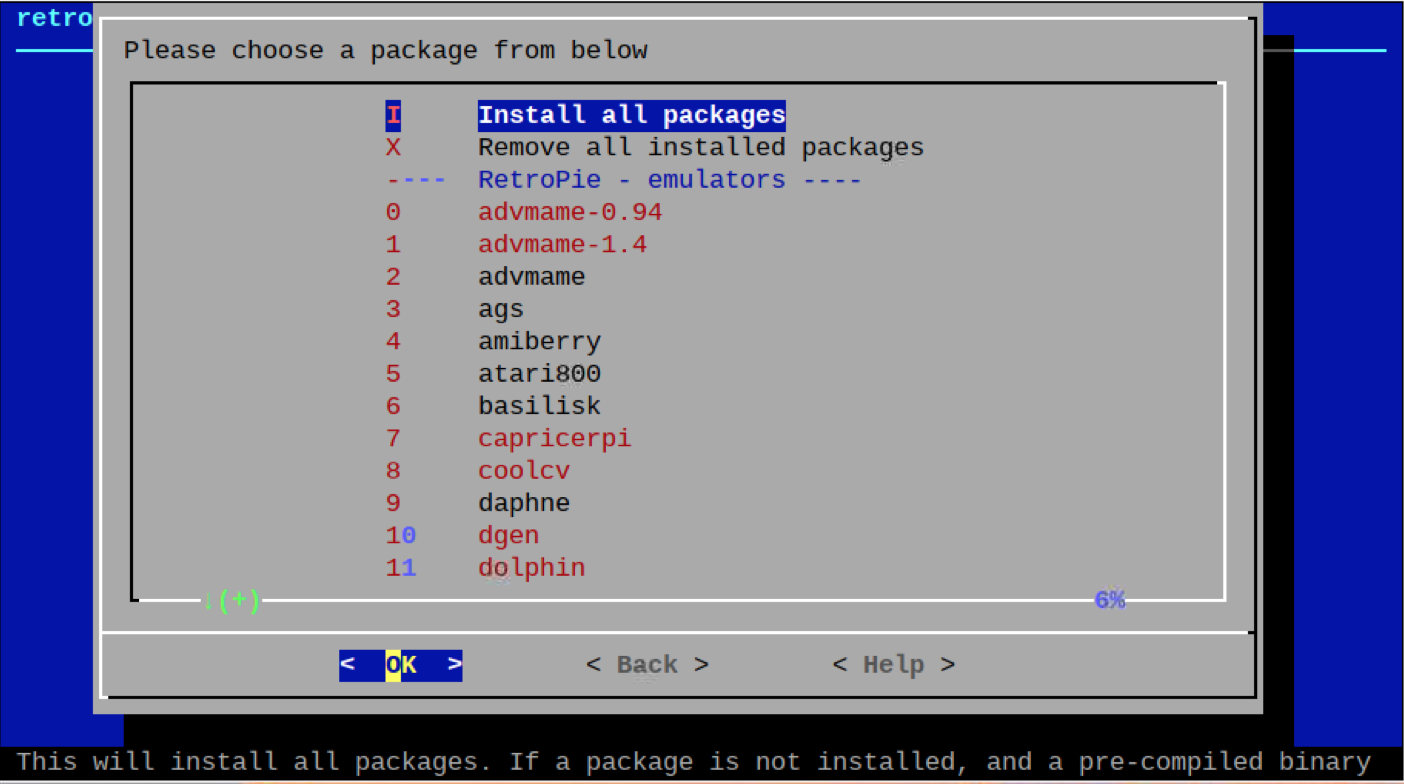
The setup will take time, since multiple dependencies and emulations are installed on your Raspberry Pi system that are needed to run RetroPie on the device.
Step 5: Run the Emulator
After completing the setup, you can simply run the emulationstation command in the terminal to launch the emulator as an app on Raspberry Pi:
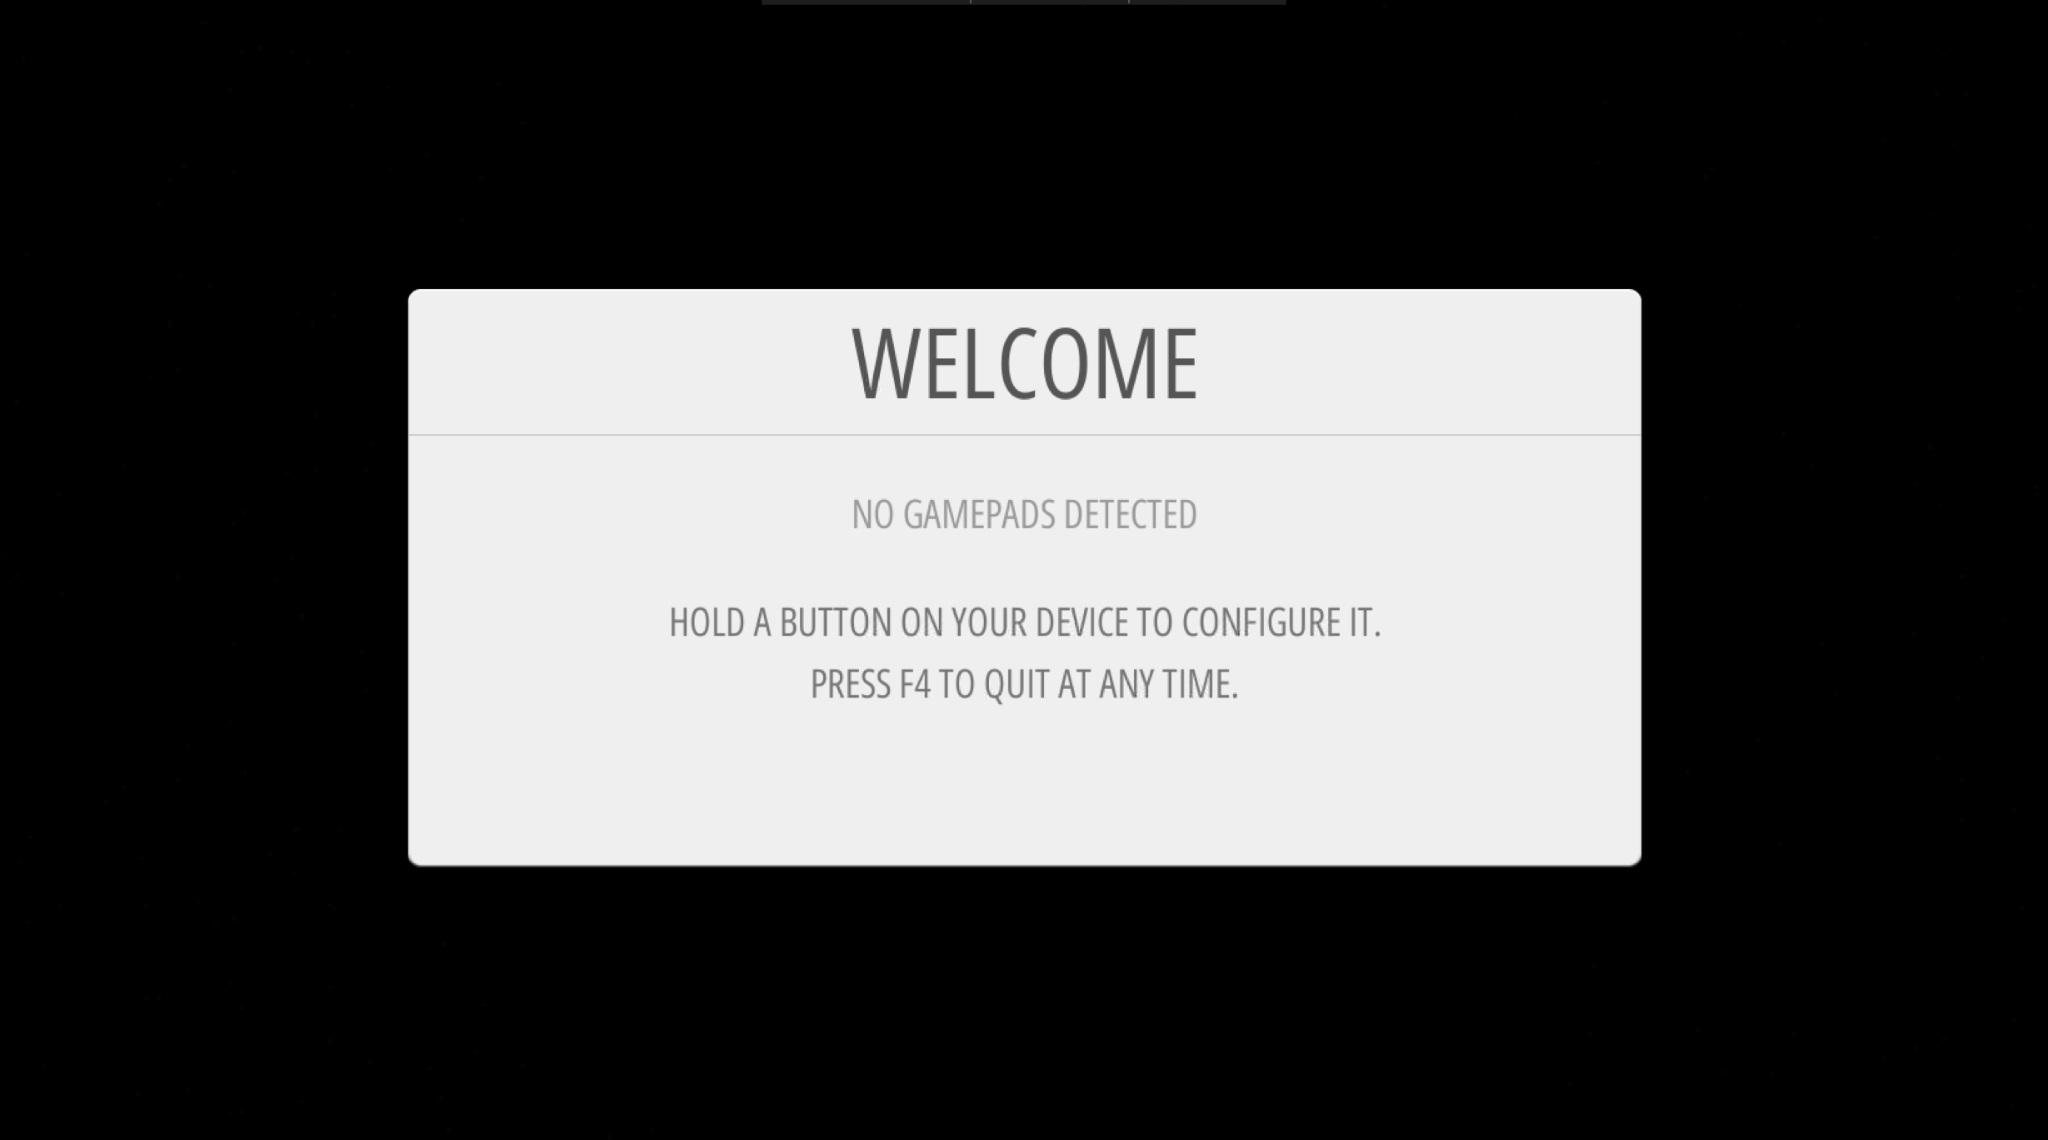
Step 6: Connect Gamepad with Raspberry Pi
You must connect your Gamepad with your Raspberry Pi since you cannot control RetroPie with your keyboard.
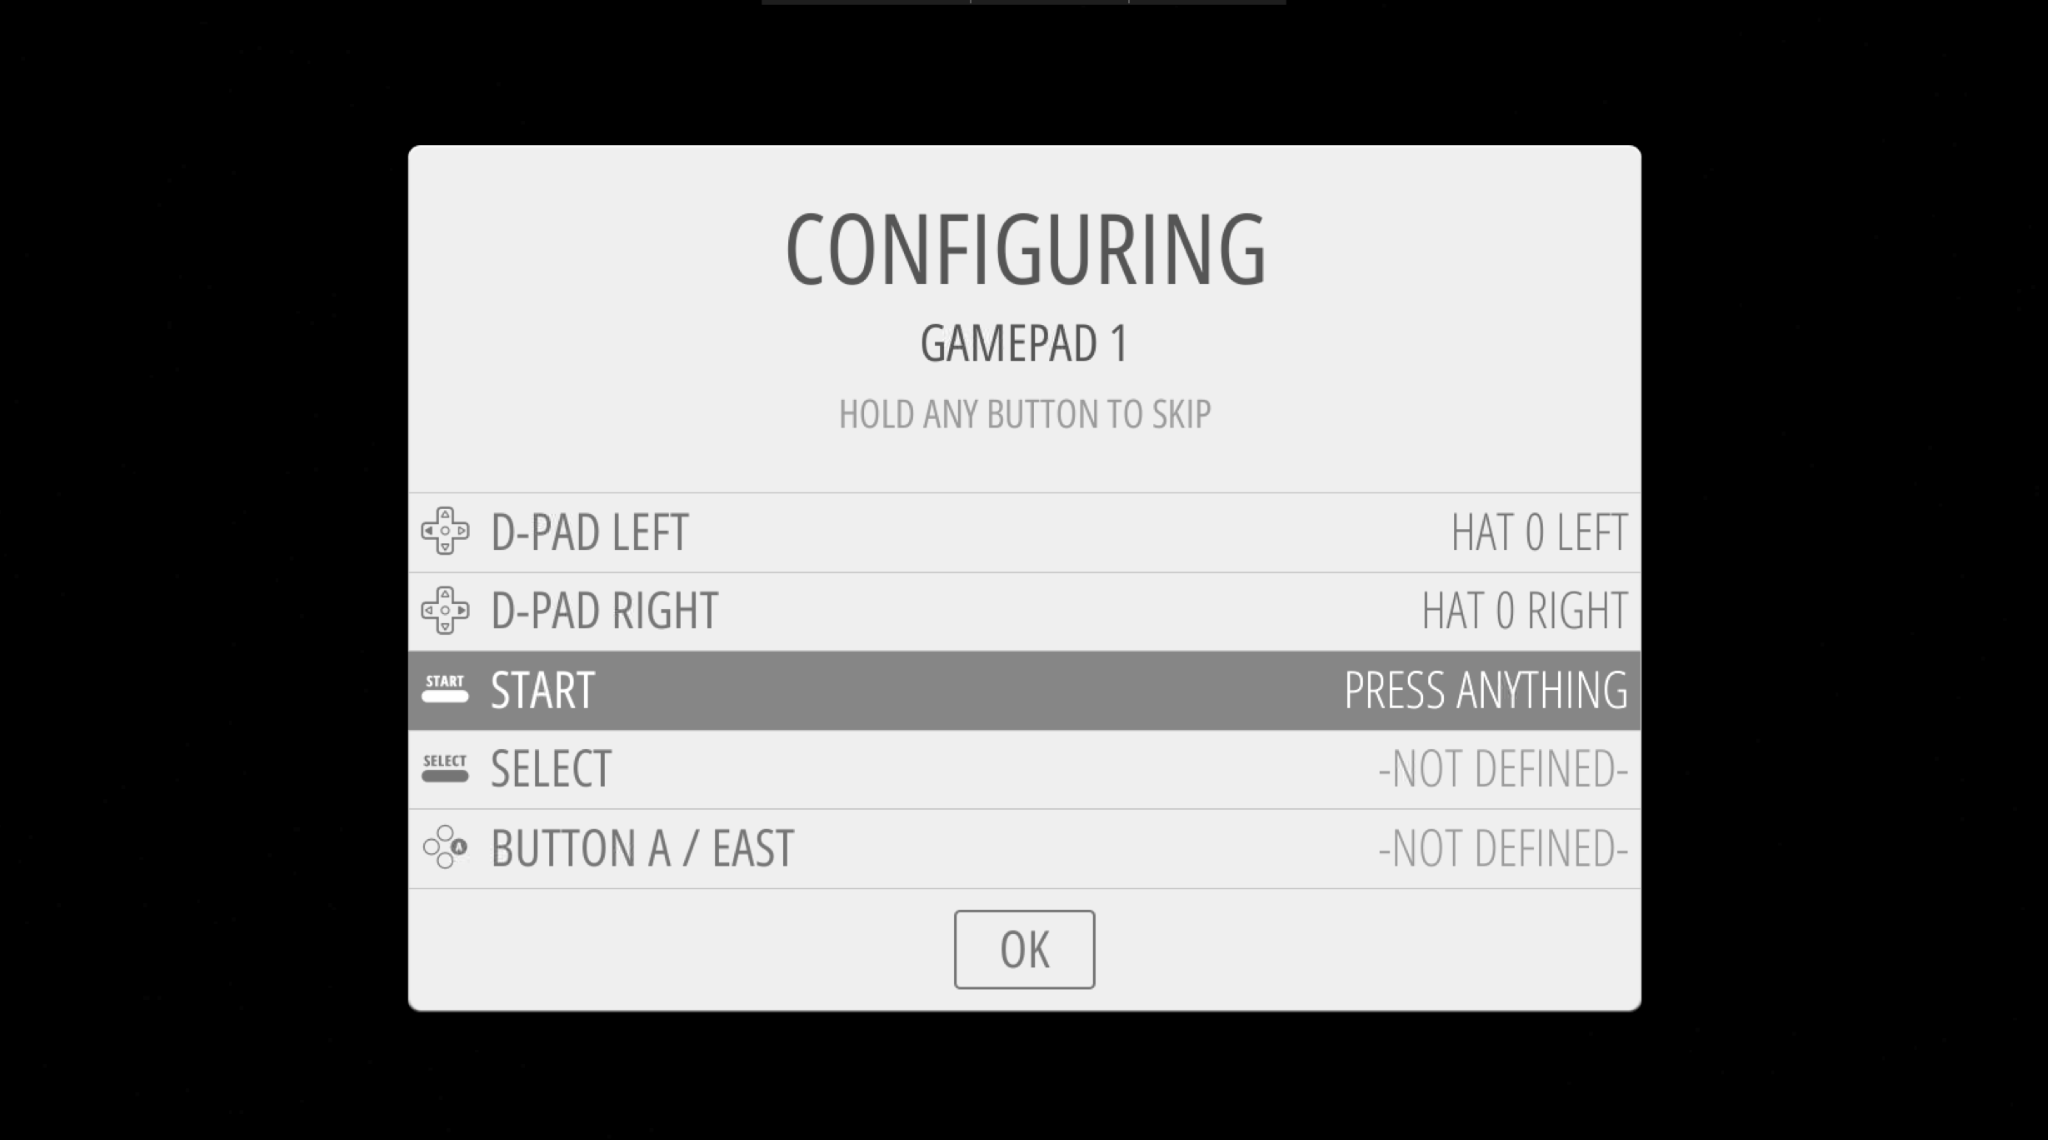
Step 7: Configure Keys on RetroPie
You have to configure keys one by one using your Gamepad on RetroPie to complete the setup:
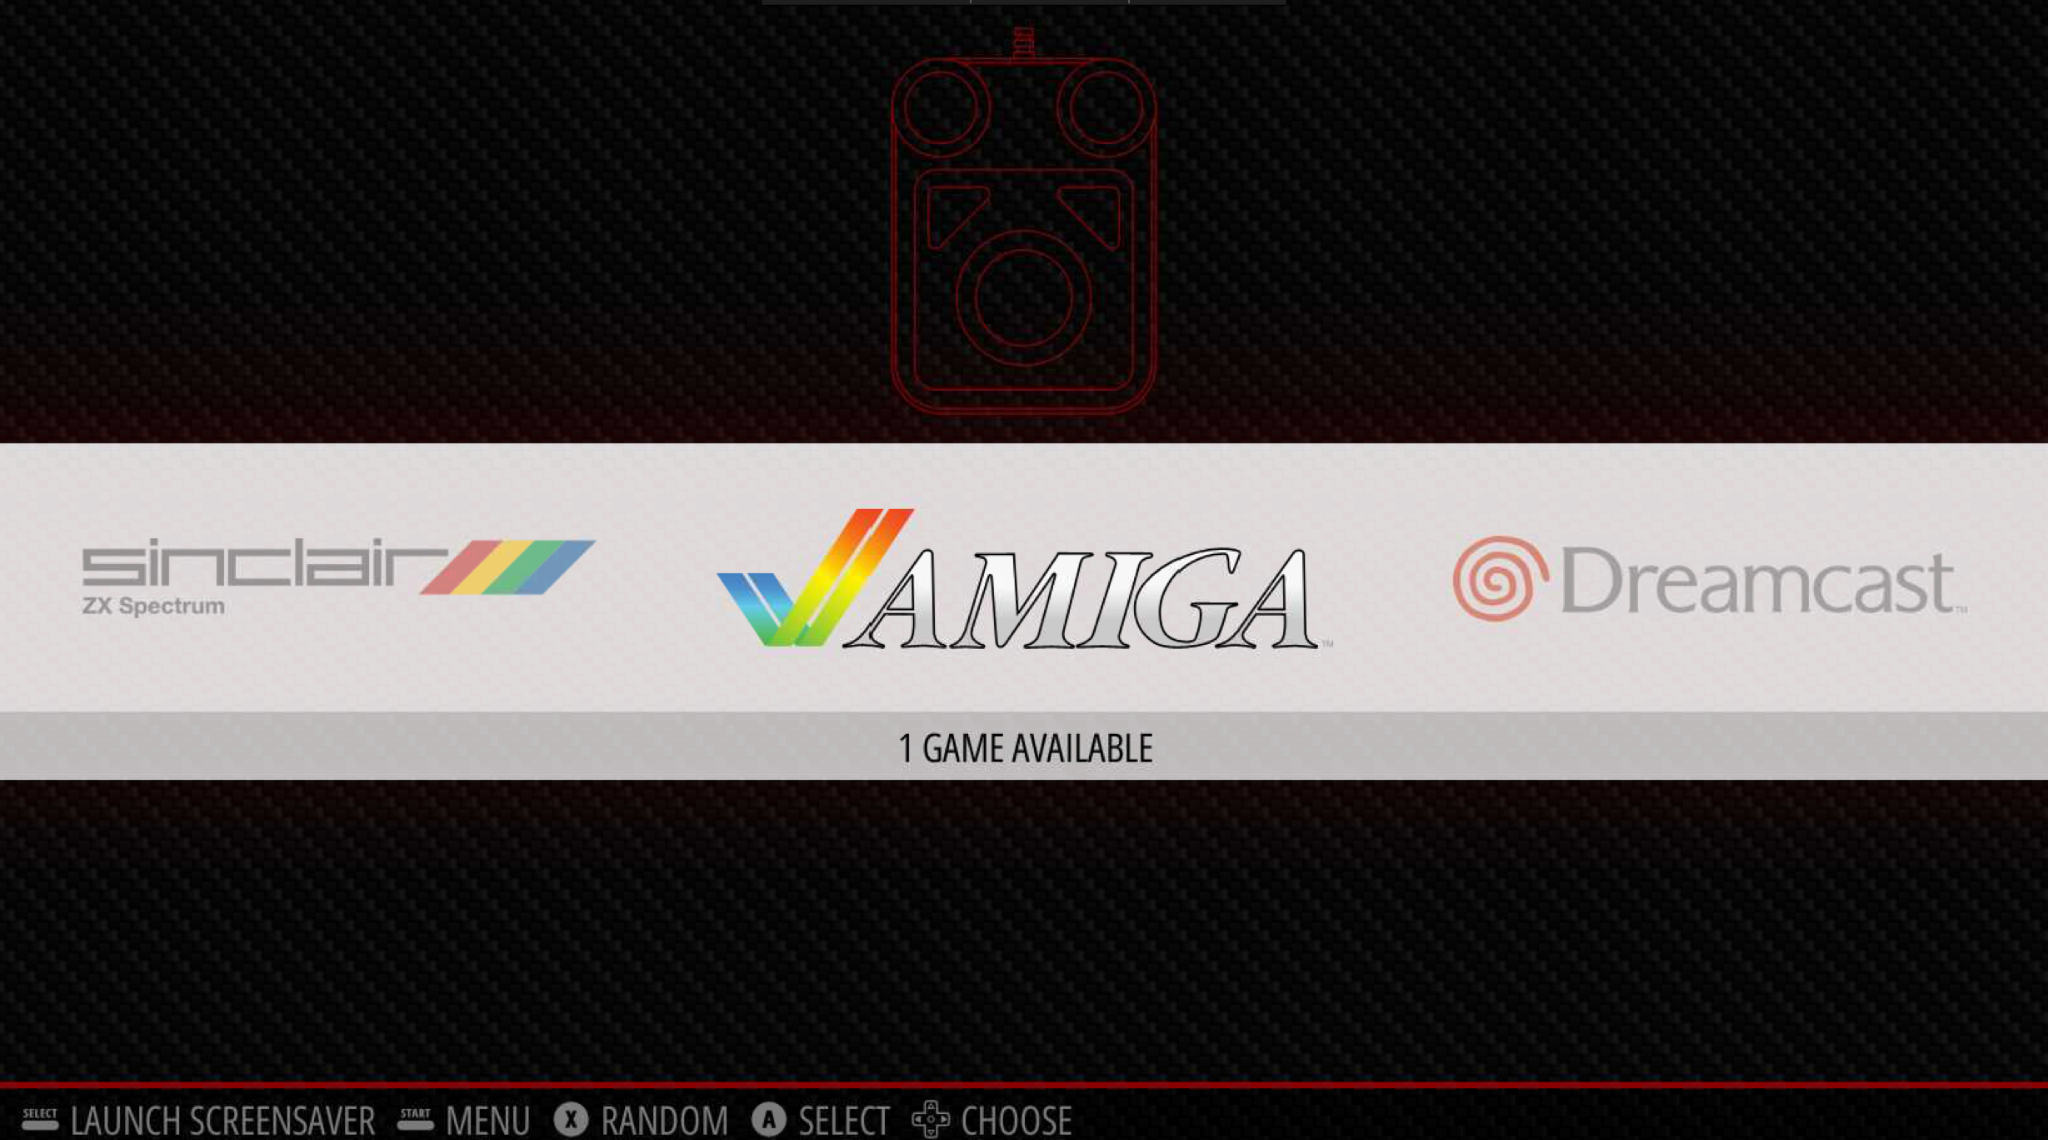
Once done, you will be able to see the RetroPie dashboard on your Raspberry Pi system:
How to Add Games to RetroPie on Raspberry Pi
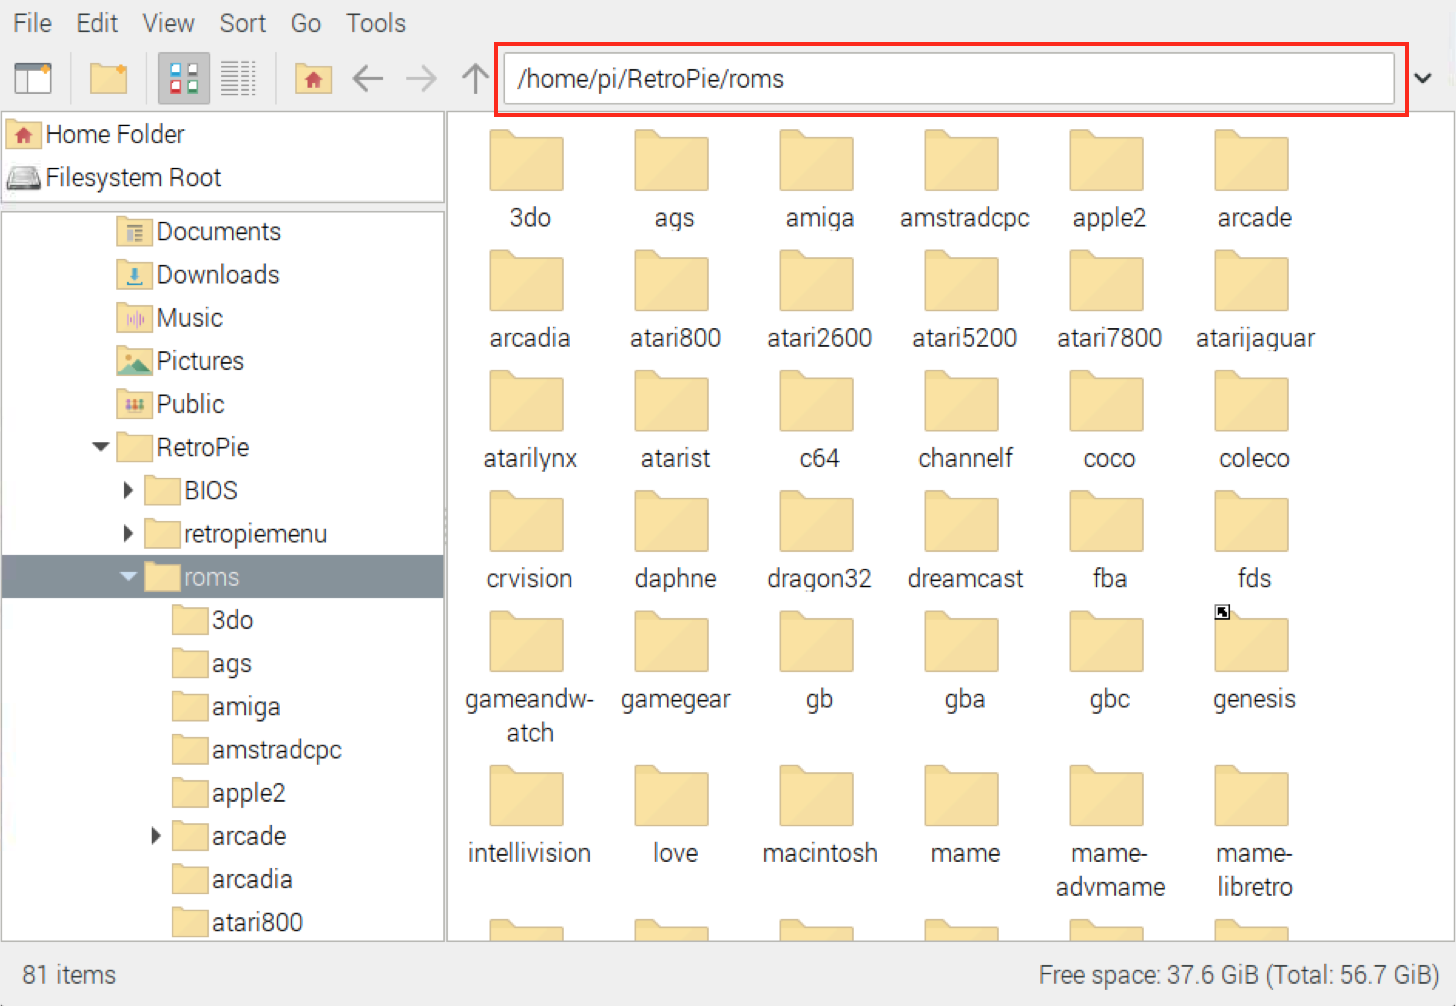
Adding games to RetroPie is pretty simple, you only need to have ROM of the game you are going to add. The game ROM is basically a file that RetroPie will load and run it on your system. The game ROM should be added to the location /home/pi/RetroPie/roms, where you have selected the game category for ROM and paste the ROM file inside the directory.
Note: Some games on RetroPie may require different screen resolution. So, if you experience an error while running the game, change the screen resolution on Raspberry Pi system to run the game.
For full guidance, how to add ROM to RetroPie, you can follow here.
How to Run RetroPie at System Startup on Raspberry Pi
You can also run RetroPie as soon as your Raspberry Pi system starts by using the following steps:
Step 1: Open AutoStart File
First, run the command below to open system’s AutoStart file on Raspberry Pi:
Step 2: Modify the File
Then add the following line inside the autostart file:
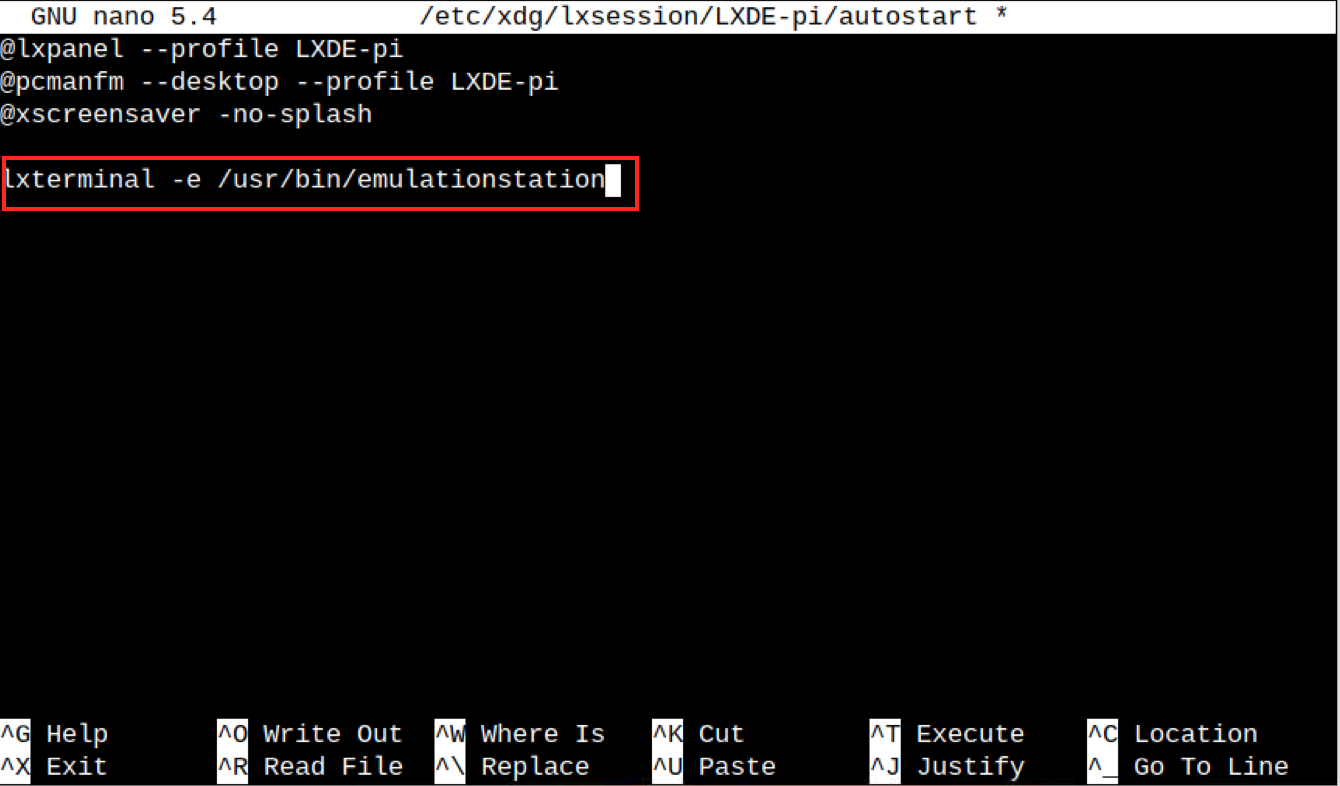
Save this file by using CTRL+X, add Y, and press Enter.
Step 3: Reboot the Device
Now, reboot your device and when it restarts, the RetroPie will automatically run on your system.
Note: You can close the RetroPie app by using the F4 key from the keyboard.
How to Overclock Raspberry Pi to Improve RetroPie Performance
Overclocking is an effective phenomenon that allows you to improve the performance of your Raspberry Pi device. If you are using RetroPie on Raspberry Pi system, you can simply overclock it by reading the guide here.
Conclusion
RetroPie is an excellent gaming platform that is designed for the Raspberry Pi users to play retro-games on their devices. You can install RetroPie as a standalone operating system on Raspberry Pi or use it as an application on your Raspberry Pi system. This guide has covered the step-by-step guide to install and run RetroPie as a desktop application on your Raspberry Pi system. It will be helpful for the users who want to use Raspberry Pi for developing projects and playing games.
Source: linuxhint.com