How to Install and Configure rsnapshot in Linux
When dealing with large data, it is important to consider how to back it up. There are two types of backup plans; one is a normal backup that backs up the entire data. Another way is an incremental backup that only keeps the additional data since the last backup. The drawback of the first plan is that it consumes a lot of memory as files are stored multiple times with the new additions. On the other hand, the incremental backup first backs up the entire data; then the additional portion is backed up since the previous backup.
The rsnapshot is a rsync-based, incremental backup utility that helps with local and remote filesystem backups. The main advantage of using rsnapshot is it saves disk space as much as possible.
- How to Install and Configure rsnapshot in Linux
- How to Install rsnapshot in Linux
- How to Configure rsnapshot in Linux
- Conclusion
How to Install and Configure rsnapshot in Linux
You can install and configure the rsnapshot in any of the Debian-based distributions using the mentioned process. We are running the commands in Ubuntu 22.04:
How to Install rsnapshot in Linux
To begin with the rsnapshot installation, first, we need to update all of the system’s packages. Then, you can download the rsnapshot tool using the apt package manager.
Update the Ubuntu 22.04 system by executing the mentioned command:
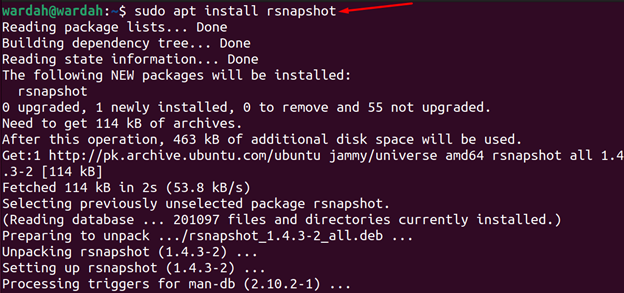
The installation way of the rsnapshot utility on Debian-based Linux distributions is pretty simple and just one command away which is mentioned below:
To install rsnapshot on RHEL/CentOS/Fedora, execute the given command:
How to Configure rsnapshot in Linux
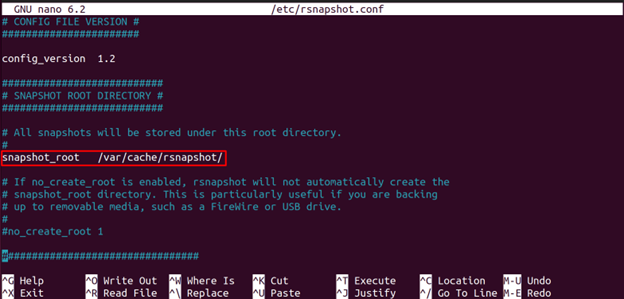
All of the rsnapshot configuration settings are stored in /etc/rsnapshot.conf file. Open this file using any editor i.e., Vim or Nano and you will see the /var/cache/rsnapshot/ path there, where all of the snapshots will be saved.
![]()
Backup Directories
Before backing up anything, you should know what actual files, directories, or data you want to back up.
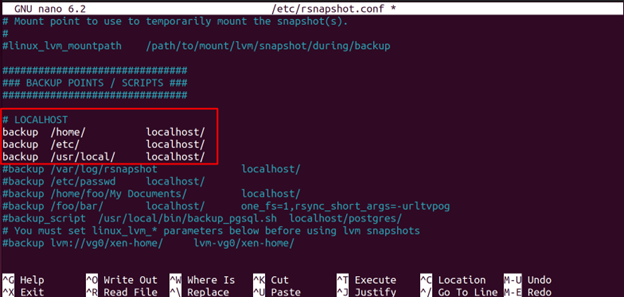
If you’re running this on your local machine, then this is pretty simple to backup the data. When you open the /etc/rsnapshot.conf file, you would see some of the directories are already on the way to store by default:
backup /etc/ localhost/
backup /usr/local/ localhost/
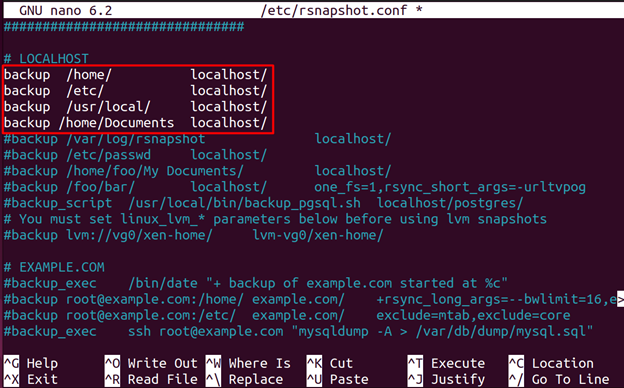
Let’s suppose we need to back up the Documents director, that line would be added like this:
Retain Backup Intervals
As we have read above, the rsnapshot is an incremental backup, it helps to retain the older snapshots whether they are hourly, daily weekly, or monthly. You can do so by assigning a specific number of snapshots that should be done in the intervals.
In the /etc/rsnapshot.conf file, move to the BACKUP LEVELS / INTERVALS section, and type the following to retain the snapshots:
retain daily 6
retain weekly 7
retains monthly 10
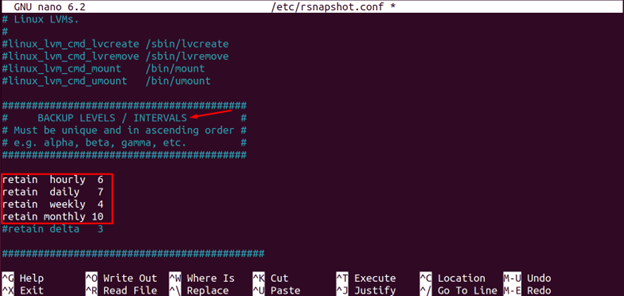
You can set this according to your snapshot requirements.
Backup Remote Machine
To backup the remote machine, there should be a password-less SSH connection with the remote machine. To set up the password-less SSH communication with the remote machine, read the below-mentioned process.
To generate the ssh-key, execute the following command in the terminal:
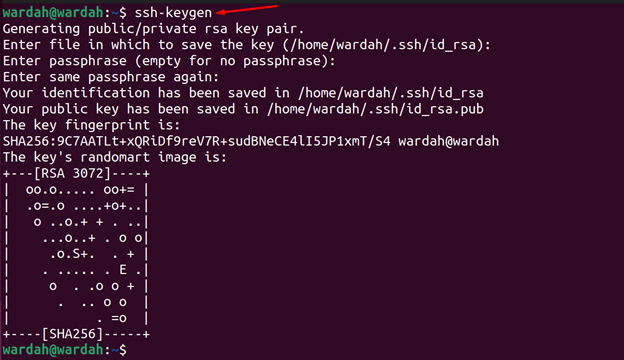
To copy the generated public key to the remote machine, use the mentioned syntax:
For example:
After executing the above steps, the password-less ssh connection will be established.
To back up the remote machines, you would have to mention the server location (directories) in the /etc/rsnapshot.conf file:
For example:
Once you have specified the server directories, run the following rsnapshot command to set the backup interval:
![]()
Scheduling Automation Tasks with Cron
To schedule an automation backup plan, you need to mention the time along with the certain intervals i-e., hourly, daily, weekly, or monthly; you need to open the /etc/cron.d/rsnapshot file using any editor.

When you open this file, uncomment the mentioned syntax, and set your schedule to perform the automated backup:
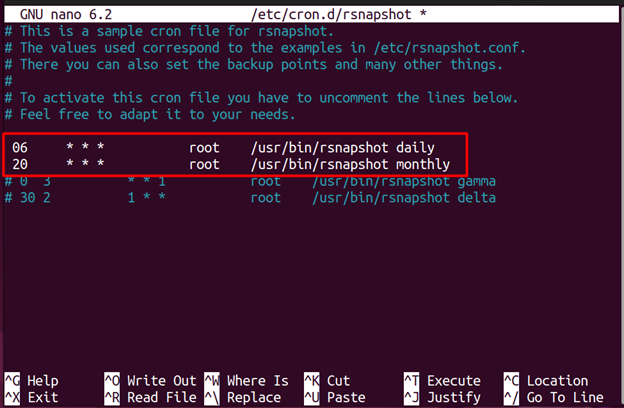
In the first line, rsnapshot will backup daily at 06:00 am, and in the second line, the backup process will be done at 08:00 pm on every first day of the month.
Test rsnapshot Configurations
Once all the configurations are done, execute the given command to check if they are error-free. If you get the response Syntax OK, means there’s nothing wrong with the settings:

You can also check the backup intervals by running the given rsnapshot command:
Replace the <interval> with the hourly, daily, weekly, or monthly, that is what you want to test.
Conclusion
The rsnapshot is an incremental backup that helps to back up data one time and then back up the additional files or directories since the last backup. The rsnapshot configurations are stored in the /etc/rsnapshot/conf file where you can edit the settings. This guideline has mentioned multiple examples to configure the rsnapshot file and how we can backup directories. We have also tested the configuration file and found no errors.
Source: linuxhint.com