How to Install a Specific Node Version Using npm?
This post will demonstrate the complete procedure to install a specific node version using npm.
Prerequisites: Before moving on to the practical implementation, first Install Node.js and NPM on Your Windows System. If it is already installed, then check its version using the following commands:
npm -v
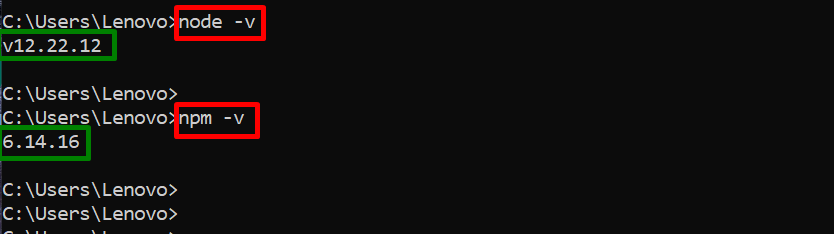
It can be seen that in the current Windows system, the Node.js “v12.22.12” and npm “6.14.16” versions are installed.
Let’s install another particular version of the Node using “npm”.
How to Install a Specific Node Version Using npm?
This section carries out the step-by-step instructions to install a specific version of Node using the “npm” package manager.
Step 1: Install Specific Node Version
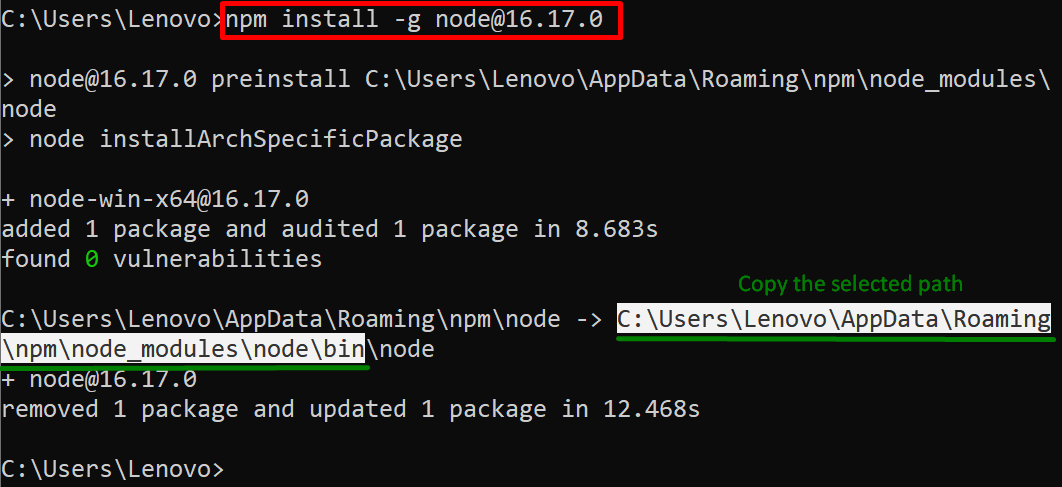
First, use the “npm” package manager to install the specific version of Node by executing the following installation command:
In the above command, the “-g” flag globally installs the Node for all projects.
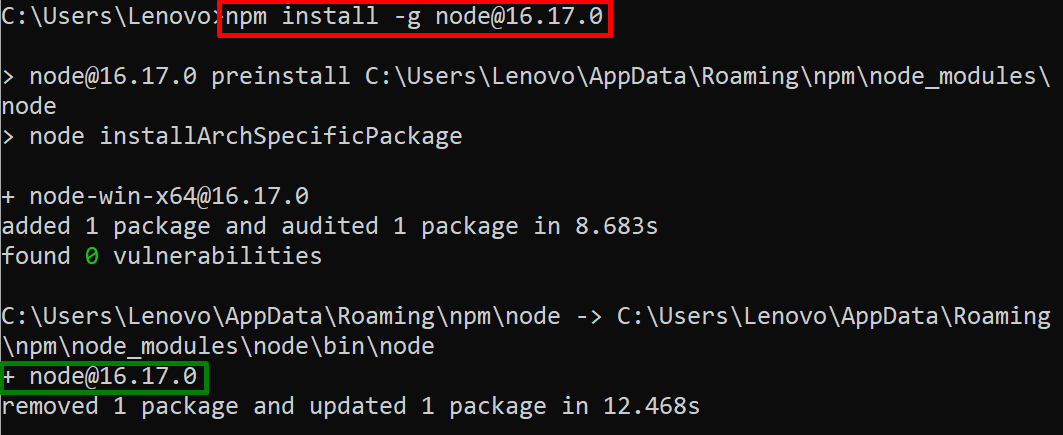
It can be observed that we have successfully installed the node version “16.17.0” in the current Windows system.
Step 2: Set Node Path
Next, open up the “Edit the system environment variable” window to set the path of the newly installed Node:
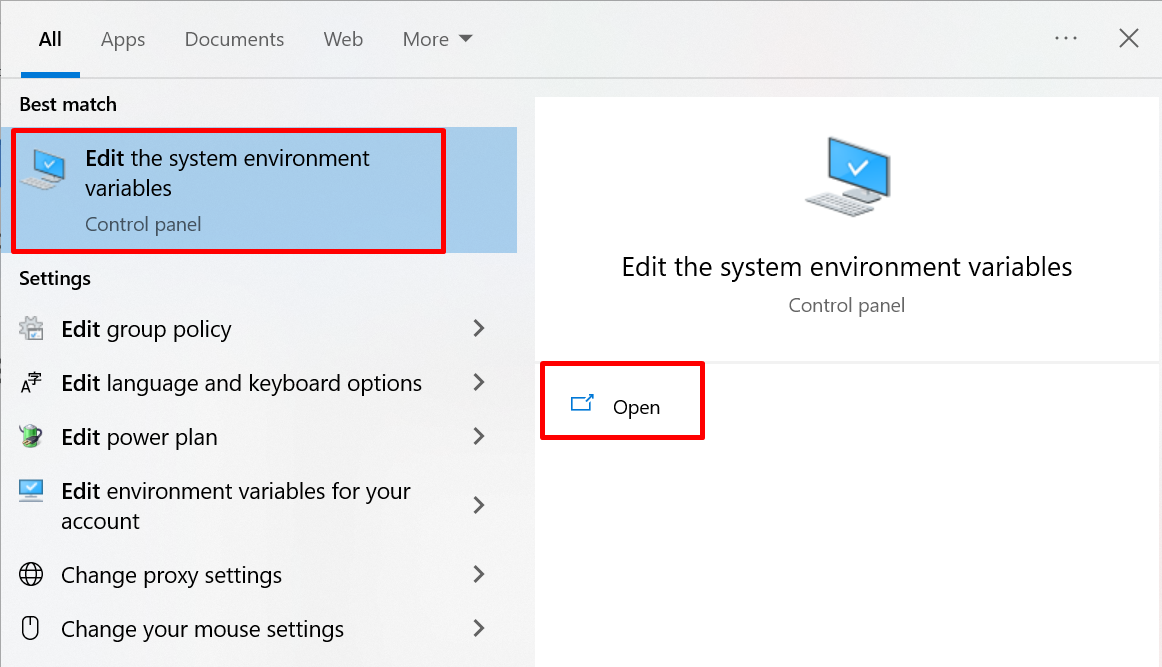
When the highlighted window is open, then click on the “Environment Variables” button:
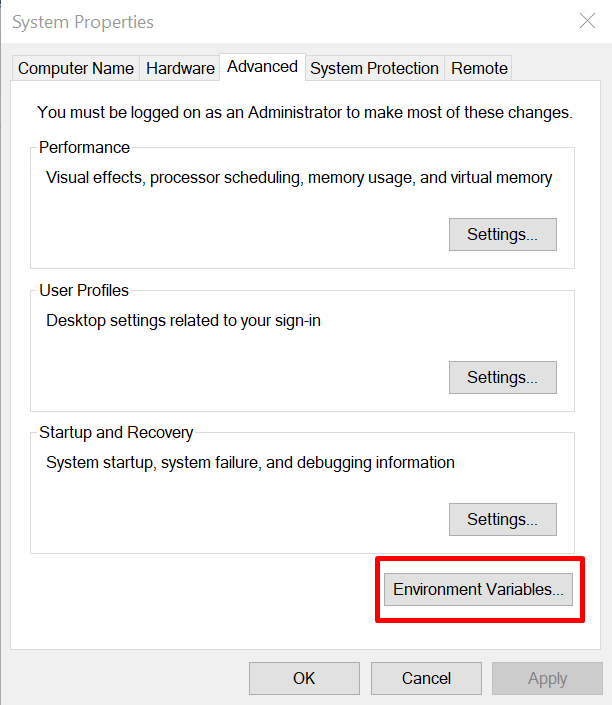
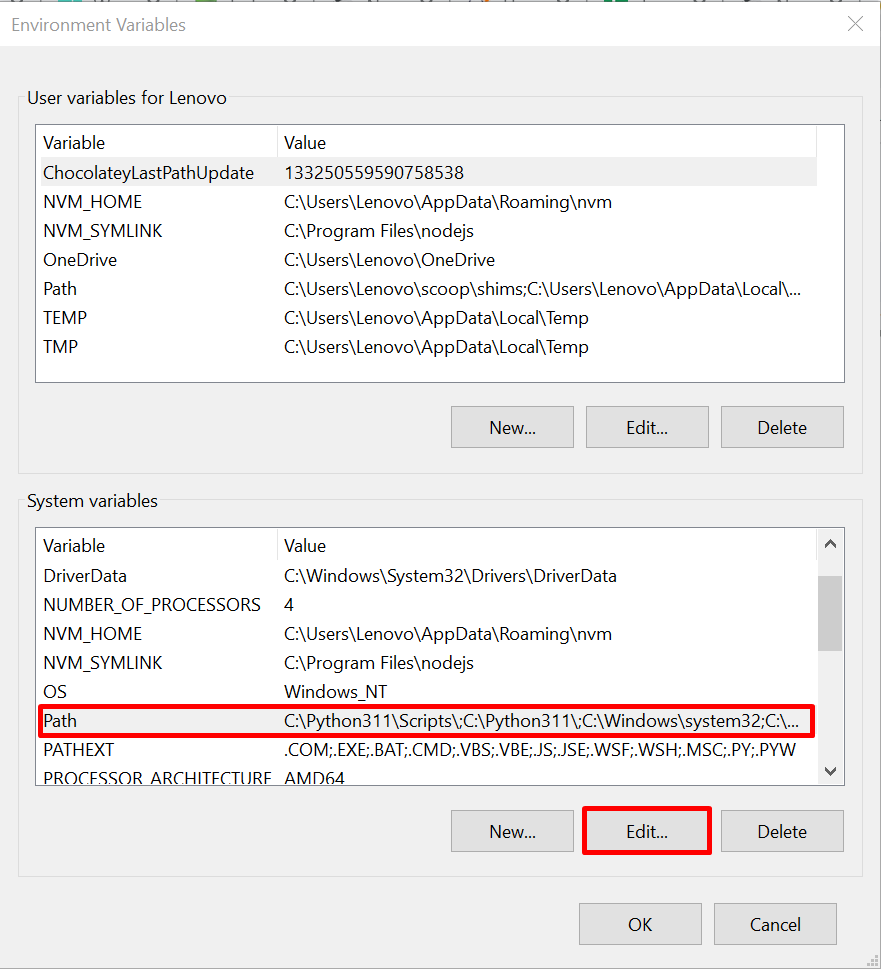
From the “Environment Variables” wizard, select the “Path” from the “System Variable” section and hit the “Edit” button:
Copy the highlighted path of the Node.js from the cmd where it is installed. By default, Node will be installed on the “C:\Users\<Username>\AppData\Roaming\npm\node_modules\node\bin” path:
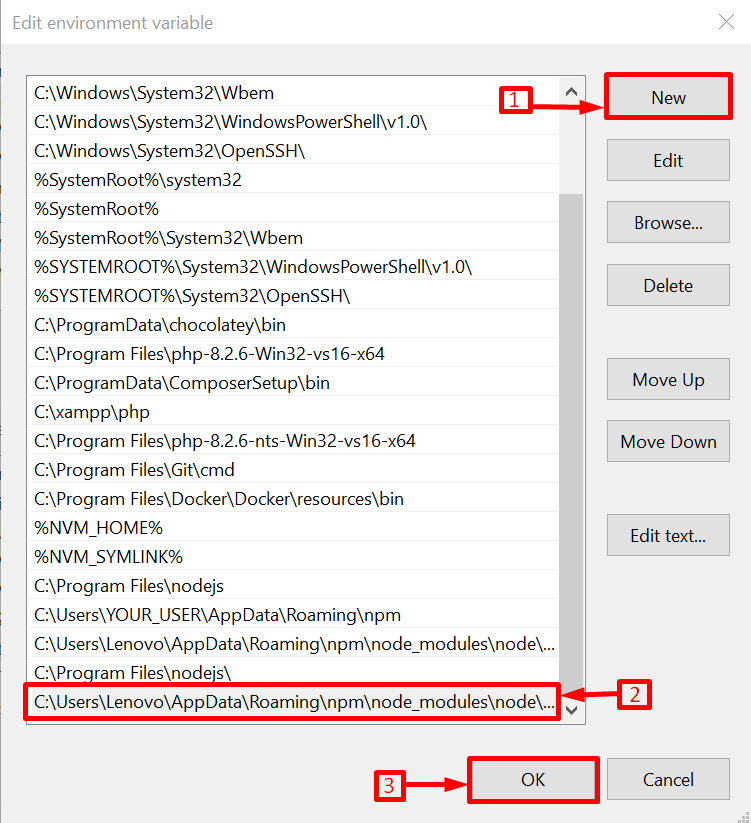
Now, click on the “New” button, paste the copied path of the Node.js into the “Edit Environment Variable List”, and hit the “OK” button:
Step 3: Uninstall Existing NodeJS
Now, completely remove the previous or existing Node Js from Windows. This step is compulsory because, if the user does not uninstall the existing node version then the specified Node version can not be activated.
Step 4: Check Node Version
Now, run the following command to check the installed node version for verification:
It can be observed that the specified Node.js version has been successfully installed in the given Windows system:

That’s all about installing a specific node version using “npm”.
Conclusion
To install a specific node version using the “npm”, utilize the “npm install -g node@<version>” command. Once it is done, then add the installation path of Node into the PATH section of “System variables”. Next, uninstall the previous Node.js version and check the version Node.js version for verification. This post has demonstrated the complete procedure to install a specific node version using npm.
Source: linuxhint.com