How to Insert a Signature Into Microsoft Word
Quick Outline
How to Insert a Signature Line into Microsoft Word
How to Save the Signature Line in the Auto Text on Microsoft Word
How to Insert a Signature in Microsoft Word
- Method 1: Insert Digital Signature into Microsoft Word
- Method 2: Insert Picture Signature into Microsoft Word
- Method 3: Draw a Signature in Microsoft Word
How to Insert a Signature Line Into Microsoft Word
In Microsoft Word, you can insert a Signature Line to decide where the document should be signed; this can be done through the following steps:
Step 1: In your Word document, find the Insert tab in the Ribbons and click on it:

Step 2: Next, click on the Signature Line icon as highlighted in below screenshot:

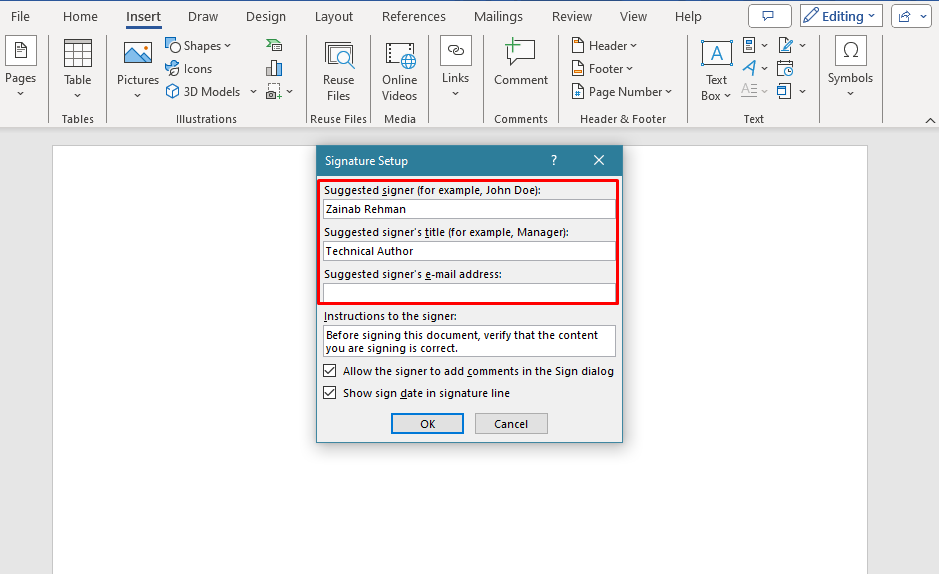
Step 3: A dialogue box of Signature Setup will appear, type the name of the Signer, title of the Signer, and email address:
Step 4: You can choose other options on the same dialogue box as per your need and click OK:

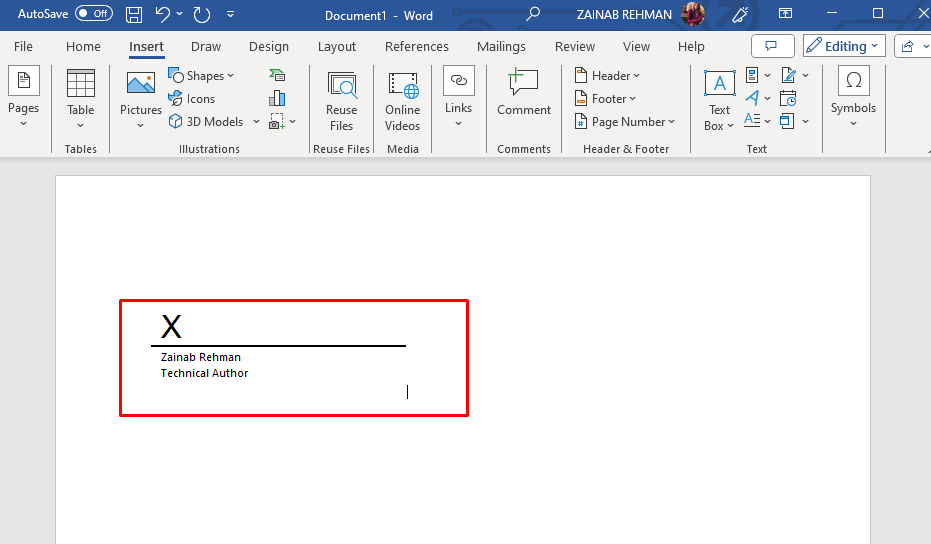
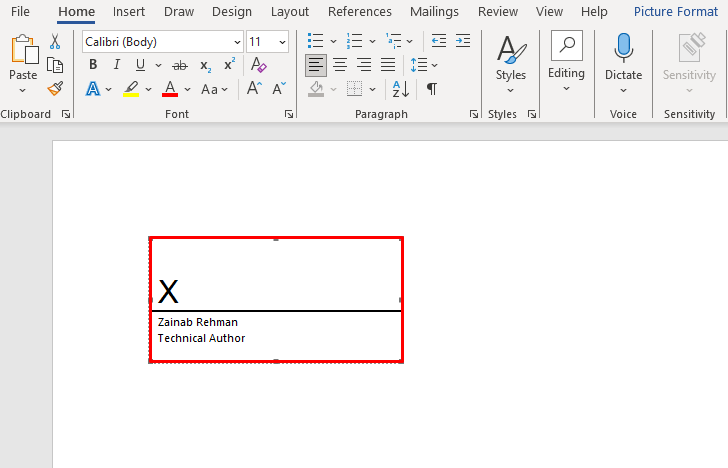
The Signature Line will appear on your screen:
How to Save the Signature Line in the Auto Text on Microsoft Word
The AutoText feature of Microsoft Word allows you to quickly insert the saved text in your document. You can also save your Signature Line in the document using this built-in feature through the following steps:
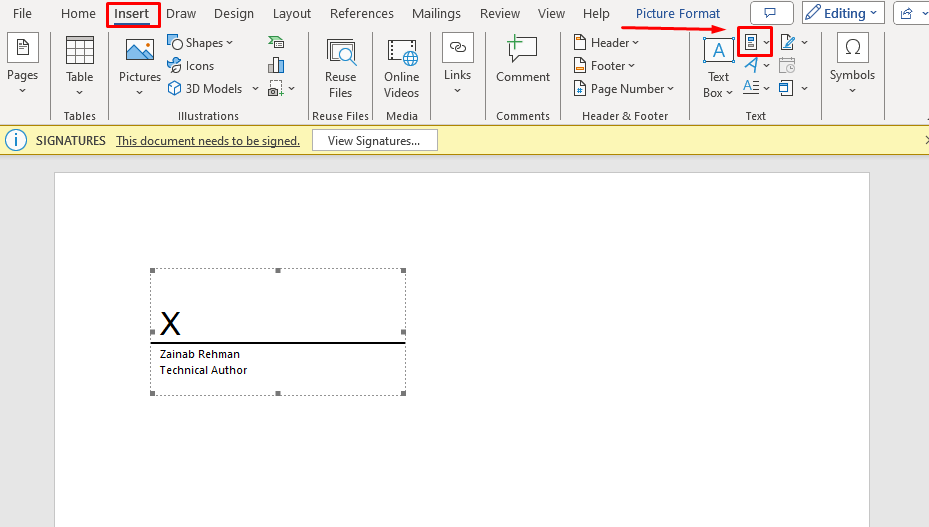
Step 1: In the Word document, select the text of your Signature Line by clicking on it. Next, click on the Insert tab and then click on the Quick Parts icon:
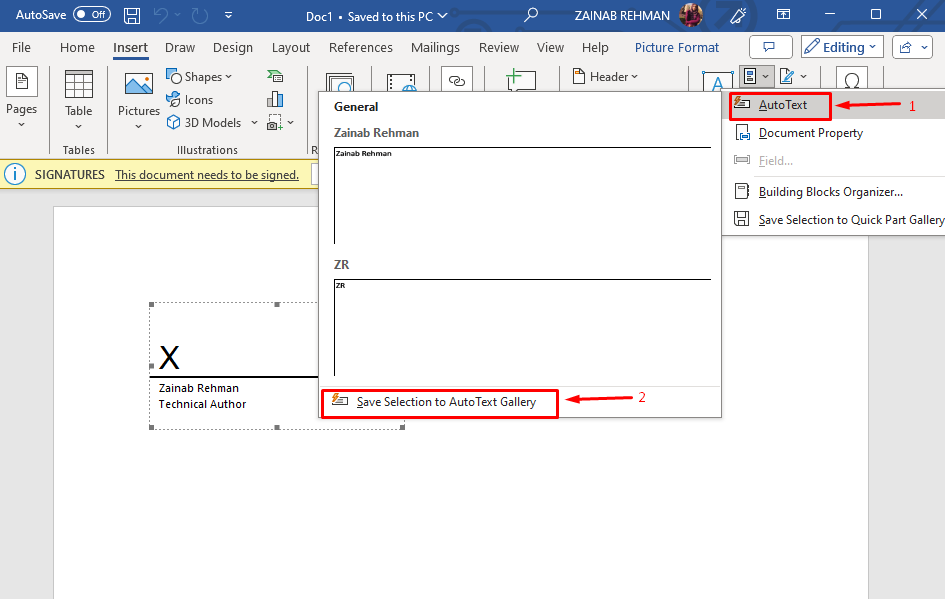
Step 2: Expand the Auto Text option and click on Save Selection to Autotext Gallery:
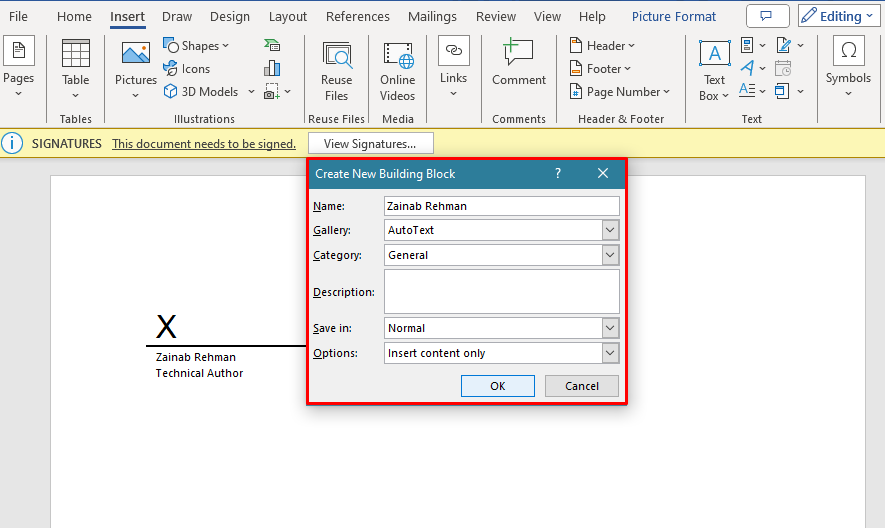
Step 3: The dialogue box will be displayed on your screen, enter the name, in the Gallery option choose Auto Text, and click on OK:
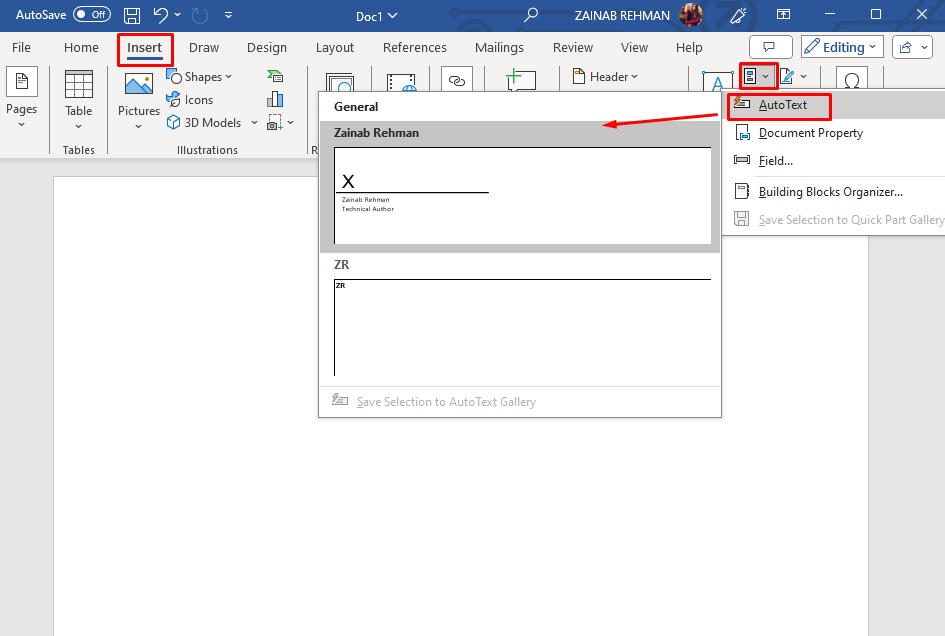
To insert the Signature Line from the Quick Part, navigate to Insert >> Quick Parts >> Auto Text and choose your saved Signature Line:
How to Insert a Signature in Microsoft Word
Microsoft Word allows you to add the digital and picture signature to your document. There are three ways to insert a signature in Microsoft Word:
- Insert a Digital Signature Into a Microsoft Word
- Insert a Picture Signature into a Microsoft Word
- Draw a Signature into Microsoft Word
Method 1: Insert Digital Signature Into Microsoft Word
Before inserting the digital signature, get a digital certificate from a proven digital authority and validate your signature. On the Microsoft support page, GlobalSign and IdenTrust are recommended. You can also create one for yourself. You can also create one for yourself and sign a document by following these steps:
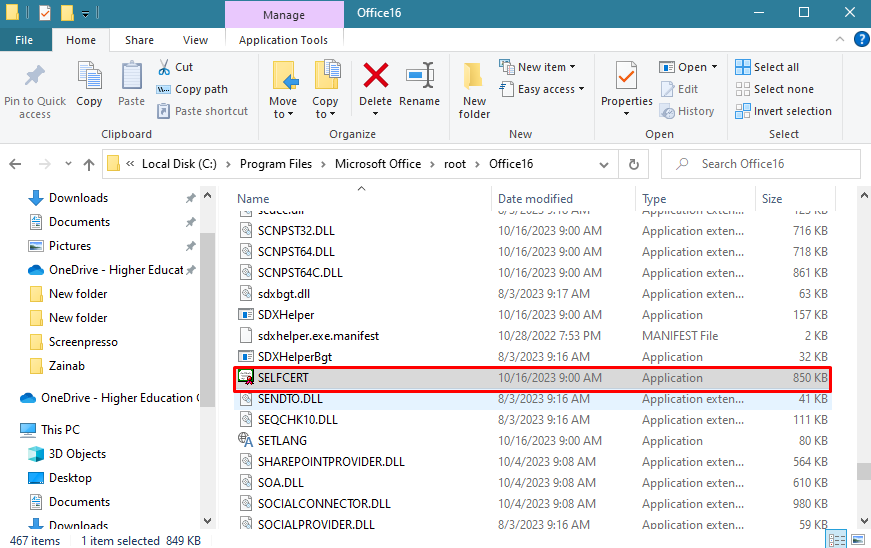
Step 1: Navigate to C:\Program Files\Microsoft Office\root\Office16 and choose SELFCERT; double-click to open the file:
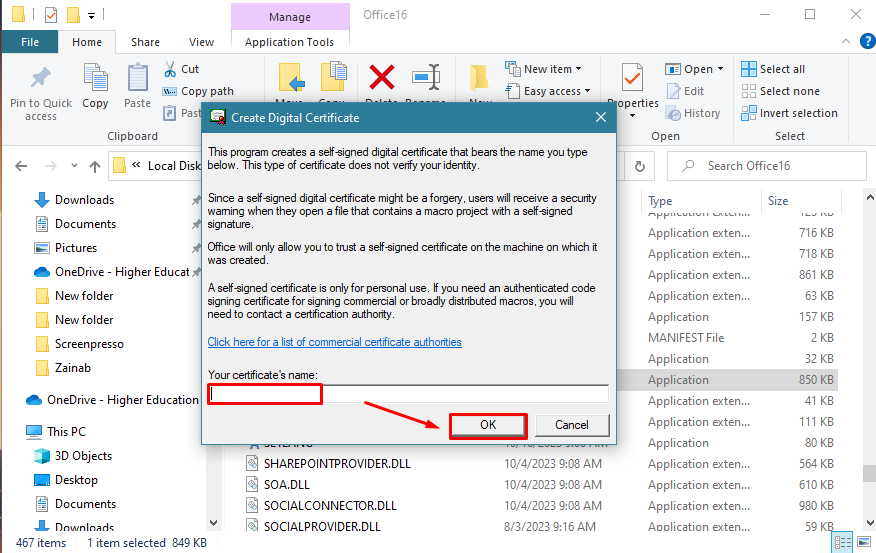
Step 2: The Create Digital Certificate Window will pop up, type the name of the certificate and click OK:
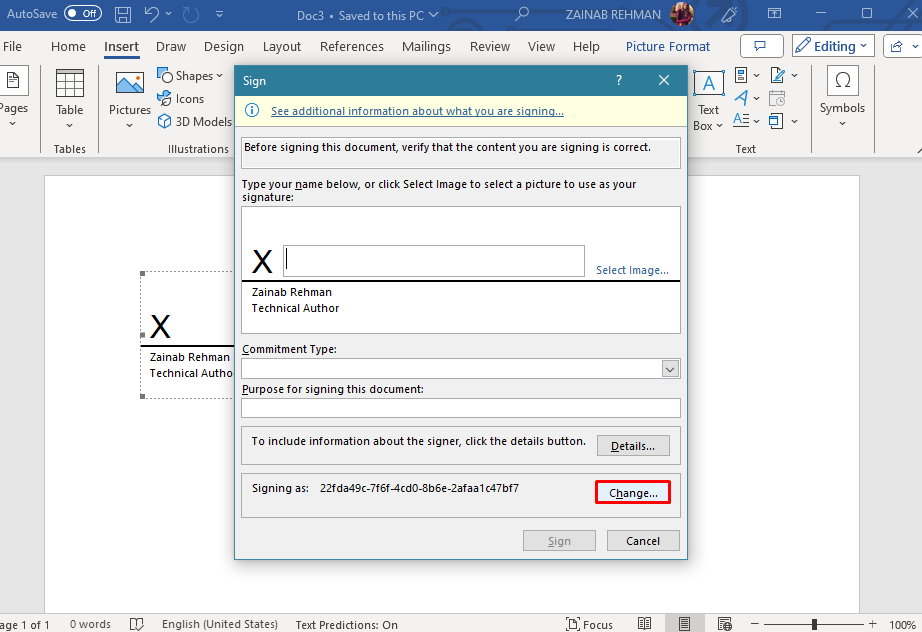
Step 3: To insert a digital signature, double click on the signature line. The dialogue box will appear type the name and click on the Change button to sign the document with your created digital certificate and choose it:
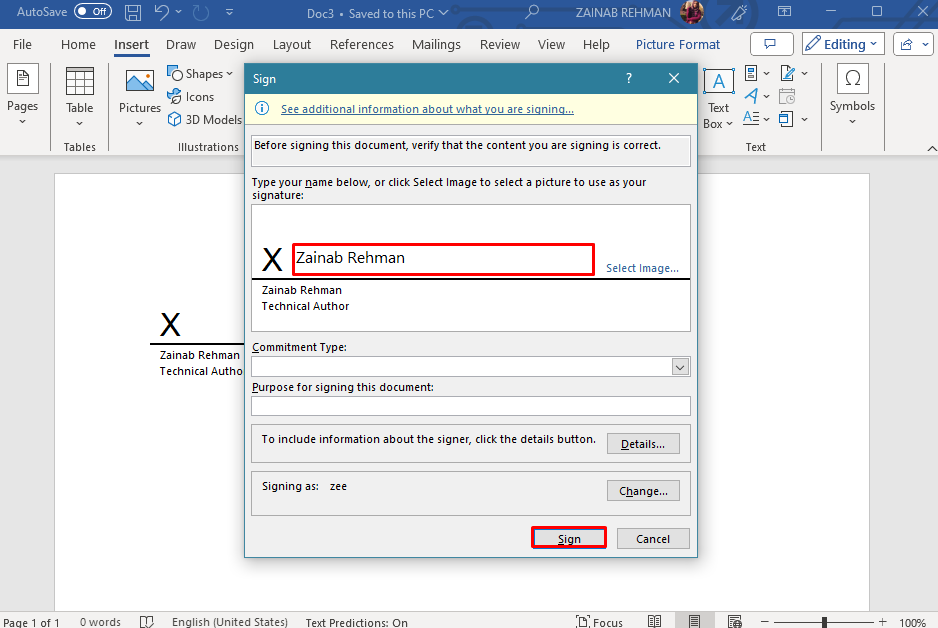
Step 4: Click on the Sign button to add a digital signature to the document:
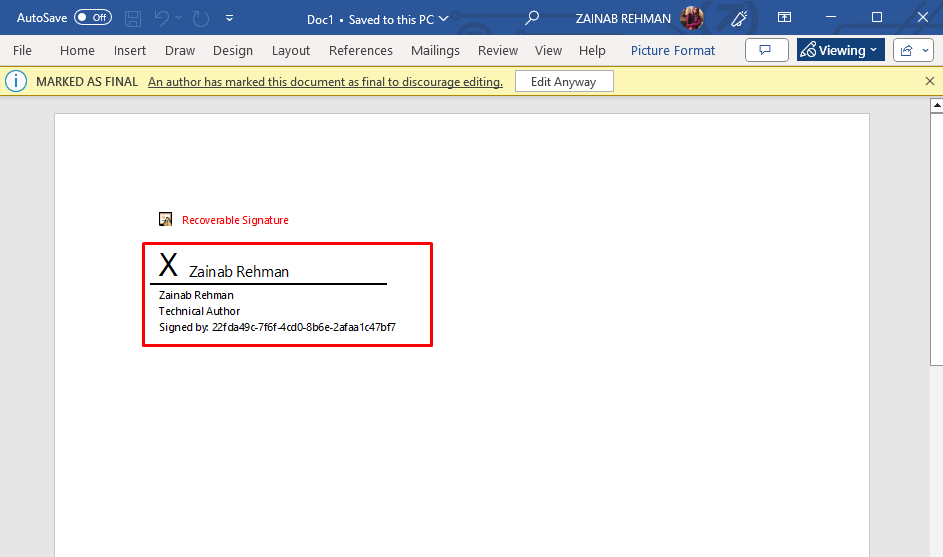
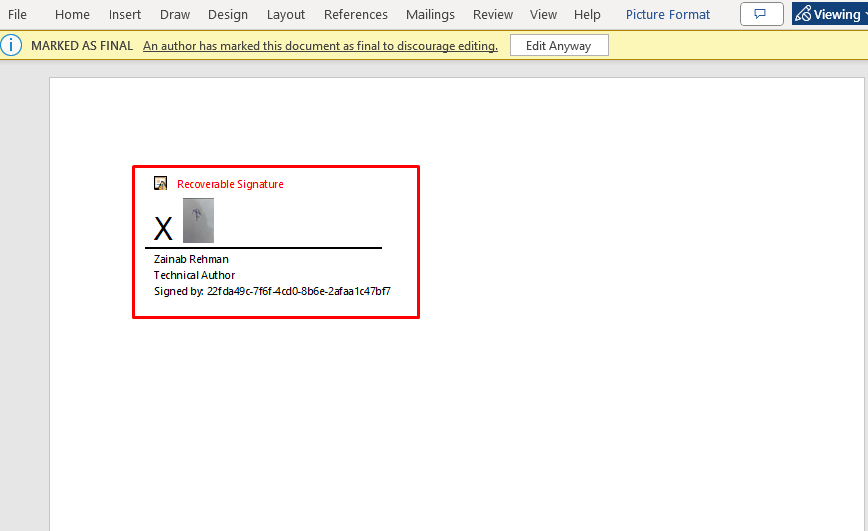
Your sign will appear above the signature line and your document will now be certified with digital signatures. Now you cannot edit the document, if you do modify the document repeat the same steps to add the digital signatures:
Method 2: Insert Picture Signature Into Microsoft Word
The handwritten signature gives the document a personal touch. Create a clean and clear signature on the blank paper using the pen. After creating a document, use your phone to scan the paper and save the image on your device. After saving the signature picture on your device, follow these steps:
Step 1: Double-click on the signature line to insert a picture signature:
Step 2: From the dialogue box, click on the select image:
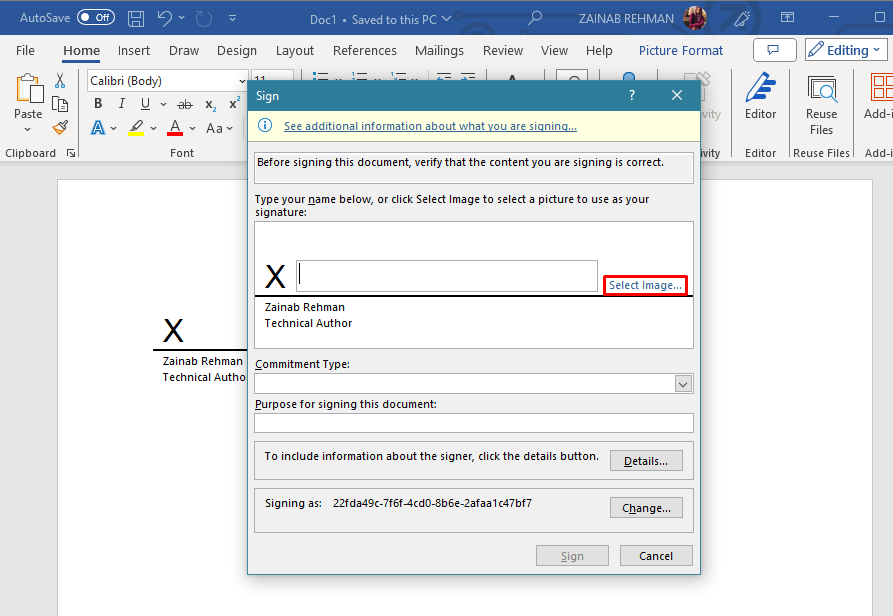
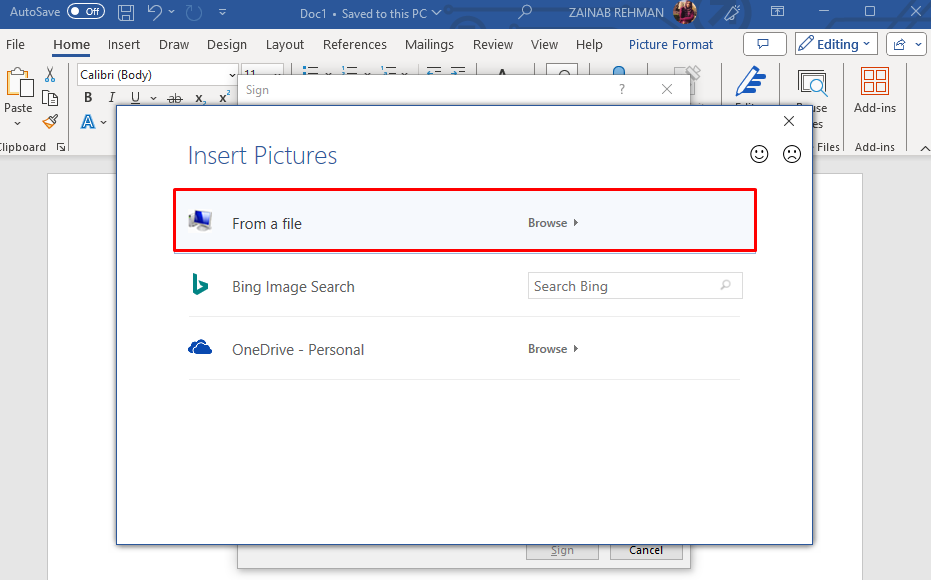
Step 3: Click on From a file, browser, and choose the image:
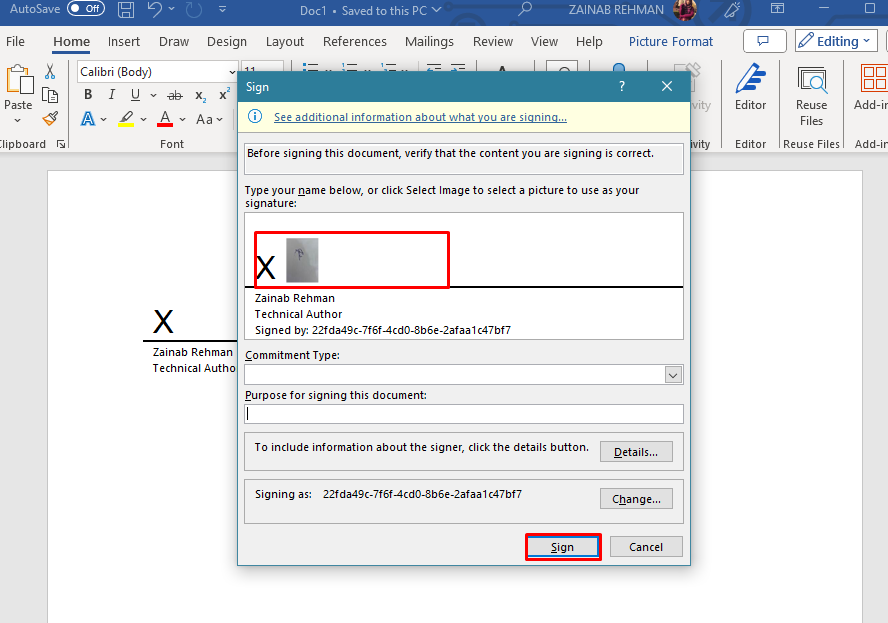
Step 4: Click on Sign to sign the document:
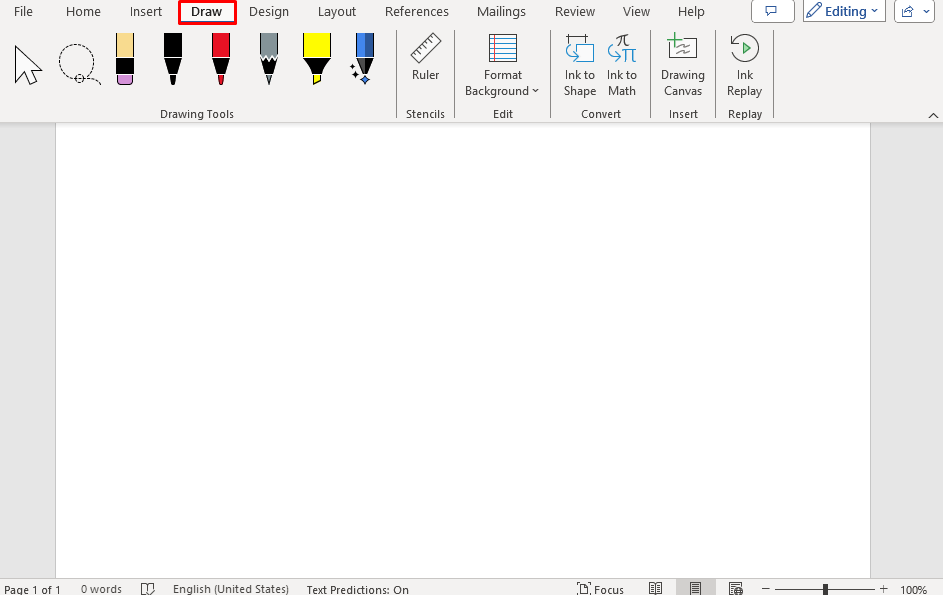
Method 3: Draw a Signature in Microsoft Word
If the touch is enabled on your device, you can draw your signature in Microsoft Word from the Draw tab. You can use the touchscreen feature of your device to create and add a signature to the document. To draw the signature, switch to the Draw tab, and choose the drawing canvas:
Use a pencil to create a signature in the document:

Conclusion
Adding the signature in the Word document is easy and pretty simple. It adds a professional touch to your documents and makes them more secure. You can add the digital signature or scan your signature and save it on the device to insert it into the Word document. If you have a touch device you can create the signature to add it into the document. You can also add the Signature line along with the signature to indicate where the signature should be written. Then save the Signature using the Quick Parts feature of Microsoft Word to reuse it later.
Source: linuxhint.com