How to Increase Idle Timeout Before Lock Screen Activates/Computer Sleeps?
Windows has a lock screen feature that automatically activates if the PC has been inactive for a set/specific amount of time. It includes features like displaying the current time, date, background images, etc. which can make the locked screen more interactive. Lock screens are primarily used to protect the computer’s contents and prevent unauthorized access. When a user locks his computer, all the applications and documents keep running in the background.
In Windows, a timeout setting can be manually set, after which the lock screen will automatically appear on the screen. Don’t know how to do it? Nothing to worry about. After reading this article, you will be able to increase or decrease the lock screen timeout using the following methods:
Method 1: Using Registry Editor
Windows Registry Editor contains all the information about the settings, permissions, and services required for all the operations on Windows. To increase or decrease the lock screen timeout using the registry editor, follow the steps explained below.
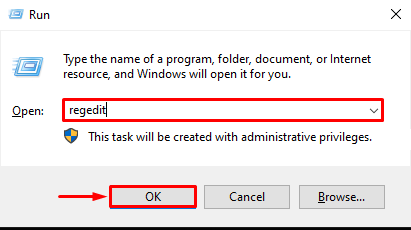
Step 1: Open Registry Editor
Press “Windows + R” on the keyboard, type “regedit” in the run box, and press “OK” or hit Enter key on the keyboard:
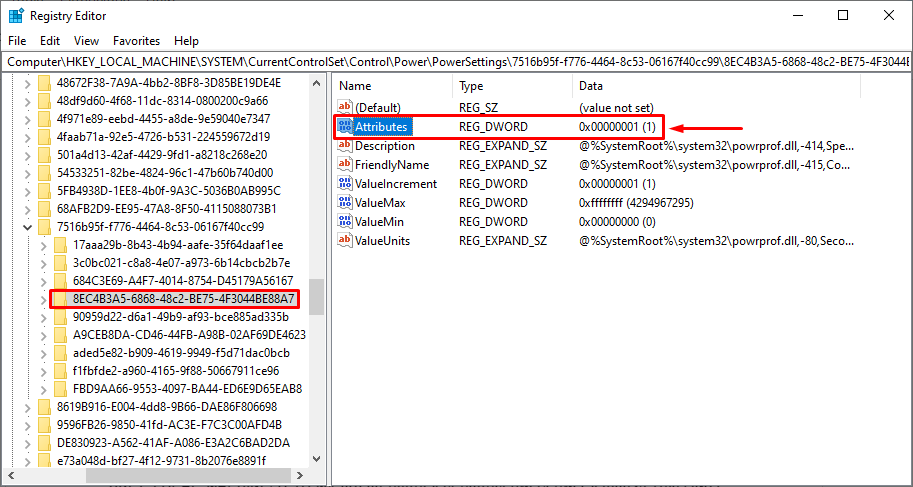
Step 2: Change Value Data in Attributes Key
Navigate to the below-given route:
“HKEY_LOCAL_MACHINE\SYSTEM\CurrentControlSet\Control\Power\PowerSettings\7516b95f-f776-4464-8c53-06167f40cc99\8EC4B3A5-6868-48c2-BE75-4F3044BE88A7”.
Once the “8EC4B3A5-6868-48c2-BE75-4F3044BE88A7” is opened, select the “Attributes” key from the right panel of the Registry Editor window:
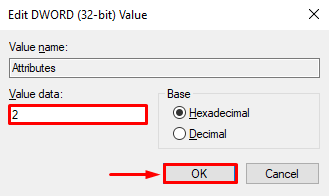
Upon doing so, the below-provided window will pop up, modify the “Value Data” to “2” and hit the “OK” button:
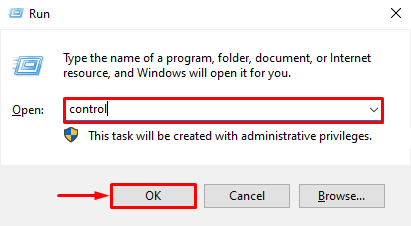
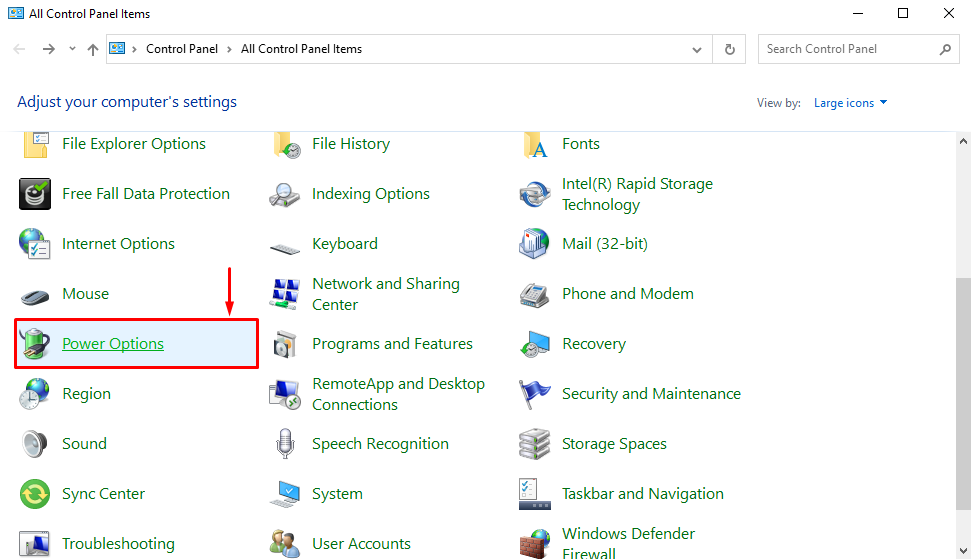
Step 3: Open Power Options
Press the “Windows + R” shortcut on the keyboard, type “control” in the run box, and hit Enter:
Next, select “Power Options” from the list by clicking on it:
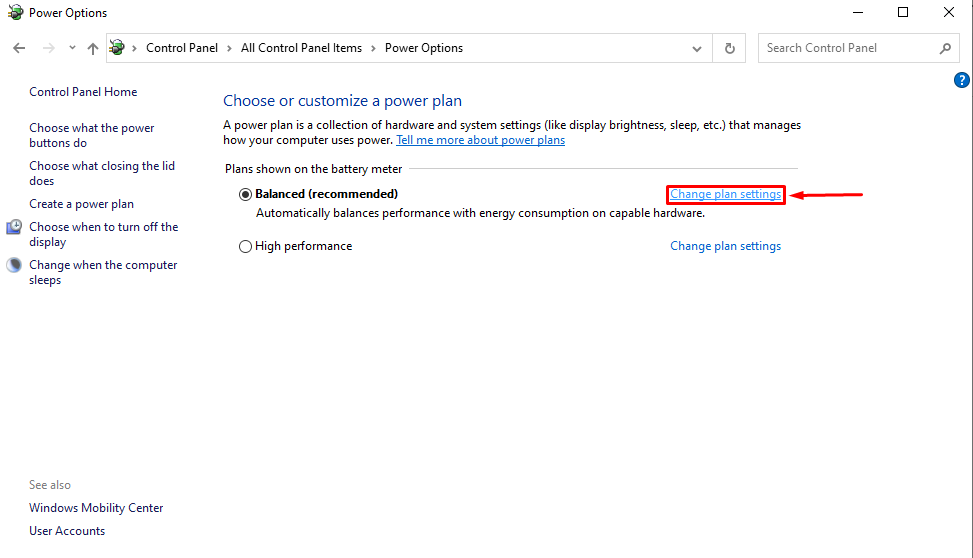
Step 4: Set Lock Screen Timeout
Click on the “Change Plan Settings” button to access and modify the settings of the currently selected power plan from the Power Options:
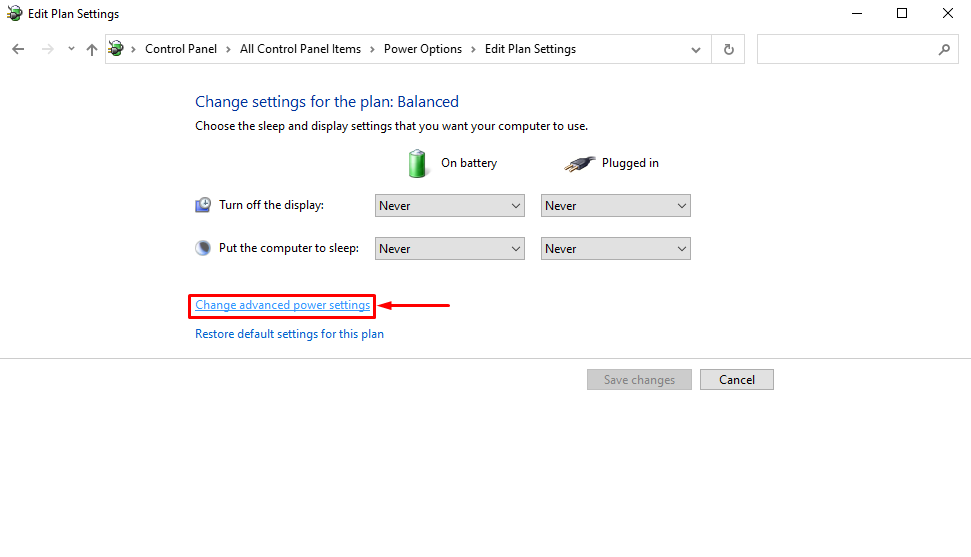
After that, select the “Change advanced power settings” option:
Upon doing so, a Power Options Window will appear. Navigate to the “Display” option, expand the “Console lock display off timeout” option, and specify a number to set the timeout in minutes:
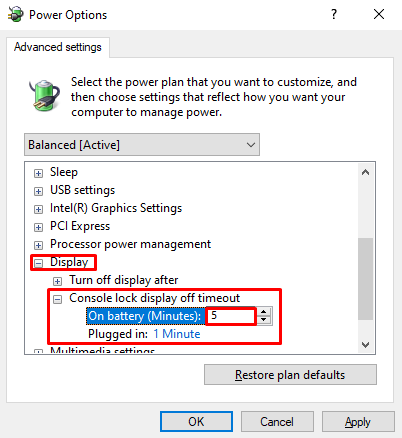
After that click on the “Apply” button to save the changes.
Method 2: Using a Registry File
The Registry Editor contains important information that, when changed, can cause errors in the normal operation of Windows. If the user is not confident with using the Registry Editor manually, they can download the edited Registry file.
Step 1: Download the Registry File
To download the registry file, click here. Upon doing so, the zip file will be downloaded to the user’s PC:

Step 2: Extract the File
Go to the “Downloads” directory in File Explorer, right-click on the downloaded zip file, and click on the “Extract Here” option to extract the file contents:
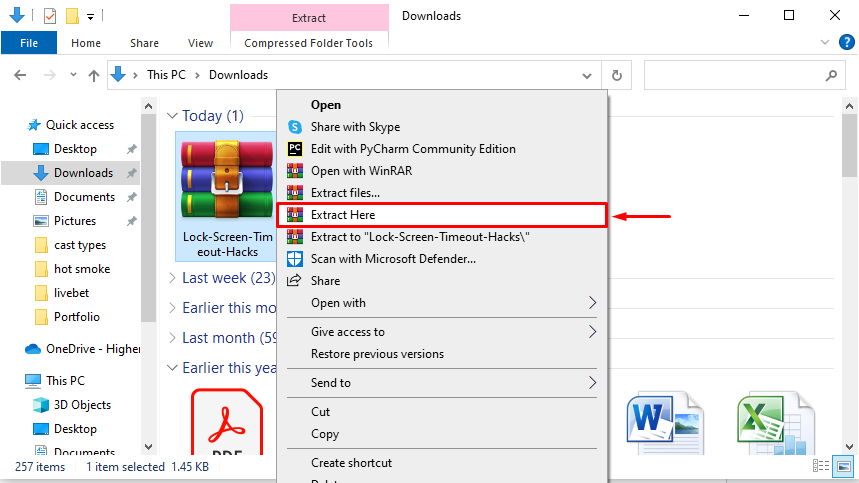
Note: This file would require a “WinRAR” application to be unzipped. To download and install “WinRAR”, navigate to their official website.
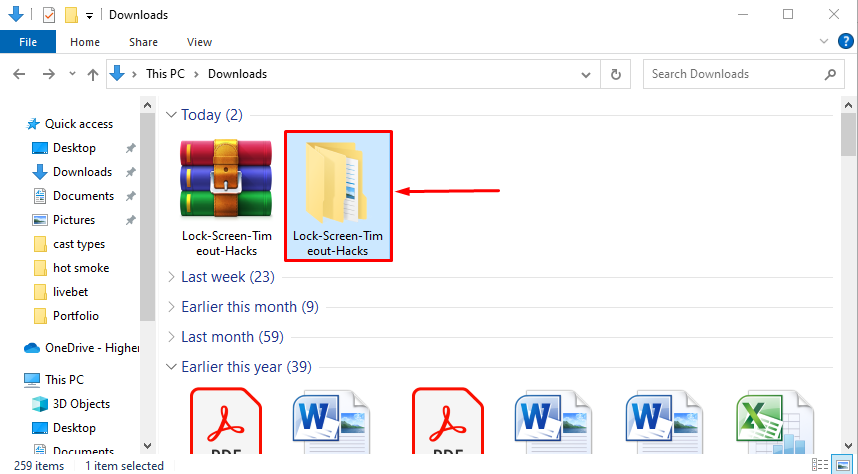
Upon doing so, the contents of the file will be extracted to the same location as shown below:
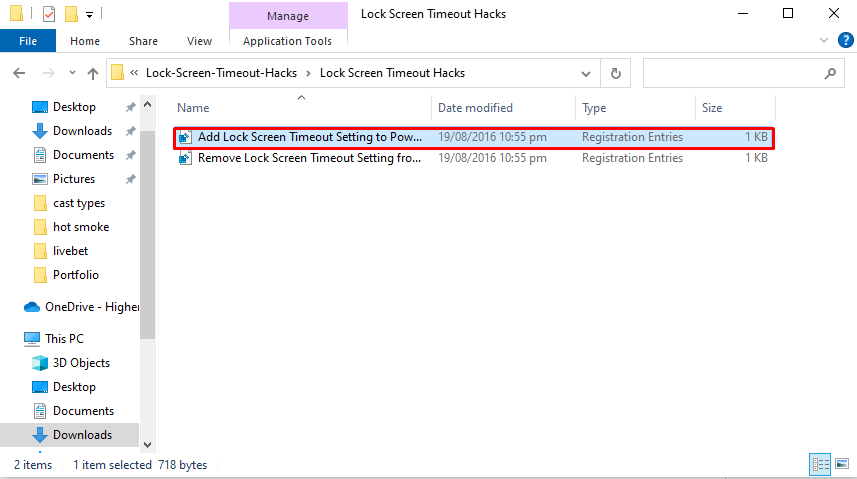
Step 3: Open the Registry Files
Open the extracted folder, and double-click on the “Add Lock Screen Timeout Setting to Power Options”:
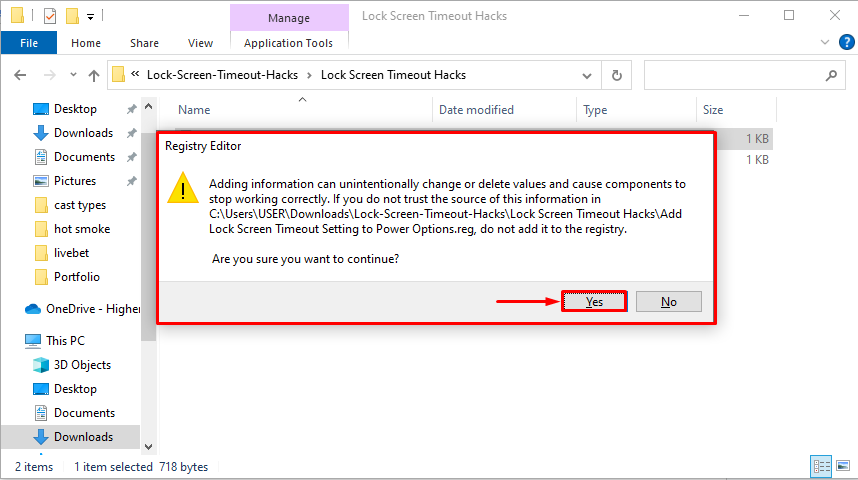
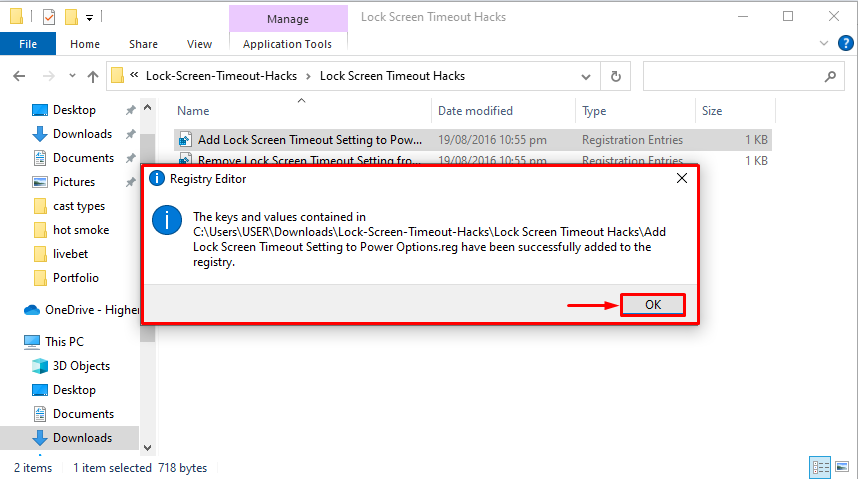
After that, the Registry Editor will ask for confirmation to apply the changes. Click on the “Yes” button:
Next, the Registry Editor will appear showing that new values have been successfully added to the registry. Hit the “Ok” button:
After this, follow “Step 3” and “Step 4” from “Method 1” to change the lock screen time from the Power Options.
Method 3: Using Command Prompt
To increase the lock screen timeout using the Command Prompt, follow the steps exhibited below:
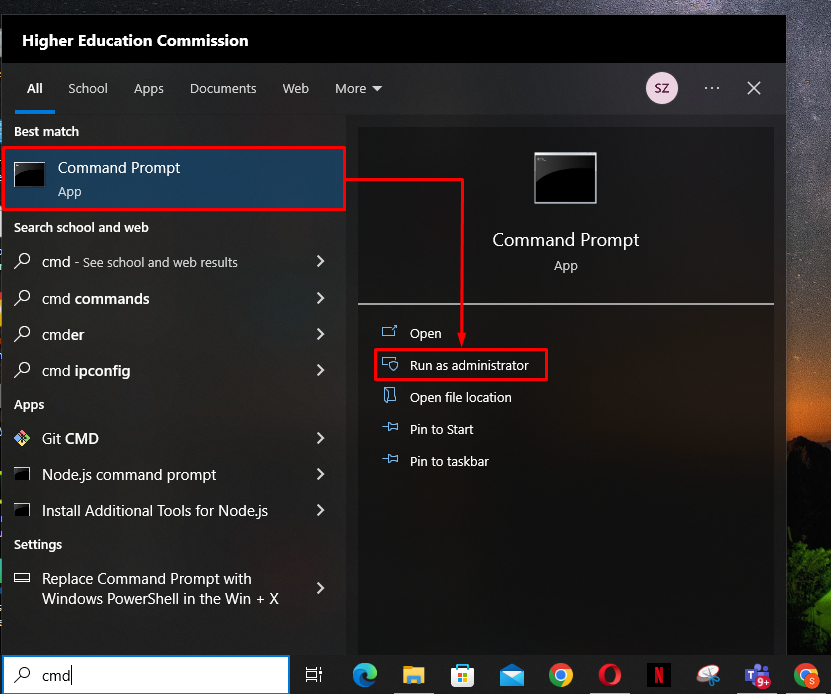
Step 1: Open Command Prompt
In the Start menu, search for “cmd” and click on the “Open as Administrator” option:
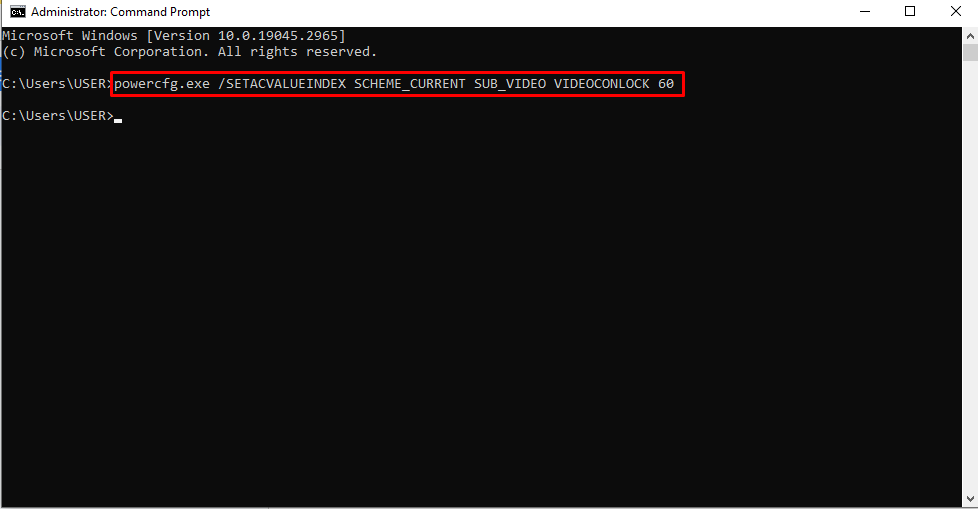
Step 2: Insert the Command
Once the CMD is launched, execute the below-stated command:
Note that the number “60” at the end of the above command represents the lock screen timeout in “seconds”. Change the number to the desired timeout for the lock screen and hit the “Enter” button on the keyboard:
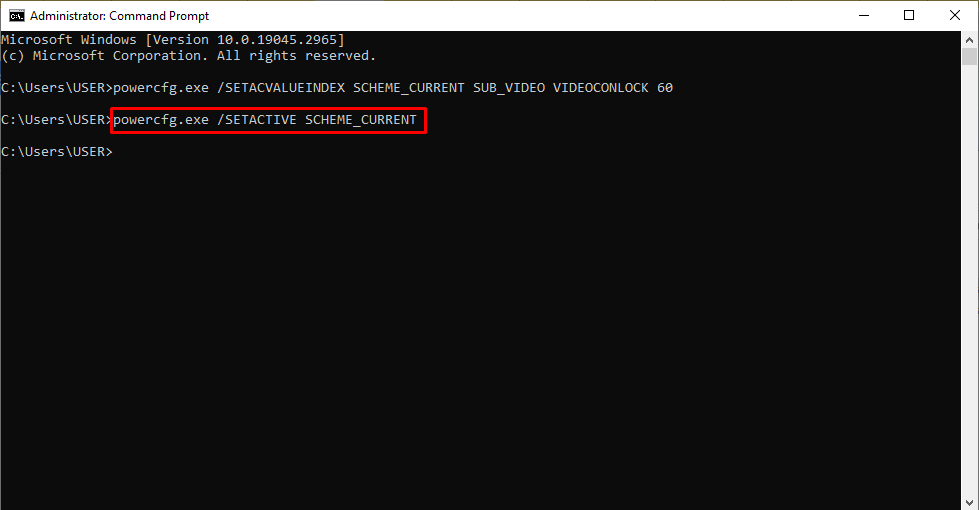
Next, run the given command in the Command Prompt and hit Enter to successfully save the changes:
Upon doing so, the lock screen timeout will be changed:
That’s all about increasing the idle timeout before lock screen activities.
Conclusion
To increase idle timeout before the lock screen activates/computer sleeps, the Registry Editor, Registry File, or Command Prompt can be used. The simplest method is to download the file from the provided link. Then, extract the file, and open “Add Lock Screen Timeout Option to Power Options”. Confirm the modifications by selecting the “Yes” button. Next, go to the “Power Options” in the control panel and edit the timeout settings. Users can successfully increase the lock screen timeout settings using the procedures explained in this article.
Source: linuxhint.com