How to Import CSV File in Kibana
“Comma-Separated Values (CSV) is one of the most versatile and easy-to-use data formats. It is a lightweight data format that allows developers and applications to transfer and parse data from one source to another.
CSV data stores data in a tabular format where each column is separated by a comma, and a new record is allocated to a new line. This makes it a very good choice for exporting databases such as SQL databases, Cassandra data and more.
It is, therefore, no surprise that you will encounter a scenario where you need to import a CSV file into your database.
The goal of this tutorial is to show you a quick and simple method of importing a CSV file into your Elasticsearch cluster using the Kibana dashboard.”
Let’s jump in.
Requirements
Before diving in, ensure you have the following requirements:
- An Elasticsearch cluster with green health status.
- Kibana server connected to your Elasticsearch cluster.
- Sufficient permissions to manage indexes on your cluster.
Sample CSV File
As usual, the first requirement is your source CSV file. It is good to ensure that the data in your CSV file is well-formatted and that it contains no errors.
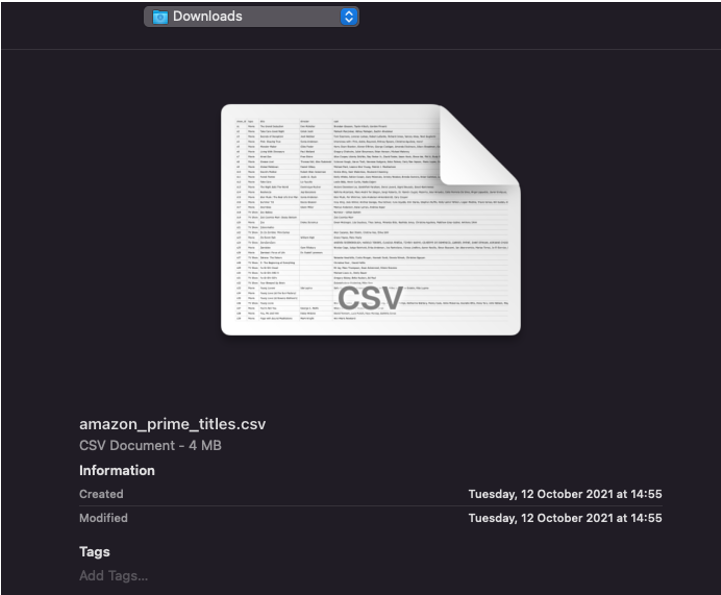
For illustration purposes, we will use a free dataset that contains movies and TV Shows from Amazon Prime.
Open your browser and navigate to the resource below:
https://www.kaggle.com/datasets/shivamb/amazon-prime-movies-and-tv-shows
Follow the procedure to download the dataset to your local machine. You can extract the downloaded archive with the command:
Import CSV File
Once you have your source file ready, we can proceed and discuss how to import it.
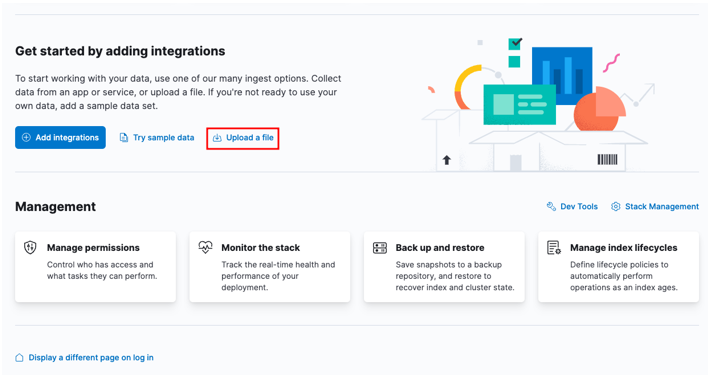
Start by heading over to your Kibana home dashboard and selecting the “upload a file” option.
Locate the target CSV file you wish to import in the launcher window.
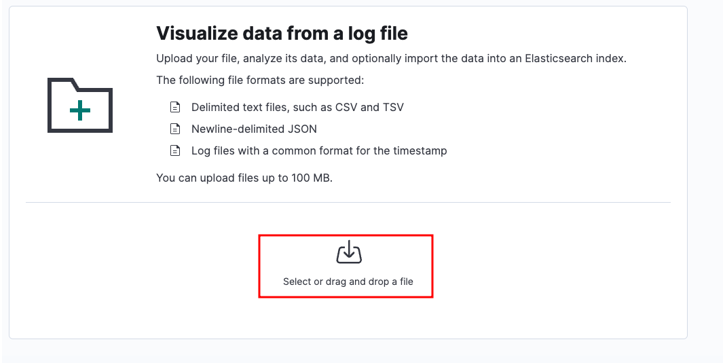
Select your source file and click upload.
Allow for Elasticsearch and Kibana to analyze the uploaded file. This will parse the CSV file and determine the data format, fields, data types, etc.
NOTE: Depending on your cluster configuration and the data size, this process may take a while. Ensure that the master node is responding to avoid timeouts.
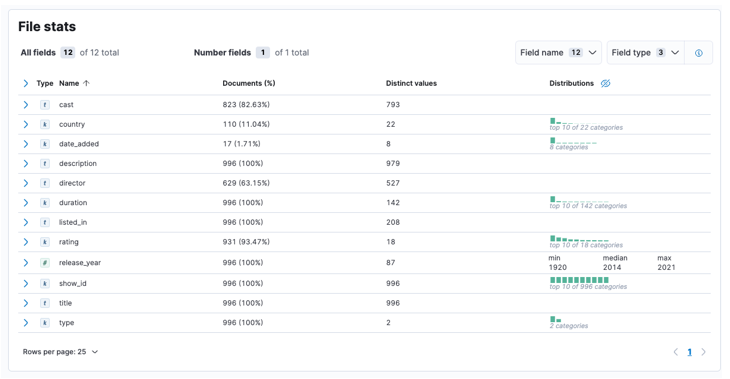
Once the process is complete, you should get a sample of your file content and the file statistics as analyzed by Elastic.
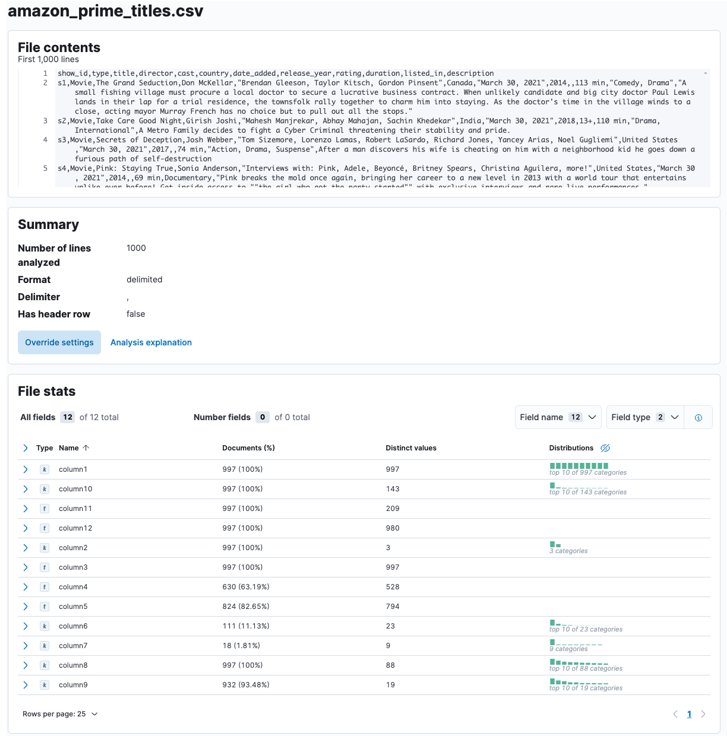
You can tailor numerous parameters, for instance, the delimiter, header rows, etc. For example, we can customize the output above to tell Elastic that our CSV file contains header files.
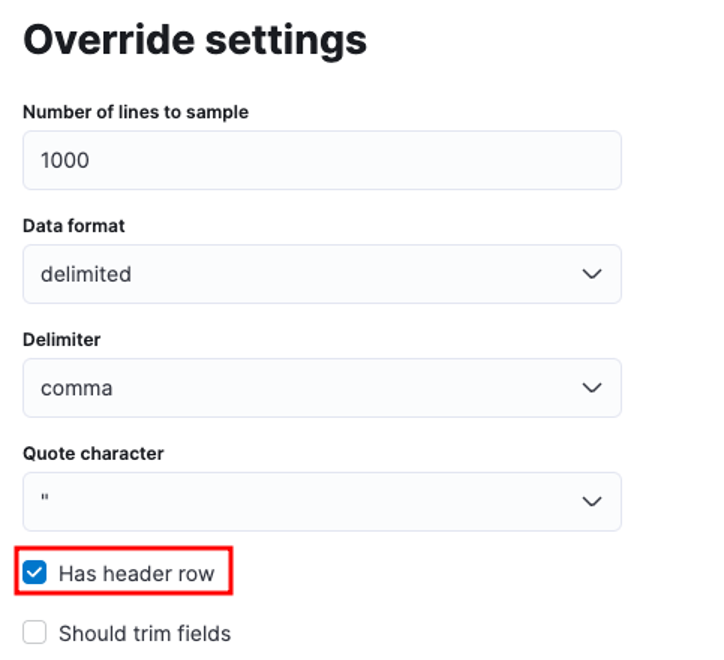
We can then click apply and re-analyze the data. This should format the data in the correct format, including the fields.
Next, we can click import to proceed to the imported dashboard.
Here, we need to create an index in which the CSV data is stored. You can allocate any supported name to your index.
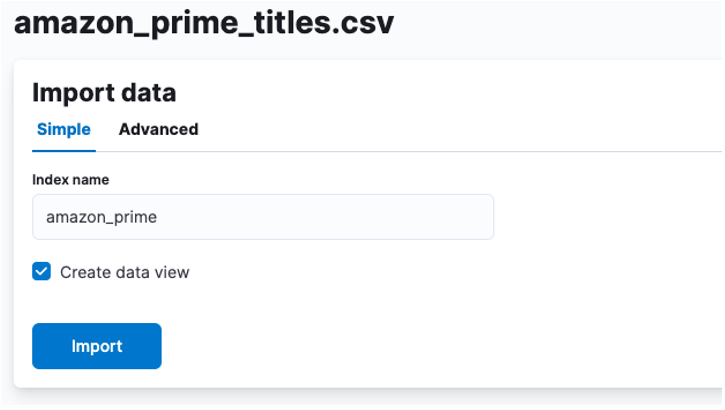
If you wish to customize your index properties, such as the number of shards, replicas, mappings, etc. Select the advanced option and tweak your settings as your heart desires.
Finally, click import and watch as Kibana does its “magic”. Once completed, you can access your index either via Elasticsearch API or use the Kibana dashboard.

And you are done!!
Conclusion
In this post, we covered the process of fetching and importing your CSV dataset into your Elasticsearch cluster using the Kibana dashboard.
Thanks for reading & Happy coding!!
Source: linuxhint.com