How to Handle Overflowing Text with CSS
While adding content to the site’s functionality, there can be issues in the mismatch of content and its allocation on the web page after the site’s deployment. In such a scenario, the overflowing text appears that interrupts the site’s layout. To cope up with such a situation, this overflowing text needs to be handled beforehand for the proper formatting of the site.
How to Handle Overflowing Text with CSS?
The overflowing content can be handled via the following approaches:
Example 1: Handling the Overflowing Text by Hiding Overflow Text
In this demonstration, the overflowing text can be managed by hiding it.
HTML Code
First, overview the below HTML code:
<html>
<head>
<meta charset="utf-8">
<meta name="viewport" content="width=device-width, initial-scale=1">
<title></title>
</head>
<body>
<h3>Lorem Ipsum es simplemente el texto de relleno de las imprentas y archivos de texto. Lorem Ipsum ha sido el texto de relleno estándar de las industrias desde el año 1500, cuando un impresor (N. del T. persona que se dedica a la imprenta) desconocido usó una galería de textos y los mezcló de tal manera que logró hacer un libro de textos especimen. </h3>
</body>
</html>
In this code, include an “<h3>” element comprising the provided heading to be evaluated for the overflowing behavior.
CSS Code
Now, head to the CSS code lines:
h3 {
width: 600px;
overflow: hidden;
white-space: nowrap;
background: #eee;
}
h3.clipped {
text-overflow: clip;
}
h3.ellipses {
text-overflow: ellipsis;
}
</style>
According to this code snippet, style the heading and clip it using the “text-overflow” property.
Output

As seen, the heading is clipped in accordance with the allocated width.
To better understand the concept, let’s change the width to “800px” in the CSS code after which the content will be hidden accordingly:
width: 800px;
overflow: hidden;
white-space: nowrap;
background: #eee;
}
In this code, the width is changed to “800px” and now observe the change in the outcome:

This output implies that the overflowing text can be managed in a custom way by adjusting the content’s width.
Example 2: Handle the Overflowing Text by Clipping it Using the “overflow” Property
This example handles the overflowing text with the help of the “overflow” property such that the overflowing content is clipped, thereby making it invisible. The “overflow” property notifies users to clip the text or add scrollbars when the content is too big to accumulate in the target area.
This property has the below-given values:
-
- “visible”: It specifies that the overflow is not clipped.
- “hidden”: It represents that the overflow is clipped, and the remaining content is invisible.
- “scroll”: It shows that the overflow is clipped, and a scrollbar is included to view the remaining content.
- “auto”: It includes scrollbars when required/mandatory.
Now, proceed to the below code demonstration utilizing the discussed property:
HTML Code
First, consider the following HTML code:
<html>
<head>
<title>CSS Overflow</title>
</head>
<body>
<form>
<fieldset>
<legend>Handle the Overflow Text</legend>
<div id="overflowtext">
Lorem Ipsum es simplemente el texto de relleno de las imprentas y archivos de texto. Lorem Ipsum ha sido el texto de relleno estándar de las industrias desde el año 1500, cuando un impresor (N. del T. persona que se dedica a la imprenta) desconocido usó una galería de textos y los mezcló de tal manera que logró hacer un libro de textos especimen. </div>
<input type="button" onclick="overFlow()" value="Clip the Overflowing Text">
</fieldset>
</form>
In this code, include the stated legend and a “<div>” that comprise the provided text. Also, create a button associated with the “onclick” event accessing the “overFlow()” function upon the click of a button.
CSS Code
Now, proceed to the CSS code:
form {
width:70%;
margin: 0 auto;
text-align: center;
}
* {
padding: 2px;
margin:5px;
}
#overflowtext {
margin: 0 auto;
height: 50px;
overflow: scroll;
}
</style>
In this code, set the margin, and padding and apply the “overflow” property with a value “scroll” to scroll the compressed content.
JavaScript Code
Now, proceed to the JS code:
function overFlow() {
document.querySelector('#overflowtext').style.overflow = "hidden";
}
</script>
In the JavaScript code, associate the “overflow” property with the “querySelector()” method to clip the overflow, and the remaining content will be invisible.
Output
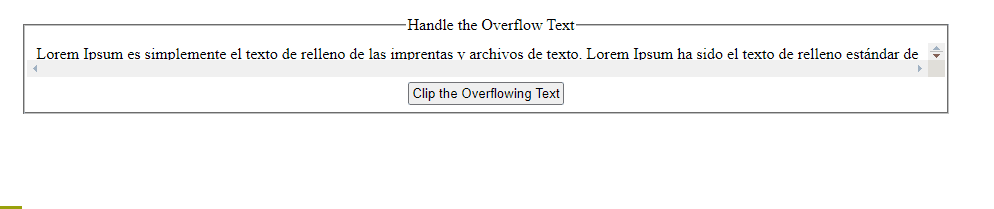
In this output, it can be analyzed that the overflowing content is clipped from the end.
Conclusion
The overflowing content can be handled by hiding the overflow text in CSS or with the help of the JavaScript “overflow” property. The former approach hides the overflowing text while the latter approach clips the overflowing text by setting the content’s width as per the requirements. This blog provided information about handling overflowing text with CSS.
Source: linuxhint.com