How to Handle HTML DOM Input Email Autocomplete Property?
For the creation of real-time projects like newsletter signups, contact forms, checkout forms, and user logins, the “email” field is required. The user has to enter his email to continue or start the process and also to login into his account. For this purpose, the user has to provide a mail login or register every time, which makes it a bad user experience. This issue is resolved with the help of JavaScript HTML DOM autocomplete property.
This blog explains the procedure to handle the HTML DOM input email autocomplete property of JavaScript.
How to Handle HTML DOM Input Email Autocomplete Property?
The autocomplete property of HTML DOM input “email” element, provides a list containing the most recent data that is previously inserted in the “email” field. It allows a user to pick his email from the list if it is available automatically.
Syntax
The syntax for DOM input email autocomplete property is stated below:
The above syntax sets and removes the autocomplete property over the emailObj element.
This syntax retrieves the value of the “autocomplete” property to find if this property is enabled or not.
Let’s have a JavaScript program for autocomplete property
Example: Enabling, Disabling, and Retrieving the Value of Autocomplete Property
In this example, the autocomplete property is going to be disabled, enabled by setting this property to “on” and “off” respectively. Then, the current value of autocomplete property is going to be retrieved:
<center>
<h1 style="color: cadetblue;"> Linuxhint </h1>
E-mail: <input type="email" id="demoEmail">
<br>
<br>
<button onclick="Disabler()"> Disabler </button>
<button onclick="Enabler()"> Enabler </button>
<h3 id="target"> </h3>
<button onclick="Checker()"> Checker </button>
</center>
<script>
function Disabler() {
document.getElementById("demoEmail").autocomplete = "off";
}
function Enabler() {
document.getElementById("demoEmail").autocomplete = "on";
}
function Checker() {
var j = document.getElementById("demoEmail").autocomplete;
document.getElementById('target').innerHTML = j;
}
</script>
</body>
The explanation of the above code block is stated below:
- First, the “input” element is created with a type of attribute “email” to accept and perform basic validation to make sure entered data is email.
- Next, three button elements are created which call the “Disabler()”, “Enabler()”, and “Checker()” functions.
- Now, define the “Disabler()” function by selecting the “input” element using its id and assigning the value of “off” for its “autocomplete” property.
- In the “Enabler()” function, apply the same “autocomplete” property but now assign it a value of “on”.
- After that, define the “Checker()” function by adding just “autocomplete” next to the reference of the input element and store it in variable “j”.
- In the end, display the value of this variable “j” over the webpage using the “innerHTML” property.
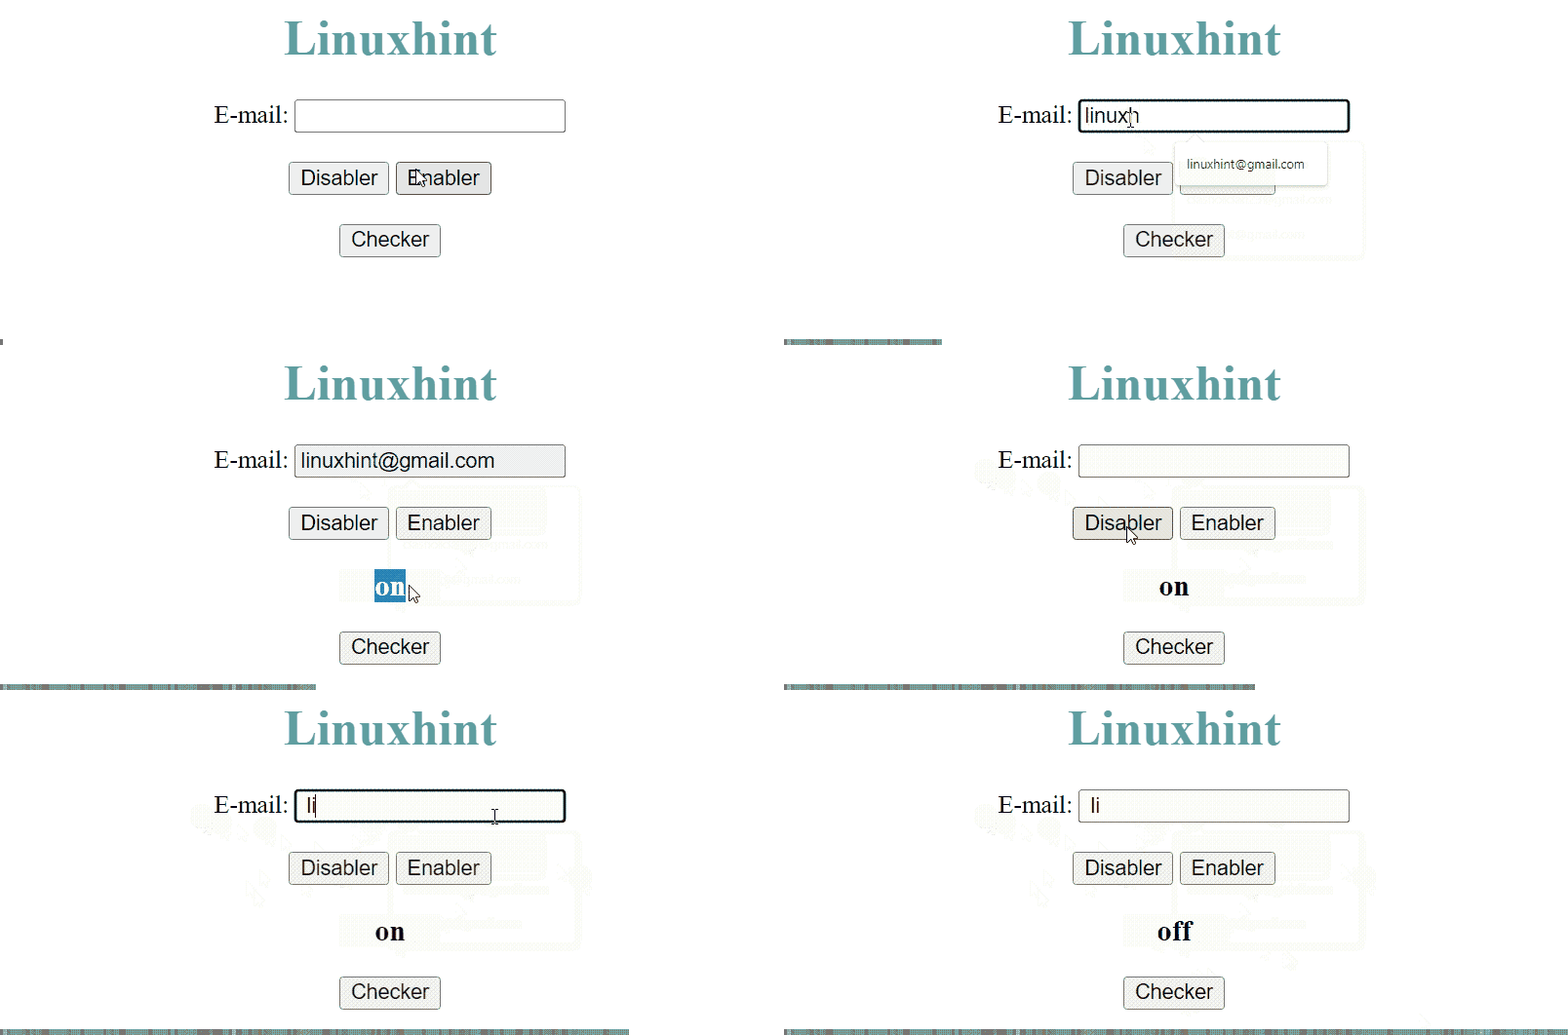
Output after the compilation of the above is shown as:

The output shows that the input email autocomplete property is being disabled and enabled. Its value is also retrieved and displayed on the webpage.
Conclusion
The HTML DOM input email autocomplete property, automatically creates a list that contains the values that the user previously entered in the email field. So that, the user can easily choose from their previously entered data and hence, enhances the user experience. This property is set when the value of “on” is assigned to it and disabled when the value of “off” is passed. This blog has explained the DOM input email autocomplete property by JavaScript.
Source: linuxhint.com
