How to Git clone Particular Version of Remote Repository
This post will discuss the method of cloning the desired version of the remote repository on Git.
How to Git Clone Particular Version of Remote Repository?
Implement the below-stated instructions to clone the desired version of the remote repository on Git:
- Switch to the required repository.
- Set the remote URL to the list.
- Clone the GitHub server repository to the particular folder in the local repository.
- Navigate to the cloned repository folder, check the log history, and select commit id.
- Execute the “git reset HEAD <commit-id>” command.
- Verify the log history.
Step 1: Switch to Git Repository
At first, move to the required Git local repository with the help of the “cd” command:
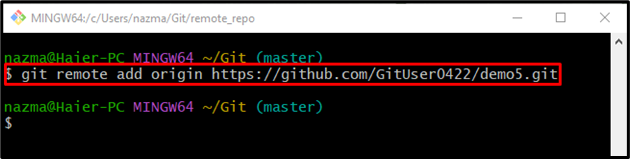
Step 2: Add Remote URL
Use the “ git remote add” command to add the remote URL in the list to build a connection between the local and remote server for tracking:
Here, the “origin” is specified as the name of the remote:
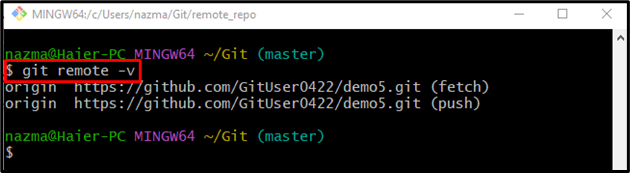
Step 3: Verify Remote List
Next, to ensure that the specified remote repository URL is added or not, run the provided command:
It can be seen that the “origin” exists as the remote URL name in the list:
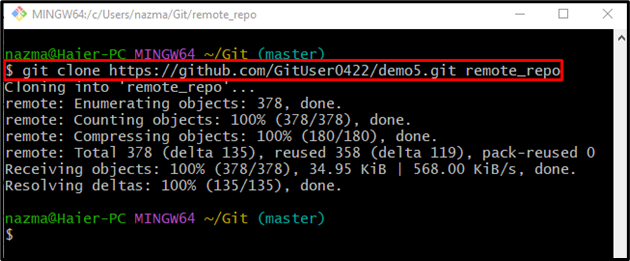
Step 4: Clone GitHub Repository
Then, execute the “git clone” command for cloning the remote repository to the local machine:
In the above-given command, we have specified the name of the folder at the end of the remote repository path in which we want to clone. For instance, “remote_repo”:
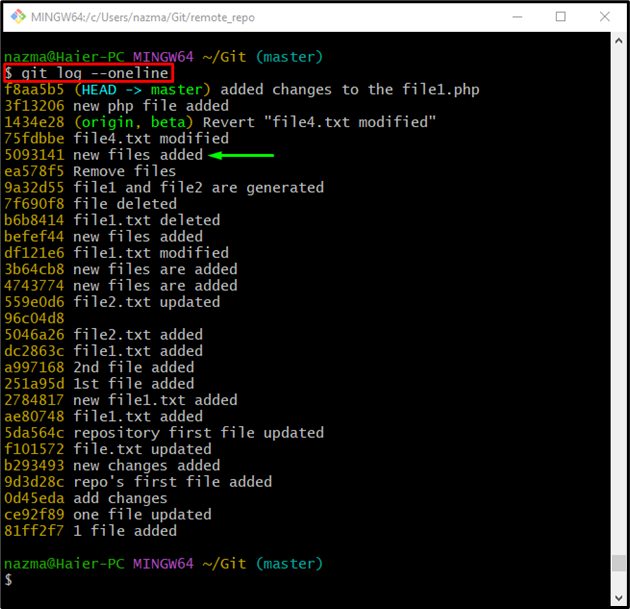
Step 5: Check Git Log History
After that, view the history of the Git log by running the “git log” command along with the “–oneline” option:
From the provided log history, we have selected the highlighted commit id:
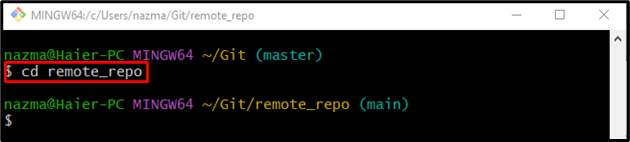
Step 6: Navigate to Cloned Remote Folder
Now, switch to the folder in which the cloned remote repository is placed by executing the “cd” command:
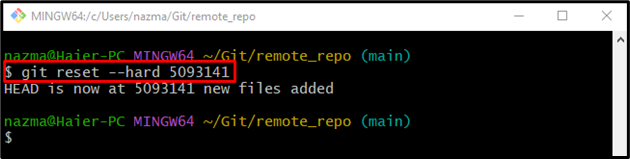
Step 7: Reset HEAD to Particular Commit
Finally, run the “git reset” command and reset the HEAD pointer to the desired version of the remote repository:
According to the below-given output, the HEAD pointer is moved on the specified commit id:
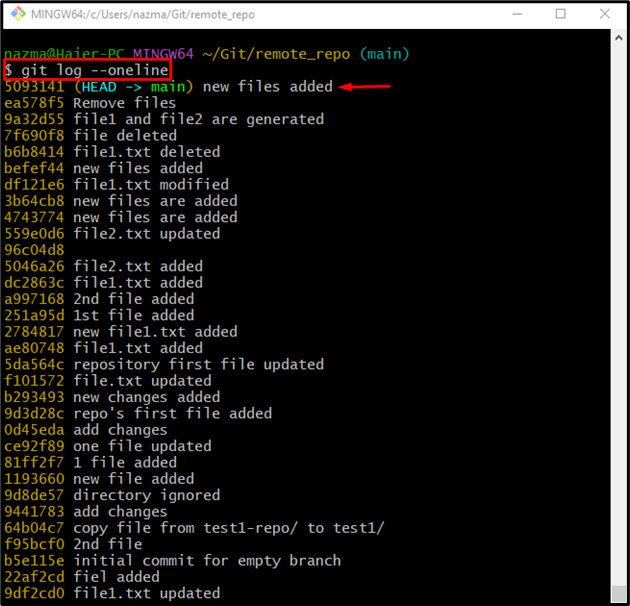
Step 8: Ensure Cloned Remote Repository Particular Version
Lastly, verify the particular version of the remote repository is cloned or not by checking its log history:
It can be observed that the cloned remote repository folder contains the desired version:
That’s it! You have learned how to clone the desired version of the remote repository on Git.
Conclusion
To clone the desired version of the remote repository on Git, first, move to the required repository and add the remote URL to the list. Then, clone the GitHub repository to the specific folder in the local machine. After that, navigate to the cloned repository folder, check the log history and select commit id. Next, execute the “git reset HEAD <commit-id>” command and verify it by checking the log history. This post demonstrated the process of cloning the desired version of the remote repository on Git.
Source: linuxhint.com